Richard Bertinet's bread sticks with cheese
>> Wednesday, June 17, 2009

Another recipe from the book by Bertinet. I alternate between Bertinet and Dan Lepard. Maybe I should tell D. my interest in these two guys is something to worry about. This time I've chosen some twisted bread sticks with pecorino, olives and herbs. To go against the tide, as usual, I've only added the cheese. Maybe this way there might be some chance that my youngest tries the sticks. This boy, he's so badly brought up. I don't know who's to blame. Not me, it's never me. Bertinet makes the sticks with white bread dough, but I've used whole spelt flour dough for a change...
Cheese bread sticks (adapted from the olives, pecorino and herbs bread sticks by Bertinet)
For the dough:
For the filling:
Weigh the flour and rub the yeast in. Add the water and mix well until is all absorbed. I usually allow a quarter of an hour for autolysis. Here's an explanation of autolysis from Heartland Mill: Autolyse (or dough autolysis) A process in which the flour and water in a formula are mixed together at low speed and allowed to sit for a rest period, usually of 20 minutes. This pre-hydration allows for better links between gluten and starches and results in shorter mix times and improved dough extensibility. Loaves made with autolysed dough will be easier to shape and will have more volume and better crumb structure. Due to the shorter mix time (less oxidation), the dough may retain more of the carotenoid pigment responsible for the creamy-yellow color desired in well-crafted bread.
You've got to do it before adding the yeast. I promise I'll be good next time and do it right. But that'll be next time.
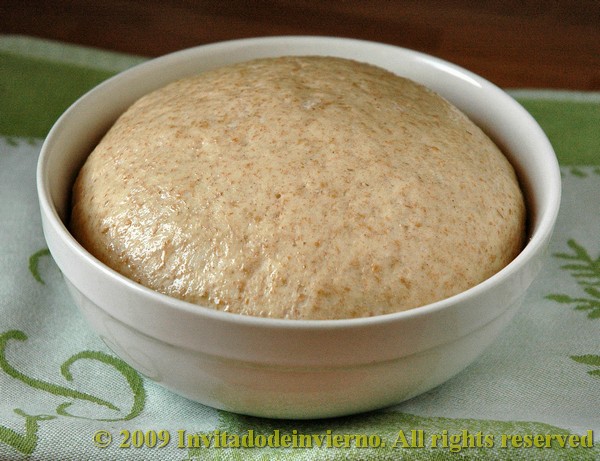
Once the dough has been allowed to rest, add the salt and knead it. This time I've used the traditional kneading method, not the French Bertinet's method, because the dough was quite hard, in spite of having a lesser ratio of whole flour than the original recipe called for. After 8-10 minutes, put it into an oiled bowl to proof and cover it; mine took more or less an hour.
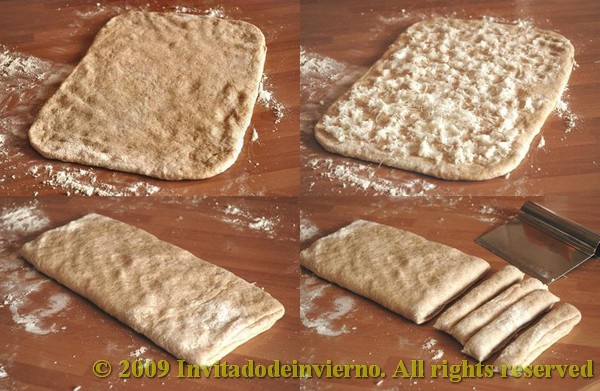
Tip the risen dough on the counter and flatten it with your palms to obtain a rectangle 1 cm thick approximately. If the dough is reluctant to keep the size you want, leave it to relax for a while and stretch it again after that. Spread the shredded cheese on top along with any other ingredient, if you like; press the cheese with your fingers so that it sticks to the dough. Then fold the dough in thirds, like a letter. Flatten the dough again so that the assembly sticks together.
Preheat the oven to 220 ºC. Then cut strips of dough with a scraper or a similar tool, a little bit thicker than your finger. Twist these strips one by one and roll them on the counter to make them thinner and longer. Flour the counter as needed. Put them on an oven pan as you go or wherever you prefer to allow the sticks to proof. I wanted to bake the sticks in a big oven dish, covered with aluminum foil as directed by Dan Lepard for baguettes. So I put them straight on the pans to proof. Leave them for half an hour.
Look at that, the charm of handmade things, completely unequal... ahem. Put the dishes in the oven well covered in aluminum foil. The recipe calls for a baking time of 10 to 12 minutes. I had to bake them longer and uncovered in the end to get them to brown correctly.
This cunning Bertinet says you can dip the sticks in olive oil for eating... obviously olive oil doesn't go to his rolls of fat. Lucky man.
And... this goes to Susan of Wild Yeast for her weekly Yeastpotting!


8 comentarios:
Estupendos! Me gustan mucho!
Wow, they look super! You did such a perfect job.
MC: Gracias! BTW... how many languages do you speak? :-)
HH: Thank you! They're very easy!
Beautiful, and the perfect thing to stand them in too!
Delicious breadsticks, especially with cheese in it!
Susan: Thanks, I love the jug too!
Elra: perfect if you use manchego cheese!
Hi,
Your recipes are so nice with a traditional touch :) I gotta try this one.
Thanks Doll!
Post a Comment