Related Posts Widget for Blogs by LinkWithin

Soufflé potatoes with soft garlic

>> Saturday, January 22, 2011

Soufflé potatoes 1

This month a fellow Spanish blogger was challenging us to prepare a soufflé. The name of this dish comes from the French and means literally blown up. I think I've prepared a soufflé only once in my life before this, back in the mists of time, and I barely remember it. Bad thing, because if it had been memorable, I would remember. But that means too that it was not a complete disaster. You know that soufflé is a classic dish in French cuisine, which can be sweet or savory, and when it is savory it is made almost always with a bechamel sauce base with egg yolks to which various flavorings can be added, then mixed with the egg whites beaten to stiff peaks, which are the element that gives the soufflé its lightness. Soufflés are baked in the oven, where, if well prepared, they greatly increase in volume. They have the disadvantage then that on cooling they can go down... deflate... demoralize... collapse. So, do not give them time. The best solution is just to devour them as quickly as possible... without warning.


Among the various preparation options we were given in the challenge, it was to prepare the soufflé with potatoes using their skins as containers. Good idea, nothing is wasted. Instead of the classic gruyére cheese, I decided to use Manchego cheese (you know of my liking for Manchego... or perhaps I should call it addiction), and to add just a little more spark, use some stir-fried soft garlic. And so I started out on a sunny January morning.

Soft garlic 1

Soft garlic 2

Soft garlic 3

My source for the recipe is a beautiful video, here. And here goes my adaptation:

Soufflé potatoes with Manchego cheese and tender garlic
Yields four servings:

  • 4 medium sized starchy potatoes
  • 4 eggs
  • 100g Manchego cheese
  • 15ml virgin olive oil for rubbing the potatoes
  • 30g butter
  • 1 bunch of soft garlic (you can use more if you are a soft garlic lover)
  • More virgin olive oil for frying the garlic
  • Salt and pepper
Soufflé potatoes 3
  1. We start by preheating the oven to 180ºC to roast the potatoes. Wash the potatoes thoroughly and dry them very well. Rub them with the oil and coat them in salt (for the skins to get crispy) and place them on a baking dish. When the oven is hot, roast the potatoes for an hour or as required. 
  2. In the meantime grate the cheese as finely as you want. Set aside.
  3. Clean the soft garlic, getting rid of the outer layers and slice finely; stir-fry with some olive oil on medium heat till wilted. Drain the oil and set aside too.
  4. Crack the eggs and separate the whites from the yolks. Keep the whites in the fridge as they will be the last ingredient to be added to the soufflé mixture.
  5. When the potatoes are thoroughly baked and soft (check by piercing them with a knife) take them out and let them temper a little, enough to avoid burns. Cut in half and hollow them with a spoon; put the potato meat in a bowl. Set the skins aside for later. Lightly mash the potato with a fork while still warm.
  6. Raise the oven temperature to 200ºC.
  7. Beat yolks lightly and add to mashed potatoes, mix well.
  8. Add the butter, then the cheese and well drained garlic, then the salt and pepper. Check the seasoning, it should be on the salty side because you will still add the egg whites.
  9. Whisk the whites with a pinch of salt until stiff, preferably with some electric appliance if you have it. Carefully mix with the mashed potato, slowly and carefully to deflate the whites as little as possible.
  10. When thoroughly mixed, scoop portions of the mixture into the potato skins, just a little over the edge. After filling all the potatoes there will be leftover mixture enough to fill a small soufflé mold. Rub the mold with butter or oil, sprinkle with bread crumbs and pour the remaining soufflé mixture. The mold must be large enough to fit the surplus to a height of about 3/4. You can sprinkle all the soufflés with more cheese so that the tops brown nicely in the oven. Place the filled potatoes in a baking dish and bake everything around 15-20 minutes (the soufflé in the mold takes a tad more, as the amount is larger than in the potatoes).
  11. Remove the soufflés from the oven and devour, without burning your tongue. If the potatoes were fine enough, they can be eaten whole, skin and all.
Soufflé potatoes 2

This is a succulent and fairly easy recipe and, at least in small doses it does not present a great danger of collapsing. And I like these dishes to which you can add a lot of different ingredients to make them more varied. Tell me, have you ever attempted to make soufflé? Now you have run out of excuses.

Firma 200px

Eager to know more?

Gougéres with manchego cheese

>> Monday, January 17, 2011

Gougeres 1

This recipe is no sophisticated reprocessing of a classic recipe, but the change of French cheese in the original recipe for such a Spanish native cheese like manchego infuses the puffs with such a rich taste that I wanted to share it. For those who do not know about gougères, they are small choux dough balls, basically very similar to sweet choux puffs like profiteroles, but tiny, savory and with cheese. They are soft and very light, because they are almost hollow. They are typical from the Burgundy region and are usually had as an appetizer to accompany the wine, including in wine tastings. The French are genius when it comes to food, oh là là. Concerning my culinary tastes, I am quite a Francophile... Everyone has a dark side. And I assure you these little puffs, like all small bites, are eaten by the dozen. You could eat tons. Well at least I could...


I have used the recipe in the Tartine book, the ever famous pastry shop in San Francisco, that I have modified only slightly. If you do not know the book, I highly recommend it. All the recipes I have tried have turned out to be a success. Making choux dough may seem a bit scary at first, when you've never even attempted it, but I assure you it really is not difficult and the result is well worth it. And with my Thermomix it is a breeze. Lately I have been preparing these puffs quite often whenever we have had guests and they are always a hit.

Gougères with manchego cheese
Yields between 90 and 100 puffs

  • 310ml skimmed milk (or a mixture of whole milk and water at 50%)
  • 140g unsalted butter
  • 1/2 tsp salt
  • 140g AP flour (in fact I usually make them with spelt)
  • 5 medium eggs
  • 130g soft manchego cheese, coarsely grated
  • Black pepper to taste
  • 1 aditional egg for glazing
  • Finely grated manchego cheese for sprinkling (optional)
  • Some herbs for sprinkling (optional)
Gougeres 2
  1. Preheat the oven to 170ºC if convection type, some 10ºC more if only radiation type. 
  2. To make the choux dough, put the milk, butter and salt in a saucepan and bring to a boil (heat to 90°C in the Thermomix, about 5 minutes on low speed). Once the mixture is hot, tip the flour in all at once and, without removing the pan from the heat, stir vigorously with a wooden spoon until the dough coheres into a ball and starts to detach from the walls of the pan, about a minute (Thermomix 20 seconds, speed 4). 
  3. Turn off the heat, allow the dough to temper about five minutes and then add the eggs one at a time, stirring well to absorb each time before adding the next egg (in Thermomix speed 4, no time). You will have a soft, sticky dough. 
  4. Add the cheese and mix with a spatula.
  5. Line two baking trays with parchment paper. 
  6. With a silicone spatula, transfer the dough to a pastry bag (you will need at least two batches) with a round nozzle of about 8mm. Close the bag with a clip and, keeping the pastry bag tip at 1cm above the tray, pipe small mounds about 4cm in diameter (you do not have to be very accurate, of course), and leaving 2-3cm between them (although they rise more than expand).(*)
  7. Beat the aditional egg and gently brush the dough mounds. Sprinkle with more cheese or herbs, if desired. The last time I made them I did not brush them with egg, but just sprinkled with a herbed salt mixture from La Camargue... delicious.
  8. Bake for 25 minutes, be careful not to let them get burnt. When done, transfer to a wire rack to cool.
  9. If there is still dough left, keep baking for as many batches as necessary and remember that the parchment paper can be reused.
(*) Tips: If the dough is too runny, so much so that it pours out of the pastry bag when you lift it vertically, just let it cool a bit, until the consistency is thick enough to make the mounds. Getting the "feel" of this dough just takes a little practice. On the contrary, if the dough is somewhat thick, so that is a bit hard to pipe, there is nothing really to be done, but it does not mean the gougères will not rise (well, unless the dough has the consistency of cement). They will turn out equally succulent. I advise against the use of silicon sheets on baking trays for these puffs, at least in my case I think that once they prevented my puffs from rising up right. Using parchment paper they blow up divinely like little balloons.

I serve my gougères with various types of charcuterie, I do not know if this is too French, but it is a combination you will not forget...

Firma 200px

Eager to know more?

Roscón de Reyes or Three Kings cake

>> Friday, January 7, 2011

Roscón Reyes 1

Roscón de Reyes is a strong tradition in Spain (check the pronunciation of roscón here). It is eaten on the Día de Reyes or Three Kings day and also on the previous eve, when traditionally presents are given, in remembrance of the presents the Kings brought to baby Jesus. Roscón de Reyes is a brioche-y bun in the shape of a crown, traditionally studded with colorful candied fruit and scented with orange and lemon zest and orange blossom water (these flavorings are essential to a Spanish roscón, otherwise you just cannot call it such). Today roscón has become so widely popular that the cakes are baked all over Spain in huge amounts since the beginning of January or even earlier, which inevitably means that in many supermarkets and pastry shops you find stuff of very low quality. Which inevitably leads, if you are fond of baking at all like I am, to prepare it yourself. And it is not difficult, only a bit time consuming as any yeast-leavened sweet bread is. But well worth the effort.


Roscón Reyes 5

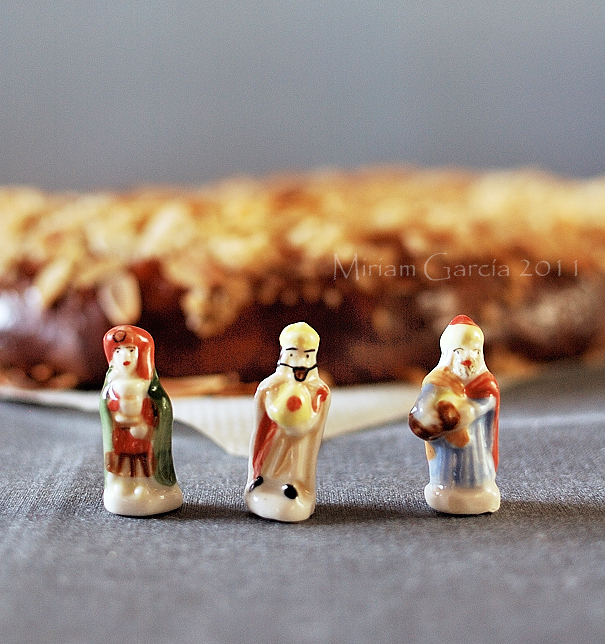
The Christmas season has not always been so Christian as it is now. The origin of roscón has nothing to do with the arrival of the Magi to Bethlehem to worship the child, but appears to be related to the Roman Saturnalia. These were celebrations dedicated to the god Saturn in which the Roman people celebrated the longer days that started soon after the winter solstice. For these celebrations round cakes with figs, dates and honey were prepared, which were divided equally among the commoners and the slaves. Already in the 3rd century, it was usual to hide a dry bean inside the cake, and the fortunate finder was named king of kings for a short period of time agreed beforehand. This type of game was popular in the Iberian peninsula since the Roman era, he who found the bean had to pay the treat for the others... Nowadays a small figurine is hidden in the cake and the person who happens to find it is set to pay for the roscón. That is not possible if you make it at home, of course.

This recipe is uncomplicated and it works, although you need to have a basic knowledge of bread kneading and sweet doughs in general. It is adapted from my Thermomix cookbook. It yields 2 medium roscones or a large one.

Roscón de Reyes

For the flavored sugar

  • 120g icing sugar
  • Zest of 1 lemon
  • Zest of 1 orange (feel free to use more)
For the preferment
  • 40g whole milk
  • 30g water (you can use also 70g skimmed milk instead of the milk and water)
  • 10g fresh baker's yeast
  • 130g strong flour
For the main dough
  • 30g whole milk
  • 30g water
  • 70g butter, softened
  • 2 large eggs or 3 small ones
  • 15g fresh baker's yeast
  • 30g orange blossom water (it may sound like a lot, but roscón is not roscón without this)
  • 1 tbsp rhum (optional)
  • 450g strong flour
  • 1 pinch salt
  • The flavored sugar
  • The preferment
For garnish
  • Beaten egg glazing
  • Candied fruit
  • Sliced almonds
  • Sugar
  • Butter
    Roscón Reyes 3
  1. Fine, let's make the preferment first. Sift the flour, crumble the fresh yeast on top, add the liquid and knead until just mixed. 
  2. Then fill with tepid water a bowl where the dough ball can fit and put the dough in it. When the dough is fermented enough, the ball will float. It can take from 15 minutes to half an hour, it depends on the temperature on your kitchen. 
  3. In the meantime, zest the lemon and the orange and mix the zest with the icing sugar; cover and set aside to let the aromas permeate the sugar.
  4. Now for the main dough: sift the flour again, add the crumbled yeast, eggs, flavored sugar, orange blossom water, milk, water, preferment and salt (everything but the butter). Knead by hand or in a stand mixer with the hook attachment until you have an elastic dough. Make a ball and leave to rest for 10 minutes, covered. I prefer to let the dough stand for a while without the butter, as fat interferes in the gluten formation. Somewhere in the future I will divide the dough in two and try to add everything altogether to the first dough and delay adding the butter to the second dough, then check if the final cakes show some difference.
  5. After the rest, flatten the dough on the counter and smear the soft butter (I prefer to do this by hand), knead thoroughly to mix well. When the dough is smooth enough, make a ball, put into an oiled bowl, brush the surface with oil too and let double in bulk, well covered. Mine takes between 3 and 5 hours, but it depends on temperature again and on how active your fresh yeast is.
  6. Once the dough is doubled, tip it on the floured counter and flatten with your hands to degas completely. Divide the dough in two, then make a ball with each dough portion. Set one aside.
  7. Leave the first ball to rest for a couple of minutes. Prepare two parchment papers the size of your oven sheets, flour them lightly. 
  8. Lay one of the dough balls on one of the papers, then punch a hole in the middle with your floured fingers and start opening the hole. Stretch the ring of dough little by little. If it tends to shrink, let it rest for another couple of minutes before resuming your stretching. In the end the ring should be about 6-7cm thick and have an oval shape about 30x40cm.
  9. Brush the roscón thoroughly with beaten egg, cover with plastic (though the plastic shouldn't touch the roscón as it would stick to it) and let nearly double again, it will take at least one hour. Repeat the whole process for the second dough ball.
  10. Half way the rising, preheat your oven to at least 180-190ºC if your oven is of the air convection type like mine, somewhat closer to 200ºC if radiation type, but not higher than that (again, you know this depends largely on every oven).
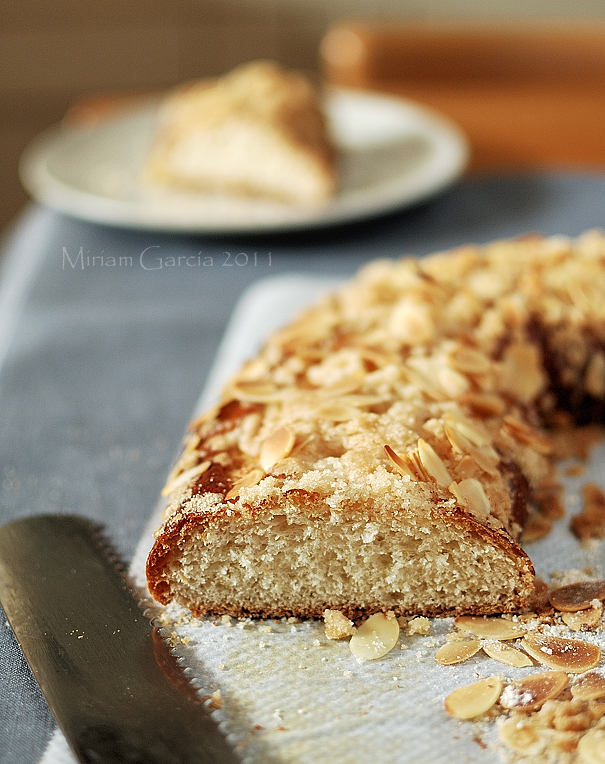
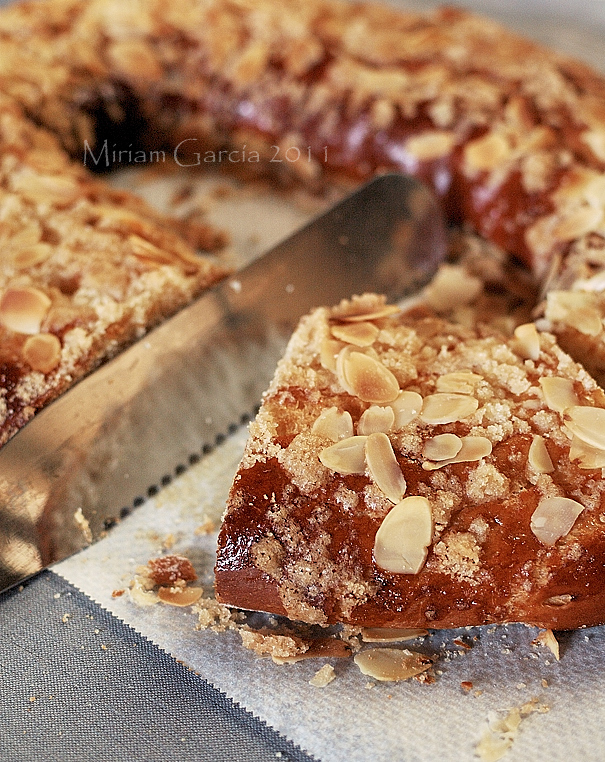
  11. When the roscones have almost doubled, brush them with egg again, very carefully as the dough is a delicate thing at this point. Then you have two options: the traditional one is to stud the whole thing with colorful candied fruit as though the fruits were the jewels in the crown. The second one and my favourite (at home we are not exactly fond of radioactive-colored candied fruit in cakes) is to mix a handful of sugar in melted butter or in some water (just enough to get a crumbly mixture) and sprinkle on the roscón. Then sprinkle some sliced almonds too on top... delicious.
  12. Put the roscones into the oven for 10 minutes, then lower the heat by 10ºC and leave some further 10-15 minutes (cover with aluminum foil if you find they brown too much). After the baking time, take them out and let cool on the sheets.
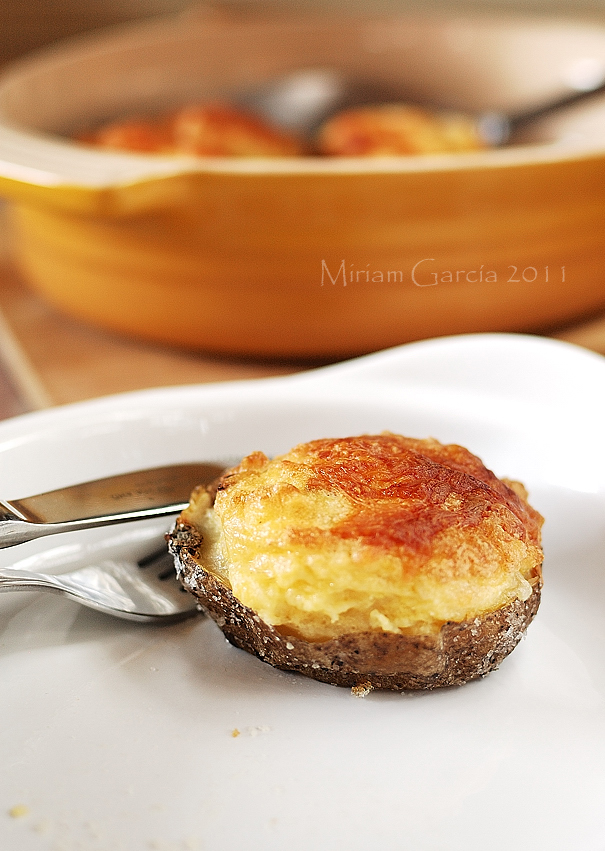
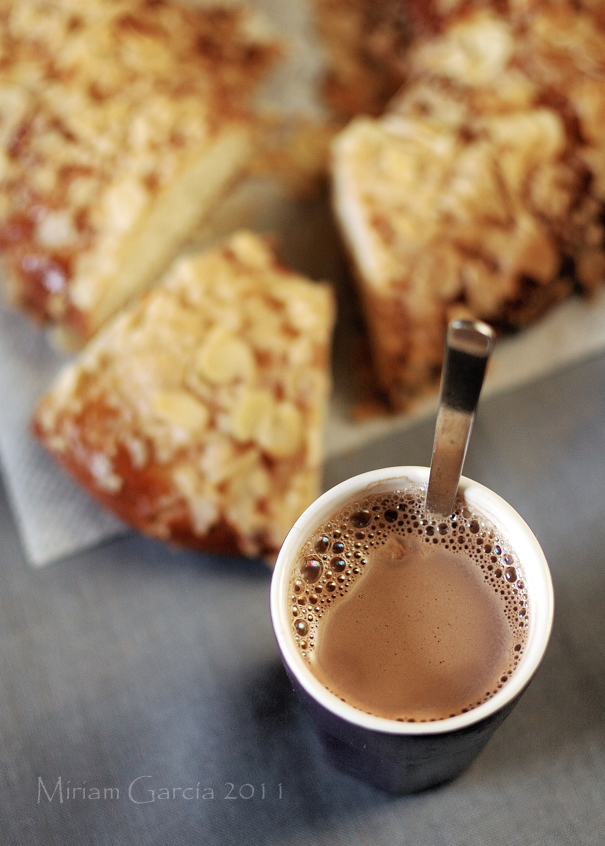
This time my roscones were a bit overfermented, that is why they are a bit on the flat side. A good roscón should have a rounder section. Nowadays a lot of people like their roscón stuffed with whipped cream, ganache or many other fancy fillings, you just open the roscón like a giant bagel and pipe the filling, then replace the top half. I do not like this at all, but feel free to do it. I won't interfere, but I will lose all respect for you... However, of course you must have your roscón with hot chocolate... I admit no objections about it. I would be soooo disapointed if you would not...

Roscón Reyes 2

And by the way, this is my first submission of the year for YeastSpotting, Happy New Year, Susan!

Firma 200px

Eager to know more?

Followers

About This Blog

Lorem Ipsum

  © Blogger templates Palm by Ourblogtemplates.com 2008

Back to TOP