Related Posts Widget for Blogs by LinkWithin
Showing posts with label sweet. Show all posts

School of Tapas: Apple paste with Manchego cheese

>> Thursday, March 15, 2012

Dulce de manzana con queso manchego

This apple paste or dulce de manzana is a typical recipe from the northern part of Spain, especially Asturias. This is a humid, lusciously green apple-growing region, best known for its delicious cider, brewed all over the place by large and small apple growers. It is also known for its strong and amazing blue cheeses, like Cabrales. This apple paste is similar to the famous quince paste, dulce de membrillo, a true staple food in many Spanish regions (I'm sure you'd be treated to this dulce in the Spanish villas in the region of Castilla La Mancha...). Similarly apple paste and strong cheeses go together like a horse and a carriage. Here I have paired dulce de manzana with a hearty Manchego cheese. An easy tapa not to be missed.

Here follows the recipe for the apple paste. No, I won't give you the recipe for Manchego cheese, it's a state secret.

Dulce de manzana

  • 1.3 pound (600g) apples (some tangy variety, like Reinette)
  • 1 lemon
  • 0.4 cup apple cider (100g)
  • 1 pound sugar (500g) 

Dulce de manzana

  1. Peel the lemon and get rid of as much pith as you can. cut in half and extract the pips.
  2. Peel and core the apples. cut in large chunks and sprinkle with some of the lemon juice to prevent them from browning. Add the cider and sugar, stir to mix. Process the mixture in a food processor or blender till smooth.
  3. Put the pureed fruit in a heavy saucepan. Turn on the heat to low and simmer 35-40 minutes uncovered, stirring often. 
  4. When the paste is ready, the pureé will acquire a deep redish golden color. To test for doneness, take a teaspoonful of the mixture and drop it on a plate. Wait until it's cold. If the drop is firm enough to the touch and detaches from the plate in one piece when pushed with your finger (a lot more solid than jam consistency), then it's done. If the pureé is too soft, just proceed with the simmering 2-5 minutes longer or as long as needed.
  5. When ready, pour the paste into a shallow container large or small enough to form it into the shape of a thin ingot (the thickness of the portion in the photos is the final thickness) and let it cool completely. I recommend you use a lidded container, as the paste tends to dry quite a bit. Well, unless you intend to eat it all in one go. You can also use a loaf pan lined with plastic so that you can unmold it on a plate. But always keep it covered if you're not going to finish it right away.
  6. Slice the cheese and slice pieces of the apple paste of similar size. Top the cheese with the dulce de manzana and enjoy!
Dulce de manzana con queso manchego

It is essential to use tangy apples in order to offset the sweetness of all the sugar needed for the pureé to gel.

Dulce de manzana con queso manchego

And let me add a last tip: dulce de manzana goes really well with all kinds of meat or liver terrines and foie...

Eager to know more?

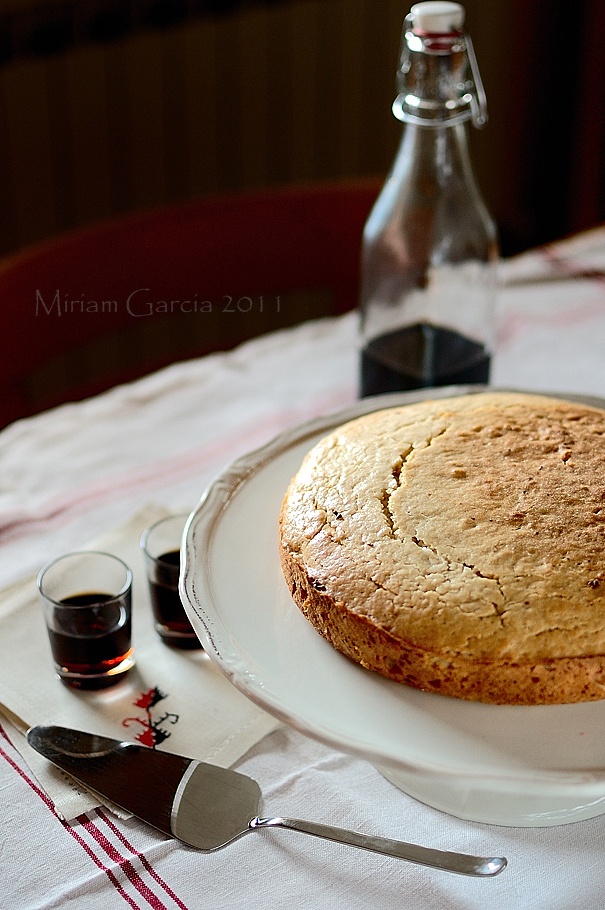
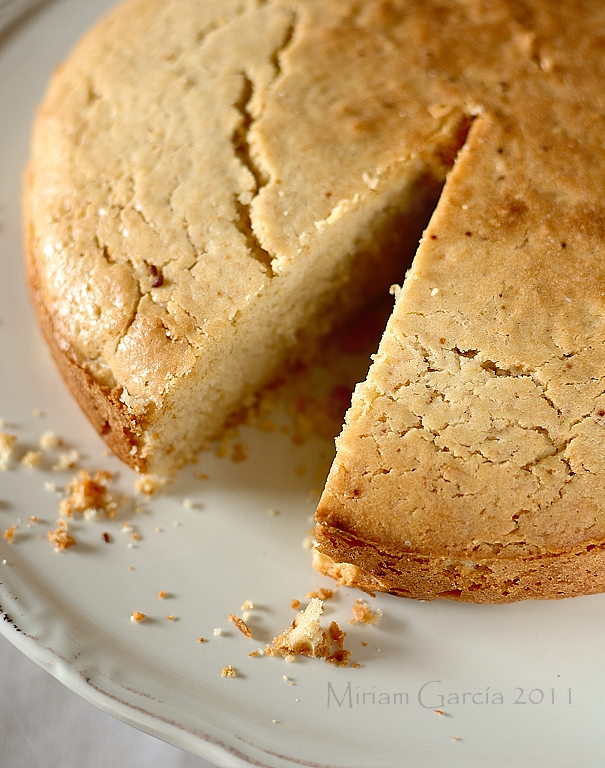
Bica blanca, a typical white cake

>> Monday, May 23, 2011

Bica blanca 1

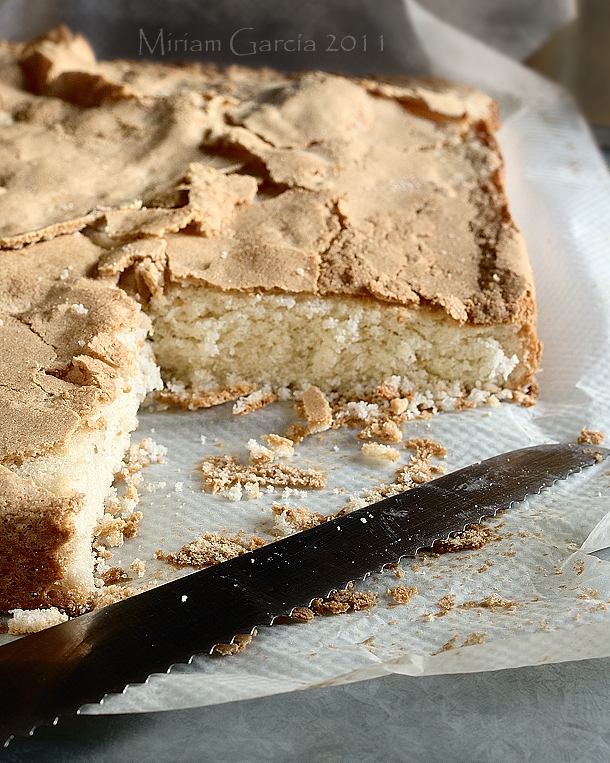
Bicas are a kind of popular dense cake, typical in some areas of the northwest corner of Spain, in Galicia. Among the several varieties of bicas, one of my favourites is bica blanca or white bica. And why is it called white? Well, because it uses only the egg whites and no yolks. White bica is a luscious cake made with egg whites, sugar, flour and... tons of cream. It's the perfect recipe to use up leftover egg whites from custards, flans and the like. I prepare this cake every now and then and it's always a huge success, my kids love it and you know they are quite picky. Though I am sure the bleak winters in the area where this cake originates help people to burn all the sugar and the cream it contains... unlike my boys, who certainly spend to much time in front of the video console.


Bica blanca 3

Bica blanca

  • 6 egg whites
  • 2.5 cup/250g AP flour
  • 1 cup/250ml whipping cream
  • 1.3 cup/325g sugar
  • Butter for the dish
  • Ground cinnamon for sprinkling
  1. Preheat the oven to 180º-200ºC/356º-392ºF, depending on the type of heating, either traditional or air convection.
  2. Separate the egg whites from the yolks if you are using whole eggs instead of leftover whites. Use the yolks to make a good custard...
  3. Measure the flour and set aside.
  4. Measure the sugar.
  5. Whip the egg whites in a food processor with a pinch of salt and add the sugar little by little once the whites have started to foam, till you have a stiff meringue. Set aside a couple spoonfuls of sugar for later sprinkling on top of the cake.
  6. When the meringue is stiff, set the speed to low and add the flour by the spoonful while beating.
  7. Whip the cream to soft peaks. Add it to the meringue-flour mixture and mix carefully and gently with a spatula.
  8. Line a rectangular cake dish with parchment paper (typical bicas are rectangular and wrapped in paper). Butter the paper and pour the batter. Smooth the surface with a spatula, then sprinkle sugar and cinnamon on top for a perfectly genuine finish.
  9. Bake 35 minutes. Then use a stick or toothpick to check for doneness and take out of the oven if thoroughly baked. Use the paper to pull the bica out of the dish and place on a wire rack to cool.
  10. Devour immediately.
Bica blanca 2

I use a 24x30cm/9.5x12" dish and my bicas are a bit too thin, as traditional bicas are 5-6cm/2-2.5" thick. This type of cake does not really expand a lot, as the batter is already quite "expanded" because of the egg whites and the whipped cream. It keeps perfectly well for 2-3 days wrapped in plastic foil, but it rarely lasts that long...

Eager to know more?

Medieval arroz con leche and a trip to Granada

>> Friday, May 13, 2011

Arroz andalusí 2

During the past Easter holiday, Semana Santa in Spanish, we spent a few days in the beautiful Ansalusian town of Granada. Amazing place, I swear. It not only houses one of the most magnificent Muslim monuments in the world, the Medieval fortress of Alhambra, but it is also a great spot for eating tapas, definitely one of the best in Spain. It is views like the ones below that prompted the 20th Century Mexican poet and diplomat, Francisco Alarcón de Icaza, to exclaim: “dale limosna mujer / que no hay en la vida nada / como la pena de ser ciego en Granada” meaning “Give him alms lady, for there is nothing in life as wretched as being blind in Granada”. (Here is a good resource about the rise and fall of Islamic Spain.) This very famous quote can be found everywhere in Granada, on tiled walls, on souvenirs for tourists… Granada is the Spanish word for pomegranate and this beautiful fruit is depicted all around, in the typical pottery, the street name signs, the sewer caps…


And can you guess what I bought in Granada? A couple of cookbooks, of course. One of them is the translation of an anonymous Andalusian manuscript of the 13th Century to be exact, written somewhere in al-Andalus, the former Islamic territory in Medieval Spain, which included not only the present region of Andalusia, but at least the southern half of the Iberian Peninsula. (Muslims ruled varying tracts of land in the Peninsula from year 711 to 1492, a time span of almost eight centuries.) A masterpiece of culinary history, but rather confusing when it relates to methods of preparation and quantities of ingredients, as if it had been written by… a grandmother (in Spain a “historical” phrase is attributed to grandmothers when it comes to pastry and bread: “add as much flour as it can take”… very precise). Nevertheless, I found it fascinating reading. I was delighted to verify how little some recipes have changed after a whopping 800 years. I love to imagine how al-Andalus citizens ate meatballs, escabeches and pepitorias virtually identical to those we eat now, sitting in the cool while listening to the rumour of one of the many fountains that graze Granada… Also interesting to see how some ingredients, now thought exotic but which were added to a wide variety of dishes at the time have disappeared completely and haven’t even been preserved in Andalusian cuisine, such as rue or citron leaves.

One of the recipes that caught my attention was a rice pudding sweetened with honey, predecessor of our current arroz con leche or rice pudding, an enormously popular dessert all over Spain, and closely related to it. In fact almost identical, but for the use of honey as the main sweetener instead of sugar. As my husband is a big fan of rice pudding, I got to it, though I dislike it myself… quite a lot. Yes, nobody is perfect.

Here follows the recipe as it appears in the book (translation extracted from this web):

Take rice and soak it in fresh water, enough to cover it, for a day or overnight. Then wash it and put it on the fire in a pot or kettle. Cook it with water or fresh milk, then add four or five ratls of clean honey from which you have skimmed the foam. Cook it carefully on a gentle fire. Moisten it, while cooking, with fresh milk until it sticks together, coagulates and becomes a paste. Pour it onto a platter and macerate it with a spoon. Make a hole in the center which you fill with fresh, melted butter and dust it with ground sugar and cinnamon and use it.
Arroz andalusí 4

And here goes my version:

Medieval arroz con leche

Prep time: 12 hours
Cook time: 1 hour 5 mins
Total time: 13 hours 5 mins
Serves: 8
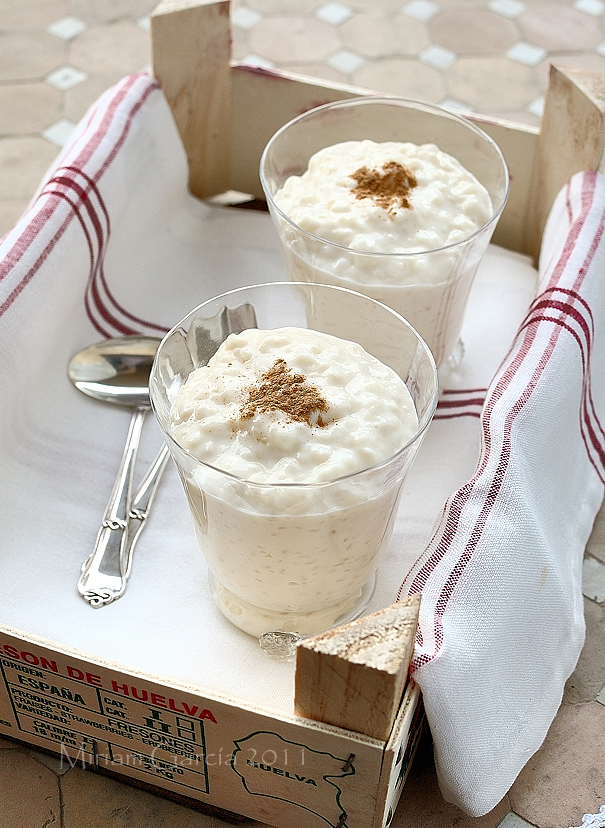
A lusciously creamy rice pudding, arroz con leche, is a hugely popular dessert all over Spain, originated during the Medieval Muslim rule of Spain. Here is a 13th century version, sweetened with honey instead of sugar.

Ingredients:
  • 1 cup (200g) round grain rice
  • 6 cup (150dl) whole milk
  • 1/2 cup (175g) good quality honey*
  • 1 stick cinnamon
  • Melted butter to taste
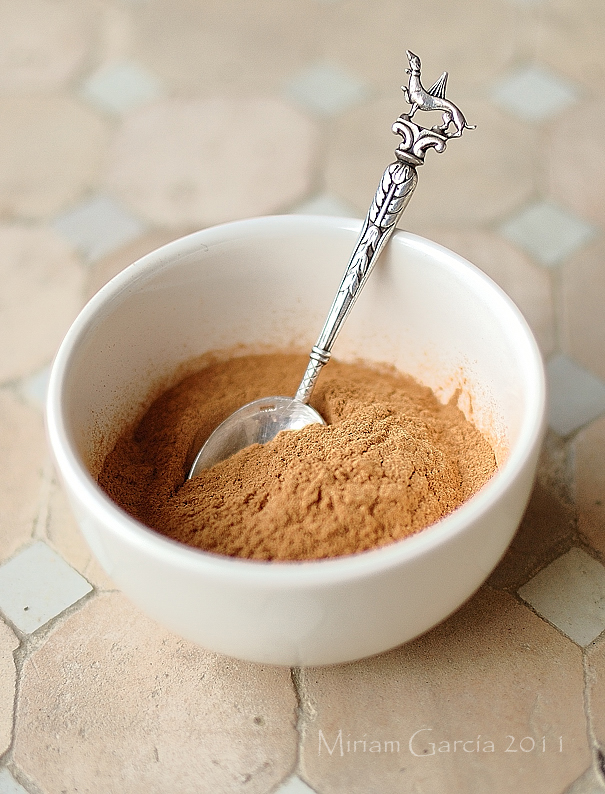
  • Ground cinnamon for sprinkling
Instructions:
  1. Put the rice in a bowl, add water and let it soak overnight.
  2. The next day let the rice drain thoroughly in a colander. Then transfer it to a pot, add the milk and the cinnamon stick.
  3. Bring it to a very soft boil and cook for 45 minutes, stirring often and scratching the bottom of the pot to prevent the rice from sticking.
  4. Add whatever sweetener you prefer, either honey, sugar or both (see note below) and keep cooking another 20 minutes, stirring till you have a soft and sticky mass.
  5. Once the rice is cooked and it has achieved a creamy consistency, test for sweetness and correct if desired. Take into account that it will further thicken on cooling.
  6. Tip the rice on a platter and let it cool covered, or better still covered with plastic foil touching the surface, so that it develops no skin (unless you like the skin of course).
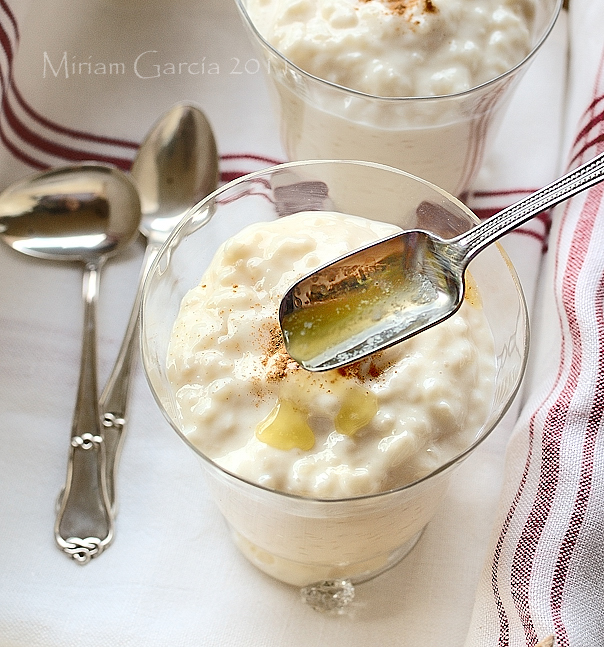
  7. To serve, sprinkle with cinnamon and drizzle with a little melted butter.
*For those who are not honey lovers, you can substitute half the honey with plain sugar, then the ratio is approximately 1/4 cup (90g) honey/1/2 cup plus 1 tbsp (110g) sugar; 1 cup plus 2 tbsp (230g) if you only use sugar. The sweetness of sugar is about 3/4 of honey.

Arroz andalusí 3

I admit it: I didn’t taste it. I told you I don’t like it at all, though I am quite alone in this. Anyway, I’m such a sweet and loving wife that I gladly made it for my husband… ahem. And as a true “connoisseur” of rice pudding varieties, his verdict was that it was truly delicious. Although maybe he tells me so not to ruin our relationship. How am I to know? ;)

And by the way, the Spanish version of my blog was recently included in a list of recommended blogs for Spanish majors at this web of online college courses... I am so honored that anyone considers my blog is a good resource for Spanish culture! Well, namely cooking... they say "Bonus if you can make recipes published in Spanish"... fun.

Eager to know more?

Torrijas, a Spanish Easter treat

>> Saturday, April 23, 2011

Torrijas 1

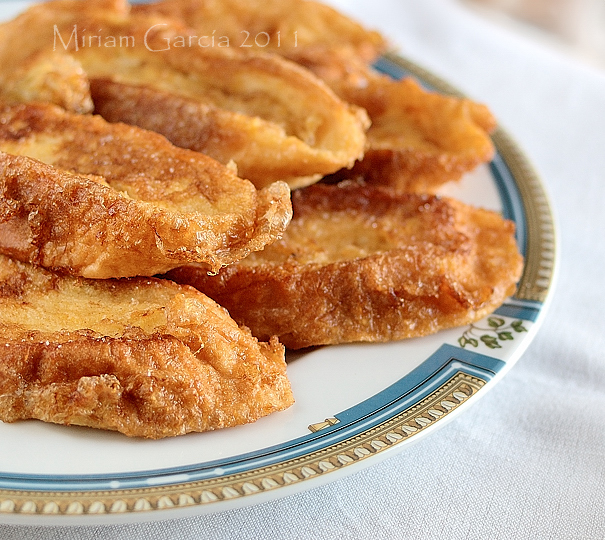
All relevant religious holidays in Spain have a reflection in the food. Spain was a strictly Catholic country for centuries with the liturgical periods tightly marking the habits, and with food rules that had to be obeyed. Though nowadays the religious rules regarding food, like fasting on certain days during Easter, are largely overlooked, funnily enough the food traditions remain and making torrijas for the Easter celebration, usually a labor holiday lasting four days, is one of them. Also you can find them in pastry shops, restaurants and bars all over the country during this period. Torrijas are apparently a rather ancient recipe, as they first appear quoted by a Spanish author in the 15th Century. Now... listen to yours truly pronouncing this funny word here.


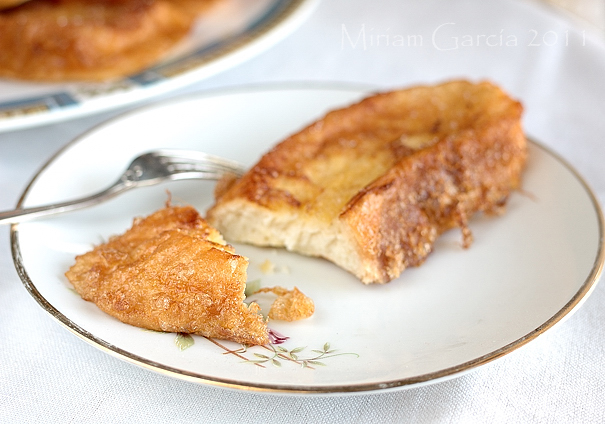
Torrijas are a very simple dish, very similar to French toast and pain perdu, most often made by soaking slices of stale bread in sugared milk, also flavoured with cinnamon or vanilla, then bathed in beaten egg, fried in oil and sprinkled with a mixture of sugar and powdered cinnamon. In fact, another one of the many ways developed by the not so well-off to use up bread leftovers. Though today bread especially baked for the purpose of making torrijas can be bought. As it usually happens with most traditional dishes, the perfect ingredients and method are controversial matters, torrijas made with sweet wine instead of milk and others bathed in syrup after frying being also popular. And of course, the best torrijas are always one's mother's, no discussion about it!

Torrijas 3

Homemade torrijas


By Miriam García
Published: April 23, 2011
Torrijas are a very simple dish, similar to French toast and pain perdu, most often made by soaking slices of stale bread in sugared milk, then bathed in beaten egg, fried in oil and sprinkled with cinnamon sugar.


4.0 stars based on
35 reviews


Prep time: 1 hour 15 minutes
Cook time: 45 minutes
Total time: 2 hours
Yield: 16

Ingredients
  • 4 cups (1 liter) milk
  • 3 tbsp sugar (or honey if you prefer)
  • 1 stick cinnamon
  • 3-4 medium eggs
  • Sunflower oil or other insipid oil for frying
  • Sugar and cinnamon for sprinkling
Cooking Directions
  1. Cut the bread into 1 inch (2.5cm) slices. Arrange them on a shallow dish that can hold the milk.
  2. Put all the milk in a saucepan with the sugar and the cinnamon stick, bring to a boil. Turn off the heat the moment it starts to boil and leave to infuse for 5 minutes.
  3. Pour the milk on the bread and let soak for one hour.
  4. Beat the eggs in a plate large enough to hold at least one torrija.
  5. Heat the oil to medium in a large frying pan that can hold several torrijas at the same time. With a spatula (the bread might be overly soft), carefully transfer the soaked slices one by one into the egg and turn them to coat. Then transfer the slices to the hot oil.
  6. Fry for a couple of minutes on each side, until brown.
  7. Take out to a dish lined with a paper towel and thoroughly sprinkle with sugar and cinnamon. Enjoy warm or cold.
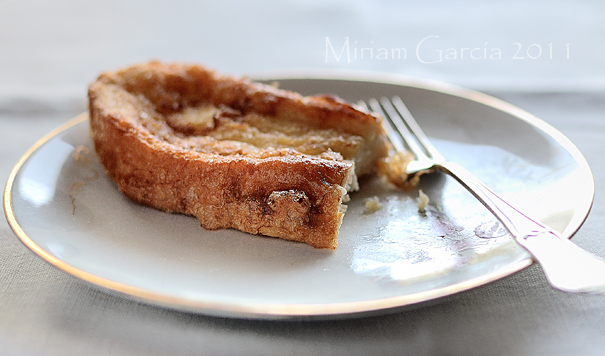
Tips for superb torrijas: I find the result is best when you let the bread go very stale before soaking, so that the slices can soak as much milk as possible and yield a very creamy inside afterwards. So what I do sometimes is to slice the bread before letting it dry overnight, to assure that the loaf dries thoroughly (and because slicing is a lot easier while the bread is soft). And I recommend you make sure that the slices soak as much milk as feasible, so it is best to check how they are doing within say 20 minutes after pouring the warm milk on them, because you can always add a little more if the slices have soaked up all the liquid in the dish, say another cup. For me these are indeed the secrets for a lusciuosly creamy interior that looks and tastes more like pastry cream than like plain milk-soaked bread. Because that is what I really love about torrijas, that the alchemy of soaking and frying metamorphoses the simplest ingredients into something different and truly delicious.

Torrijas 2

Check this article at Honest Cooking.

Eager to know more?

Jijona turrón ice cream

>> Friday, April 15, 2011

Turrón ice cream 1

Do you know what turrón is? It is a nougat-like confectionery mostly made with almonds, tons of almonds… and also sugar, honey and egg whites. It is typical Christmas fare all over Spain, although originating from the southeast Mediterranean coast, in the region of Valencia (check here the Spanish pronunciation of turrón). It is usually shaped into either a rectangular tablet or a round cake where almonds can be left whole or ground to a paste to yield the following traditional varieties:

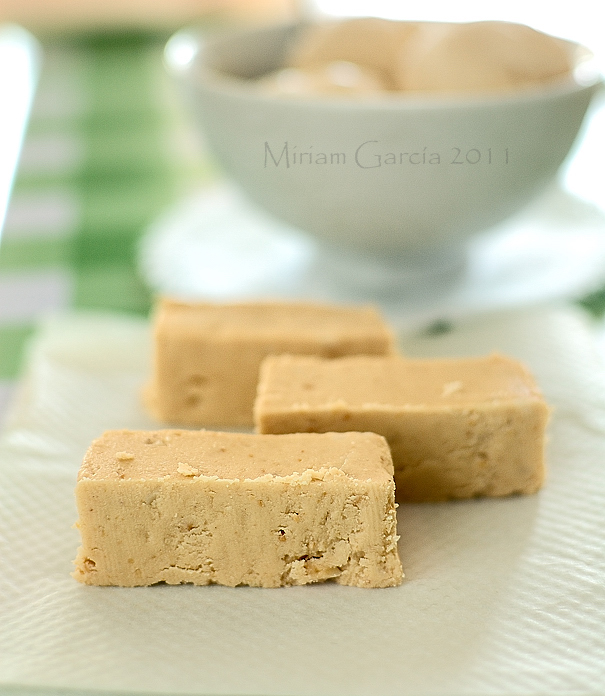
  • Hard (the Alicante variety): A compact block of whole almonds in a brittle mass of eggs, honey and sugar; 64% almonds (premium quality).
  • Soft (the Jijona variety): Similar but the almonds are reduced to a paste. The addition of oil makes the matrix more chewy and sticky; 60% almonds (premium quality).
Jijona is a small town known since the Middle Ages for its excellent honey and productive almond orchards. This local produce gave birth to turrón, referenced for the first time in a document of 1531. Turrón is such a valued confection that today its formulas and quality are standardized and endorsed by a Regulation Council.


Turrón ice cream 2

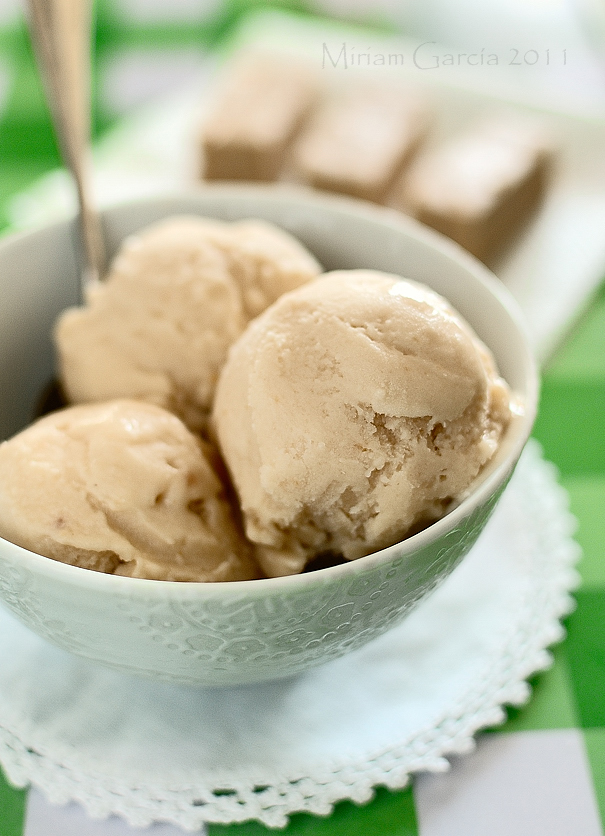
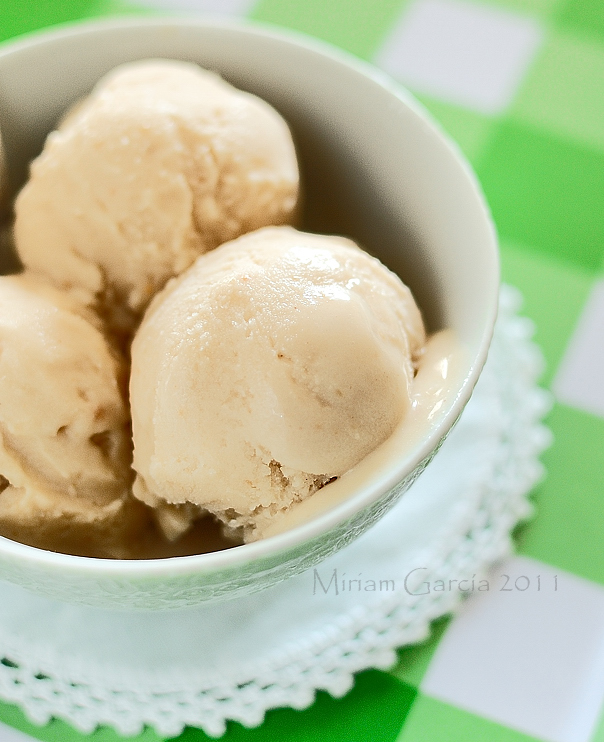
And I guess you are wondering why I am talking about Christmas now, right at the beginning of Spring. Well, because the same as turrón itself reminds any Spaniard of Christmas, ice cream flavored with Jijona turrón is a variety that no Spanish ice cream shop fails to stock during the warm season. And as in Spain it is very common to have turrón leftovers at home after Christmas, this is a wonderful way to give this traditional confection a totally different twist. And that is exactly what I did. So as warmer weather is on its way in the northern hemisphere and just in case you happen to lay your hands on a tablet of Jijona turrón, here is the recipe for this creamy, rich and very Mediterranean ice cream:

Jijona turrón ice cream
Serves 6

For the custard:
  • 0.75 cup (150g) sugar*
  • 2 cups (500ml) whole milk
  • 3 medium eggs (whites separated)
For the flavouring:
  • 0.33oz (150g) soft Jijona turrón
  • 3 tbsp Málaga wine (a good quality sweet Sherry can be used instead)
  • 0.85 cup (200ml) whipping cream
  1. To make the custard, put the sugar, milk and egg yolks in a saucepan and prepare a custard using a bain marie or double boiler, stirring slowly and continuously with a wooden spoon, until the custard is set and it coats the back of the spoon. Watch it closely to avoid any boiling, or it will curdle.
  2. Process the crumbled turrón with the wine into a paste, then add to the custard and mix well. Set this mixture aside and let cool to ambient.
  3. When the turrón custard is cool, whip the cream to soft peaks and add, folding gently till fully incorporated.
  4. Whip the egg whites to stiff peaks and fold carefully into the mixture. Mix gently but thoroughly to avoid any white streaks in the final ice cream mixture.
  5. Leave to freeze in your icebox and whip every hour till fully set or churn in your ice cream maker, if you are lucky to have one, which I am not.
*A note on sugar: the sugar content is a very region-dependent and even personal matter, and it should be adjusted to your liking, so I recommend you try the mixture before churning. Usually European confectioneries, pastries and sweet things in general are less sweet than for example in the United States. And remember frozen desserts should always be on the sweet side before freezing or churning, as the sweetness will be less noticeable afterwards.

Turrón ice cream 3

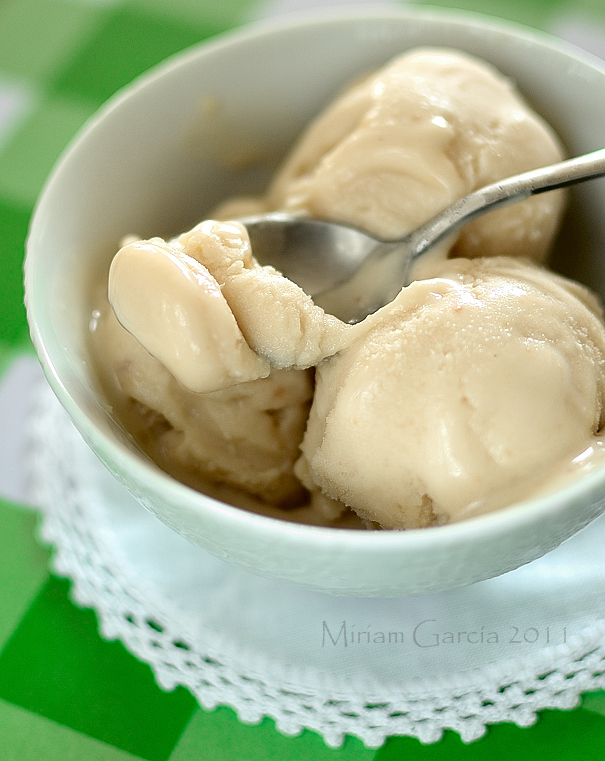
And there you have it. To my taste this ice cream is so rich that I don’t need any topping or sauce on mine, but feel free to use some chocolate sauce or almond brittle…

Check this article at Honest Cooking.

Turrón ice cream 4

Eager to know more?

Matcha tea mousse pies and Japan in our minds

>> Monday, March 21, 2011

Image from Wikimedia Commons

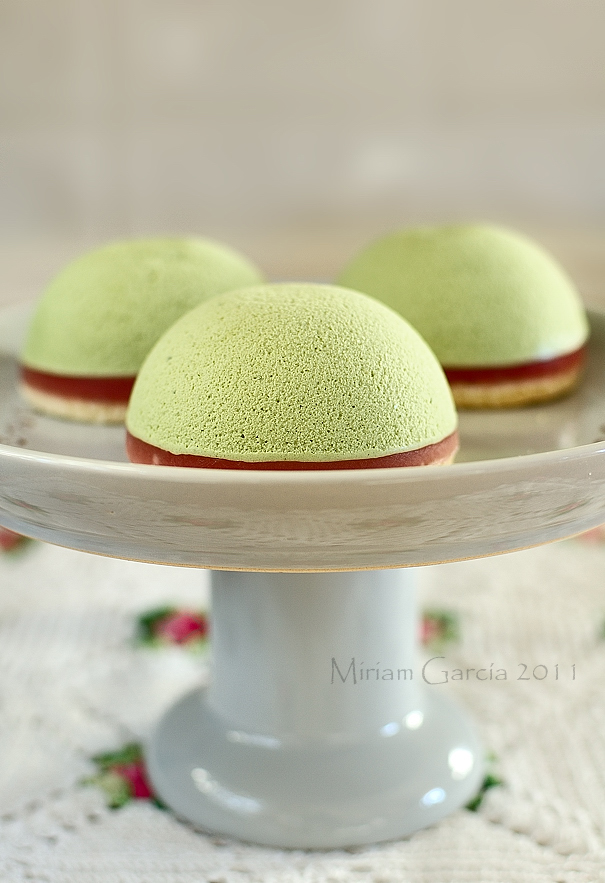
No matter how hard we try to plan our lives, they can always be disrupted. And nature is unpredictable. I would have preferred not to have any reason to make this recipe, but Japan is in everybody's mind these days. So in remembrance of the Japanese people I have prepared this simple recipe for little mousse pies. These sweets have the subtlety of flavors so common in Japanese cuisine and are relatively easy to make, and furthermore eye-catching. The post header image is a painting by Japanese painter and engraver Hokusai, of the Edo period, executed between 1830 and 1833, and it is called... tsunami. This artist deserves to be as famous as Van Gogh, at least, but we Westerners are pretty ethnocentric... I love this painting since I was a child because this type of painting unmistakably reminds me of... Tintin books. They are obviously inspired by that art style, just take a look at the next picture. And Tintin stories have always been among my favorite readings.

Image from this blog

Before I give you the recipe, I just want to remind you that there are various charities where you can contribute to the Japanese earthquake and tsunami relief, like the Japanese Red Cross, or even one of those bakesales for Japan that are being organized here and there.

In Spain, a Japanese girl called Makiko and living in Madrid has set up a blog to ask for people to contribute by making an origami crane. The blog is called 1000 grullas por Japón, meaning 1000 cranes for Japan. It is a Japanese tradition to make 1000 origami cranes when you want to make a wish come true. This is my crane:


Once you have your crane, you have to take a picture and send it to Makiko. She will gather all the crane photos and send them to her family and friends in Japan. I found it is a beautiful initiative.

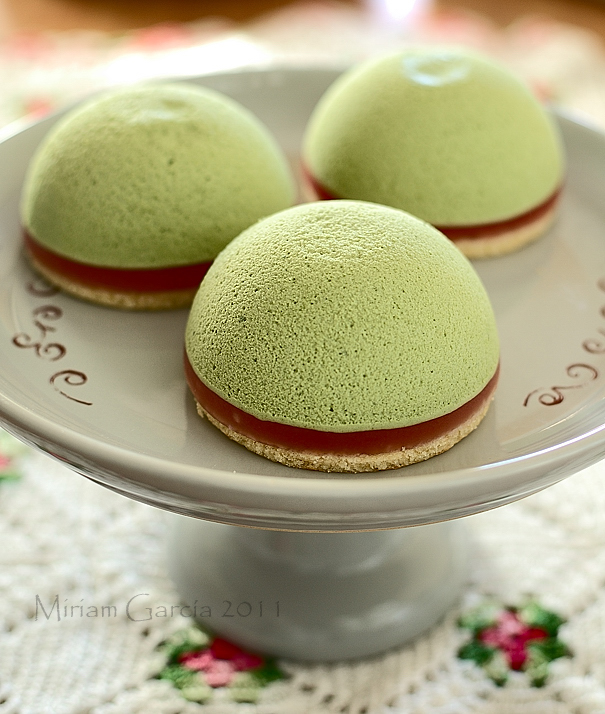
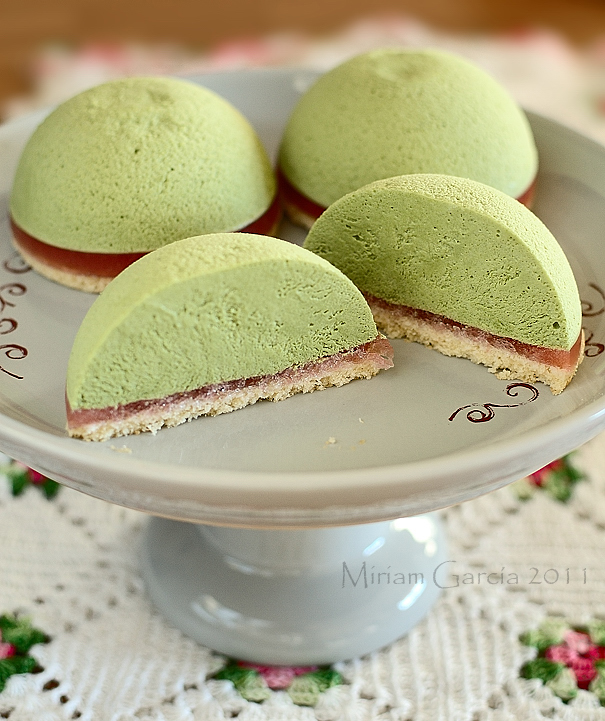
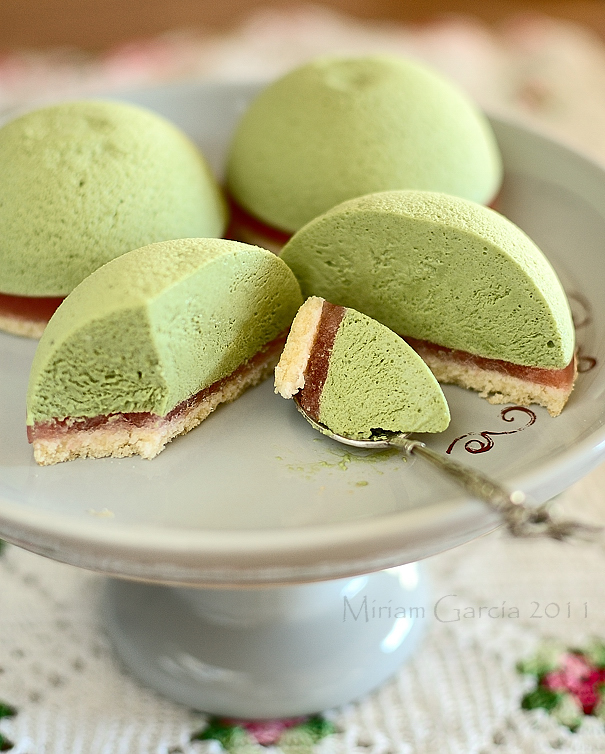
For the matcha tea mousse I have used the recipe I used for this cake, just remember to whip the cream only to soft peaks, so that the mousse is fluid enough to fill all gaps and render a smooth and marvelous little pie. I happen to have a wonderful set of silicone bombe molds, like the ones depicted here, perfect to make these little pies. Oh, and I also recommend that, as in this case the slightly bitter taste of matcha tea mousse is not offset by the same amount of other sweeter mousse, better increase the amount of sugar from 40g to 60g. For the coulis jelly layer I used strawberries, which can already be found in stores.

Matcha tea sweets 1

Matcha tea mousse pies
For the cake base:
  • 100g uncooked marzipan
  • 90g egg (I used 2 medium eggs, which is slightly more than that)
  • 25g butter
  • 30g AP flour
  • 1g baking powder
  1. Preheat the oven to 190ºC.
  2. Weigh the flour and the baking powder, sieve them together and set aside.
  3. Heat the marzipan to 50ºC in the microwave oven. Put it in a bowl and mix with the egg. Whip with a mixer till white and fluffy.
  4. Melt the butter; add it little by little to the marzipan mixture while whipping.
  5. Add the flour mixture and mix well.
  6. Carefully spread the batter on an oven tray lined with parchment paper, with and offset spatula or something similar, as the batter layer needs to be quite thin. Bake for 6 minutes or till browned at the edges. Take it out of the oven and leave to cool on the paper.
Then prepare the tea mousse as per this recipe (please remember to add 60g of sugar instead of 40g) then pour the mousse in the molds, leave room on top to add the strawberry jelly later (the cake circle can be put on top, there is no need to fit it into the mold). Leave the mousse to set in the fridge.

Matcha tea sweets 2

For the strawberry jelly:
  • 80g strawberries
  • 1 sheet gelatin
  • 1 tsp sugar
  • 100ml water
  1. Put the gelatin sheet in a bowl of cold water to hydrate as per the manufacturer's instructions. 
  2. In the meantime process the strawberries and heat the resulting puree in a saucepan; add the water little by little if it is too thick. Sieve the puree to eliminate the seeds. Then bring it to boiling point again and add the gelatin. 
  3. When the gelatin is dissolved, turn the heat off and leave to cool. 
Matcha tea sweets 3

To put everything together:
  1. When the jelly is at ambient, pour it on the set mousse portions. Take it to the fridge again for the strawberry jelly to set.
  2. Use a pastry ring or large cutter to cut circles off the cake of the same size as the mousse in the molds (I am lucky enough to have a pastry ring of the same size as my bombe molds), then carefully lay them on top of each little pie.
  3. When the pies are thoroughly cold, take them to the icebox, so that they can be easily unmolded without ruining them. When completely frozen, get them out of the molds and wait until thawed. You can leave them to thaw in the fridge.
Matcha tea sweets 4

Of course this mousse can also be used to fill small pastry rings or tiny tart rings, or even use it all in one cake for a layer. It is also good in small glasses, perhaps placing the cake crumbled at the bottom and the mousse on top. Mousses are very versatile, we all know. The recipe amounts are not very balanced, because the mousse was enough for my six bombe molds of about 7cm diameter and a layer for a 20cm cake, while the marzipan cake was just a little over the amount necessary for the 6 circles and for the jelly I had to increase the quantities a little (all changes already reflected in the amounts I am giving). I love mousse desserts, they are light and beautiful. In addition, this mousse in particular is not very sweet and you eat it without hardly noticing...

Eager to know more?

Madeira cake and a very British Oscar

>> Tuesday, March 8, 2011

Madeira cake 3

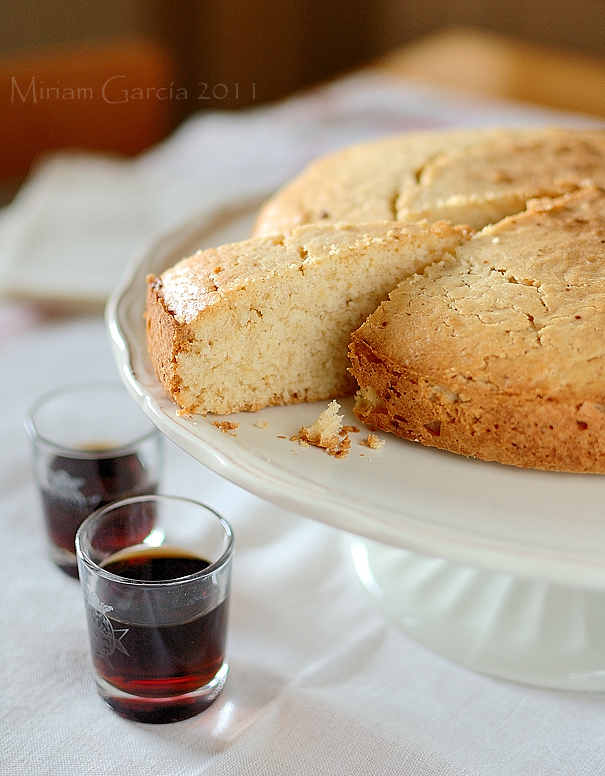
This post is dedicated to Colin Firth. Why? Because I want to. Because I feel like it. For his freshly baked Oscar. Because he's been one of my favorite actors for hundreds of years. Because he's had to wait to have wrinkles, to lose some hair and for his cheeks to drop for critics to appreciate his performing art. Instead, we all know that Nicole Kidman, an instance among many, is a smashing actress ever since she was born. Yeah.. Maybe the film critics are mostly men? That's the reason why I recently made this utterly British classic, that the Britons used to have for high tea while sipping a glass of sweet Madeira wine with their little finger raised, hence the name of the cake... This is a touch of genius, nothing better than sweet wine to accompany this luscious cake... In fact the cake is quite a normal cake flavored with lemon, but if you picture Mr. Darcy tasting it, it suddenly and unexpectedly becomes more appealing...


Precisely because of the almost-zero recognition of movie hunks by the film critics, I worship George Clooney, because the guy must be as sharp as a tack for winning an Oscar before needing a walking stick (okay, who won for a role where he was hardly recognizable, with 20 kilos overweight). Okay, I worship him for this and for some other reasons I will not mention. It's not that I feel quite the cinephile lately, I always do because I love cinema, of course good cinema (you're wondering what good cinema is? In my blog I say what is good... and what is not). I just do not usually talk about it here, it does not usually fit with the recipes I post. This time it did not fit either, but I could not resist myself. What for?

Madeira cake 1

The recipe for this cake, born in the 18th century, comes from a cute British cookbook published by Harrods, oh dear, quintessentially British (the Anglophile in me again). It also caught my attention because it carries a small proportion of rice flour, and since I had a brand new brown rice flour, I told myself this cake was the opportunity I expected. But fear not, the few healthy brown rice molecules are well neutralized by tons of butter...

To the point:

Madeira cake

  • 150g soft unsalted butter
  • 100g caster sugar
  • 225g AP flour
  • 50g rice flour
  • Juice and zest of one lemon
  • 2 tsp leavening agent (or 2+2/3 tsp baking powder)*
  • 4 medium eggs
  • Candied lemon peel (optional)
*To prepare a leavening agent you mix cream of tartar with baking soda. This agent is like any store-bought baking powder, that is, a mixture of an alkaline compound, sodium bicarbonate, with an acid, in this case the cream of tartar. The acid and the alkali get in contact when dissolved in the liquid of the batter and they react. The acid-alkali reaction releases carbon dioxide that makes the cake or cookie rise. In the case of store-bought baking powder, acid usually has a slow-action or is activated only by heat (that is, the reaction will not start until you put the batter in the oven). On the contrary, cream of tartar acts very quickly, immediately on dissolving in the liquid. If the dough has an acidic component, such as buttermilk, depending on the amount it might not be necessary to add the cream of tartar, but only the baking soda. Equivalence between store-bought baking powder and the mixture of baking soda and cream of tartar is as follows:
1 tsp of baking powder equals:
  • 1/4 tsp baking soda + 1/2 tsp cream of tartar or
  • 1/4 tsp baking soda + 120ml acid liquid, like buttermilk, sour milk or yoghourt
The ratio of cream of tartar to baking soda must always be 2 to 1, that is, double amount of cream of tartar. Well... sometimes my past as a chemist just shows. Source: On food and cooking, Harold McGee, and Joy of Baking.
  1. Preheat the oven to 180ºC if conventional, to 160ºC if convection type. 
  2. Whip the soft butter with the sugar till white and fluffy. 
  3. In the meantime, weigh and sieve the solid ingredients, set aside. Zest the lemon and add the zest to the flour mixture. 
  4. Crack the eggs and mix with the lemon juice. 
  5. When the butter and sugar mix is ready, add the solids and the eggs alternately, in 2 or 3 batches, mixing all the time at a slower speed than before. 
  6. Line a 18cm cake pan with parchment paper. When the batter is ready, pour it in the pan (it will be quite thick) and smooth the surface with a spatula. Bake immediately as the cream of tartar will start acting at once.
  7. Bake for one hour. Unmold and let cool on a wire rack. 
Madeira cake 2

I have to agree with the British: the obvious lemony taste of the cake along with its dense texture (but not heavy), coupled with a deliciously crispy crust combines beautifully with a good sweet or raisin wine... hics.


And last but not least (I've been forgeting to mention this for a month already). I was one of the judges for the photographic contest DMBLGIT, January edition, hosted by the very lovely Katherine of A girl in Madrid... Check the winners at her site. I do apologize for not posting this earlier, I kept forgeting all the time! And the experience was a tough one, so many beautiful photographs to choose from... Congratulations to all the winners, it was well deserved.

Eager to know more?

Apple cream, John Barry and Valentine's day

>> Thursday, February 10, 2011

Apple cream 1

I have a nasty cold. I am a wreck. And I do feel that way. This has not prevented me from feeling an urgent desire to make a dessert with apples though, being them one of my many addictions. I've said it before, inspiration is a very peculiar animal and comes whenever she wants to, not when it is convenient for you. Serves no programs or schedules. Just like death. That is why John Barry died on January 31st, the composer of such famous film scores as Out of Africa and well-known arranger of the original James Bond theme, when it was completely untimely for him to die... Any movie fan knows his music. He was also British and, as some say, that's a plus. Among his not so well-known compositions is the evocative soundtrack to the movie Robin and Marian, an utterly romantic movie with Sean Connery (sigh...) and Audrey Hepburn (another sigh...). Yes, the quintessential love story. I recommend you watch it, you will not regret it now that honeyed Valentine's day is on its way. Because the movie is not cloying in any way, it shows us the reunion of Marian and Robin Hood after his return from the Crusades, both middle-aged and already-done-it-all. But that does not prevent... sparks from flying between them. Delightful. Wonderful. Sublime. Totally underrated. And another excuse to enjoy the voice of Sir Sean Connery... a religious experience (although I might be thinking of something more profane). This is your homework for this cloying, sugary week. No complaining. Search for this movie and watch it, little children. And if you like it, you can watch it on every Valentine's day with your partner from now on. Though I don't wait till Valentine's day to celebrate.


You may wonder what is the relationship of the apple cream with everything that I mentioned earlier. Well, in the opening scene of the movie we see some fresh apples on a window sill that are displayed later rottening as a symbol of a world that is falling apart, Robin and Marian's. Okay, the relationship is difuse. But the ways of the subconscious are mysterious. And mine is even more mysterious, I tell you. Do not wish to know further. Also, I write my own scripts, just like Pedro Almodóvar. And that is obvious for both.

The recipe for this rather symbolic cream comes from an interesting monograph on reinette apples by a Spanish chef, famously cultivated among other regions in the north Castilian area of El Bierzo. Reinette apples are known for their tart and peculiar taste, the best for cooking desserts. Though who knows where the apples I find in my area come from. Maybe they are brought from the other side of the world, where the growers get a ridiculous revenue from them and then loads of fuel are wasted in bringing them here so that the oil companies are very happy... thanks to us. But that's another story. To the point:

Apple cream

  • 4 large tart cooking apples
  • 1 bottle natural cider (0,75 liters)
  • 200g sugar
  • 6 large egg yolks
Apple cream 2
  1. Put the cider in a saucepan and add the sugar. Bring to a boil.
  2. Peel and core the apples, cut them in chunks and add to the cider. Process everything to a runny puree.
  3. Boil the mixture to a compote consistency, about 10-15 minutes. The puree must be somewhat thick, although it will thicken further with the addition of the yolks.
  4. Once you have the required consistency, turn off the heat and add the yolks while stirring vigorously for the egg yolks to mix and set without forming threads. Leave to cool.
Apple cream 3

This simple cream is as versatile as pastry cream, because it is really quite similar. I like it well in small pots, but it can be used to fill cakes, pastries and whatever you can think of. Although to make it as pot de creme, I use a more fluid consistency than that of pastry cream, as a smooth cream for the sick... It has the pleasant color of coffee with milk, but it surprises you with the taste of apple and cider. And I've added one teaspoon of sugar on top of the cream that was conveniently caramelized with my brand new blowtorch, a gentle gift from my mother, in a créme brulée fashion.

Apple cream 4

And... celebrate your love everyday, not only when the department stores tell you to.

Firma 200px

Eager to know more?

Roscón de Reyes or Three Kings cake

>> Friday, January 7, 2011

Roscón Reyes 1

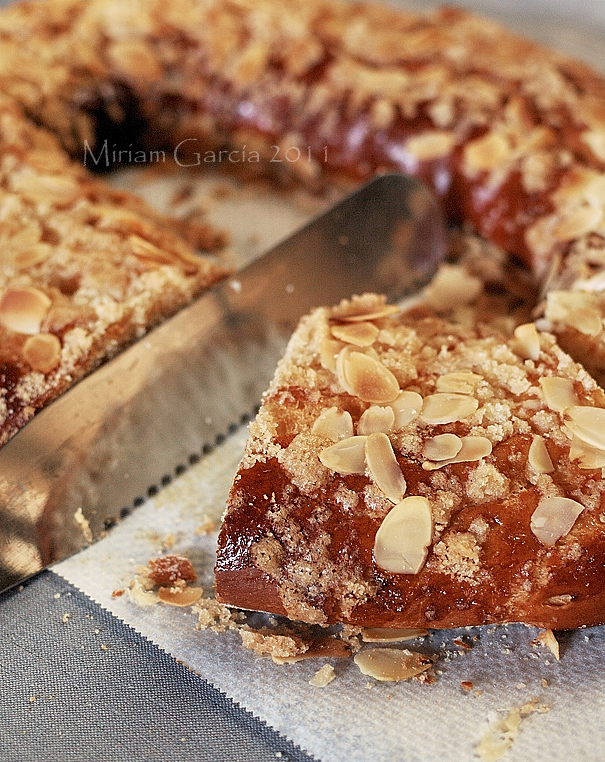
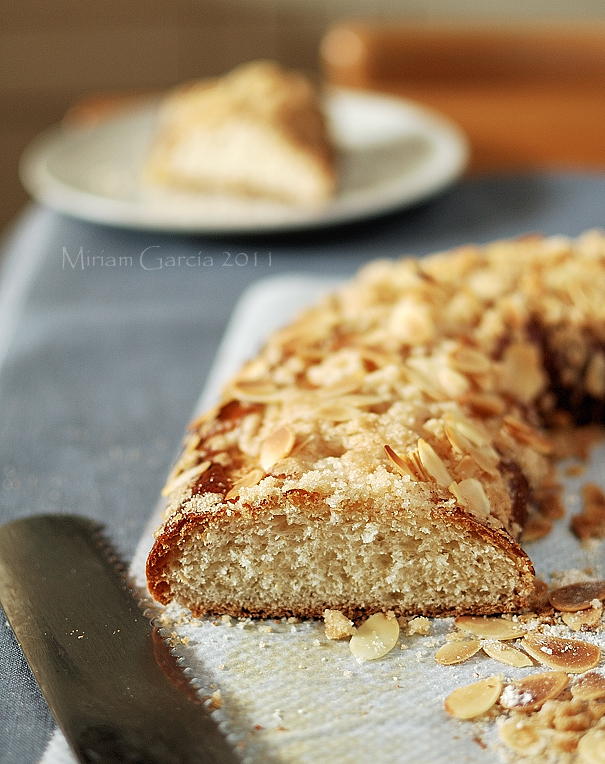
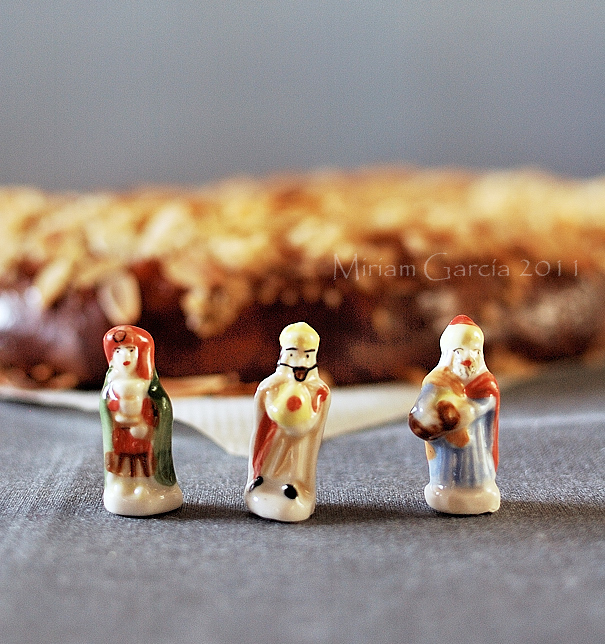
Roscón de Reyes is a strong tradition in Spain (check the pronunciation of roscón here). It is eaten on the Día de Reyes or Three Kings day and also on the previous eve, when traditionally presents are given, in remembrance of the presents the Kings brought to baby Jesus. Roscón de Reyes is a brioche-y bun in the shape of a crown, traditionally studded with colorful candied fruit and scented with orange and lemon zest and orange blossom water (these flavorings are essential to a Spanish roscón, otherwise you just cannot call it such). Today roscón has become so widely popular that the cakes are baked all over Spain in huge amounts since the beginning of January or even earlier, which inevitably means that in many supermarkets and pastry shops you find stuff of very low quality. Which inevitably leads, if you are fond of baking at all like I am, to prepare it yourself. And it is not difficult, only a bit time consuming as any yeast-leavened sweet bread is. But well worth the effort.

Roscón Reyes 5

The Christmas season has not always been so Christian as it is now. The origin of roscón has nothing to do with the arrival of the Magi to Bethlehem to worship the child, but appears to be related to the Roman Saturnalia. These were celebrations dedicated to the god Saturn in which the Roman people celebrated the longer days that started soon after the winter solstice. For these celebrations round cakes with figs, dates and honey were prepared, which were divided equally among the commoners and the slaves. Already in the 3rd century, it was usual to hide a dry bean inside the cake, and the fortunate finder was named king of kings for a short period of time agreed beforehand. This type of game was popular in the Iberian peninsula since the Roman era, he who found the bean had to pay the treat for the others... Nowadays a small figurine is hidden in the cake and the person who happens to find it is set to pay for the roscón. That is not possible if you make it at home, of course.

This recipe is uncomplicated and it works, although you need to have a basic knowledge of bread kneading and sweet doughs in general. It is adapted from my Thermomix cookbook. It yields 2 medium roscones or a large one.

Roscón de Reyes

For the flavored sugar

  • 120g icing sugar
  • Zest of 1 lemon
  • Zest of 1 orange (feel free to use more)
For the preferment
  • 40g whole milk
  • 30g water (you can use also 70g skimmed milk instead of the milk and water)
  • 10g fresh baker's yeast
  • 130g strong flour
For the main dough
  • 30g whole milk
  • 30g water
  • 70g butter, softened
  • 2 large eggs or 3 small ones
  • 15g fresh baker's yeast
  • 30g orange blossom water (it may sound like a lot, but roscón is not roscón without this)
  • 1 tbsp rhum (optional)
  • 450g strong flour
  • 1 pinch salt
  • The flavored sugar
  • The preferment
For garnish
  • Beaten egg glazing
  • Candied fruit
  • Sliced almonds
  • Sugar
  • Butter
    Roscón Reyes 3
  1. Fine, let's make the preferment first. Sift the flour, crumble the fresh yeast on top, add the liquid and knead until just mixed. 
  2. Then fill with tepid water a bowl where the dough ball can fit and put the dough in it. When the dough is fermented enough, the ball will float. It can take from 15 minutes to half an hour, it depends on the temperature on your kitchen. 
  3. In the meantime, zest the lemon and the orange and mix the zest with the icing sugar; cover and set aside to let the aromas permeate the sugar.
  4. Now for the main dough: sift the flour again, add the crumbled yeast, eggs, flavored sugar, orange blossom water, milk, water, preferment and salt (everything but the butter). Knead by hand or in a stand mixer with the hook attachment until you have an elastic dough. Make a ball and leave to rest for 10 minutes, covered. I prefer to let the dough stand for a while without the butter, as fat interferes in the gluten formation. Somewhere in the future I will divide the dough in two and try to add everything altogether to the first dough and delay adding the butter to the second dough, then check if the final cakes show some difference.
  5. After the rest, flatten the dough on the counter and smear the soft butter (I prefer to do this by hand), knead thoroughly to mix well. When the dough is smooth enough, make a ball, put into an oiled bowl, brush the surface with oil too and let double in bulk, well covered. Mine takes between 3 and 5 hours, but it depends on temperature again and on how active your fresh yeast is.
  6. Once the dough is doubled, tip it on the floured counter and flatten with your hands to degas completely. Divide the dough in two, then make a ball with each dough portion. Set one aside.
  7. Leave the first ball to rest for a couple of minutes. Prepare two parchment papers the size of your oven sheets, flour them lightly. 
  8. Lay one of the dough balls on one of the papers, then punch a hole in the middle with your floured fingers and start opening the hole. Stretch the ring of dough little by little. If it tends to shrink, let it rest for another couple of minutes before resuming your stretching. In the end the ring should be about 6-7cm thick and have an oval shape about 30x40cm.
  9. Brush the roscón thoroughly with beaten egg, cover with plastic (though the plastic shouldn't touch the roscón as it would stick to it) and let nearly double again, it will take at least one hour. Repeat the whole process for the second dough ball.
  10. Half way the rising, preheat your oven to at least 180-190ºC if your oven is of the air convection type like mine, somewhat closer to 200ºC if radiation type, but not higher than that (again, you know this depends largely on every oven).
  11. When the roscones have almost doubled, brush them with egg again, very carefully as the dough is a delicate thing at this point. Then you have two options: the traditional one is to stud the whole thing with colorful candied fruit as though the fruits were the jewels in the crown. The second one and my favourite (at home we are not exactly fond of radioactive-colored candied fruit in cakes) is to mix a handful of sugar in melted butter or in some water (just enough to get a crumbly mixture) and sprinkle on the roscón. Then sprinkle some sliced almonds too on top... delicious.
  12. Put the roscones into the oven for 10 minutes, then lower the heat by 10ºC and leave some further 10-15 minutes (cover with aluminum foil if you find they brown too much). After the baking time, take them out and let cool on the sheets.
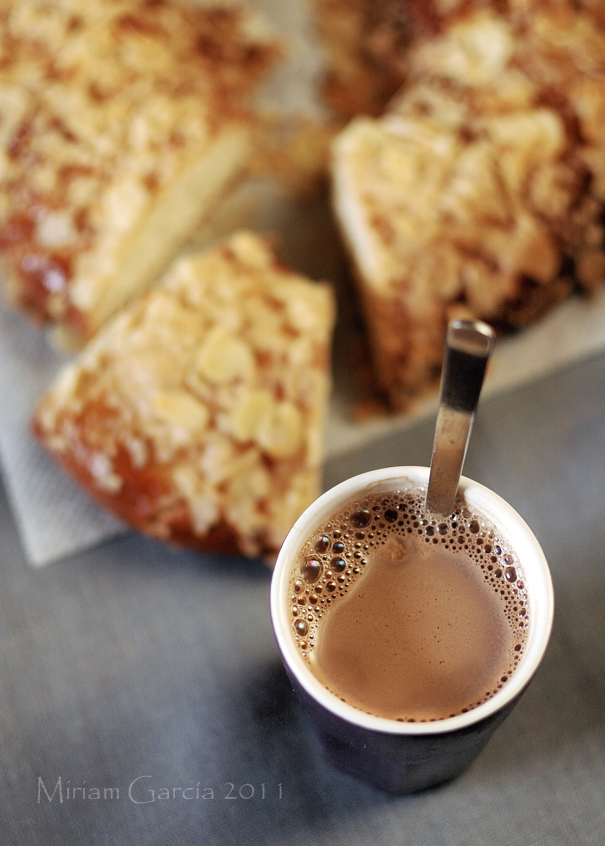
This time my roscones were a bit overfermented, that is why they are a bit on the flat side. A good roscón should have a rounder section. Nowadays a lot of people like their roscón stuffed with whipped cream, ganache or many other fancy fillings, you just open the roscón like a giant bagel and pipe the filling, then replace the top half. I do not like this at all, but feel free to do it. I won't interfere, but I will lose all respect for you... However, of course you must have your roscón with hot chocolate... I admit no objections about it. I would be soooo disapointed if you would not...
Roscón Reyes 2

And by the way, this is my first submission of the year for YeastSpotting, Happy New Year, Susan!

Firma 200px

Eager to know more?

Chocolate turrón, Spain's Christmas fare

>> Friday, December 31, 2010

Chocolate turrón 2

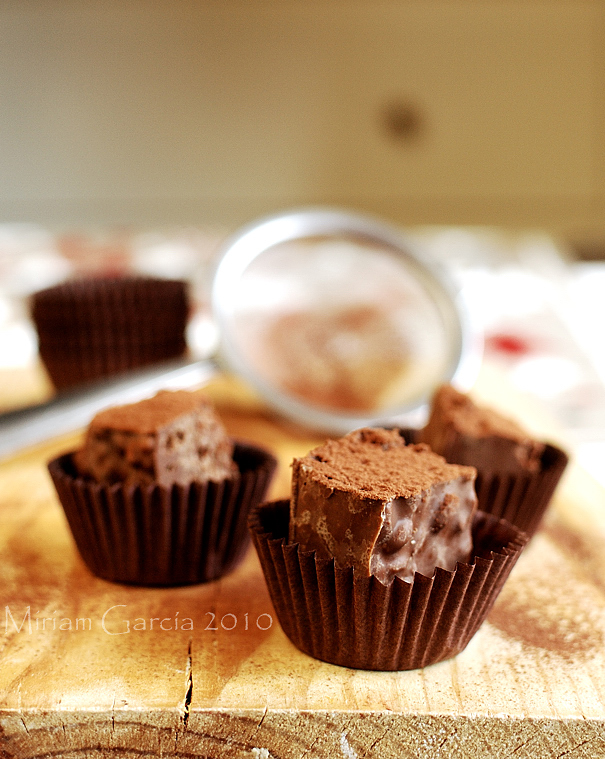
A Spanish Christmas celebration is not such without turrón, as it should graze the table of every respectable family during the holidays. Everybody here likes turrón of some type, and those who do not are regarded as hopeless individuals. Turrón is a confectionery typically made of honey, sugar and egg white, with toasted almonds or other nuts, and usually shaped into either a rectangular tablet or a round cake (check here the Spanish pronunciation of turrón). As found in Wikipedia, Spanish turrón may be roughly classified as:

  • Hard (the Alicante variety): A compact block of whole almonds in a brittle mass of eggs, honey and sugar; 64% almonds.
  • Soft (the Jijona variety): Similar but the almonds are reduced to a paste. The addition of oil makes the matrix more chewy and sticky; 60% almonds.


Eager to know more?

Chestnut tiramisu

>> Friday, December 17, 2010

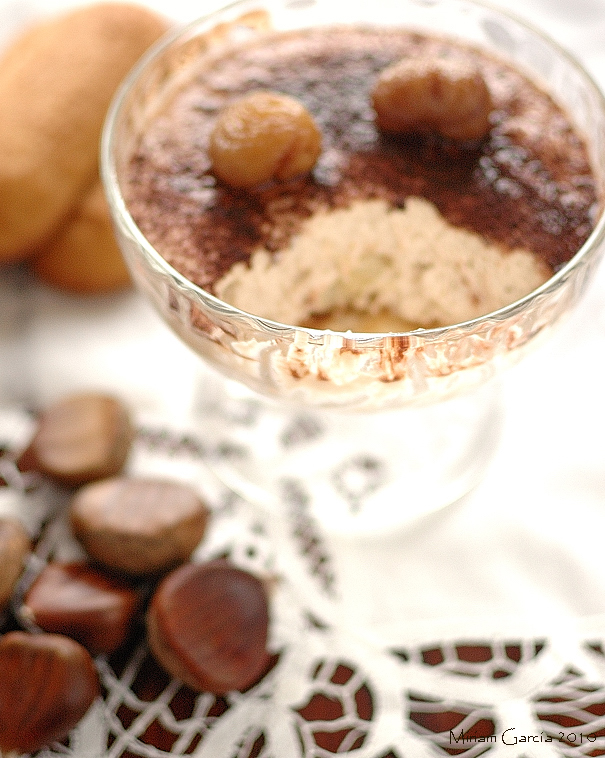
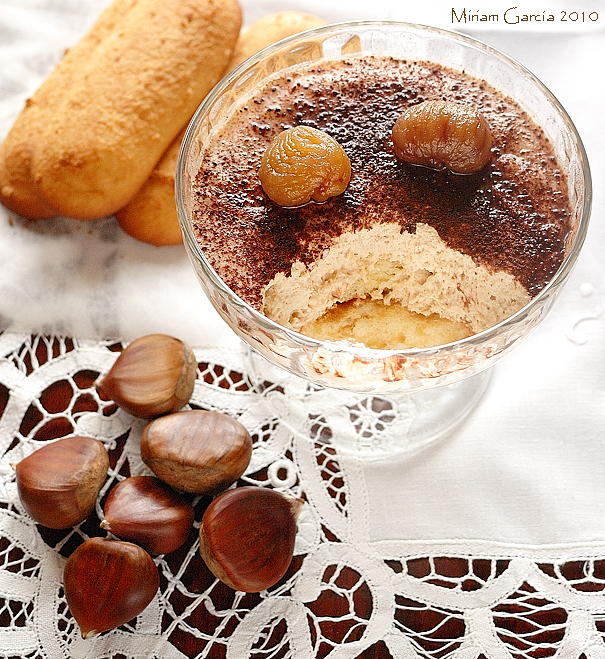
Chestnut tiramisu 1 script EN

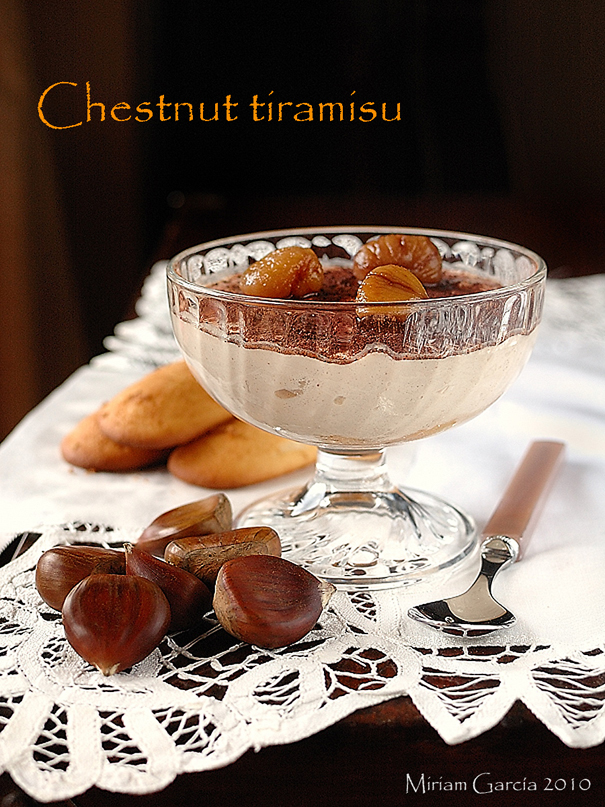
This is a variation on the classic, irresistible and delicious tiramisu, inspired by a recipe of Elle à table (this online magazine has some wonderful recipes, I strongly recommend it if you understand some French) an Italian dish sieved through the French love for chestnuts or marrons. I've modified it because the amount of added chestnut seemed simply ridiculous to me and because the eggs were added without separating whites from yolks and with little mixing, I preferred to separate the whites from the yolks, beating those until stiff as per the traditional method and make a custard with the yolks to increase slightly the conservation period of the tiramisu (I guess the true method of using the raw yolks does not give much leeway for conservation). In short, after cutting here and adding there, in the end the recipe only slightly resembles the original. But I assure you it is a terrific dessert for Christmas as it can be prepared the day before the big feast, leaving time for the yummy ladyfingers to thoroughly soak the syrup and for the custard-mousse to settle. It looks as if I had a lazy day, because I prepared the tiramisu with store-bought ladyfingers, store-bought mascarpone and store-bought chestnut puree... you can not be superwoman full time.


Chestnut tiramisu 3

Chestnut tiramisu
Yields 8 large servings

  • 4 eggs
  • 150g unsweetened chestnut puree *
  • 70g agave syrup
  • 500g mascarpone cheese
  • 350g whipping cream
  • 12-16 soft ladyfingers
  • 60cl strong coffee
  • 30cl maple syrup or golden syrup
  • Unsweetened cocoa for sprinkling
* You can replace the total weight of the puree plus the agave syrup for sweetened chestnut puree or chestnut compote, ie, 220 g, eliminating the agave. Naturally, I recommend testing the sweetness of the cream before adding the egg whites, and add more sugar or syrup if necessary. If you prepare the recipe with sweetened chestnut puree, I recommend to use powdered sugar to adjust the sweetness, because plain sugar will not dissolve well in the custard-cream-cheese mixture.

Chestnut tiramisu 2
  1. Break the eggs and separate the yolks from the whites, keep the latter in the fridge.
  2. Put the chestnut puree in a saucepan with the agave syrup on low heat and stir until well mixed. This is not necessary if you use the sweetened chestnut puree, of course. Add the yolks and heat yet very slowly, stirring continuously, until thickened so that the custard coats the back of your spoon. This can be done in a water bath or double boiler too, although it will take longer. Once the custard has thickened, remove from heat and let it temper a little.
  3. While it cools, beat the mascarpone with the cream until well blended. I added a splash of milk because the mixture was too thick.
  4. Add the chestnut custard and mix well again to blend. You should have a relatively smooth cream that can be dosed in the cups or molds after you add the beaten egg whites.
  5. Chop the ladyfingers and lay them on the bottom of eight cups or pretty bowls, preferably glass ones, one and a half or two per glass, though this depends on your personal taste.
  6. Mix the coffee with the golden or maple syrup and drizzle on the ladyfingers.
  7. Then whisk the egg whites until stiff with a stand mixer, a hand beater or whatever you have on hand.
  8. When thoroughly stiff, add the cream-cheese-chestnuts mixture and mix well with a gentle motion. Distribute the mousse among the eight cups, on the ladyfingers. If it is a bit stiff, tap the glasses carefully on a hard surface to settle the mousse and level the surface. Put the bowls in the fridge to let the tirumisu mousse set overnight. The portions are generous, if you prefer more modest rations you can divide the mixture between 10 and 12 bowls instead.
  9. The next day, when ready to serve tiramisu, decorate each serving with two or three marrons glacé (although I used chestnuts in syrup... they are cheaper and are also delicious) and sprinkle cocoa powder on top of everything in the last minute
Chestnut tiramisu 4

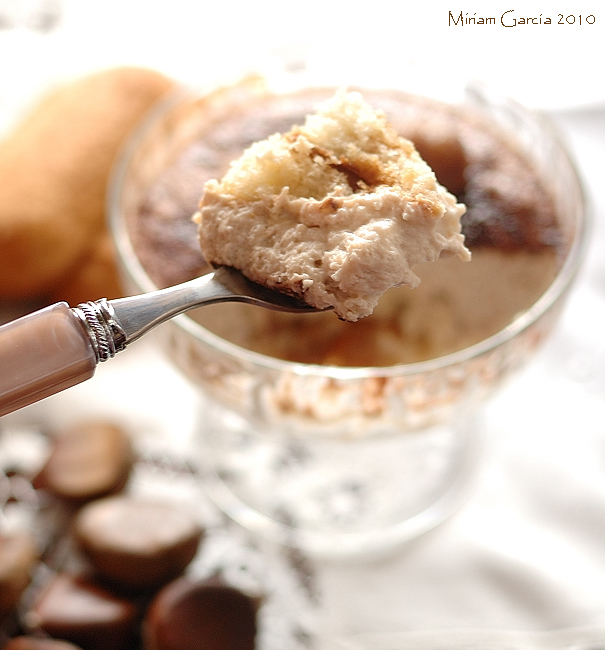
I assure you that the day I prepared it, the dessert was a hit with my guests. The result is a feathery airy and smooth cream with a subtle chestnut flavor, nicely complemented with the wet and sweet ladyfingers. Ideal to impress anyone and an elegant dessert for the holiday ahead of us.

Eager to know more?

Marzipan mousse with Christmas compote

>> Wednesday, December 8, 2010

Marzipan mousse 1

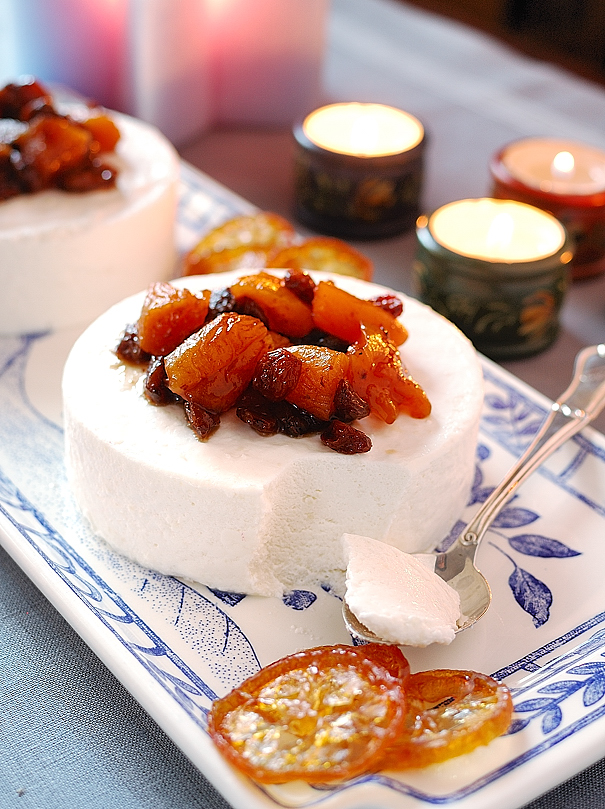
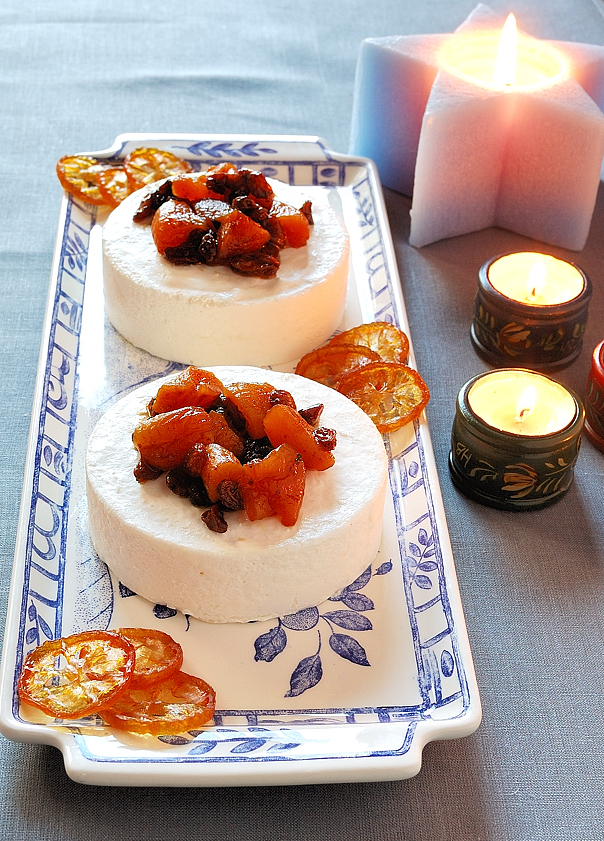
This is a reinterpretation of two typical Spanish Christmas sweets, marzipan and dried fruit compote, combined in one scrumptious dessert. The mousse recipe comes from a book by famous Spanish pastry chef Paco Torreblanca and for the sauce I used my method of cooking the dried fruit in sweet wine, without sugar added as marzipan already has plenty of it. Also it is a great alternative for those who find marzipan overly sweet or heavy... this is a lighter way to eat it.


Marzipan is one of those culinary treasures that we do not appreciate in full because here in Spain we all grow up with it and that makes it all too familiar for us... and we take it for granted. As Claudia Roden tells us, Spain is the largest commercial producer of marzipan in the world, with the beautiful town of Toledo as the center of this trade. In Toledo there is a marzipan museum, where this delicacy is described as the ancient symbol of harmony between Arabs, Jews and Christians in the city during the Middle Ages. In Toledo marzipan is made by grinding equal weights of blanched almonds and sugar until the almond oil that is released turns the mixture into a smooth paste. This paste is modeled with traditional molds and baked in the oven until it browns on top. I will say that the Germans (I have relatives in Germany) also have popular varieties of marzipan, with the peculiarity that their marzipan always carries a tiny ratio of bitter almonds, unlike the common Spanish marzipan. I assure you that bitter almonds give it a very interesting twist.

This mousse caught my attention because it seemed a very different way to taste something so ubiquitous and familiar to Spaniards as marzipan.

For the mousse:

  • 400g milk
  • 500ml whipping cream
  • 250g marzipan
  • 8 sheets of gelatin
For the compote:
  • 100g dried apricots
  • 100g seedless raisins
  • Sweet wine, preferably Muscat
Marzipan mousse 2
  1. Soak the gelatin sheets in cold water as per the package instructions.
  2. Heat the milk to 50°C approx., cut marzipan into pieces and add to the milk. Beat well in a blender or electric mixer until completely dissolved. The mixture must be fine and without very noticeable chunks.
  3. Add the drained gelatin sheets to the mixture and stir well to dissolve. Leave to cool to about 30°C.
  4. When the warm milk and marzipan mixture is tempered, whip the cream to stiff peaks. Add the liquid to the whipped cream in four or five batches and mix gently each time, being careful not to deflate the cream too much.
  5. When everything is homogenized, pour the mousse into whatever molds you want to use. Pastry rings are great for these matters, especially if we want to make small portions, but it is also possible to use a rectangular loaf dish and cut the mousse into slices. The mousse can also be poured into a round mold to use it as a layer in a cake. To easily unmold the mousse first cool it in the refrigerator and then freeze it in the freezer, better overnight. I place the pastry rings on a baking paper placed on a tray. If you use another type of mold, it’s better to line it with plastic wrap to easily unmold the mousse.
  6. The compote-sauce is prepared by cooking the dried fruit covered with the wine. Cook until the fruits are softened and the wine has thickened to your taste and turned into a beautiful syrup. I cut the fruit in small pieces for a more homogeneous look. Let cool. You can make this several days before use, for it is better to leave it to rest so that the flavors mingle.
  7. The day you want to serve the mousse, take it out of the freezer at least 2 hours in advance and transfer it to the fridge. Serve it on a beautiful dish and then top with the compote. This mousse, besides being a different way of eating marzipan (not exactly lighter...), can take advantage of all the marzipan leftovers after the Christmas celebrations.
There you have a very elegant dessert made with most traditional ingredients... this is going to turn into a classic at my household, I am sure. I hope you enjoy it in the upcoming Christmas.

Eager to know more?
Marble cookies and the Best of Food Blogs Cookbook

>> Monday, November 29, 2010

Galletas mármol 1

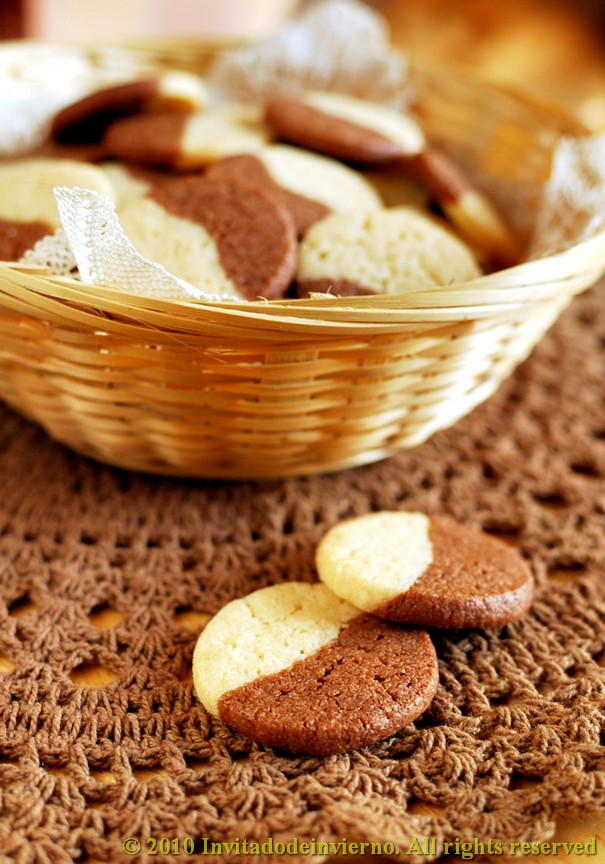
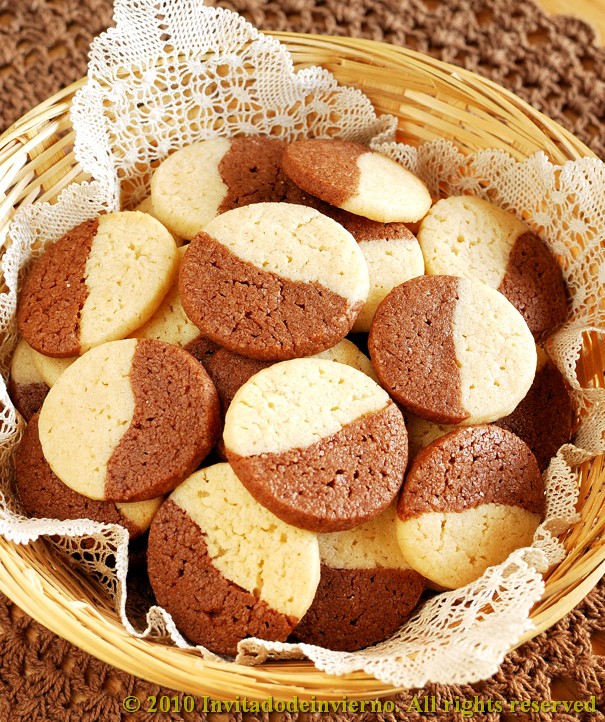
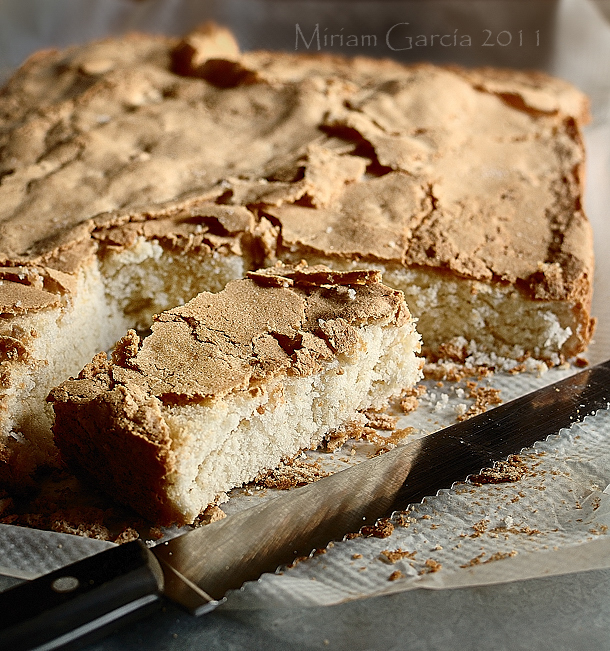
The original name of these cookies was zebra cookies, but I don't like it. So I changed it to marble cookies. I don't marbleize them much though, they are more bicolor cookies... I love icebox cookies, they are easy and practical to make, you can keep them in your freezer and bake them whenever you have guests. And don't forget to keep the carton cylinder inside your plastic wrap or foil rolls, because you'll be needing it.


To change the subject, remember I told you one of my recipes had been published in the
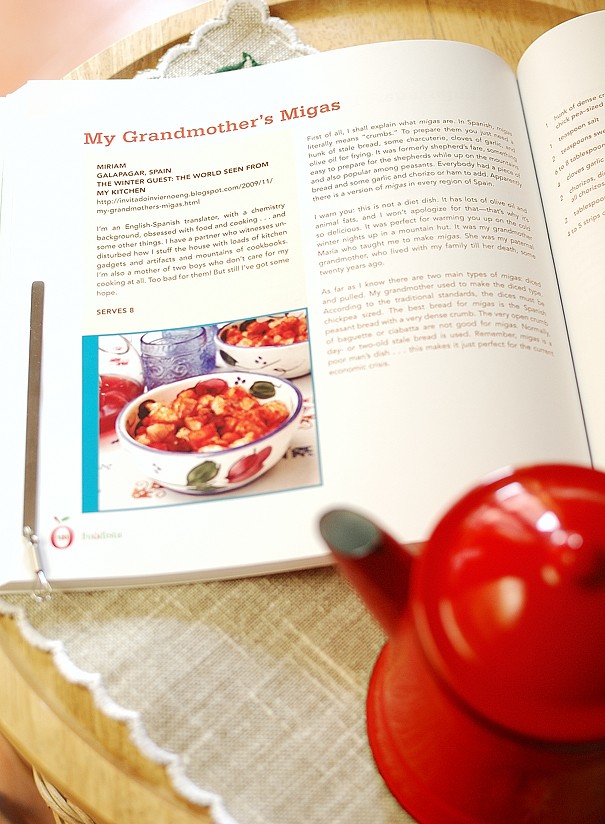
Foodista Best of Food Blogs Cookbook? Well, I recently received my book... I feel siderally connected to all the home cooks in the Universe... I must admit I loved to see my story and my recipe on print. And in a book sold in Amazon... I can imagine what it will be like to have a whole book on sale... Beside I was so lucky to have my photo featured in king-size in the book's introduction. I guess I overdid the resolution. So I'm giving away a copy of the book, check it out here. You just have to shout "hey, I'm interested in the book" in the comments section and leave your e-mail, so that I can contact you should you be the lucky winner. And after this "tooting my own horn" moment, let's get to the recipe.

Foodista 1

This is the only recipe I've ever tried from this book. But it's never too late to do something you never did before, right?

Marble cookies (adapted from The Art of the Cookie, Jann Johnson)

  • 1 large egg
  • 115g butter at ambient temperature
  • 160g sugar
  • 210g A-P flour
  • 1 tsp baking powder
  • 1/4 tsp salt
  • 30g dark chocolate
  1. Measure the flour and sieve it with the baking powder and the salt.
  2. Measure the butter and the sugar, and whip with a hand or stand mixer till white and fluffy.
  3. In the meantime, melt the chocolate in a bowl, on bain-marie or in the microwave (be careful not to overheat it if using the microwave).
  4. Beat the egg and add to the butter and sugar mixture. Then add the flour little by little, until well mixed. Divide the dough in two portions and add the melted chocolate to one of the portions. Then knead for the chocolate to distribute evenly. It may be necessary to flour the counter top, but if the dough has right consistency it is so buttery that it hardly sticks to the surface.
  5. Now you have two doughs of different color. Then you can do whatever you want to make both colors mingle; you can lay one beside the other like I do, make a ball with both and knead slightly for the doughs to mingle or you can even roll them, put one on top of the other and roll them together to get spiral cookies. Once you've made up your mind about what to do next, you should make rolls as long as the carton cylinders in the center of you foil or plastic wrap rolls, you'll need 2 or 3.
  6. Make dough rolls that can fit into one of these cylinders, then wrap them in plastic and put them into the carton. This helps keep the round profile of the cookies, because if you let the dough rest on a flat surface it will flatten slightly on its base.

Galletas mármol 3

I think I learnt this trick at Martha Stewart's website. It's wonderful as it's so easy and at hand.

Galletas mármol 2

Once you have your dough cylinders ready, chill them overnight or a minimum of 2 or 3 hours. When you're ready to bake, preheat the oven to 185-190ºC, slice the rolls, place the cookies on a cookie sheet with parchment paper and bake for 8-10 minutes, watching closely so that they don't brown too much. Take them out to cool on a wire rack and you're all set. For Christmas I'm thinking of adding matcha tea for green dough and red food coloring for red dough... freaking awesome.

Eager to know more?
Sparkling wine jelly and a giveaway

>> Sunday, November 7, 2010

Cava jelly 1

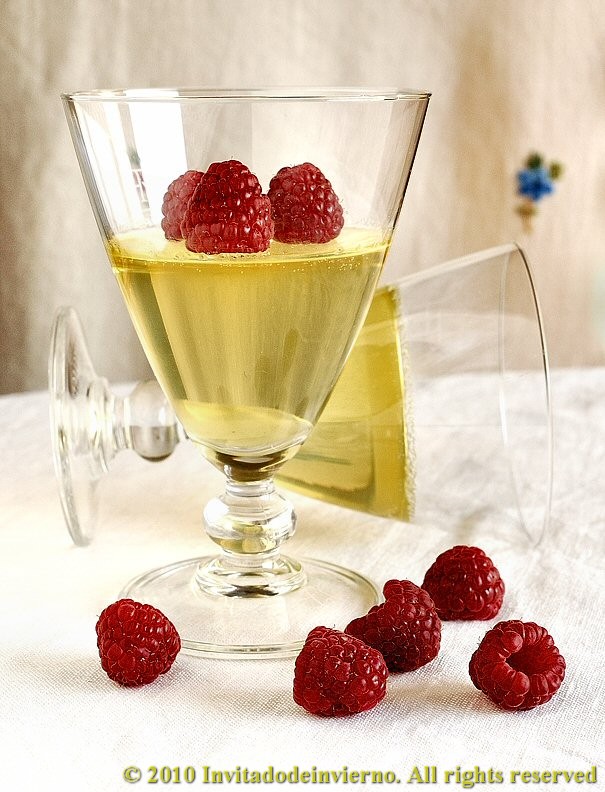
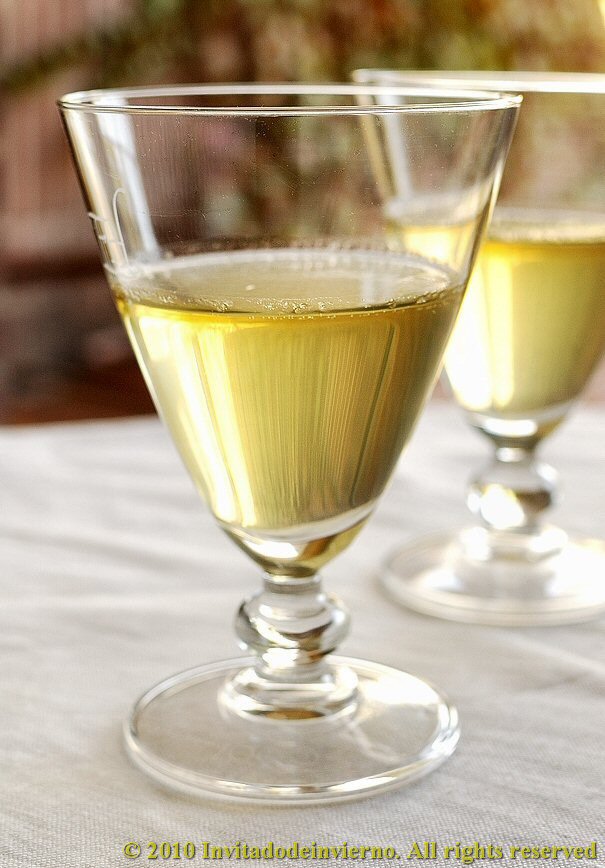
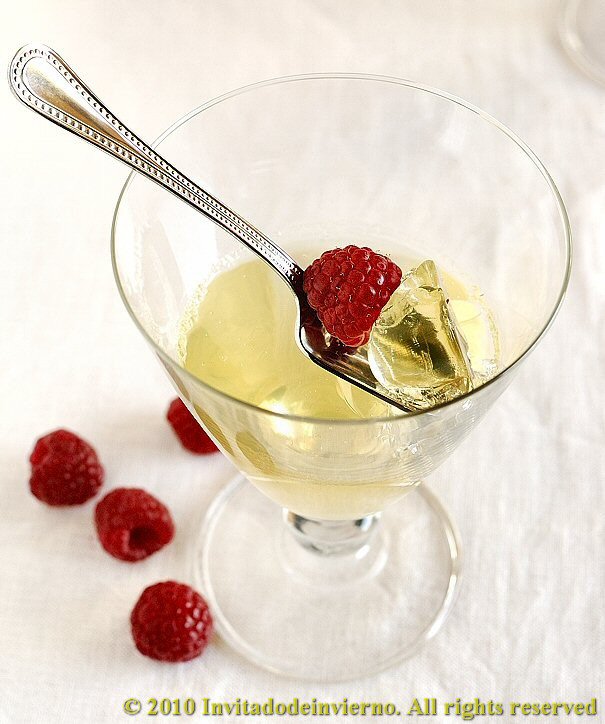
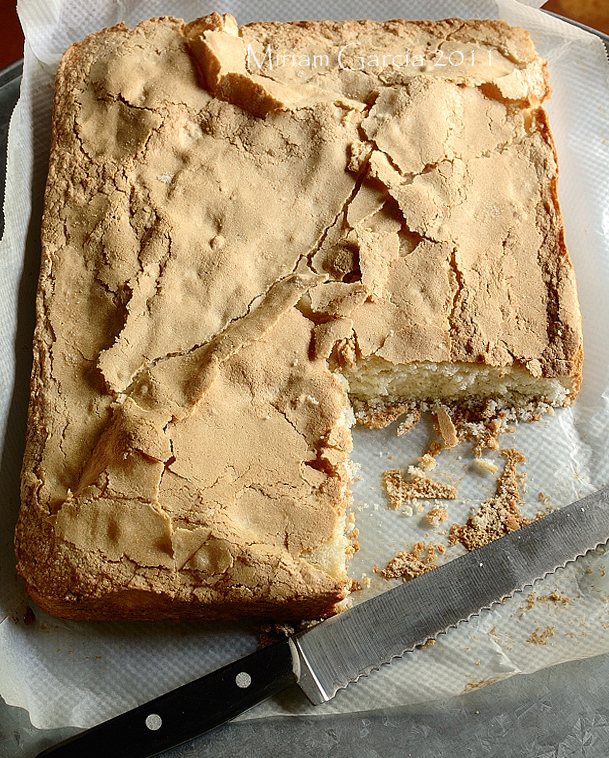
I want to share something with you: my kitchen is one of my favourite places. It has a southern exposure, that means scorching heat in the summer but simply lovely autumn and winter afternoons... Like right now. I go through my many cookbooks sitting there on our bar stools, at our table, and sometimes I take my laptop too. I was there when I received another CSN gift code to giveaway among my readers (are you there?). It's time to start planning Christmas shopping already, don't you think? Maybe you'll also fancy the main ingredient in this recipe for your celebrations. This is a great way to use up sparkling wine or champagne leftovers, now that Christmas is approaching (yes, summer was over and the next thing you know is Christmas is around the corner). But my conscience is at ease because, after all, this is a fridge-cleaning recipe... ahem. Although in my household it is not a common occurrence that there is sparkling wine left while I am around. I know that the first step to overcoming a problem is acknowledging it, and I acknowledge it bluntly but I do not want to change. Nononono, no matter what. I looove a good cava. Slurp. But despite my dedication to the cause, life recently provided us with half a bottle that was quietly degassing, poor thing, and I decided to try this concoction I had seen in a French magazine, here. And I liked it, because in addition to having it for dessert, I find it could make an excellent addition to other dishes, also savory... Can you imagine a good liver terrine with diced cava jelly? And pink colored cava can be very decorative.


As for the giveaway, it amounts exactly to $75 to be spent on any of the varied CSN Stores (my favourite is the kitchen&dining section... go figure). And what do you have to do?

  • Just subscribe to my blog on Google Connect and leave word of it in a comment. All readers already subscribed just need to say so to enter. Complicated? ...
  • Deadline: you have till November 20th, 12pm GMT, to do so, each comment will be given a number and then I will use a random number generator to pick the winner.
  • As usual, unfortunately the giveaway is open only to US and Canada residents.
And now to the recipe. This dessert is so easy to make that I feel almost embarrassed to explain how. Here we go.

Sparkling wine jelly
Yields 2 plentiful glasses or 3 scant glasses
  • 350ml cava brut or other sparkling wine (watch for the sweetness, cava brut is not very sweet, so reduce the sugar or agave nectar if using a sweeter wine)
  • 4 sheets gelatin
  • 2 tbsp agave syrup (say 3 tbsp sugar)
  • Red berries for garnish
Cava jelly 3
  1. Hydrate the gelatin sheets in a bowl with cold water according to the package instructions.
  2. Take a cup of the wine and warm it up to about 60-70ºC, the minimum amount possible in order to dissolve the gelatin. Only a portion is used to prevent degassing the wine completely. Add the softened gelatin and stir in the warm wine until it is dissolved.
  3. Then add the remaining wine and mix thoroughly. Choose some nice wine glasses and pour the jelly very carefully to avoid splashing on the sides, for the sake of an "elegant" presentation just like we deserve... Cool to room temperature first (do not put hot things in the fridge, that's ecological terrorism.) When cooled, transfer the glasses to the fridge to finish setting.
  4. Serve chilled garnished with the red berries, a perfect match.
Cava jelly 2

So what do you think? Do you fancy a glass of chilled cava? I do. (And how very eye-catching are glass objects...)

Eager to know more?
Followers

About This Blog

Lorem Ipsum

  © Blogger templates Palm by Ourblogtemplates.com 2008

Back to TOP