Related Posts Widget for Blogs by LinkWithin
Showing posts with label maple syrup. Show all posts

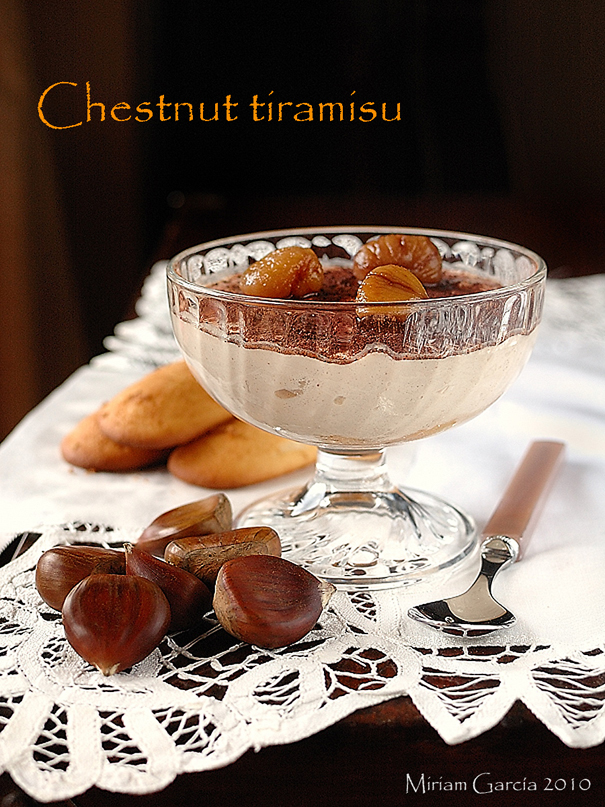
Chestnut tiramisu

>> Friday, December 17, 2010
Chestnut tiramisu 1 script EN

This is a variation on the classic, irresistible and delicious tiramisu, inspired by a recipe of Elle à table (this online magazine has some wonderful recipes, I strongly recommend it if you understand some French) an Italian dish sieved through the French love for chestnuts or marrons. I've modified it because the amount of added chestnut seemed simply ridiculous to me and because the eggs were added without separating whites from yolks and with little mixing, I preferred to separate the whites from the yolks, beating those until stiff as per the traditional method and make a custard with the yolks to increase slightly the conservation period of the tiramisu (I guess the true method of using the raw yolks does not give much leeway for conservation). In short, after cutting here and adding there, in the end the recipe only slightly resembles the original. But I assure you it is a terrific dessert for Christmas as it can be prepared the day before the big feast, leaving time for the yummy ladyfingers to thoroughly soak the syrup and for the custard-mousse to settle. It looks as if I had a lazy day, because I prepared the tiramisu with store-bought ladyfingers, store-bought mascarpone and store-bought chestnut puree... you can not be superwoman full time.
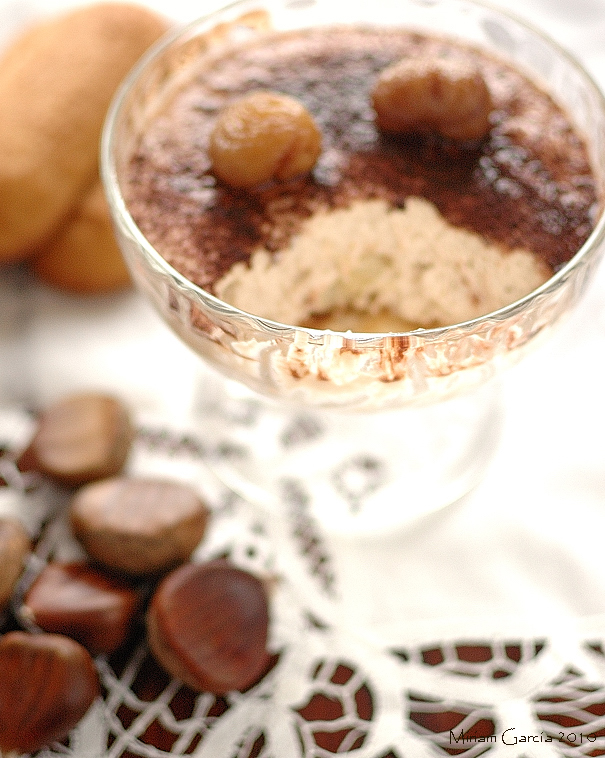

Chestnut tiramisu 3

Chestnut tiramisu
Yields 8 large servings

  • 4 eggs
  • 150g unsweetened chestnut puree *
  • 70g agave syrup
  • 500g mascarpone cheese
  • 350g whipping cream
  • 12-16 soft ladyfingers
  • 60cl strong coffee
  • 30cl maple syrup or golden syrup
  • Unsweetened cocoa for sprinkling
* You can replace the total weight of the puree plus the agave syrup for sweetened chestnut puree or chestnut compote, ie, 220 g, eliminating the agave. Naturally, I recommend testing the sweetness of the cream before adding the egg whites, and add more sugar or syrup if necessary. If you prepare the recipe with sweetened chestnut puree, I recommend to use powdered sugar to adjust the sweetness, because plain sugar will not dissolve well in the custard-cream-cheese mixture.
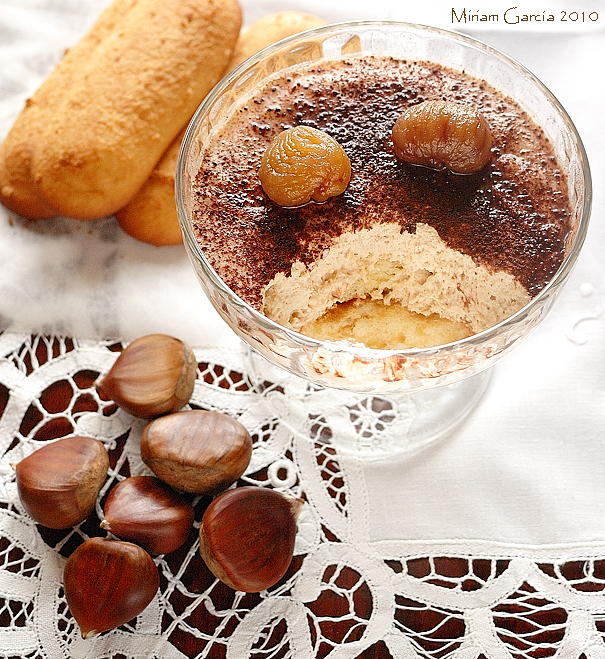
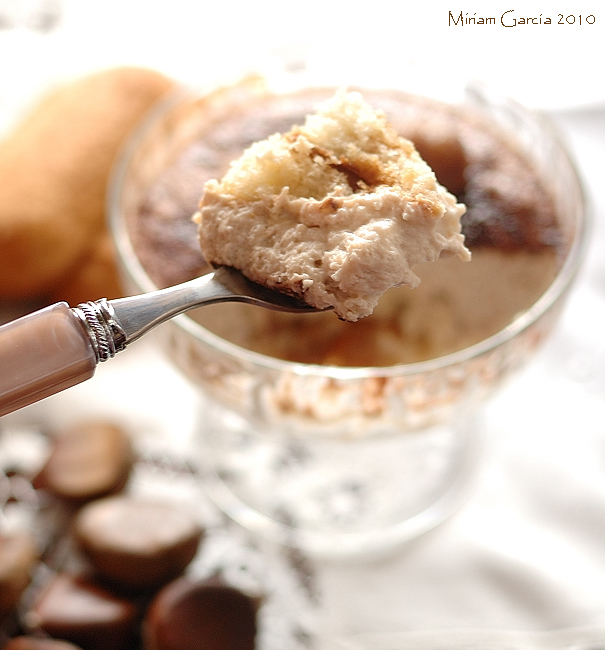
Chestnut tiramisu 2
  1. Break the eggs and separate the yolks from the whites, keep the latter in the fridge.
  2. Put the chestnut puree in a saucepan with the agave syrup on low heat and stir until well mixed. This is not necessary if you use the sweetened chestnut puree, of course. Add the yolks and heat yet very slowly, stirring continuously, until thickened so that the custard coats the back of your spoon. This can be done in a water bath or double boiler too, although it will take longer. Once the custard has thickened, remove from heat and let it temper a little.
  3. While it cools, beat the mascarpone with the cream until well blended. I added a splash of milk because the mixture was too thick.
  4. Add the chestnut custard and mix well again to blend. You should have a relatively smooth cream that can be dosed in the cups or molds after you add the beaten egg whites.
  5. Chop the ladyfingers and lay them on the bottom of eight cups or pretty bowls, preferably glass ones, one and a half or two per glass, though this depends on your personal taste.
  6. Mix the coffee with the golden or maple syrup and drizzle on the ladyfingers.
  7. Then whisk the egg whites until stiff with a stand mixer, a hand beater or whatever you have on hand.
  8. When thoroughly stiff, add the cream-cheese-chestnuts mixture and mix well with a gentle motion. Distribute the mousse among the eight cups, on the ladyfingers. If it is a bit stiff, tap the glasses carefully on a hard surface to settle the mousse and level the surface. Put the bowls in the fridge to let the tirumisu mousse set overnight. The portions are generous, if you prefer more modest rations you can divide the mixture between 10 and 12 bowls instead.
  9. The next day, when ready to serve tiramisu, decorate each serving with two or three marrons glacé (although I used chestnuts in syrup... they are cheaper and are also delicious) and sprinkle cocoa powder on top of everything in the last minute
Chestnut tiramisu 4

I assure you that the day I prepared it, the dessert was a hit with my guests. The result is a feathery airy and smooth cream with a subtle chestnut flavor, nicely complemented with the wet and sweet ladyfingers. Ideal to impress anyone and an elegant dessert for the holiday ahead of us.

Eager to know more?

Sweet sourdough bread with cinnamon, sugar-free

>> Monday, January 11, 2010


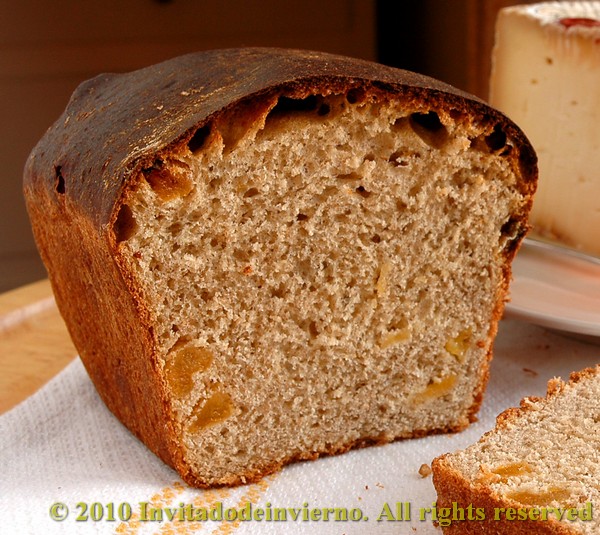
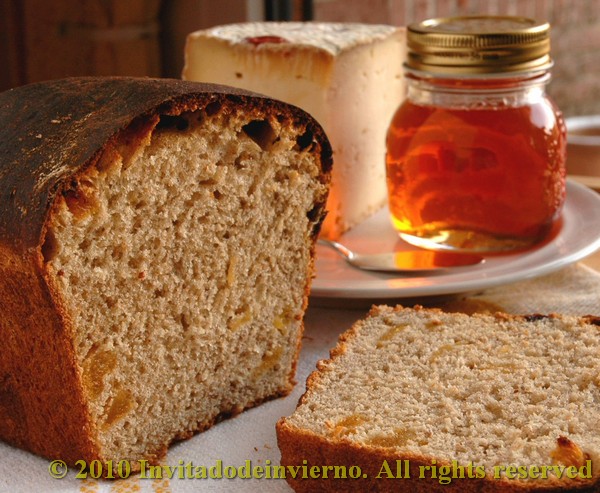
I made this bread last Christmas for the first time and it's bound to become a classic at my household, because it's delicious. In spite of the name, it's not very sweet. It's excellent as toast for breakfast, with some ham or a sharp cheese... I found the recipe at this blog (thanks Tess for the great idea and check out her amazing painted breads!) and it originally contained ginger and orange. As I usually do, I took her recipe and turned it upside down, so that the result is almost unrecognizable. But that's what globalization is about... you pick ideas and concepts here and there, shake them in a cocktail shaker and pour the concoction on your cultural heritage, don't you?


Sweet sourdough bread with cinammon and dried apricots, sugar-free

  • 100g white flour sourdough (baker's percentage: 100%)
  • 160g light spelt
  • 130g bread flour
  • 130g whole spelt
  • 8g fresh yeast (I didn't trust my sourdough in this cold)
  • 9-10 dried apricots, soaked in Cointreau or Triple Sec (the original included candied ginger instead, but I'm no big fan)
  • 65ml maple syrup (dark molasses in the original recipe)
  • 40ml agave syrup (1/4 cup sugar in the original recipe)
  • 65ml melted butter
  • 200ml water (250ml if sugar is used instead of the agave)
  • 1 tsp Cointreau from the apricots soaking
  • 1/2 tsp anise seeds
  • 1 tsp cinnamon
  • 1/2 tsp salt

If you don't want to use such a ridiculous mixture of flours, just follow the original recipe, which is more sensible. But you know I loooove spelt. If you happen to dislike dried apricots, you can of course substitute for any other dried fruit or even nuts. These would be a great match too.

Weigh your solid ingredients and mix them. Crumble the yeast on top of them. Add the sourdough. In other bowl mix the liquid ingredients with the melted butter. Knead well, around 10 minutes by hand or 6-8 in a stand mixer, till you have an elastic and smooth dough. Then add the drained apricots. Make a ball, put it into a well oiled bowl, cover and leave to proof. My bread took 4 hours to double in bulk, because my kitchen is quite chilly these days. When doubled, I made a roll and dumped it into a loaf pan, covered it with a plastic cap and put it in the fridge to raise overnight. The next day the bread had nearly doubled, so I immediately turned on the oven to 180ºC, and there went the bread. Bake it around 40-45 minutes, depending on your oven's fierceness (watch it closely at the end of the baking so that the top doesn't brown excessively). You can test the inner temperature for doneness. The original recipe calls for an inner temperature of 75ºC. But maybe because of the change in ingredients, my bread was not thoroughly baked at 75ºC (I checked it with a skewer), but at 90ºC, so watch out. When done, unmold it carefully and leave to cool on a wire rack.


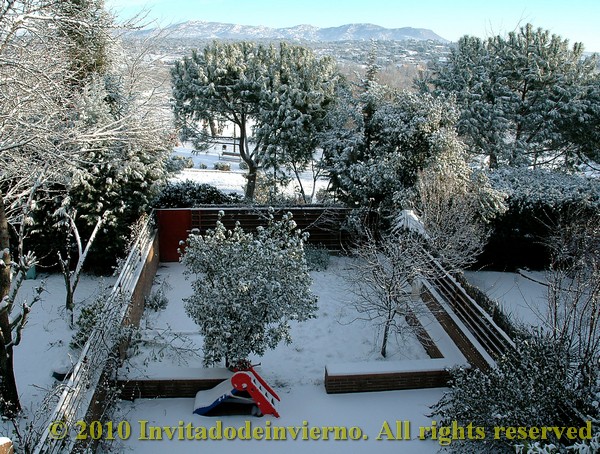
The consistency of this bread is very cake-like and the dried fruit gives it a delicious touch. Today I had a toasted slice, with cheese and quince jelly, while gazing at our snow-covered garden...

I'm sending this bread over to Susan's Yeastspotting, at Wild Yeast.

Eager to know more?

Dan Lepard's simple milk loaf

>> Wednesday, June 3, 2009


Another Dan Lepard recipe, this time of a delicious milk loaf for sandwiches, with an exquisite buttery aroma and a wonderful flavor. I bake it for my children, to prevent them from eating the nasty sandwich comercial loaves. Have you ever read the ingredients list? Do it, you're old enough. Why on earth does it need so many strange ingredients? When a loaf can last several weeks in the fridge like any uncorrupted saint´s relic, there can be no good in it... This bread is fairly easy to make and keeps very well for several days, just long enough for the children to eat it all.


Dan Lepard's simple milk loaf (from the book "The handmade loaf")

  • 250 g strong flour
  • 250 g all-purpose flour (you bet I used spelt)
  • 350 g whole milk at ambient temperature
  • 20 g golden or maple syrup (I used maple)
  • 1 1/4 teaspoons good sea salt
  • 1 1/2 teaspoons fresh yeast (I used dried yeast, one package)
Mix everything in a bowl, except the salt. Knead it lightly on a floured counter and leave to rest for 10 minutes. Then add the salt and start kneading. In case you don't know, this Lepard man does a series of short light kneads, 10 to 15 seconds, three times every 10 minutes ending with a half an hour rest, until the dough is smooth, elastic and soft like a baby's cheek. In this case I used the traditional kneading method, 8-10 minutes, watch this video. Then I made a ball, I put it in an oiled bowl, covered it with a plastic shower cap and left it to proof. As I used the super quick granulated yeast, it took less than an hour to rise.

Once the first proofing is done, deflate the dough beating it on the counter or flattening it with you hands (be rough on it!) and divide it into two balls. Butter and flour a loaf pan and put both balls inside. Leave them to proof for the second time till almost doubled. Brush the top with some milk and to the oven, preheated at 210 ºC. Bake for 15 minutes at that temperature and then lower the temperature to 180 ºC and bake the bread for another 20-25 minutes. I think I overbaked it a little, that's why the crust looks to brown. The smell in the whole house made me dizzy.

In the picture of the cut the bread was still a bit warm (I'm impatient!), that's why the crumb looks a bit "dragged" by the knife, but the cut looked better when completely cold. The crumb is dense for a sandwich loaf because of the spelt, which has less gluten than normal bread flour. That's why you can cut thinner slices, they don't need to be thick because this bread is a lot more flavorful than normal sandwich bread... well, if you call that normal. This beautiful bread goes to this week Yeastpottings!

By the way... don't you think my butter dish is really cute?


Eager to know more?

Sourdough bread with rye and spelt

>> Tuesday, April 14, 2009

I'm in the mood for baking bread. I've taken up again on sourdough and feel like practising different techniques. I've got the impression that my stand-mixer doesn't bring out the best in the dough. I decided to hand-knead this bread, French method here. As I always end up with absurd amounts of sourdough because I refuse to throw away a single bit, the recipe I used is as follows:


Sourdough bread with rye and spelt

  • 500 g (18oz) whole spelt sourdough, 50% hydration
  • 200 g (7oz) refined spelt flour
  • 150 g (5.3oz) semi-whole rye flour
  • 150 g (5.3oz) water
  • 1 tablespoon wheat germ
  • 2 teaspoons Himalayan salt (or any other good salt)
  • 1/2 teaspoon gluten
  • Splash of maple syrup (optional)
All these flours are organic and come from Rincón del Segura. I added the maple syrup on an impulse, I'm hooked lately, it's deliciousssss.

To add gluten... well, if rye and spelt flours have less gluten than white wheat, why not supplement with some added gluten? I've found some references on adding gluten to rye breads, but I'm not sure of the ratio. I've got to make some tests.

Back to my point. Mix all the ingredients (I did use my stand mixer for this), except the salt. Leave it to rest for 10 minutes (autolysis) and then add the salt. Integrate the salt and put the dough on the counter. Be rough on the dough "a la française" at least during 10 minutes (the guy in the video talks about beating it 600 times), shape it into a ball, put it into an oiled bowl, cover with plastic and leave it in the fridge overnight.

Next morning take the bowl out of the fridge and let it warm up to ambient temperature. Rye and spelt dough doesn't rise as much as white wheat dough, at least mine didn't, so don't expect it to double in bulk. Shape the dough as you like, I made bâtards and heat up your oven to 250 ºC (480ºF). I usually leave the shaped dough to proof on an oven tray with a floured cloth and inside a plastic bag. This is a recommendation by Peter Reinhart. After one hour more or less I put the bread in the oven with my mock wood peel on my mock oven stone... and then sprayed it three times with water during the first 5 minutes. For a super rustic look I had sprayed the bâtons with water and sprinkled some rolled cereal just before putting them in the oven. They baked for half an hour, more or less, but I always check for doneness with a thermometer. According to Peter Reinhart the inner temperature must be somewhere around 95 ºC (200ºF) when properly baked, at least for white bread. And then out to cool down on a grid.

In the picture it can be seen that in spite of the dense crumb characteristic of rye and whole breads, my bread had some big holes in it. I don't really know where they came from. The bread had a delicious flavour. It was a great success in some family meal and there wasn't a single crumb left.

Eager to know more?

Followers

About This Blog

Lorem Ipsum

  © Blogger templates Palm by Ourblogtemplates.com 2008

Back to TOP