Related Posts Widget for Blogs by LinkWithin
Showing posts with label agave syrup. Show all posts

Chestnut tiramisu

>> Friday, December 17, 2010

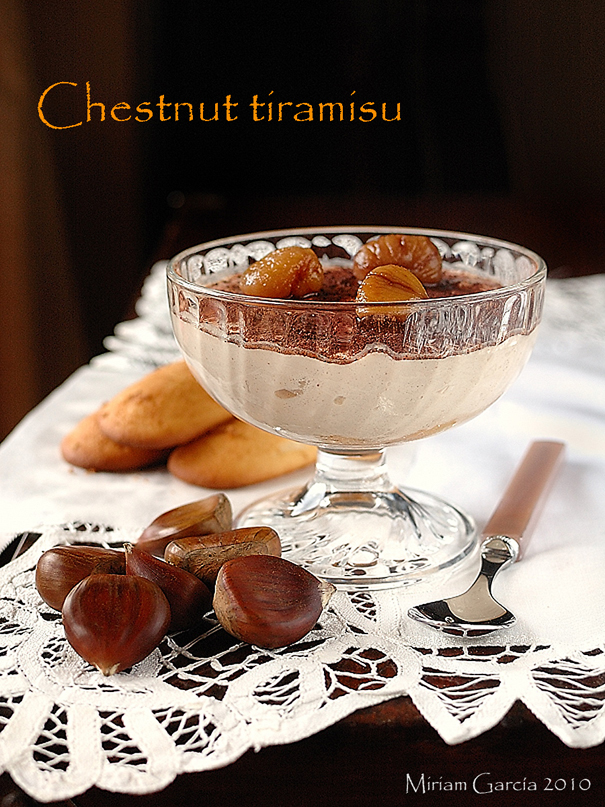
Chestnut tiramisu 1 script EN

This is a variation on the classic, irresistible and delicious tiramisu, inspired by a recipe of Elle à table (this online magazine has some wonderful recipes, I strongly recommend it if you understand some French) an Italian dish sieved through the French love for chestnuts or marrons. I've modified it because the amount of added chestnut seemed simply ridiculous to me and because the eggs were added without separating whites from yolks and with little mixing, I preferred to separate the whites from the yolks, beating those until stiff as per the traditional method and make a custard with the yolks to increase slightly the conservation period of the tiramisu (I guess the true method of using the raw yolks does not give much leeway for conservation). In short, after cutting here and adding there, in the end the recipe only slightly resembles the original. But I assure you it is a terrific dessert for Christmas as it can be prepared the day before the big feast, leaving time for the yummy ladyfingers to thoroughly soak the syrup and for the custard-mousse to settle. It looks as if I had a lazy day, because I prepared the tiramisu with store-bought ladyfingers, store-bought mascarpone and store-bought chestnut puree... you can not be superwoman full time.


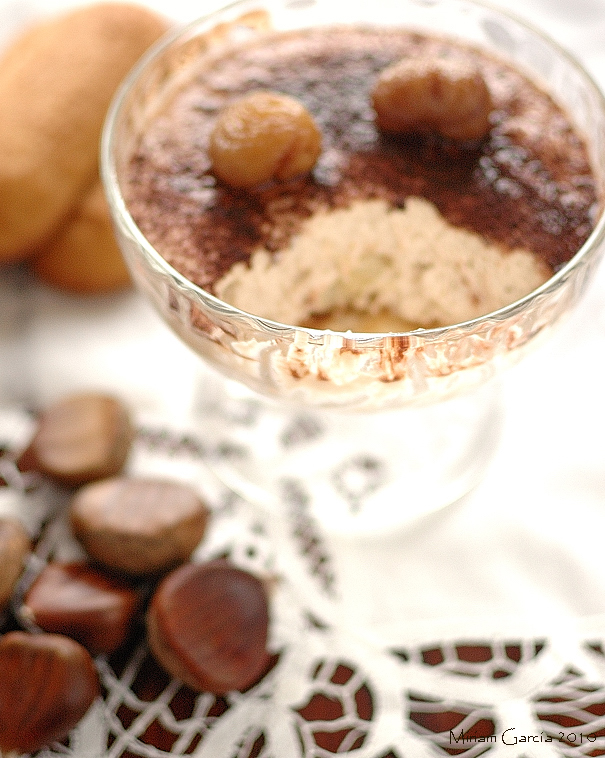
Chestnut tiramisu 3

Chestnut tiramisu
Yields 8 large servings

  • 4 eggs
  • 150g unsweetened chestnut puree *
  • 70g agave syrup
  • 500g mascarpone cheese
  • 350g whipping cream
  • 12-16 soft ladyfingers
  • 60cl strong coffee
  • 30cl maple syrup or golden syrup
  • Unsweetened cocoa for sprinkling
* You can replace the total weight of the puree plus the agave syrup for sweetened chestnut puree or chestnut compote, ie, 220 g, eliminating the agave. Naturally, I recommend testing the sweetness of the cream before adding the egg whites, and add more sugar or syrup if necessary. If you prepare the recipe with sweetened chestnut puree, I recommend to use powdered sugar to adjust the sweetness, because plain sugar will not dissolve well in the custard-cream-cheese mixture.

Chestnut tiramisu 2
  1. Break the eggs and separate the yolks from the whites, keep the latter in the fridge.
  2. Put the chestnut puree in a saucepan with the agave syrup on low heat and stir until well mixed. This is not necessary if you use the sweetened chestnut puree, of course. Add the yolks and heat yet very slowly, stirring continuously, until thickened so that the custard coats the back of your spoon. This can be done in a water bath or double boiler too, although it will take longer. Once the custard has thickened, remove from heat and let it temper a little.
  3. While it cools, beat the mascarpone with the cream until well blended. I added a splash of milk because the mixture was too thick.
  4. Add the chestnut custard and mix well again to blend. You should have a relatively smooth cream that can be dosed in the cups or molds after you add the beaten egg whites.
  5. Chop the ladyfingers and lay them on the bottom of eight cups or pretty bowls, preferably glass ones, one and a half or two per glass, though this depends on your personal taste.
  6. Mix the coffee with the golden or maple syrup and drizzle on the ladyfingers.
  7. Then whisk the egg whites until stiff with a stand mixer, a hand beater or whatever you have on hand.
  8. When thoroughly stiff, add the cream-cheese-chestnuts mixture and mix well with a gentle motion. Distribute the mousse among the eight cups, on the ladyfingers. If it is a bit stiff, tap the glasses carefully on a hard surface to settle the mousse and level the surface. Put the bowls in the fridge to let the tirumisu mousse set overnight. The portions are generous, if you prefer more modest rations you can divide the mixture between 10 and 12 bowls instead.
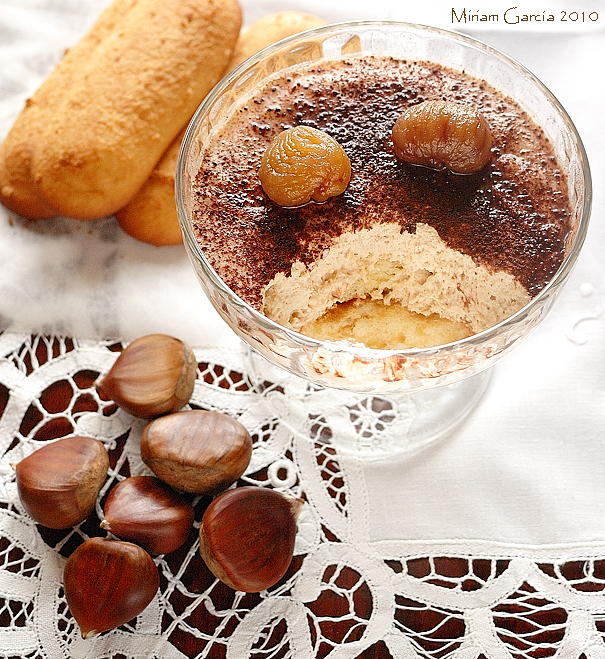
  9. The next day, when ready to serve tiramisu, decorate each serving with two or three marrons glacé (although I used chestnuts in syrup... they are cheaper and are also delicious) and sprinkle cocoa powder on top of everything in the last minute
Chestnut tiramisu 4

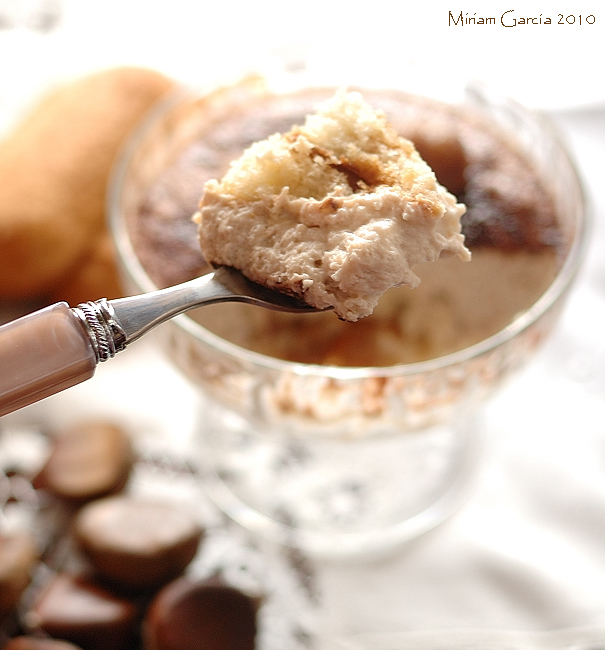
I assure you that the day I prepared it, the dessert was a hit with my guests. The result is a feathery airy and smooth cream with a subtle chestnut flavor, nicely complemented with the wet and sweet ladyfingers. Ideal to impress anyone and an elegant dessert for the holiday ahead of us.

Eager to know more?

German rote grütze with waffles

>> Saturday, September 18, 2010

Rote grutze 1

One of D's sisters lives in Kiel, north of Hamburg, in Schleswig-Holstein (I love that name...). As I told you before, this year we spent a week up there. Most of the family gathered there, 19 individuals in total, with cousins, friends, girlfriends and other animals, to explore the region of North Frisia. Friesland, the coastal area that borders the southeast corner of the North Sea, is a historical region that was divided in 1815 in Friesland in the Netherlands, and in East Friesland and North Friesland, Germany (this blog is sooo intelectual). This is a most flat region. The plain goes on into the sea and the coast is made of very large shoals, with many beaches where you can walk miles from the shore and the water won't reach up your knee. There are islands battered by the wind, beaches with sand so fine that it seems flour, full of fiery kites, colorful lighthouses, bright green meadows brimming with cows and sheep, and endless skies. A perfect place to relax.


Germany 2

I can't speak of all Germany, as I know little more than this small area in the north, but I can assure you here they are excellent bakers and pastry makers. The bäckerei-conditorei, that is bakeries and pastry shops, are a constant temptation with their array of varied breads and kuchen. As for the bread... I was almost in tears one day that, while sniffing among the various bread flours in a supermarket of the mini-village where we were staying (not too bad, not speaking German), I stumbled into some sourdough on sale, in liquid and solid state, ready to go... Now it seems so logical that this country is at the top of Europe. They deserve it! At least when it comes to bread, they rule...
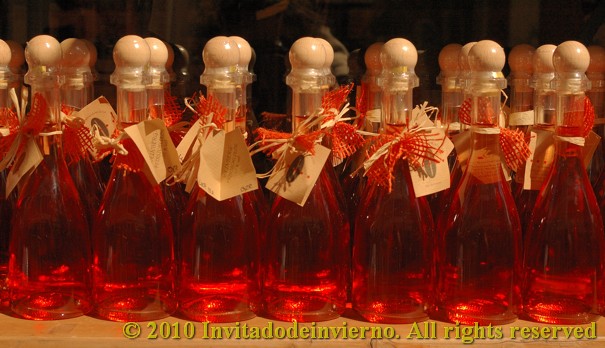
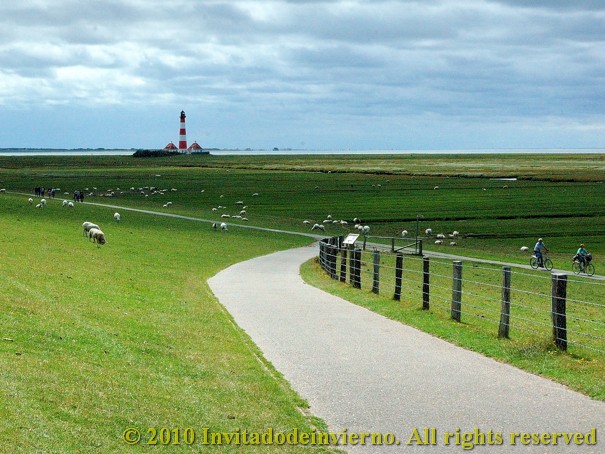
Germany 4

Germany 5

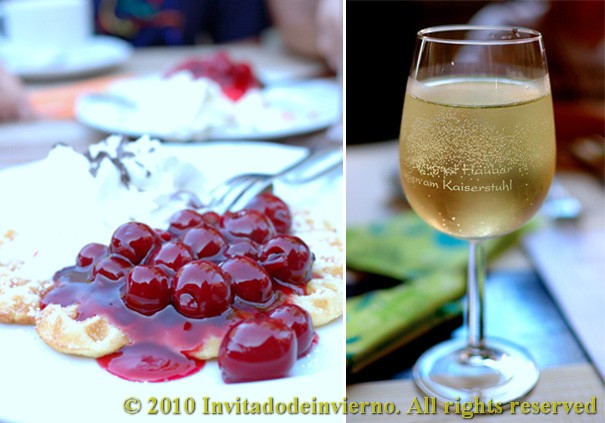
Oh, and they also have waffles with sour cherry sauce...
Germany 6

Have I told you that they make some waffles with sour cherry sauce that make you levitate?

Germany 3

So... what better way to commemorate our trip to Germany than to cook a traditional dessert popular in the area (although it's also consumed in other parts of Germany), rote grütze... Rote grütze means something like red porridge (gruel or porridge made of coarse flour or hulled grain), because this dish was originally a pudding or porridge whose thickness could vary, but it was some kind of cereal cooked in seasonal red berries juice, plentiful in the area, that is currants, raspberries, sour cherries, etc. (although usually without strawberries). It is now more often found as a sauce, with a dense core of fruit juice thickened with corn starch and abundant whole red berries. The recipe comes from a German book I bought on a previous trip. As I said, I don't speak German, but I know most of the names of the ingredients and the rest... well, you just put a bit of imagination to work or get it into Google Translate. Nor is it so difficult, the recipes consist of a few simple instructions, the book is not a study by Goethe.
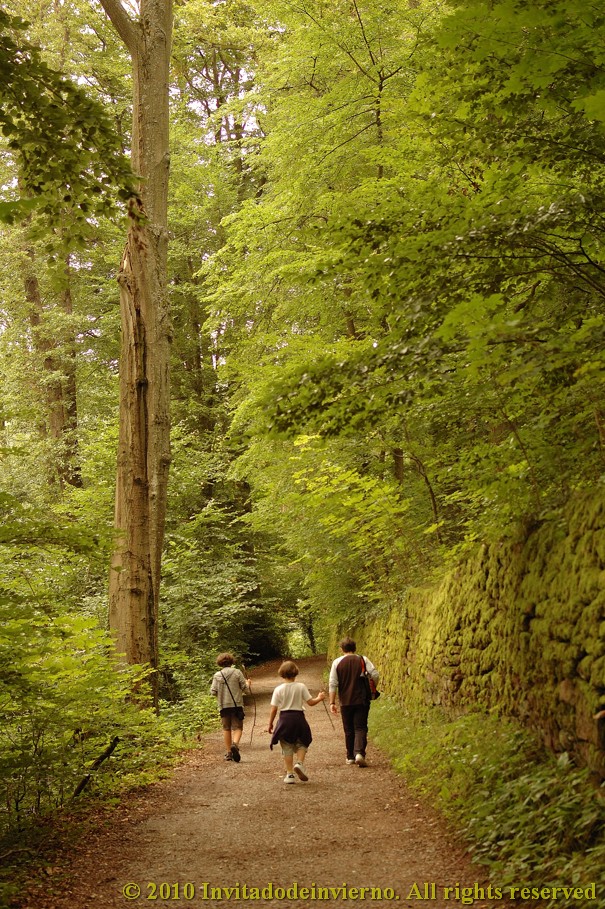
Germany 1

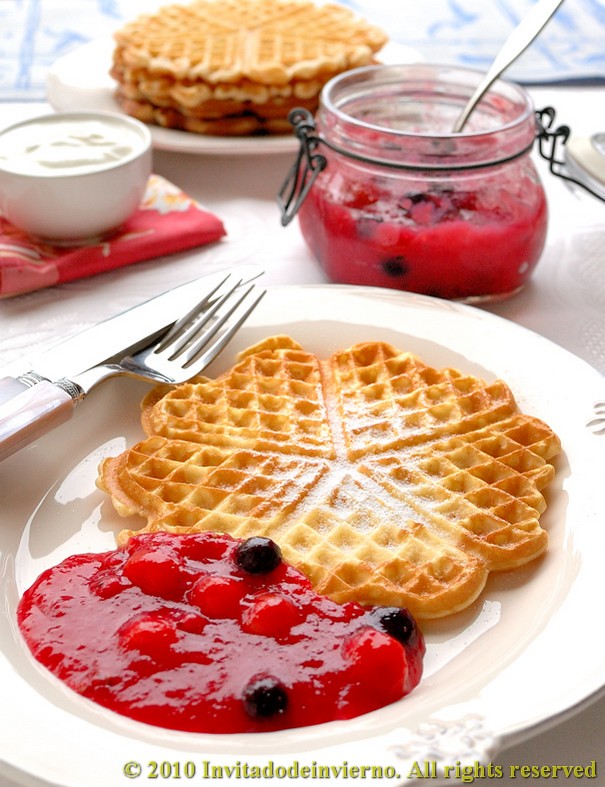
Rote grütze is traditionally accompanied by a vanilla sauce, but it's no heresy to have it with ice cream or cream cheese. And in this case also some delicate waffles on Northern German style, which I call light not because they are light in themselves, but because they're light to me compared with the leaden Belgian waffles.
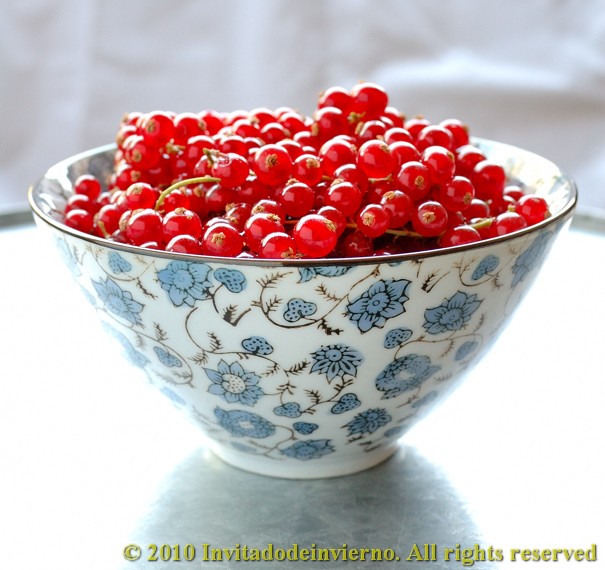
Rote grutze 2

Rote grütze with waffles
For rote grütze (adapted from this book):

  • 500g assorted red berries (cranberries, sour cherries, redcurrants, raspberries, etc.)
  • 1 liter water
  • 4 tbsp corn starch
  • 1 dash red wine or rhum
  • Sugar or sweetener to taste (I used 100g agave syrup, but this is very personal)
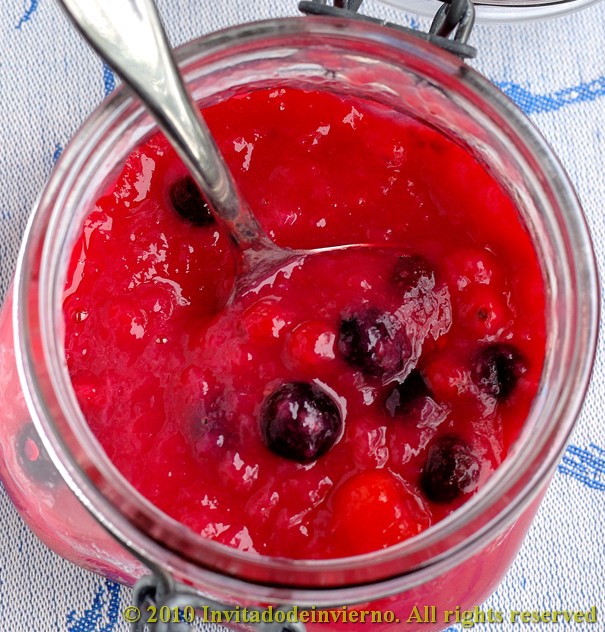
Rote grutze 3
  1. Wash and drain the fruit. Separate the little stems. Set aside about 150g of fruit to add at the end. Place the rest of the fruit in a saucepan with the water and bring it to a boil. Cook half an hour, stirring frequently.
  2. About five minutes before ending the boiling, add the wine or rum, to make sure that the alcohol evaporates. After half an hour remove from the heat and pass the mixture through a food mill to remove all the hard bits of the fruit. You'll obtain a somewhat thick juice (or a liquid purée, depending how you look at it). Put it on the heat again.
  3. Dissolve the cornstarch in the minimum amount of water and add it to the boiling juice, stirring vigorously to avoid any lump. If it's not very smooth, you can always blend it. Add the sugar or sweetener you like and test for sweetness. Please note that it should be on the sweet side, because after cooling the sweetness is always less noticeable.
  4. Then add the reserved fruit and let it cool, so that the fruit softens slightly. Keep it in the fridge.
Please note that this concoction is quite perishable, since it doesn't have the cooking time nor the concentration of sugar in a jam, so you need to keep it in the refrigerator and eat it within a few days. But... I don't think it will last too long, do you?

For the waffles (adapted from this book), yields around 10 waffles:
I modified the recipe to use agave syrup, that being a liquid affects the other ingredient's ratios. I know, what's the use of ruling out sugar when you add scoops of butter... but that's one of my typical contradictions. So I'm giving you both recipes, with sugar and with agave syrup... because you make my day.

With sugar:
  • 150ml boiling water
  • 300g all-purpose flour
  • 4 large eggs
  • 160g sugar
  • 200g melted butter
  • 1 tsp baking powder
With agave syrup:
  • 150ml boiling water
  • 300g all-purpose flour
  • 4 large eggs
  • 100g agave syrup
  • 180g melted butter
  • 1 tsp baking powder
Of my own will I added 2 large pinches of powdered vanilla and another 2 of cinnamon.
  1. I couldn't quite understand the purpose of the boiling water, I guess is to scald the flour, but the recipe doesnt indicate the order to add the ingredients, but just calls for you to mix everything at once... So I brought the water to a boil and threw in my flour, obtaining a funny paste.
  2. Then I added the butter and eggs, mixed thoroughly in a good blender or stand mixer to homogenize, and then everything else. I mixed again and turned on the waffle iron.
  3. Spread a little butter on the hot waffle iron and proceed to cook the waffles as directed on the appliance manual. When possible, try to serve the waffles warm, because they're so more delicious. Although my children eat them even the next day.
  4. So for a nice German kaffee und kuchen, between 3 and 4 in the afternoon, serve a dish of waffles, another dish with rote grütze and some other accompaniment, then help yourself to one waffle, generously sprinkle it with powdered sugar, add a heaped serving of rote grütze and... just eat everything using the waffle as a spoon.
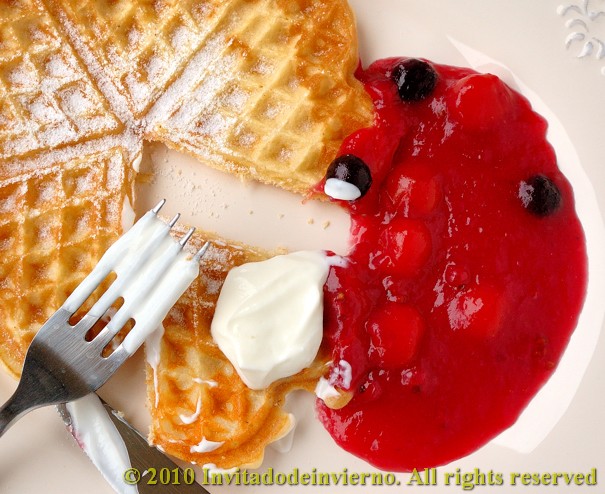
Rote grutze 4

And by the way, if you visit this part of the globe do not fail to eat waffles with sour cherry sauce. Had I told you before?

Eager to know more?

Sourdough blinis

>> Wednesday, April 28, 2010

Blinis sourdough 1

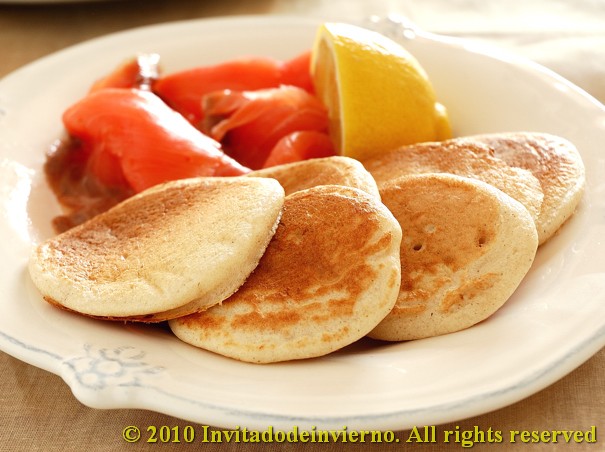
Blinis ... how they're yummy. These pancakes typical of the Russian cuisine, similar to American pancakes or, in flatter versions, to crepes (just similar), served as accompaniment to savory dishes, have several features that distinguish them. The main one is that they rely on bakers' yeast and beaten egg whites to raise, and another characteristic is that they often include buckwheat flour in their composition, which gives them an intriguing herbaceous smell. Well, here I use blinis to use up a fraction of the massive amounts of sourdough that sourdough geeks need to throw away when they don't make bread every day (my case).


Sourdough is just a mixture of flour and water, so if we do have leftovers at some point, they can be added to any preparation that carries flour and water in its composition and that can't be disturbed by its special flavor. "Recycling" extra sourdough instead of throwing it away is a perfect excuse to make blinis, don't you agree? To raise the intellectual level of the blog, here's a quote on blinis from Tatiana Maslenikoff's book La cocina rusa:

As in most European civilizations, Russia gathered and assimilated the beliefs and pagan traditions with its Christian equivalents, which were imported from the Byzantine Empire in the 10th century.
After the long winter, when the first signs of thawing were felt, the northern tribes coming out of their lethargy prepared a feast in honor of the Blazing Sun. Pancakes as round and golden as suns, made with mixed flours, were cooked and offered to Sun God for him not to forget to warm Mother Earth. This would in turn make the next harvest sprout. These pancakes (blini) were then eaten with butter, dried fish and meat. According to historians and archaeologists, the tribes celebrated a sort of costume party where the burning of an effigy of the Prince of Winter took place.
In the Christianized Russia, this feast was moved to the beginning of Lent (...) Blinis are served with smoked herring or caviar, but never meat.

Blinis sourdough 3

The idea of using sourdough on blinis is not originally mine, but found in the book Breads from La Brea Bakery, by Nancy Silverton. I've adapted the recipe, because she adds baking soda and baking powder to avoid a long time rising and speed up the process. She also adds far too much sugar to my taste, that I consider unnecessary, apart from not being very faithful to traditional recipes. I usually have that problem with American recipes, they're too sweet for me. I've also halved the amounts, because the original recipe produces eight dozen small blinis ... yes, you read that right. I only made around 40 small blinis. Here's the recipe:

Sourdough blinis
  • 250ml milk
  • 3/4 tbsp fresh bakers' yeast
  • 185g sourdough (100% bakers' percentage, mine was spelt's, but any white bread flour will do)
  • 85g all-purpose flour
  • 1 tsp agave syrup or 1 1/2 tsp sugar
  • 70g buckwheat flour (60g if you use sugar instead of agave syrup)
  • 1/2 tsp salt
  • 2 medium eggs
You know that the amount of liquid depends on the absorption capacity of the flours, so maybe you'll need to adjust the final thickness. The batter must be almost as thick as pancake batter.
  1. Lightly warm up the milk and add the fresh yeast, crumbled. Blend until dissolved. Add the sourdough and mix well. Add all the flours and the agave syrup, cover and let it ferment until double in bulk and bubbly, depending on ambient temperature and activity of yeast, something between 1 hour and 1.5 hour.
  2. Break the eggs and separate the whites from the yolks. Add these to the batter along with the salt and let it ferment again, I think one hour is enough. Leave the egg whites in the fridge in the meantime.
  3. When the batter is risen again, beat the egg whites to stiff peaks and gently add them to the batter, so as not to deflate them.
  4. Heat a skillet or pancake pan and add half tablespoon of butter. The traditional method is to coat the skillet with pork fat, but I didn't have any. Ladle small portions of dough to make the blini size you choose. I made little ones, 2 or 3-bite sized, but they can be made much larger. So you decide. They cook quickly, you have to turn them over with a spatula within seconds and cook them on the other side. It is recommended to lay them on a kitchen towel as you go, covered to prevent them from cooling, and also put them just outside a hot oven to keep them warm.
Blinis sourdough 2

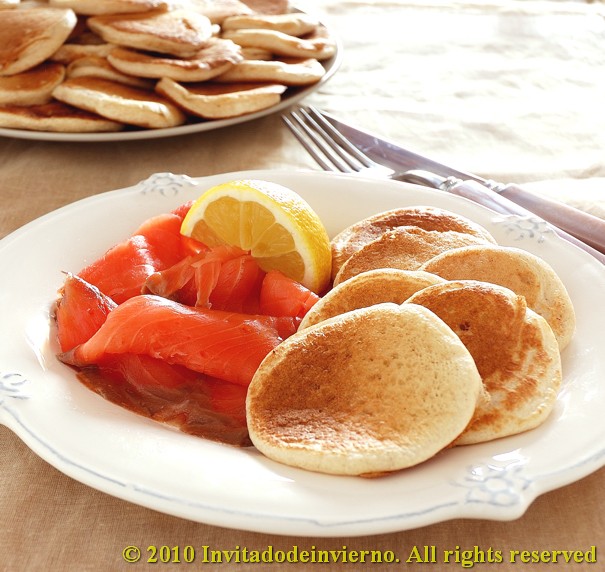
They're delicious when warm, very light and airy, thanks to the egg whites. They have a rich bread-like flavor, with the sour note from the sourdough, and a very tender consistency. A surprising and addictive combination with savory accompaniments. With a good smoked salmon they are simply superb. We did make a lot of tiny sandwiches of salmon, even without the typical addition of sour cream ... We apologize to any Russian in the room for our heresy. We only missed the vodka ... ¡na zdorovje!

Eager to know more?

Baileys and mascarpone cake

>> Saturday, March 20, 2010

Mascarpone Baileys cake 1

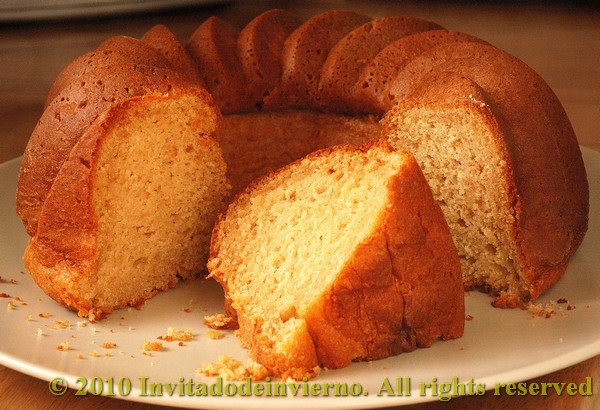
I've loved Baileys as far as I can remember, way back in the Middle Ages... okay, maybe not so long ago. Maybe I have some Irish ancestors. Maybe not, as I hate beer. Or maybe yes, as I think that potatoes are a very nice fruit indeed... The thing is that it appears that this liquor is not very often used for cooking. And it's a pity. That's why I want to contribute to a wider use in baking and to celebrate Saint Patrick's day at the same time (I'm late, I know) with this yummy Baileys cake... And I warn you: this cake tastes a LOT of Baileys. It's only fit for Baileys' lovers. So refrain if you're not a Baileys addict. Like me.


While searching for some recipe to use some homemade mascarpone cheese, I stumbled upon a nice cake recipe with amaretto in a Spanish website. But being that unfortunately amaretto is not my cup of tea, I decided to use Baileys, which makes a good match with mascarpone. And I adapted the recipe to skip the sugar and used agave syrup instead.

Sugar-free mascarpone cheese and Baileys cake

  • 4 medium organic eggs
  • 120g agave syrup
  • 250g mascarpone cheese
  • 100g Baileys
  • 200g flour
  • 1 package baking powder (around 4-5 tsp)
  • 1 pinch salt
  1. Preheat the oven to 180ºC.
  2. Separate the egg yolks and whites. Whip the whites till stiff. Set aside.
  3. In the bowl of a food processor, add the cheese, the yolks and the syrup, mix thoroughly.
  4. Add the Baileys and mix again. Then add the sifted flour with the pinch of salt and the baking powder. Mix softly and finish the mixing with a spatula.
  5. Then add the whipped whites, stirring delicately so that the whites keep their volume. Butter and flour a cake mold, pour the cake mixture and bake for 30 minutes.
  6. Use a wooden skewer to try for doneness. Take the cake out of the oven, unmold and leave to cool on a wire rack.
Mascarpone Baileys cake 2

The result is a super-moist cake with a delicious Baileys flavor. It keeps really well inside a plastic bag. Everybody loved it at home, except my little one. But he's a picky eater...

Eager to know more?

Lola's easy apple pie

>> Sunday, January 31, 2010

apple pie
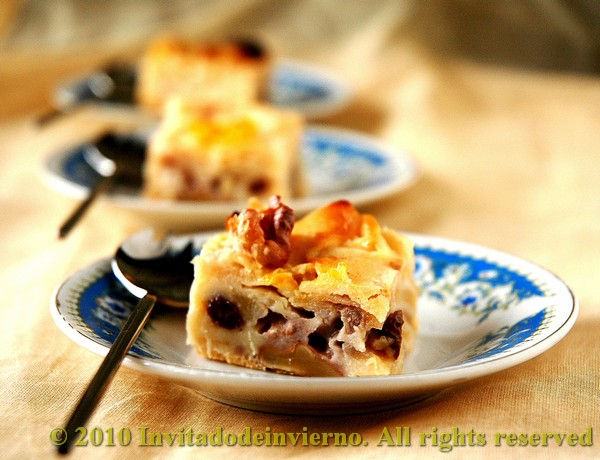
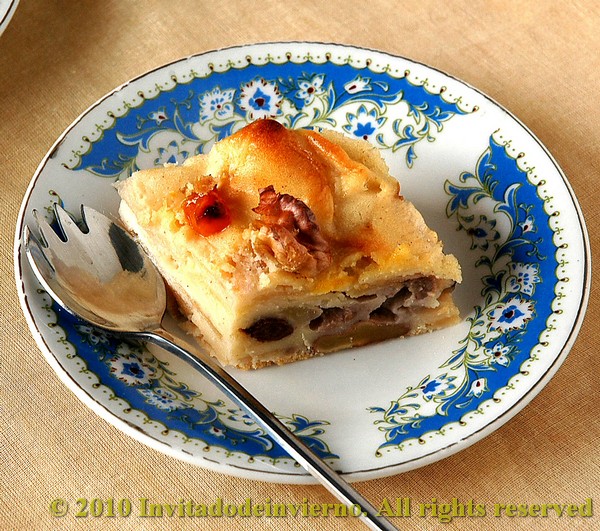
I love almost any dessert with apple in it. This simple apple pie is similar to an apfelstrudel, only without the dough wrapping. It's something in between cake and pudding, with an enormous amount of apple, mixed with raisins and walnuts, and just enough batter/dough to keep the whole thing together. I've adapted it from this lovely blog, tweaked the ingredients a little bit and subtituted agave syrup for the sugar (fantastic photo blog, I recommend it). By the way, I tell you... it 's hard for me to follow cup measurements... and I'm not getting used to it, but this pie was worth the effort.


Easy apple pie adapted from Lola Mansurov's
Yields around 8 servings

  • 1 cup all-purpose flour
  • 3/4 cup rhum to soak the dried fruits (the original calls for plain water, but... I don't know, I think this is a bit too cruel on the fruits ;-))
  • 4 medium cooking apples
  • 60g raisins (I would add more next time)
  • 60g dried apricots
  • 1/2 tsp rising agent
  • 1 pinch salt
  • 1/2 cup shelled and chopped walnuts (I would also add more of this next time)
  • 4 medium eggs
  • 7 tbsp melted butter (or 8 if you're using sugar)
  • 1/3 cup agave syrup (or 1/2 cup sugar)
  • 1/2 tsp cinammon

Place raisins and dried apricots in a bowl and cover with the rhum. I microwave them for a minute or so on full power to aid the soaking and leave the whole thing to infuse. Leave to cool. Peel, core and slice the apples. Sprinkle the slices with some lemon juice to prevent them from oxidizing. Set aside. Cream the eggs and sweetener until light and fluffy. Sift the flour with the baking powder and add them to the cream. Lastly add the melted butter and delicately stir to incorporate.

apple pie
Preheat the oven in the meantime, to 160ºC if using agave syrup and to 180ºC if using plain sugar. This distinction doesn't work for me, my oven doesn't make any difference between 200ºC and 150ºC, it just goes back and forth... Well, then mix the apple with half the walnuts, the raisins and the dried apricots, drained from the rhum. I made a mistake by laying the dried apricots on top of the cake for a nice touch of color and indeed I got it... a beautiful black color because they simply charred, so... just mix them with the rest of the ingredients. I had to get rid of my charred apricot bits and cut off the top of the least damaged ones. Let's see... where was I? Then add the egg mixture on the fruits and toss carefully to mix. Butter and flour a large pie dish. I used for the first time a beautiful Le Creuset dish I bought last summer... soooo cute. When everything is acommodated in the dish, sprinkle the remaining walnuts and bake for 40-45 minutes (at least that time was enough for me). Try for doneness with a skewer and take it out of the oven. It can be left to cool in the mold.

apple pie
The result is a delicious pie with a predominant apple flavor, of course, and a little bit of crunchiness because of the walnuts. This type of pie is my favourite, light and brimming with fruit. Have a serving while still warm, with a scoop of good vanilla ice cream... and a dash of maple syrup or a sprinkle of cinammon...

apple pie

Eager to know more?

Sweet sourdough bread with cinnamon, sugar-free

>> Monday, January 11, 2010


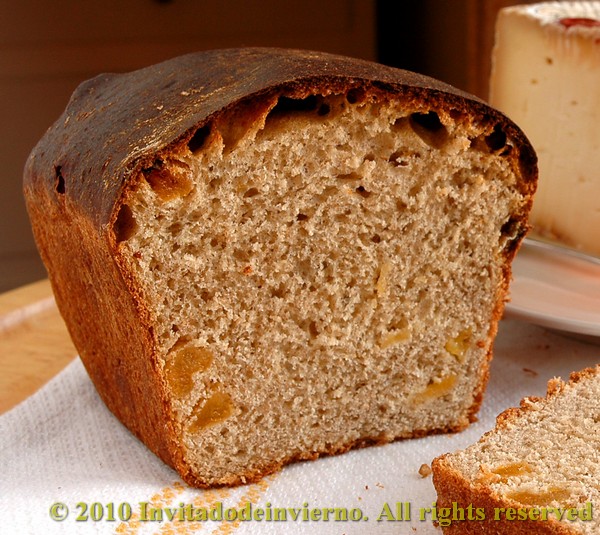
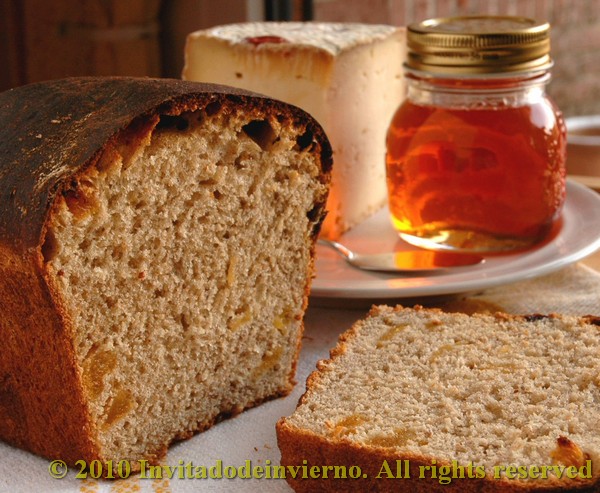
I made this bread last Christmas for the first time and it's bound to become a classic at my household, because it's delicious. In spite of the name, it's not very sweet. It's excellent as toast for breakfast, with some ham or a sharp cheese... I found the recipe at this blog (thanks Tess for the great idea and check out her amazing painted breads!) and it originally contained ginger and orange. As I usually do, I took her recipe and turned it upside down, so that the result is almost unrecognizable. But that's what globalization is about... you pick ideas and concepts here and there, shake them in a cocktail shaker and pour the concoction on your cultural heritage, don't you?


Sweet sourdough bread with cinammon and dried apricots, sugar-free

  • 100g white flour sourdough (baker's percentage: 100%)
  • 160g light spelt
  • 130g bread flour
  • 130g whole spelt
  • 8g fresh yeast (I didn't trust my sourdough in this cold)
  • 9-10 dried apricots, soaked in Cointreau or Triple Sec (the original included candied ginger instead, but I'm no big fan)
  • 65ml maple syrup (dark molasses in the original recipe)
  • 40ml agave syrup (1/4 cup sugar in the original recipe)
  • 65ml melted butter
  • 200ml water (250ml if sugar is used instead of the agave)
  • 1 tsp Cointreau from the apricots soaking
  • 1/2 tsp anise seeds
  • 1 tsp cinnamon
  • 1/2 tsp salt

If you don't want to use such a ridiculous mixture of flours, just follow the original recipe, which is more sensible. But you know I loooove spelt. If you happen to dislike dried apricots, you can of course substitute for any other dried fruit or even nuts. These would be a great match too.

Weigh your solid ingredients and mix them. Crumble the yeast on top of them. Add the sourdough. In other bowl mix the liquid ingredients with the melted butter. Knead well, around 10 minutes by hand or 6-8 in a stand mixer, till you have an elastic and smooth dough. Then add the drained apricots. Make a ball, put it into a well oiled bowl, cover and leave to proof. My bread took 4 hours to double in bulk, because my kitchen is quite chilly these days. When doubled, I made a roll and dumped it into a loaf pan, covered it with a plastic cap and put it in the fridge to raise overnight. The next day the bread had nearly doubled, so I immediately turned on the oven to 180ºC, and there went the bread. Bake it around 40-45 minutes, depending on your oven's fierceness (watch it closely at the end of the baking so that the top doesn't brown excessively). You can test the inner temperature for doneness. The original recipe calls for an inner temperature of 75ºC. But maybe because of the change in ingredients, my bread was not thoroughly baked at 75ºC (I checked it with a skewer), but at 90ºC, so watch out. When done, unmold it carefully and leave to cool on a wire rack.


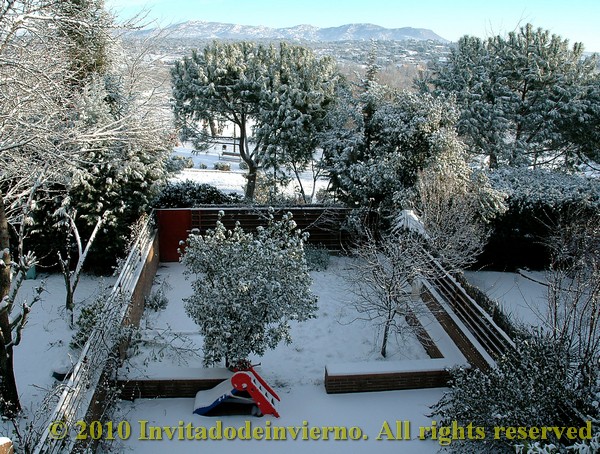
The consistency of this bread is very cake-like and the dried fruit gives it a delicious touch. Today I had a toasted slice, with cheese and quince jelly, while gazing at our snow-covered garden...

I'm sending this bread over to Susan's Yeastspotting, at Wild Yeast.

Eager to know more?

Mulled rosé wine

>> Sunday, December 27, 2009

mulled rosé wine
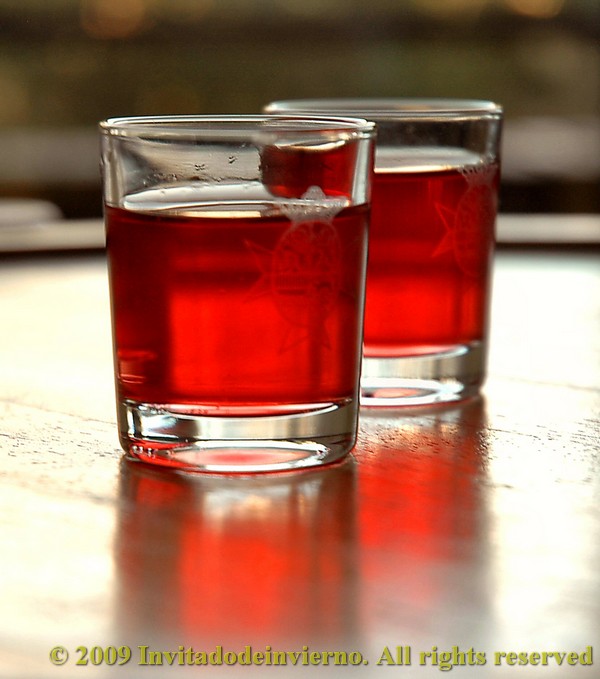
I love the spiced hot wine typical from Northern and Central Europe, mulled wine, glühwein, whatever... Two of my in-laws live in a nearby street and they have a German neighbor. I remember a copious snowfall, some five years ago, that covered all the village streets in white. It happened on the weekend, so we immediately went out on the street with the kids for a nice stroll on the new snow. This German guy didn't think twice and he went out on the street offering German stollen and some glühwein to celebrate the snow with his neighbors... he was chatting with my in-laws, so we were lucky to be invited. That's exactly the perfect way to taste glühwein...


This time I've bottled some spiced wine in cute bottles for Christmas gifting. For a more transparent and appealing look I've used rosé wine, even though the tradition calls for red wine... I hope the Germans aren't offended, sometimes I'm very disrespectful regarding traditions... I've also made it sugar-free, to help relieve the richness of the Christmas fare.


mulled rosé wine
Mulled wine or glühwein
Yields 3 half a liter bottles

  • 2 bottles of good rosé wine (but not excellent!)
  • 2 sticks cinammon
  • 1 vanilla pod
  • 4 whole cloves
  • 4 allspice grains
  • 4 tbsp agave syrup (7 or 8 tbsp sugar, though the sweetening depends on the type of wine and personal taste)
  • 2 tbsp ginger syrup (optional, just if you happen to have it handy, otherwise add another tbsp agave)
About the ginger syrup, I had some leftover from candying ginger, so I used it.

Put all the ingredients in an enameled pot and heat the whole thing up, but don't bring it to a boil. Just leave it to infuse. As we were not going to drink it straight away, I left it to rest overnight, for all the flavors to develop.


mulled rosé wine
The day after filter the wine (I used a paper percolator coffee filter) and transfer to bottles. You can add some spices to the bottles. I added some allspice which I thought would look good at the bottom of the bottles... but it floated, damn. Give the bottles to your loved ones and advise them to serve it hot.

Mmmm, how I long for the snow now...

Eager to know more?

Shabby almond tart

>> Thursday, October 1, 2009


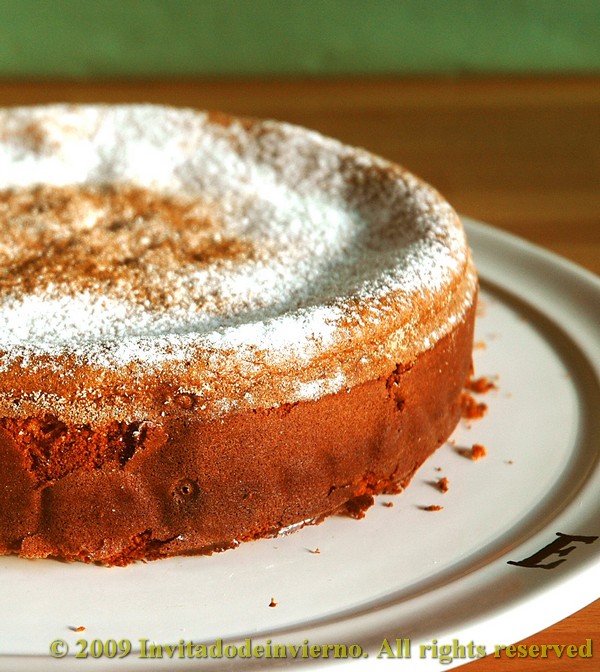
This hybrid of tart/cake looks shabby. And it's all my fault. But it's so delicious that still it deserves a whole post. It's very similar to tarta de Santiago, very typical from Galicia, only in this case the eggs are whipped with the sugar until light and fluffy, yielding a much lighter tart than the Santiago type.


But let's start from the beginning. Like Sophia Petrillo, one of my idols, used to say: picture it, Sicily, 1920... ahem, Galapagar, non defined year... I had prepared this tart a long time ago, from a Thermomix recipe in the Internet (unknown author). I had found it delicious and very easy. I had baked it for some celebration where all the guests loved it. In spite of that, I had never made it again. And now I felt like testing it in a sugar-less fashion, for the sake of health. On top of that, it's a gluten-free recipe, double healthy. No baking powder either. Couldn't be simpler.

Almond tart/cake

  • 250g almonds
  • 250g sugar
  • 6 eggs
  • Lemon zest
That's the original recipe and here goes my tweaking: I substituted 100g fructose and 50g agave syrup for all the sugar (fructose and agave are sweeter than sugar). I didn't dare to use only agave syrup because it's liquid and I was afraid it could interfere with the airing of the eggs (I don't know if that can happen). There's a lot of controversy regarding the benefits of fructose, I know... When you substitute agave syrup for sugar you need to reduce the global amount of liquid, therefore I used only five eggs instead of six.


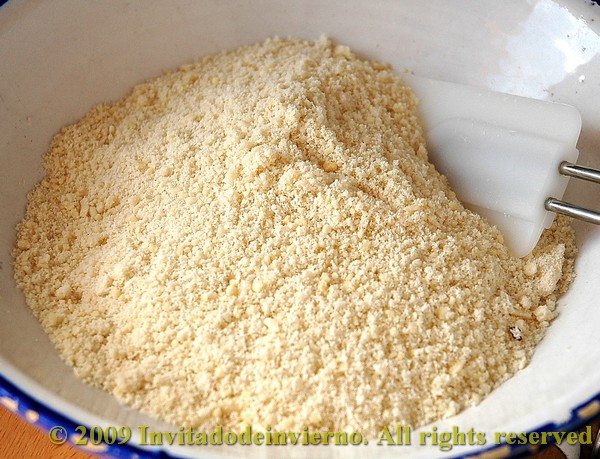
Firstly grind the almonds if you haven't bought almond meal. Then whip the eggs with the sweetener until light, fluffy and almost white in color. In my Thermomix it's very easy: fit the butterfly, add the eggs and the sweetener or sugar, and set 8 minutes at 40° and speed 3 (Thermomix 21). Turn the heat off after 2 minutes and let the mixture cream for the remaining time. Of course you can cream the eggs with the sugar in any mixer, like here. Mild heat is supposed to aid the creaming, therefore I've seen the advice to put the mixture in a bowl which is inside another bowl with tepid water (I haven't tried this though).

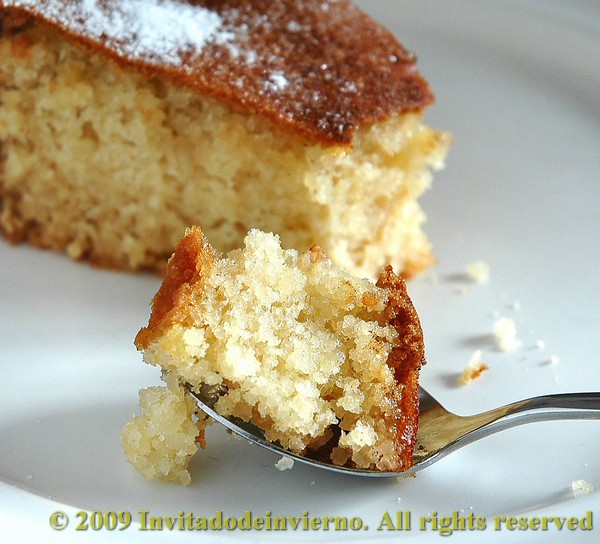
Once the eggs are creamed, add the ground almonds and the lemon zest, either with the mixer or with a spatula. I forgot to add the lemon zest... that was my first mistake. The second mistake was that I used a removable-base mold that I only buttered and floured (with rice flour to keep the thing gluten-free); because of the high sugar content the tart is very sticky and it indeed got stuck to the base and walls. I had to struggle to peel it off, that's why its looks are not... let's say... perfect. OK, I could have used a beautiful frosting to hide the disaster, but I generally hate frostings, unless they are made of marzipan... but wait, that's not frosting, is it? I find a much wiser option is to line the mold with parchment paper, thoroughly buttered. I almost forget: bake the tart/cake in the oven at 180 ºC for half an hour approx., depending on the browning. Better try with a toothpick for doneness (a fondue stick in my case) . It rises quite a lot in the oven, although it sinks when cold (maybe that's not the purpose, but it does happen to me). But, in spite of all my mistakes, the flavor was excellent. The consistency is very moist and fluffy. You can play around with the almond, using a more finely ground or less finely ground almond. I like mine not too fine, so that you get a nice crunch in each bite. And I'm sure you're wondering if there is any noticeable difference by using fructose instead of sugar. Well, yes, fructose caramelizes at 110 ºC, while sugar does it at 160 ºC, therefore there's a noticeable caramel flavor which you don't get with sugar. That is, the result is different, but equally delicious. And a lot less energetic.


You can sprinkle some powdered fructose or cinnamon or both for finishing. I find that cinnamon is a good match. I encourage you to make this tart, I know you'll do it right, the same as me next time...

Eager to know more?

See you soon and apple sorbet

>> Thursday, July 30, 2009


I'm going on a holiday and I've found no better way to say goodbye than to make a completely natural and super organic sorbet with the apples from my apple-tree. The apples I've picked are not very ripe, because until this summer the apple-tree would only produce gnome-size apples. Therefore we hadn't cared much for its apples and we've never hung any bird-scaring device. But whimsical as it is, the apple-tree has decided to produce normal-size apples this season. The bad thing is that we are compelled then to be faster than the birds, difficult thing when you're already over 40... The moment any apple starts to blush... there go the birds. They devour the apple, lovely little birds... ahem. Nature is a wonderful thing.


This is one of those Frankenstein-recipes, gathered from various patches from here and there, quite simple though:

Apple and cider sorbet

  • 1 small bottle cider (250 ml)
  • Juice from one and a half lemon
  • 6 green apples
  • 3 tbsp agave syrup
  • 2 tsp apple and pear syrup
  • 1 dash apple liqueur (optional, I added it to boost the apple flavour, but I'm sure that more ripe apples than mine would do the trick)
Put the cider in a pot and bring to a boil along with both syrups. Turn off the heat and let cool. I don't use sugar if I can avoid it, but go ahead, you can ruin your health if you like.

Peel, core and cut the apples. Sprinkle them with the lemon juice as you go, to prevent them from browning. Add the cider syrup and process it to a fine puree. Try for sweetness and adjust if necessary. It should be slightly on the excess side, because once it is frozen it will taste less sweet. Apple and pear syrup is a natural sweetener, consisting of concentrated juice. It's perfect to boost the flavour in apple desserts. It only has one disadvantage: the color, dark as molasses. In fact I added a bit too much and the resulting color was strange, to put it mildly, like that of a cinammon sorbet instead of apple´s. That's why the size of the picture is so small, not to ruin my slender reputation.


Once the puree is sweet to your taste, just freeze it in an ice cream maker (if you're lucky to have one) or in the freezer, beating it every now and then, till it reaches sorbet consistency.


And... I hope you can excuse me for not answering your comments within 15 days. Happy holidays, everyone!

Eager to know more?

Sweet and sour red pepper sauce

>> Sunday, July 26, 2009


This is one of those recipes that go from mouth to ear, I learnt it from my mother so I really don't know where it comes from exactly. It reminds of ketchup, but with red pepper instead of tomato. It is delicious, a simple yet effective recipe, wonderful with grilled meat and cheeses, like fried brie or grilled provolone.


Here goes the recipe:

  • 400 g red peppers, home-roasted or canned
  • 200 g sugar
  • 100 g vinegar (I use organic cider vinegar, I like it best)
  • 50 g water
This time I decided to skip the sugar (cringe) and use 110 g agave syrup instead, which makes it diabetic-friendly as far as I know. Being that the syrup is already liquid, I skipped the water too. Yet at the end of the boiling I had to add a couple of tablespoons of water, because I found the sauce a bit too thick. I could have reduced the cooking time too, but I wasn't in time.


You can roast the red peppers yourself (that's what I usually do), but canned peppers work just as well. You start by cutting the peeled peppers in pieces, put them in a pan, add the rest of ingredients and cook the mixture for half an hour, stirring every now and then. If you use a Thermomix, 30 minutes at Varoma temperature and speed 1 (Thermomix 21). It's possible to leave a chunky consistency or you can just process it and get a final consistency like a thick tomato sauce.

You need to sterilize previously a couple of small glass jars with lid. Just boil them in water for half an hour, with a cloth on the bottom of the pan to prevent them from breaking (the final sauce amount is not more than two small jars, but it's not something you eat by the bucket, it's very flavourful). Took the jars out of the water and let them drain on a clean kitchen towel. Pour the sauce in the jars almost to the brim. Then sterilize the filled jars in the same pan and water you used previously, with the water level just below the lids, during another half hour.


Let them cool in an upside down position and... enjoy!

Eager to know more?

Raw sweets

>> Sunday, March 29, 2009

I'm going to tell you about the two cooking courses I recently attended at La cocina de Babette, that I mentioned in my previous post. I got to know this school via Ibán's blog (a well known amateur baker in the Spanish-speaking bread-baking blogosphere), when he announced that he would materialize in Madrid and would give his worshippers a course on festive breads (I believe this happened last november). That was something not to be missed, so there I went. There I met Bea, "chief" of the school, an artisan bread enthusiast and also of those less beaten tracks on cooking (please forgive my English, sometimes I don't seem to find the right words). Being that I was happy with the "bread experience" I decided to repeat it when Bea announced that they would give a course on "guiltless desserts" and another on "guiltless chocolate". It's already sometime since I'm trying to eliminate common sugar from the sweets I cook, though it's not always an easy task. Besides I hate to try and substitute another sweetener for sugar to end up with a non-edible mess and be forced to throw a large amount of food in the garbage. That's the reason why I experiment less than I should.

The courses were given by a very nice couple, Gabi & David, whose target was to teach us to prepare uncooked pies and chocolates, everything raw and hardly heated. In short, these guys are what is called raw vegans. The courses were very interesting, we prepared pie bases with nuts, dried fruit and coconut oil, cashew nut-based sweet sauces, pie fillings with sesame and carrot, we used agave syrup as the only sweetener, prepared an avocado-based chocolate mousse... well, uncommon and new uses for known foods and also foods I'd never tasted before, like carob flour. All the products they use are organic, because they advocate you should use the freshest and most natural produce, untreated and unprocessed, they even prefer untoasted cocoa! Undoubtedly this is the way to keep the nutrients in your food at its purest. Raw vegans defend that all food qualities are best taken advantage that way and that it's best for your health. I think this is difficult to refute, it sounds logical, doesn't it? Though that doesn't mean we like everything raw, we're definitely not educated for that. This movement asserts that this is the perfect diet for humans, the primitive diet followed when humankind lived in the forests and fed only on the Earth's produce, the only diet to which the human body is perfectly adapted regarding evolution.

I have no pictures of the sweets I brought home because I didn't manage to take a single decent photo at the school (the camera is a bit new for me and it's got a lot of personality of its own). Furthermore the little pies, chocolates and the like didn't last too long when I arrived back home... ahem. Even my eldest liked the avocado, buckwheat and carob flour truffles... If I'd told him what they were made of, he'd vomit. Kids... you've got to lie to them once in a while.

I guess you're wondering: What's the point of the peas picture here? Well, they are here because regarding peas I'm completely raw vegan: I love them raw, straight out of the pod like my mother taught me. If you try them, some good quality ones of course, you'll agree. Like eating Nature's little pills. Come on, what are you waiting for?

Eager to know more?
Followers

About This Blog

Lorem Ipsum

  © Blogger templates Palm by Ourblogtemplates.com 2008

Back to TOP