Related Posts Widget for Blogs by LinkWithin
Showing posts with label spelt. Show all posts

Suikerbrood or Dutch sugar loaf

>> Tuesday, July 27, 2010

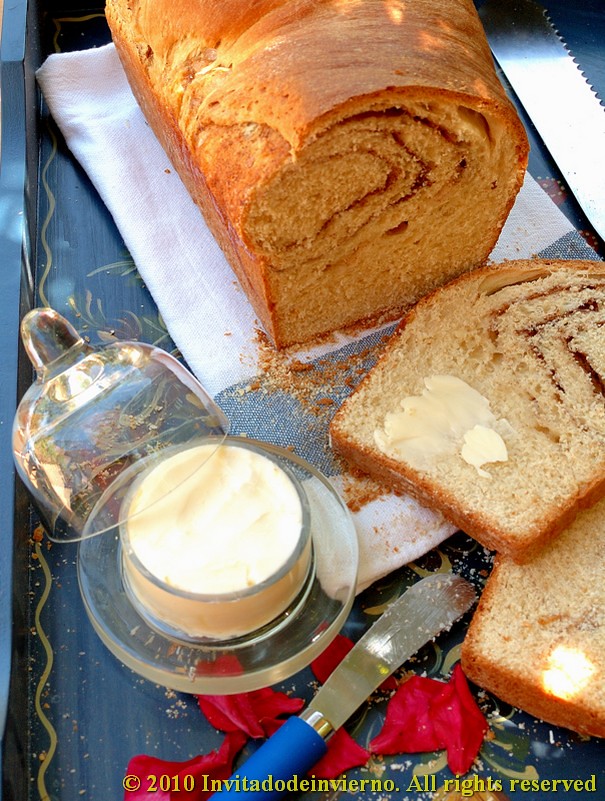
Suikerbrood 3

I have a soft spot for The Netherlands. I spent a year and a half living there, in Delft immediately after leaving college, 20 years ago now... unbelievable. When I look back I only regret that there were a lot of things related to my present hobbies that I didn't enjoy, like cooking and lacemaking (being so close to Belgium!). Mmm, those were the times when all my time was really mine, all the money I earnt was for me... No responsibilities, no mortgages, no children... Yes, those were the times. We'll be spending part of our next vacation in The Netherlands, visiting good old friends, riding bikes and watching the tall ships. Therefore with rather anticipated nostalgia, I felt an urge to prepare this delicious and very typically Dutch sweet bread, suikerbrood, meaning sugar loaf, for the first time. And surely it won't be the last.


I've searched the whole net for information on this bread, but the Dutch food blogging community doesn't seem to be as large as other countries', like mine for example. The information in Wikipedia is rather silly:

Suikerbrood or sûkerbôlle in Frisian, is a bread typical from the Northern region of The Netherlands, Friesland. Its shape has developed from a former round shape to a loaf type bread. The Frisian sugar bread contains 40% sugar and cinammon too. This bread is baked in some other parts of The Netherlands though, like Limburg in the south and North-Brabant, where the sugar content is lower (25%) and no cinammon is added. In Friesland this bread is presented as a gift to women who have just given birth to a girl.

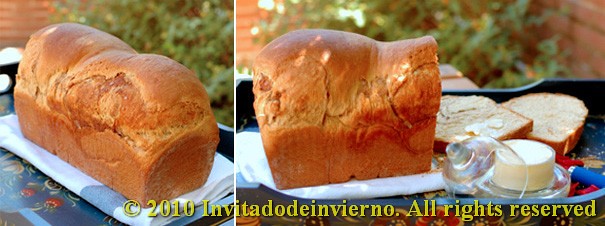
Suikerbrood 1

It's a pity I couldn't use sourdough. I'm not baking very much lately because of the scorching heat, so my sourdough is quietly resting in my fridge. The real bread is fluffier than mine, I remember it being almost as airy as a pannetone, but the directions in the recipe I found called for a second proofing of only 15 minutes (???!!!). I proofed it 45 minutes and maybe it needed even somewhat longer. I must remark though that I used less yeast, because the recipe called for 25g fresh yeast for 1/2kg flour, and that's a lot in my opinion. The final volume after baking should be almost 4 times the unleavened dough, my bread was slightly over 3 times. But it was delicious all the same. This bread includes ginger syrup, which is hard to find here in Spain. So I had to prepare it myself to be faithful to tradition... recipe follows. The ginger syrup gives the bread a subtly special flavor.

Suikerbrood or sûkerbôlle (adapted from Living on bread and water)
  • 500g strong flour (I used spelt. The original recipe called for all-purpose flour, but I think this is heresy when you use baker's yeast)
  • 10g salt
  • 1 tsp ground cinammon
  • 3 tbsp ginger syrup
  • Milk to be added to the syrup up to a volume of 200ml
  • 15g fresh yeast (if you can only use 10g and retard the first fermentation in the fridge overnight, the bread will sure have more character)
  • 75g melted unsalted butter
  • 2 eggs
  • 75g sugar (the type of sugar the Dutch use for this can't be found in Spain. See how it looks here. You can use sugar cubes instead, crushed with a rolling pin. This type of sugar melts during the baking and leaves a lot of sweet and gooey pockets in the bread... Though the original recipe calls for 150g sugar, I preferred to reduce it)
Ginger syrup (from the recipe for candied ginger by David Lebovitz)
  • A couple of fresh ginger roots
  • 1 cup sugar
  • 1 cup water
  1. Peel the ginger and slice finely.
  2. Put everything in a pot and boil till the ginger is tender, or until the syrup scores 106ºC. I'm a primitive being and I didn't measure anything though. You just need a minimum of 3 tbsp of the damned thing. And you can keep the candied ginger for your next Christmas confections.
Suikerbrood 2

Fine, now that you have your ginger syrup, proceed to preparing this utterly delicious and utterly Dutch bread:
  1. Pour the syrup into a measuring cup and add the milk till you get 200ml of liquid.
  2. Add the eggs.
  3. Melt the butter and add it too; mix well.
  4. Weigh the flour and crumble the yeast in it. Add the liquid ingredients and start kneading till you have a reasonable gluten development. My dough was a bit on the dry side, maybe that's another reason why the crumb was on the dense side.
  5. Put the dough in an oiled bowl, cover with plastic and leave to double in bulk. Mine took less than one hour yesterday because of the heat in my kitchen. Simply amazing. I can't imagine what could have happened had I added the original amount of yeast. I would have needed a machete to get into my kitchen.
  6. Preheat the oven to 170-180ºC.
  7. After the first proofing, tip the dough on the countertop, deflate it and shape it into a large rectangle by sliding your fingers underneath the dough and pulling. The rectangle needs to be as wide as the length of your loaf pan, so that the rolled dough fits into the mold. I don't have photos of the process as it was almost night when I started and I don't have the proper photography props. I admit donations though. And my baking inspiration doesn't arrive when it's called, I couldn't tell her to come back the next day... no no no. My dough had a wonderful gluten development I don't always get, because I could stretch it a lot without much effort. The heat also has something to do when the dough carries butter.
  8. When the dough is well stretched, scatter the sugar pieces and sprinkle the cinammon. Roll the dough carefully to make a cylinder, lift it and put it into the oiled and floured loaf pan. Cover with plastic film and let it at least double in volume.
  9. Bake it 40 minutes. Watch it every now and then to prevent it from browning too much on top. When done, unmold on a cooling rack. Let it cool.
If you like bread that is sugary and smells of cinammon, this is up your alley. Undescribable if you have it in a veranda with tons of butter... like the Dutch do... eet smakelijk.

And I'm sending this one to Wild Yeast, for the weekly YeastSpotting.

Marken 2005

Eager to know more?

Indecent chocolate cake

>> Monday, July 19, 2010

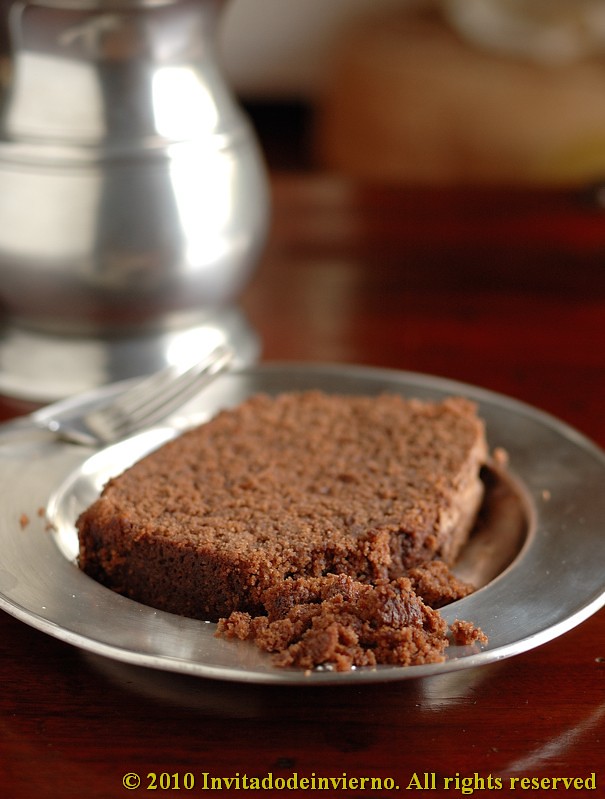
Chocolate cake 1

Now that I've got your attention...

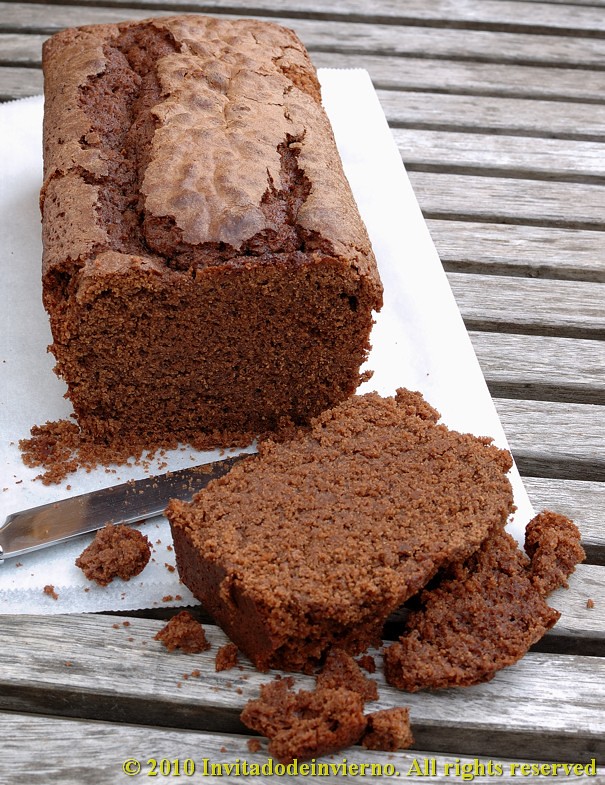
That's the way some people advertised their parties while I was at college, with a notice where you could read SEX in a large font... followed by the details of the party in a much smaller font. Well, this post beginning has to do with the author of this recipe, the very well known British chef Nigella Lawson, the queen of food porn (just take a look...). Her recipes can send your blood sugar sky-rocketing and raise your cholesterol so much you'd need a chisel to clear your arteries. In fact I found the recipe already tweaked by Heidi of 101 cookbooks. She praised it so much it made me curious. So today it's a sweet and chocolatey day. I hardly try this kind of delicacy when I make it, but my children often appreciate these indecently caloric cakes, just because they don't put on weight (so far) and they can do it. Yes, they can.


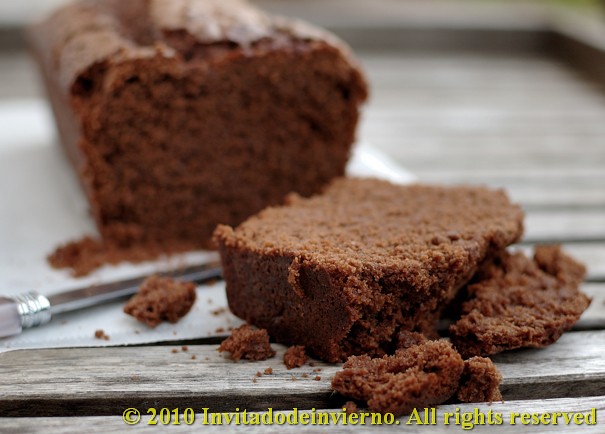
I was intrigued by the sinking and deflating quality of the cake that Heidi talked about in her post. Oddly enough, my cake didn't sink although it didn't really raised a lot. It was extremely soft and moist (indecent, I tell you), I guess it has to do with the boiling water addition, which I had never seen before added to a cake. When you add the water it feels as if the chocolate in the batter melted again. My family loved this cake, I strongly recommend it, in spite of the health issues... And I dared to turn on the oven during a rather brief break from the scorching heat of this month.

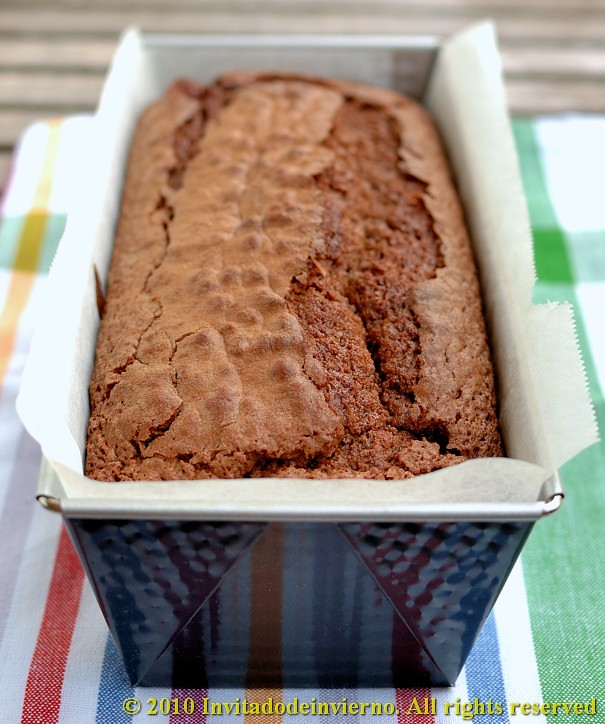
Chocolate cake 2

Indecently rich chocolate cake

  • 145g spelt flour (all-purpose will do too)
  • 1 tsp baking powder
  • 1/2 tsp salt
  • 225g softened butter
  • 215g muscovado sugar
  • 2 large eggs
  • 115g bittersweet chocolate
  • 250ml boiling water (I really only added 2/3 of this amount)
  1. Preheat the oven to 190ºC.
  2. Sieve the flour, mix with the baking powder and the salt and set aside.
  3. Melt the chocolate in the microwave or a double boiler and leave to temper.
  4. Cream the butter in a stand mixer until light and fluffy then add the sugar little by little while still beating. Scrape the bowl every now and then for all the butter to homogenize. When all the sugar is added, add the eggs one by one, beat well to mix.
  5. Bring the water to the boil.
  6. Add the melted chocolate at a slower speed and mix thoroughly.
  7. Lastly, add the solid ingredients and the boiling water, first 1/3 of the flour mixture, then 1/3 water, mix and repeat 2 more times. I didn't add all the water because I found the batter too thin. Mix well.
  8. Line a loaf pan with parchment paper, oil it well using a brush (I use tigernut or sunflower oil). Don't skip the paper, otherwise you just won't be able to take the cake out of the pan. Bake for 30 minutes, then lower the temperature to 160ºC and bake for another 15 minutes. Try for doneness (although it's difficult to make out, as it's quite sticky), and leave to cool in the pan: don't unmold while still warm, as it would crumble down; it's very fragile and crumbly.
Chocolate cake 3

I love to use spelt in cakes and cookies. But regardless of the type of flour, what I always try is to use stone-ground flour, because it contains all the essential oils of the grain germ, something that's missing in conventional industrially milled flour. When the flour contains the germ nutrients it goes rancid more quickly... therefore if you get rid of the germ the shelf-life is extended... so that large producers and distributors can speculate. If you want to know more about this fascinating subject, read Michael Pollan's In defense of food.

Chocolate cake 4

Eager to know more?

Challah, from far away

>> Monday, May 17, 2010

Challah 1

Though the English-speaking blogosphere is packed with Challah recipes, this word is quite unknown in Spain. All ethnicities and nationalities with communities of a certain importance in the United States enjoy an amplification and diffusion in the rest of the world of all their characteristics and peculiarities that for example we Spaniards do not enjoy. When we were compelled to emigrate, we had a lot of Spanish-speaking countries to go to, instead of heading for the United States, like Italians, Germans, Swedes, Irish, Russians, Poles, etc. And now our cuisine is not as widely known as theirs.


It's funny how in almost all the books where I have the recipe for challah (see here its pronunciation, I mean hear it), the name is written in the form challah. I guess that's the spelling in Yiddish and German. But in Spanish we would pronounce that starting with a sound like in the Italian word ciao, for example. I have a book in Spanish in which it is correctly transcribed, jalá, which leads me to worship the translator... I like that book, New Jewish Cooking by Elizabeth Wolf Cohen. Although the recipe I used here is not from this book, but from a baking course on festive breads. Are you yawning yet? Good. This is my method for screening my readers. Only the chosen ones will get to the bottom of the chasm of knowledge...

Challah 5

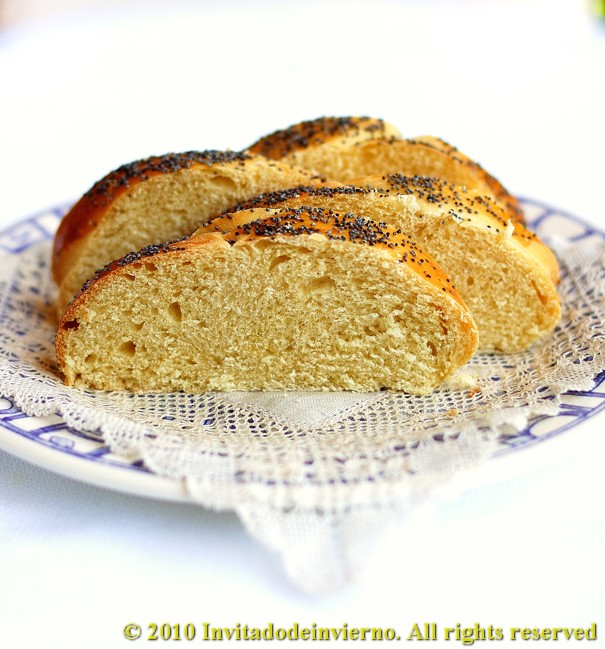
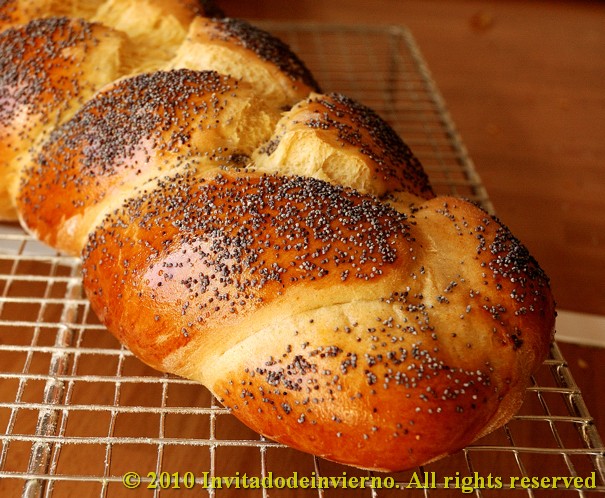
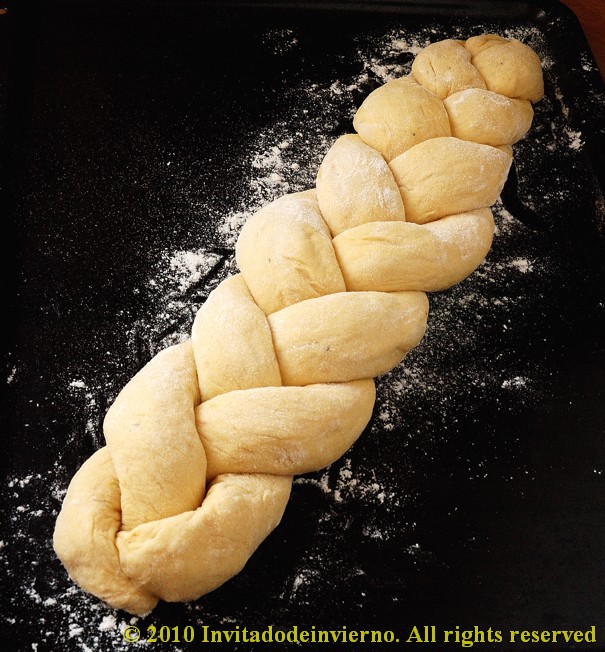
When I brought home my first challah from my baking course, my youngest son liked it a lot, so with the happy occasion of his birthday today, I decided to bake him a challah, because he doesn't like cakes... And also because challah is delicious. Here it is:

Challah, Shabbath's bread (recipe by Paul Merry)
Yields 2 biggish plaited breads

  • 1/4 tsp saffron
  • 270ml water
  • 700g bread flour (I used 500g spelt and 200g Manitoba flour)
  • 10g salt
  • 12g fresh yeast
  • 2 tbsp agave syrup (the original recipe calls for honey instead)
  • 3 medium eggs
  • 80g softened butter, at ambient
  • Poppy seeds
  • 1 aditional egg for brushing
Challah 3
  1. Lightly toast the saffron to boost its flavour. I put the threads on a little piece of aluminum foil and heat it with a lighter. Put half the water in a bowl, heat it in the microwave and leave the saffron to infuse. Let cool.
  2. In the meantime mix the liquid ingredients. Add the cooled saffron mixture to the rest of the liquid (substract the infusion water from the total), then add all the solids except the butter and the poppy seeds.
  3. Knead well until gluten begins to develop, around 10 minutes. Then add the softened butter in small pieces and continue kneading until the dough is smooth and supple, but not too soft. Make a ball, place it on an oiled bowl, cover and let it double in bulk, from 1 hour to 1.5 hours.
  4. When doubled, punch it to degas. Leave it in the same container to continue the fermentation till almost double again, at least another hour. Once fermented for the second time, tip the dough on the countertop, degas again and try to shape it into a flat rectangle. Cut the rectangle into two equal parts (you can weigh the portions, but I'm a primitive person without scale), then roll each portion into a cylinder and divide into three pieces, to make the strands of the plait. Each portion is shaped into a long thread, about two fingers thick. Leave the stretched strands to rest a couple of minutes on the counter for the dough to relax.
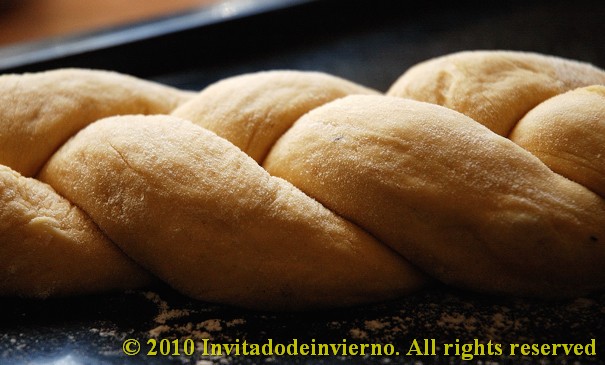
  5. The next step is to make the plait. What, you don't know how to make a plait? Shame on you. Here's an instructional video. The braid should be initiated at the center, progressing to one end. Then flip the bread and make the other end of the braid. The center should be thicker than the ends. Try not to overtight the crosses, better let the braid a little loose, because it needs space to rise. It's a good idea to make the braid on a well floured baking sheet so that you don't need to transfer it later.
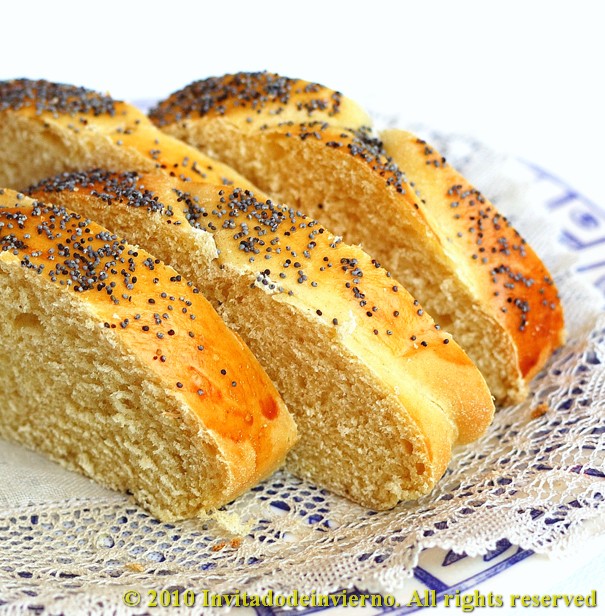
  6. Make a glaze with one egg yolk and a little water (the remaining egg white can be frozen). Brush both braids, trying not to let much egg flow between the strands, so that it doesn't act as glue. You can brush them a second time after a few minutes. After the final glaze, sprinkle poppy seeds on the loafs and allow them to rise a third time. They will take less than an hour, so turn on the oven to 190ºC immediately.
  7. When properly risen, put the loafs into the oven. In my oven they took something in between 20 and 25 minutes to bake. To test for doneness, press the sides near the base, and if the bread springs back, they are ready. Handle them with great care not to break them and leave to cool on rack.
Challah 4

I think less yeast can be used, 10g or less may be more than sufficient. The neatness in making the strands is important for the outcome. The first loaf (which is not in the photos, uh-huh) looked worse, because all the strands rose to almost fuse with each other. The second loaf was much better looking, although the center burst to some extent. I have to improve my braiding technique. I'm willing to bake all the challah loafs that may be required. And some more. Yum.

Challah 2

I guess you know it keeps very well inside a plastic bag, but if you don't find it as good as freshly made, you can always slice it and toast it. It is delicious spread with butter. And as French toast...

This challah goes to Susan's Yeastspotting!

Eager to know more?

Sourdough blinis

>> Wednesday, April 28, 2010

Blinis sourdough 1

Blinis ... how they're yummy. These pancakes typical of the Russian cuisine, similar to American pancakes or, in flatter versions, to crepes (just similar), served as accompaniment to savory dishes, have several features that distinguish them. The main one is that they rely on bakers' yeast and beaten egg whites to raise, and another characteristic is that they often include buckwheat flour in their composition, which gives them an intriguing herbaceous smell. Well, here I use blinis to use up a fraction of the massive amounts of sourdough that sourdough geeks need to throw away when they don't make bread every day (my case).


Sourdough is just a mixture of flour and water, so if we do have leftovers at some point, they can be added to any preparation that carries flour and water in its composition and that can't be disturbed by its special flavor. "Recycling" extra sourdough instead of throwing it away is a perfect excuse to make blinis, don't you agree? To raise the intellectual level of the blog, here's a quote on blinis from Tatiana Maslenikoff's book La cocina rusa:

As in most European civilizations, Russia gathered and assimilated the beliefs and pagan traditions with its Christian equivalents, which were imported from the Byzantine Empire in the 10th century.
After the long winter, when the first signs of thawing were felt, the northern tribes coming out of their lethargy prepared a feast in honor of the Blazing Sun. Pancakes as round and golden as suns, made with mixed flours, were cooked and offered to Sun God for him not to forget to warm Mother Earth. This would in turn make the next harvest sprout. These pancakes (blini) were then eaten with butter, dried fish and meat. According to historians and archaeologists, the tribes celebrated a sort of costume party where the burning of an effigy of the Prince of Winter took place.
In the Christianized Russia, this feast was moved to the beginning of Lent (...) Blinis are served with smoked herring or caviar, but never meat.

Blinis sourdough 3

The idea of using sourdough on blinis is not originally mine, but found in the book Breads from La Brea Bakery, by Nancy Silverton. I've adapted the recipe, because she adds baking soda and baking powder to avoid a long time rising and speed up the process. She also adds far too much sugar to my taste, that I consider unnecessary, apart from not being very faithful to traditional recipes. I usually have that problem with American recipes, they're too sweet for me. I've also halved the amounts, because the original recipe produces eight dozen small blinis ... yes, you read that right. I only made around 40 small blinis. Here's the recipe:

Sourdough blinis
  • 250ml milk
  • 3/4 tbsp fresh bakers' yeast
  • 185g sourdough (100% bakers' percentage, mine was spelt's, but any white bread flour will do)
  • 85g all-purpose flour
  • 1 tsp agave syrup or 1 1/2 tsp sugar
  • 70g buckwheat flour (60g if you use sugar instead of agave syrup)
  • 1/2 tsp salt
  • 2 medium eggs
You know that the amount of liquid depends on the absorption capacity of the flours, so maybe you'll need to adjust the final thickness. The batter must be almost as thick as pancake batter.
  1. Lightly warm up the milk and add the fresh yeast, crumbled. Blend until dissolved. Add the sourdough and mix well. Add all the flours and the agave syrup, cover and let it ferment until double in bulk and bubbly, depending on ambient temperature and activity of yeast, something between 1 hour and 1.5 hour.
  2. Break the eggs and separate the whites from the yolks. Add these to the batter along with the salt and let it ferment again, I think one hour is enough. Leave the egg whites in the fridge in the meantime.
  3. When the batter is risen again, beat the egg whites to stiff peaks and gently add them to the batter, so as not to deflate them.
  4. Heat a skillet or pancake pan and add half tablespoon of butter. The traditional method is to coat the skillet with pork fat, but I didn't have any. Ladle small portions of dough to make the blini size you choose. I made little ones, 2 or 3-bite sized, but they can be made much larger. So you decide. They cook quickly, you have to turn them over with a spatula within seconds and cook them on the other side. It is recommended to lay them on a kitchen towel as you go, covered to prevent them from cooling, and also put them just outside a hot oven to keep them warm.
Blinis sourdough 2

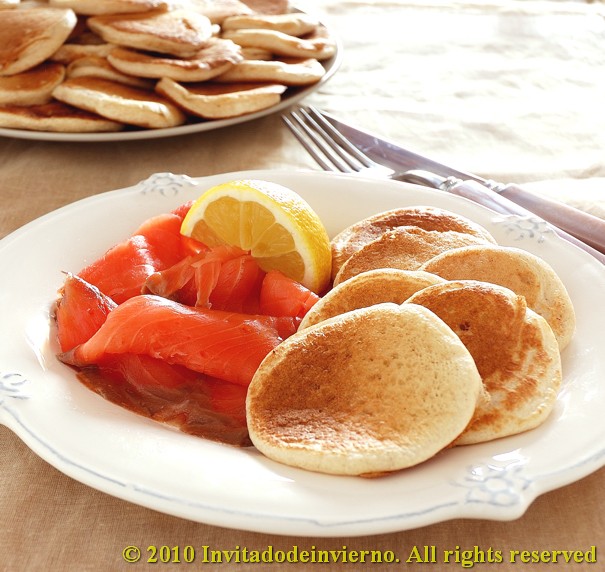
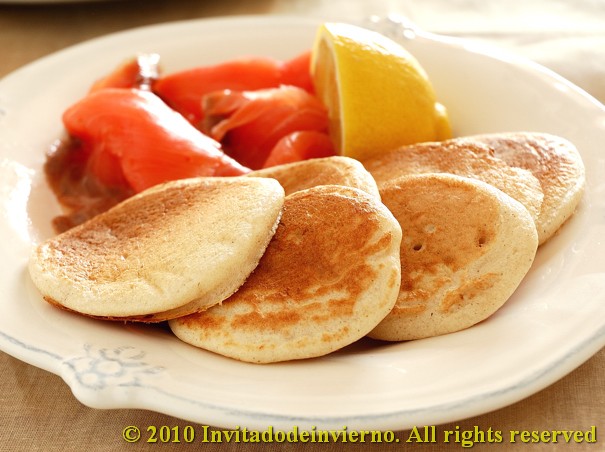
They're delicious when warm, very light and airy, thanks to the egg whites. They have a rich bread-like flavor, with the sour note from the sourdough, and a very tender consistency. A surprising and addictive combination with savory accompaniments. With a good smoked salmon they are simply superb. We did make a lot of tiny sandwiches of salmon, even without the typical addition of sour cream ... We apologize to any Russian in the room for our heresy. We only missed the vodka ... ¡na zdorovje!

Eager to know more?

San Francisco sourdough bread

>> Wednesday, April 7, 2010

San Francisco sourdough 1

Those of you out there who are among the followers of the Holy Sourdough know that the only rite of passage that allows you to qualify for a gold-plated bread-scoring tool is to make a San Francisco sourdough bread... I admit I had always wondered, somewhat skeptically, if San Francisco yeastie beasties would be much different from the ones in the Spanish plateau (the rain in Spain doesn't stay mainly in the plain...). But I've been lucky enough to get some of these bugs from my generous friend Bea... so that I could check myself. I haven't reached a definite verdict though.


Here's what baker Peter Reinhart says about the bugs and San Francisco sourdough:

(...) a wild strain of yeast called Saccharomyces exiguus is used to make sourdough bread, as opposed to S. cerevisiae used in regular breads. But the complex sour flavor is not created by the wild yeast. Other bacterian organisms, specifically lactobacillus and acetobacillus, create lactic and acetic acids as they feed off the enzime-released sugar in the dough, and these are responsible for the sour flavor. San Francisco sourdough bread, for example, has a particular type of local bacteria called Lactobacillus sanfrancisco (...) that gives this bread a different quality, more sour with a thicker crust, than any other wild-yeast bread made in other parts of the world.
If Reinhart says so... The peculiar flavor that this sourdough imparts comes from one of those bacterias, from the lactobacillus type. Well, I only know that I have baked two breads with this sourdough so far and either I've finally learnt to bake decent bread or this sourdough is really special. Both breads were wonderful, with a delicious flavor that caused them to disappear in no time. The recipe I used is nothing special:

San Francisco sourdough 2
  • 200g San Francisco sourdough, fed with spelt for several days (baker's percentage: 100%)
  • 300g water
  • 500g white bread flour (I had to add 50g more)
  • 2 tsp salt
  1. Mix all the ingredients and knead by hand or in a stand mixer, till the gluten is well developed. Make a ball and put it inside an oiled bowl, cover with a plastic shower cap and put in the fridge. Leave to proof overnight.
  2. Take the dough out of the fridge the next morning and leave it to temper on the counter and to further proof. It must double in bulk. It will take at least 2 hours.
  3. When doubled in bulk, tip the dough on a well floured counter and shape in whatever shape you like. Then put the formed loaf on a floured cloth, a bannetone or a large bowl, depending on the bread shape, and leave to rise again.
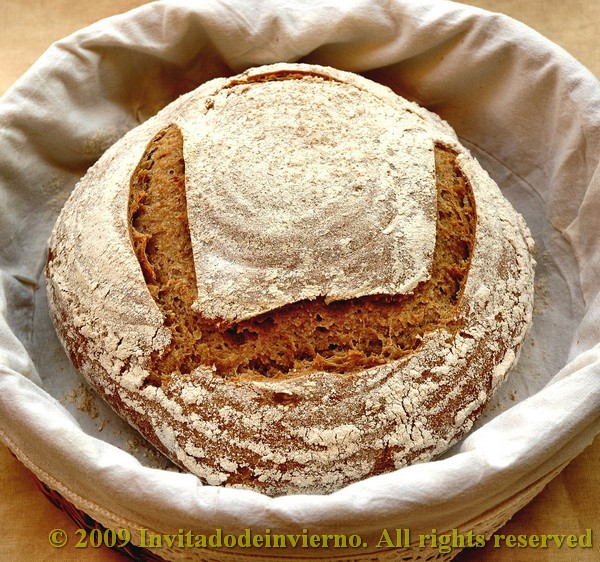
  4. I usually bake my loafs in a Dutch oven. Preheat the oven to 250ºC (that's the maximum reached by my oven) with the Dutch oven inside. When the loaf is doubled, take the Dutch oven out on the counter and slide the bread into it. Score it, cover with the lid and put it back into the oven. This bread hardly took 30 minutes to bake. Check the inner temperature, it should be at least 92ºC (large tears rolled down my cheeks when I opened the Dutch oven to find such a stunning bread... I had never baked such a beautiful bread before... so well risen, with such an appealing color...).
  5. Then let the loaf cool on a wire rack and... devour it. I can't express how delicious it was with butter...
And being that I am a studious little girl, I'm more than willing to try this sourdough again just to check if its flavor and aroma are really special or not... as many times as needed. Sorry, I must be going, I've got some baking to do. Bye.

San Francisco sourdough 3

I almost forgot! I'm sending this bread to Susan's Yeastspotting... don't forget to check it tomorrow for a weekly showcase of breads!

Eager to know more?

Daring Cooks' challenge February: Mezze

>> Sunday, February 14, 2010

Pita bread 1

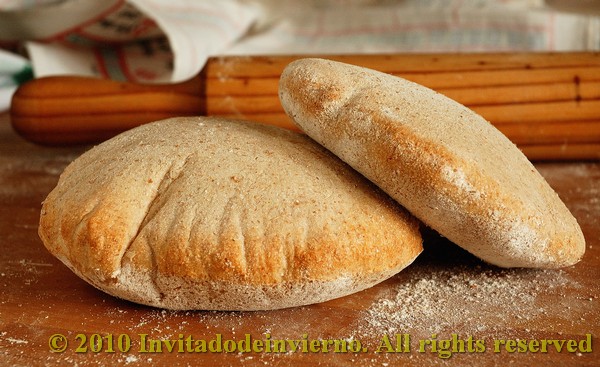
I have really enjoyed this challenge. I love Middle Eastern food and almost any Mediterranean food in general, therefore I was really excited about the mezze. Michele, this month's host, says: "if you’re not familiar with mezze, it’s more of a style of eating than a specific recipe or recipes. Mezze is a bunch of small dishes served all at once—sort of like the Middle Eastern version of Spanish Tapas. It can be served as appetizers before a meal, or as the meal itself". So this was really a multiple challenge, because it involved various dishes. The essential part of the challenge involved preparing pita bread and hummus, which I had never prepared before. That's good for me, I need to be pushed every now and then. D. knows a lot about it...


The 2010 February Daring Cooks challenge was hosted by Michele of Veggie Num Nums. Michele chose to challenge everyone to make mezze based on various recipes from Claudia Roden, Jeffrey Alford and Naomi Dugid.

For my mezze, besides the compulsory pita bread and hummus, I prepared roasted red peppers and falafel, both having starred at my table a number of times previously. I'm really hooked on falafel. And I'm not usually a chickpea lover (I'm in love with chickpea flour though), but the flavoring of falafel really gives me a kick. And they are easy to make, you can prepare a lot and freeze part of them for later use, which is very practical when you have kids... or even unexpected visitors. I was planning to prepare dolmades too, but I couldn't find the time to scout for grapevine leaves... they're nowhere to be found in my neighborhood. I'm giving you 3 recipes here, for pita bread, hummus and falafel.

Pita bread, adapted from Flatbreads & Flavors by Jeffrey Alford and Naomi Duguid
Prep time: 20 minutes to make, 90 minutes to rise and about 45 minutes to cook

  • 2 teaspoons regular dry yeast (.43 ounces/12.1 grams) (I used 25g fresh baker's yeast)
  • 2.5 cups lukewarm water (21 ounces/591 grams)
  • 5-6 cups all-purpose flour (17.5 -21 ounces/497-596 grams) (I used spelt here, half white and half whole, and I had to use 7 cups in total)
  • 1 tablespoon table salt (.50 ounces/15 grams)
  • 2 tablespoons olive oil (.95 ounces/29 ml)
Pita bread 2

  1. In a large bread bowl, pour the warm water. Crumble the fresh yeast on 3 cups of flour. Stir in the flour, a cup at a time, and homogenize. Let this sponge rest as long as needed, until double in bulk and bubbly (mine took less than 1 hour, but I think the amount of yeast was more on the excess side). The original directions call for a minimum of 10 minutes, I think that's too short.
  2. Sprinkle the salt over the sponge and stir in the olive oil. Mix well. Add more flour, a cup at a time, until the dough is too stiff to stir. Turn it out onto a lightly floured surface and knead for 8 to 10 minutes, until smooth and elastic. Rinse out the bowl, dry, and lightly oil. Return the dough to the bowl and cover with plastic wrap. Let rise until at least doubled in size, approximately 1 1/2 hours.
  3. Place a pizza stone, or two small baking sheets, on the bottom rack of your oven, leaving a 1-inch gap all around between the stone or sheets and the oven walls to allow heat to circulate. Preheat the oven to 450F (230C) (I use old floor tiles as a pizza stone...).
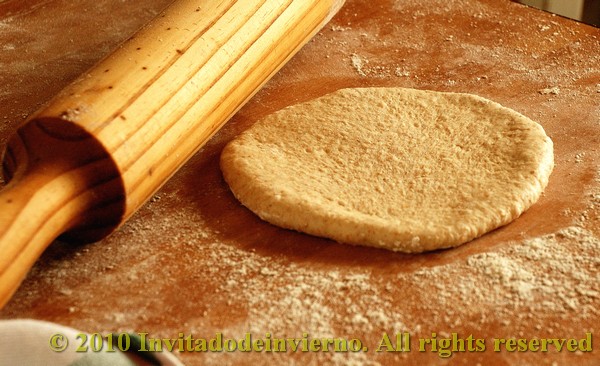
  4. Gently punch down the dough. Divide the dough in half, and then set half aside, covered, while you work with the rest. Divide the other half into 8 equal pieces and flatten each piece with lightly floured hands. Roll out each piece to a circle 8 to 9 inches in diameter and less than 1/4 inch thick. Keep the rolled-out breads covered until ready to bake, but do not stack.
  5. Place 2 breads, or more if your oven is large enough, on the stone or baking sheets, and bake for 2 to 3 minutes, or until each bread has gone into a full balloon (I needed around 12 minutes for the breads to brown). If for some reason your bread doesn't puff up, don't worry it should still taste delicious. Wrap the baked breads together in a large kitchen towel to keep them warm and soft while you bake the remaining rolled-out breads. Then repeat with the rest of the dough. Wow, my breads puffed up so beautifully!
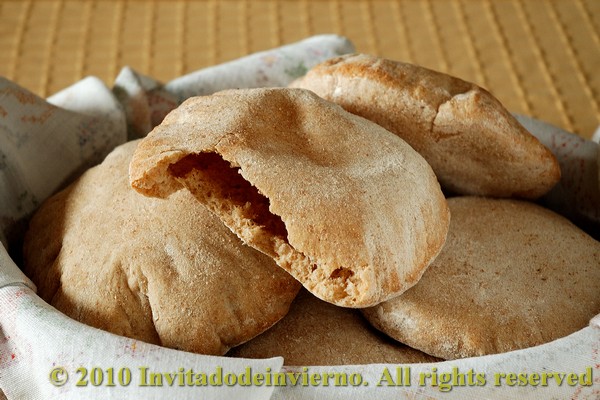
Pita bread 3

Hummus, recipe adapted from The New Book of Middle Eastern Food by Claudia Roden
Prep Time: Hummus can be made in about 15 minutes once the beans are cooked. You can use dried chickpeas or canned boiled chickpeas, but I prefer to soak them and cook them myself.
  • 1.5 cups dried chickpeas, soaked in cold water overnight (10 ounces/301 grams)
  • 2-2.5 lemons, juiced (3 ounces/89ml)
  • 2-3 garlic cloves, peeled and crushed
  • a big pinch of salt
  • 4 tablespoons tahini (sesame paste) (1.5 ounces/45 grams)
  • Additional flavorings (optional) (I simply garnished it with pimentón oil, 3 or 4 tablespoons of olive oil with half a teaspoon of sweet Spanish pimentón)
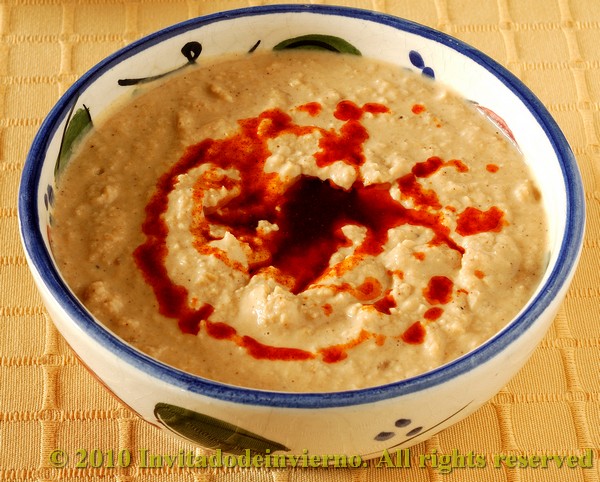
Hummus 2

Directions:
  1. Drain and boil the soaked chickpeas in fresh water for about 1 ½ hours, or until tender. Drain, but reserve the cooking liquid.
  2. Puree the beans in a food processor (or you can use a potato masher) adding the cooking water as needed until you have a smooth paste. (I preferred to add the lemon juice here and use the water later to adjust the thickness. If you use the cooking water here to adjust the thickness so that you can process it, maybe the mixture will be too liquid after adding the lemon juice... it's just my idea)
  3. Add the rest of the ingredients and mix well. Adjust the seasonings to taste.
  4. Serve on beautiful pottery and drizzle the surface with the flavored oil.
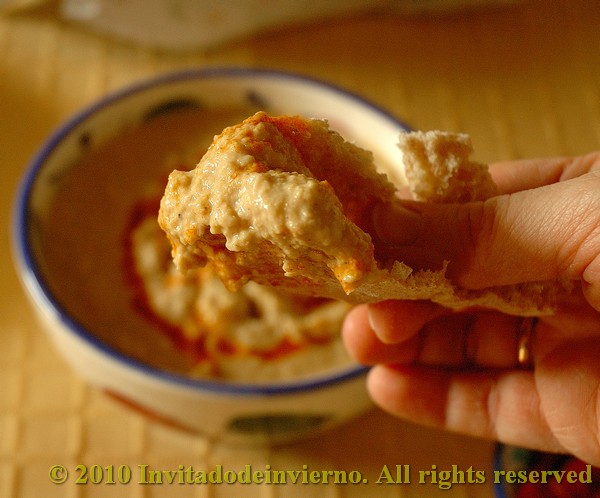
Hummus 1


Falafel

I didn't use the recipe Michele provided, but the one I usually prepare, from the book Tamasin's Kitchen Bible, by Tamasin Day-Lewis (ambitious name for a book, don't you agree? But I quite like it. And yes, she's Daniel Day-Lewis's sister)
  • 340g chickpeas, soaked overnight
  • 2 medium onions
  • 4 cloves garlic, crushed
  • 2 green chillies, seeded and finely chopped
  • 1 handful flat parsley
  • 1 handful fresh coriander
  • 2 tsp cumin seeds
  • 2 tsp coriander seeds
  • Salt
  • 600ml olive oil
The challenge's recipe included some all-purpose flour too. It's true that the crushed chickpeas mixture can ooze some liquid, but I prefer to drain them a little bit after crushing. Or dry them thoroughly on paper before processing them. And if you don't want to drain the crushed chickpeas, you can also add some chickpea flour, then you keep the falafel gluten-free. In fact I added some this time, that's why my little balls have such a light color, they are rolled in chickpea flour.
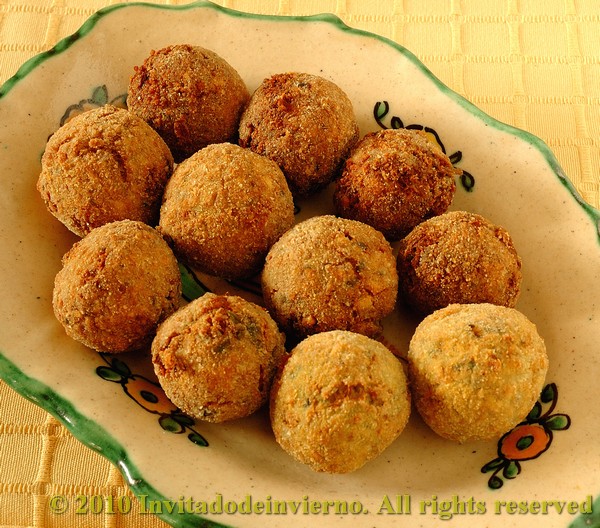
Falafel 2

The preparation is really easy: first grind the cumin and the coriander seeds in a mortar. No need to grind them to a powder. Then put all the ingredients together in a food processor or mixer and grind them to a grainy pulp. Don't expect it to be smooth. Take walnut-sized pieces with a spoon and form them into balls. I rolled the balls in chickpea flour to absorb some of the moistness.

If you're not going to eat all the falafel at once, you can freeze them at this point. I use ice cubes trays for this.
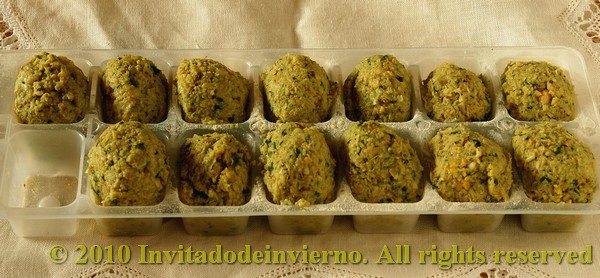
Falafel 1

Heat the oil and fry the balls in batches; brown them thoroughly and drain on kitchen paper. They're delicious dipped in tahini sauce, but that was another failure, because my last tahini paste had gone into my hummus... am I badly organized??
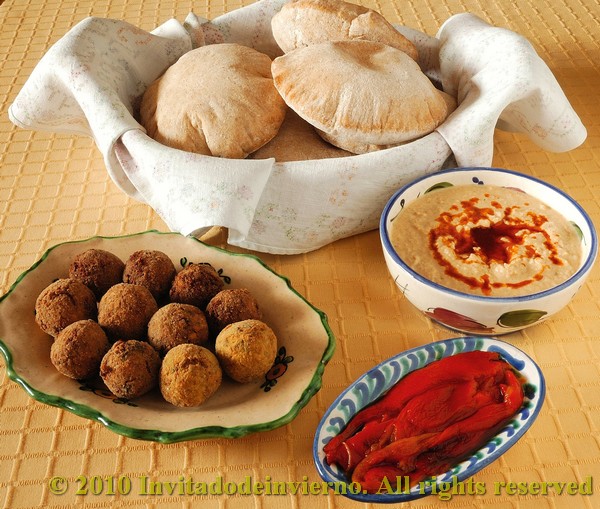
Mezze 1

Eager to know more?

Spelt carquinyolis or Catalan cantuccini

>> Tuesday, January 5, 2010


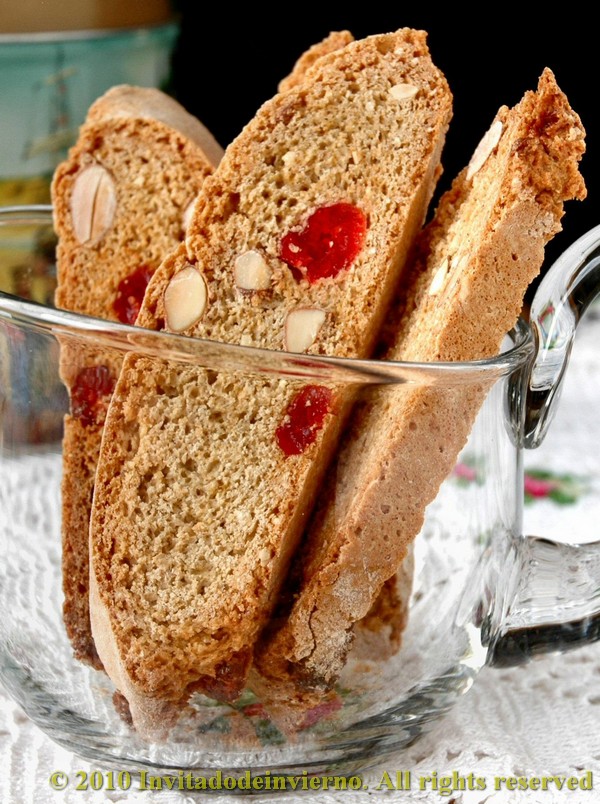
No, no, no... these are not cantuccini... these are carquinyolis... totally different... (ahem). I'd been wanting to make these typical Catalan cookies for a long time (do I start my posts like this too often?...). As you probably know, this type of twice baked cookies, first as a loaf and then sliced, are known as cantuccini in Italy and they also exist in Jewish ashkenazi cookery, with the name of mandelbrot, almond bread. They are typical in Catalonia, on the Northeast corner of Spain. When I was a child we used to spend part of our summer holiday camping in Catalonia and my parents used to buy carquinyolis. I didn't eat them though... didn't know what I was missing.


I've found the recipe at the lovely Catalan blog La cuina vermella. I've increased the amounts by 50 %, I've used white spelt instead of regular flour, and I've "adulterated" the cookies by adding some dried cherries... just to add a colour touch (heresy! I beg the Catalans pardon... please bear with me).


Spelt carquinyolis (yields approx. 35 carquinyolis)

  • 600g spelt flour, white (all-purpose flour can be substituted, of course)
  • 350g sugar
  • 90g almond meal or ground almonds (what's the right name?)
  • 100g unskinned, unroasted almonds
  • 90g dried cherries (or any other colorful dried fruit)
  • 1 tbsp leaven, not completely heaped
  • 3/4 tbsp cinammon
  • Lemon zest
  • 4-5 medium eggs (it depends on the size of the eggs, the dough mustn't be dry, but sticky) and another egg for brushing the loafs before baking
Put the almonds in a bowl with water to soak. Weigh the dry ingredients and make a well in the middle. Add the eggs in the well and mix slowly and carefully with the dry ingredients. Knead the resulting dough until all the liquid has been absorbed. If the result is too crumbly, just add another egg. Finally add the almonds, rinsed and dried with a paper towel, and the cherries. Knead to incorporate.


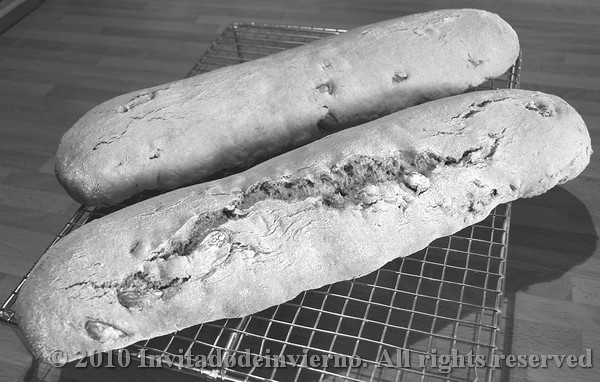
In the meantime heat the oven to 180 ºC. Divide the dough in two and, on a well-floured counter, form two loafs that can fit in one baking sheet. Transfer the loafs to the sheet, lined with parchment paper. Brush the loafs with the beaten egg (I forgot this step!). Put the loafs in the oven and bake half an hour. The loafs have to be somewhat thin, as they rise quite a lot in the oven. After 30 minutes, try for doneness with a toothpick. Take them out to a cooling rack and leave to rest for 5 minutes. Then slice them with a good serrated knife into 1 cm-thick slices, more or less. I'm not capable of cutting thinner slices. Then put the slices back on the baking sheet and back into the oven for 10 minutes to brown. Turn them once when half baked, to brown on both sides. When done take them out to cool on a rack.


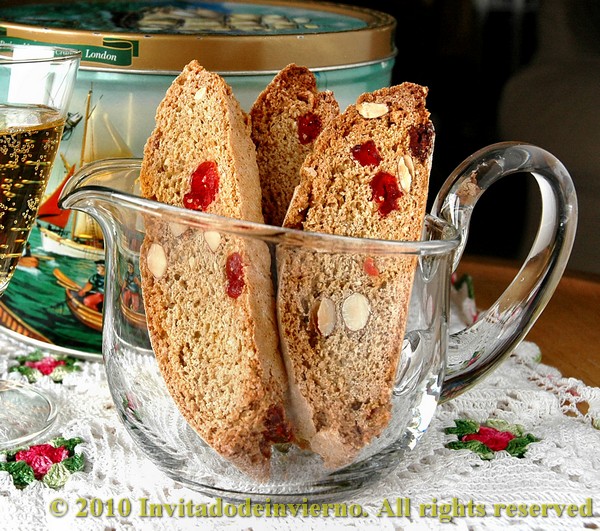
For those who've never had this type of cookie before, they are hard and very crunchy. Catalans dunk them in mistela... mmm. I vouch that at home we have dunked them in cava last Christmas. A lot of cava. Really a lot. Loads of cava. I don't know if this is accepted as a traditional way to have carquinyolis, but what the hell, they're delicious that way...

Eager to know more?

Spelt pain a l'ancienne

>> Wednesday, November 25, 2009

Spelt pain a l'ancienne
This is Peter Reinhart's recipe for pain a l'ancienne, from his book The Bread Baker's Apprentice. It's a very easy bread because it hardly needs any kneading and it only ferments once. The fermentation is retarded by mixing all the dry ingredients with ice-cold water. This time I used spelt for the bread, as I always do lately. The dough is tremendously soft, like that of ciabatta, so that's what I made: small beautiful ciabattas. Take into account that you have to start this the day before, as the dough needs to rest overnight in the fridge.


I'm especially fond of spelt. This is what La Espelta y la Sal, Spanish spelt producers located in Sigüenza say about it:

Spelt is a primitive wheat variety, whose properties are well known and appreciated since the days of old. In Europe, it is mainly cultivated in Germany, France, Switzerland, Austria and also in some areas of Spain, (...) Spelt is rich in magnesium, phosphorus, iron and vitamins A, B and C. By consuming it on a daily basis the levels of cholesterol and triglycerides can be lowered, and it also controls metabolism, especially the sugar metabolism. It carries a higher amount of essential aminoacids than normal soft wheat and it also has a higher vitamin and mineral content. It is worth noting the presence of silicic acid, which enhances brain activity and assists in skin and hair care. Spelt has also a high gluten content, making it therefore very convenient for baking. In Central Europe it is considered to be a gourmet's grain; in France it is known as the caviar among cereals. Its flavor vaguely reminds of walnuts.

Well, this is the producer's word and I guess they have to be positive about spelt. But anyway, I've already read about it in several places where it is said that spelt is indeed more nutritious than white wheat, and that it's been abandoned because of the yield, which is higher for white wheat, and disregarding quality. In any case, the essential thing for me is that the flour is organic and that it retains the germ, that part of the grain that keeps most of the nutrients and beneficial substances. "Industrial" flour lacks the germ, because the milling process eliminates it; it's like if you ate eggs without the yolk. And this lack of nutrients is compensated by adding vitamins, among other additives. If you want to know more about this, check In defense of food, by Michael Pollan.

Spelt pain a l'ancienne (adapted from P. Reinhart)
  • 600g spelt flour
  • 2 tsp salt
  • 450g ice-cold water (put some ice cubes in a bowl and weigh them, then add water up to 450g)
  • 5g dry baker's yeast or 15g fresh yeast

Leave the ice-cubes to melt. Weigh the flour, put it in a large bowl, crumb the yeast on top of the flour and mix. Add the salt and then the water. Mix thoroughly and knead 5 minutes by machine or 8 by hand. There's no need for the gluten to develop. Then oil a large bowl, put the dough ball in, cover with plastic and leave in the fridge overnight.

Spelt pain a l'ancienne
The next day take the dough out of the fridge. It will be expanded, but not doubled. Leave to temper at room temperature and let it double, as long as needed. When the dough has doubled in bulk, tip it on a very well floured counter as it is a very soft dough. Turn on the oven in the meantime, up to 290 ºC according to Reinhart, but my oven is not that good... Stretch the dough forming a rectangle and taking care not to degas it too much. Prepare 2 sheets of parchment paper on 2 baking trays. Thoroughly sprinkle them with semolina.

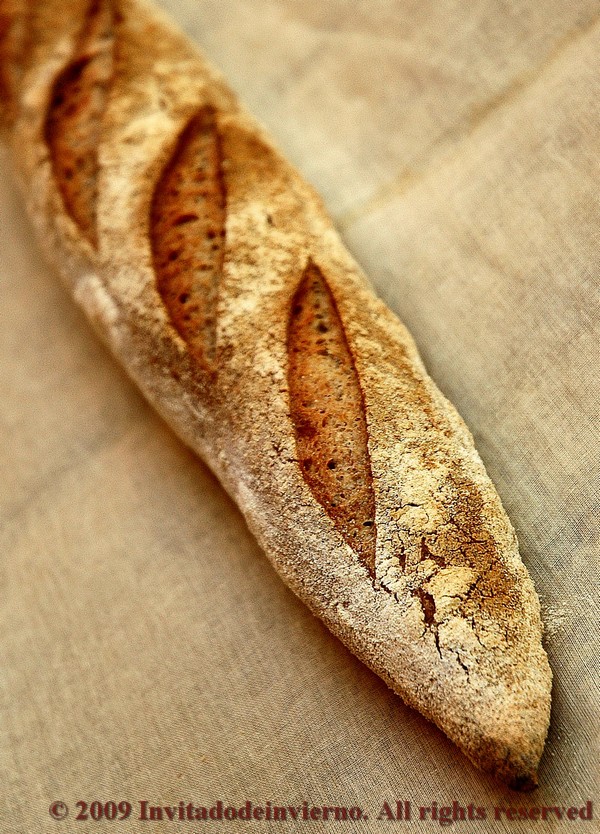
Then cut strips of the dough, around 10-8 centimeters wide, depending on the kind of bread you want to make. You can leave them as thin strips for baguettes or fold them in 3 as ciabattas, like I did. Transfer the strips to the parchment paper. Sprinkle the surface of the breads with flour for that super-rustic-wrinkled-ciabatta look. When the oven is at full heat, transfer the paper with the breads on onto the baking stone if you have one. If you don't, you can bake the bread straight on the baking sheets, no problem. Spray water on the oven walls and close the oven door immediately. Repeat this 3 times at 30 seconds intervals. Then lower the temperature to 250 ºC... I wish I could. My oven temperature was not that high. My oven had one of those days... full of personality. Bake for half an hour or until the bread has an internal temperature of 95 ºC (if you have a roast-beef thermometer).

Spelt pain a l'ancienne
The bread turned out delicious. Spelt has less gluten than common wheat and the crumb doesn't show the same picturesque holes. But I like spelt a lot. I was born that way. I never get a super crispy crust in my oven, unless I make sourdough bread inside my Dutch oven. I guess too low a temperature is the reason.

Spelt pain a l'ancienne
I encourage you to try this bread. It requires hardly any serious effort and the result is excellent. The cold water and the fridge do most of the job. Perfect for beginner bakers.

I'm sending this bread to Susan for YeastSpotting.

Eager to know more?

Barley, rye and spelt sourdough bread

>> Wednesday, July 22, 2009


Being that I liked so much the taste of barley in this bread, I wanted to try barley in a softer bread. Can you guess where I got this recipe from? Mmmm, (clock ticking...) you're right, from Dan Lepard's book again! That's what I call tiresome. (I think I've gone a bit too far with the picture size, have I not? I go blinder everyday.)


And without further delay, here's the recipe, adapted for spelt sourdough. The original recipe calls for white wheat sourdough:

Barley, rye and spelt sourdough bread

  • 250 g spelt sourdough (100% hydration)
  • 300 g water
  • 175 g spelt flour (I used semi-whole)
  • 225 g rye flour (I used white)
  • 100 g barley flour (I used whole)
  • 1 1/2 tsp good sea salt
You know you can find everything you wanted to know about sourdough but never dared to ask in The Fresh Loaf.

Well then... mix all the ingredients except the salt. I didn't allow for the 20 minutes autolysis because rumour has it that the benefits are only really noticeable in white breads (my source for this statement is the book by Nancy Silverton, Breads from the La Brea Bakery. She's very clever, so I believe her). As this is rather a sticky dough because of so much whole and rye flour, I used my mixer for kneading, to make things easier. I added the salt halfway and I kneaded for around 5 minutes. And then all the dough went to a well oiled bowl, I covered it with a plastic shower cap and left it to ferment.


I then went out for dinner (I know this is not related to the recipe, it's just for you to see that I have some social life, not only blogging life) around half past eight and when I came back home around twelve the dough had more than doubled and looked beauuutiful... so plump and round, like a little baby... sorry, I get carried away. I decided to form a small boule and a ficelle for a change. Then I put both in the fridge inside a plastic bag, the boule in my one and only banneton (for the time being).

The next day I took them out of the fridge around ten in the morning, while I started the oven, because it takes nearly an hour to get to 250 ºC. Around eleven I put the ficelle into the oven, which baked nicely on the garden tiles for 20 minutes, and then I baked the boule inside my red dutch oven. Half an hour was enough. I always follow Peter Reinhart's advice and I control that the final inner temperature of the loaf is 92-95 ºC with roast-beef thermometer (I looove kitchen gadgets).


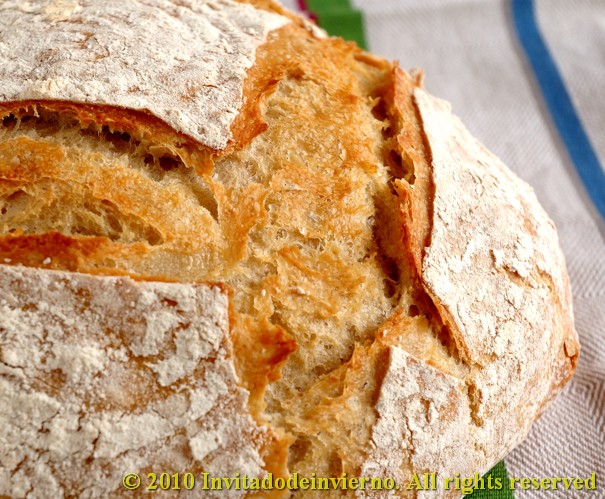
Result: ex-cel-lent, the ficelle was so cute and the boule... oooohhh, it's the first time that I get a a boule that looks like the ones in the books, with the nice banneton marks and all. Besides, I love the baking in the dutch oven, it's more thrilling that the bread is concealed and then when the time comes to open the treasure chest... I love it. The scoring was not so good, because I did it when the boule was already in the pot (mistake) and manouvering around it was more difficult. The crumb was dense, but soft and moist. Perfect for nordic accompaniments like smoked salmon, caviar with hard boiled egg and that type of thing. I guess I'm going to have it for breakfast the whole week.


Eager to know more?

A voyage through time and organic cereals

>> Monday, July 13, 2009

Last weekend we have made a voyage through time, to the 14th century, where we have discovered beautiful romanic churches...


we've seen the work of artisans and we've witnessed how a Queen was sent to exile...


we've tasted Medieval delicatessen and admired the birds of prey of the falconers...


But for me the best discovery of all has been to find an enterprising producer of spelt and other organic products in the vicinity of Sigüenza, named deSpelta. Of course, I could not help taking hold of two bags of another type of wheat called "trigo negrillo", black wheat... couldn't resist when I learnt that it is a native crop of the area, not very productive, but with excellent nutritional qualities and perfectly adapted to the harsh climate of the Alcarria region. It is grown by these producers with great care to recover a type of production that it's not "fashionable" any more. As I learnt from the vendor, it's a soft kind of wheat, not fit for breadmaking unless mixed with some other higher-gluten flour. I expect to use this very special flour to prepare some homemade pasta and Spanish crepes very soon... so stay tuned!


Eager to know more?

Dan Lepard's simple milk loaf

>> Wednesday, June 3, 2009


Another Dan Lepard recipe, this time of a delicious milk loaf for sandwiches, with an exquisite buttery aroma and a wonderful flavor. I bake it for my children, to prevent them from eating the nasty sandwich comercial loaves. Have you ever read the ingredients list? Do it, you're old enough. Why on earth does it need so many strange ingredients? When a loaf can last several weeks in the fridge like any uncorrupted saint´s relic, there can be no good in it... This bread is fairly easy to make and keeps very well for several days, just long enough for the children to eat it all.


Dan Lepard's simple milk loaf (from the book "The handmade loaf")

  • 250 g strong flour
  • 250 g all-purpose flour (you bet I used spelt)
  • 350 g whole milk at ambient temperature
  • 20 g golden or maple syrup (I used maple)
  • 1 1/4 teaspoons good sea salt
  • 1 1/2 teaspoons fresh yeast (I used dried yeast, one package)
Mix everything in a bowl, except the salt. Knead it lightly on a floured counter and leave to rest for 10 minutes. Then add the salt and start kneading. In case you don't know, this Lepard man does a series of short light kneads, 10 to 15 seconds, three times every 10 minutes ending with a half an hour rest, until the dough is smooth, elastic and soft like a baby's cheek. In this case I used the traditional kneading method, 8-10 minutes, watch this video. Then I made a ball, I put it in an oiled bowl, covered it with a plastic shower cap and left it to proof. As I used the super quick granulated yeast, it took less than an hour to rise.

Once the first proofing is done, deflate the dough beating it on the counter or flattening it with you hands (be rough on it!) and divide it into two balls. Butter and flour a loaf pan and put both balls inside. Leave them to proof for the second time till almost doubled. Brush the top with some milk and to the oven, preheated at 210 ºC. Bake for 15 minutes at that temperature and then lower the temperature to 180 ºC and bake the bread for another 20-25 minutes. I think I overbaked it a little, that's why the crust looks to brown. The smell in the whole house made me dizzy.

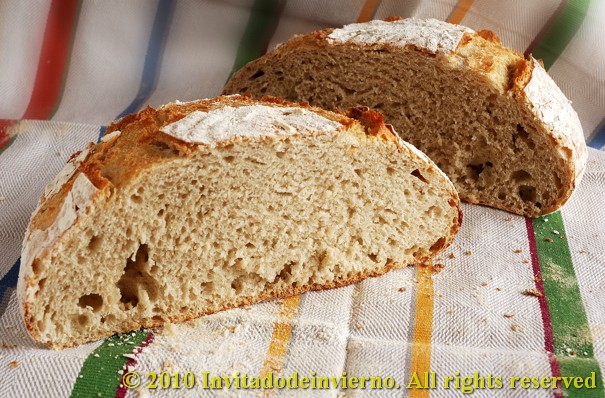
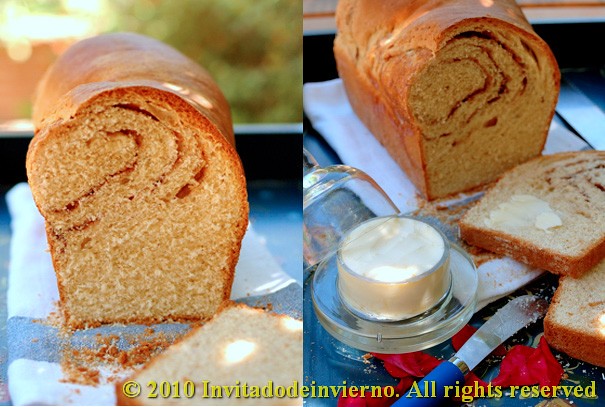
In the picture of the cut the bread was still a bit warm (I'm impatient!), that's why the crumb looks a bit "dragged" by the knife, but the cut looked better when completely cold. The crumb is dense for a sandwich loaf because of the spelt, which has less gluten than normal bread flour. That's why you can cut thinner slices, they don't need to be thick because this bread is a lot more flavorful than normal sandwich bread... well, if you call that normal. This beautiful bread goes to this week Yeastpottings!

By the way... don't you think my butter dish is really cute?


Eager to know more?
Rye flatbreads with sense and sensibility

>> Monday, May 11, 2009


I've baked these flatbreads more than once. They're super-easy because no shaping is needed, they're just cut with a round mold or a glass, like cookies. The recipe comes from the wonderful book by Dan Lepard "The handmade loaf", not translated into Spanish yet, grrrr. By the way, if there's any publisher in the room, I'm the perfect guy for the translation...

These are flatbreads with rye and honey, with a nice brown inside and a sweet honey touch, delicious with butter for breakfast... a lot of butter... more, spread more butter. Mister Lepard makes them with white strong flour, but as I don't want to eat too much white flour, I use spelt instead.

Flatbread with rye and honey

  • 250 g white spelt flour (300 g strong white flour in the original)
  • 150 g semi-whole rye flour (100 g in the original, but I wanted to put more rye to pretend I'm healthy)
  • 300 g water (Mr. Lepard advises to have it at 20 ºC, as usual I didn't pay any attention and I added the water straight from the tap)
  • 1 teaspoon salt
  • 1 tablespoon honey (Lepard says 3 teaspoons, but that is too much effort with honey)
  • 1 sachet bread yeast (I think I overdid it here, I'm not sure this is equivalent to 1 1/2 teaspoons fresh yeast as in the original recipe, but it was already late, we're going to have dinner and I was a bit in a hurry)
As usual, I mixed everything except the salt in my super-mixer and I left the dough to autolyze. I don't exactly find practical Lepard's short kneading method, I usually prefer to do all the kneading and then forget about the dough for a long while. Therefore I started to prepare the dinner and when I remembered about the dough, well, it was well autolyzed indeed. Then I added the salt and mixed it for a short while. The gluten had developed quite a lot while the dough was forgotten... good for autolysis! I've got to repeat this effect next time, I must remember to.

Then I put the dough in an oiled bowl and covered it with my famous and recycled plastic shower cap. I believe it stood for a couple of hours, till it doubled in bulk. Then I tipped the dough onto the floured counter and flattened it with a rolling pin, up to around 8 mm as per the recipe. Then you've got to leave it to relax for a short while. I cut it in circles with a glass, around 9 cm diameter. I put them on a well floured baking tray. Flour everything thoroughly, because the dough is very sticky. The scraps can be rerolled to cut more breads, until all the dough is finished. Once all the breads were formed, I put the trays inside a plastic bag for to keep the moisture and left them to double again. And this is why the breads caught some sense and sensibility... I left them in the kitchen while I watched the movie's DVD...

After one hour more or less, I took the trays out of the bags, because the breads had more than doubled, they were bursting at the seams. I made the V-sign with my fingers and... sticked them on the breads without mercy to make the nice indentations that show on the pictures. And the 25 minutes to the oven, preheated to 200 ºC. While they were baking I went back to the living room to watch Emma Thompson and Alan Rickman suffer... mmmmmm.


And, after 25 minutes they had acquired a nice dark golden colour. So I took them out to cool on a rack. Like all rye breads, they go very well with savory food, like smoked salmon, ham, etc. They keep very well for several days, I put them in a plastic bag and being so thin, if you toast them for a short while, they come out as freshly baked. Enjoy!

(Also, this is my first time on Yeastspotting, the breadmaking roundup by Susan!)

Eager to know more?

"Shapeless" sourdough bread with wine, rye and spelt

>> Friday, April 24, 2009

Look at the silly title. Maybe to call the post "all-round kitchen leftovers bread" or even "crisis bread", because of using up leftovers, would have been more accurate.

The shapeless thing is because it hardly has any shape, you can see it in the picture. I didn't feel like deflating the fermented dough very much, so I just folded it like a ciabatta, but without much interest. I had a lazy day. Another one. The leftover thing comes from using a mix of a white spelt leftover from a 5 kg sack, mixed with semi-whole rye and spelt, Dutch sourdough and last but not least, some Viña Mayor red wine which had been standing in my fridge for ages. It's not that I don't like wine, but it lately doesn't seem to agree with me and my partner-in-crime prefers beer... damn him. Mr. Lepard, the king of leftovers usage, would be very proud of me.

And... I told myself I could bake half the bread in the artifact that's shown in the picture, just to pass the time. The German name is "Römertopf", the same as the trademark. The meaning is "roman pot", quite nice. As far as I've read it's quite common in Germany. My mother got it as a gift thousands of years ago. She didn't find it interesting to use, so she passed it to me. She knows I love kitchen gear. So far I have used it mostly for roasting chickens. The result is delicious, they get a perfect browned and crispy skin, in spite of the lid, and you get plenty of sauce.

As in any clay pot the heat is well distributed and being that you must soak it in water for 10 minutes before putting it in the oven, all these moisture is supposed to be released inside the pot to keep the food tender and juicy.

Therefore, on a beautiful and warm April night I got down to work... ahem. I'm giving the formula but I don't know what for, it makes no sense:

Leftovers sourdough bread with wine

  • 390 g semi-whole rye and spelt sourdough, 50% hydration, just doubled in volume, perfectly bubbly
  • 130 g red wine (I was afraid to put too much and end up with a black-and-blue bread)
  • 80 g water
  • 120 g white spelt flour (the leftover flour in the sack)
  • 290 g semi-whole spelt flour
  • 2 teaspoons Himalaya salt
  • 2 tablespoons gluten (Mrs. Guru advice, though I didn't dare to add as much as she does
I put everything into my stand mixer (my precioussssss), except the salt, and I mixed it just to blend. I left it to stand for some 10 minutes and then I added the salt. After some brief shakes I left it in an oiled bowl, well covered with a night cap, to proof overnight in the fridge. By the way, after the advice of Nils the Great, I added the wine cold from the fridge.

The next day I took it out of the fridge and left it to temper at around 9 AM. Then I left it ferment for 5 hours, till 2 PM, with an intermediate folding exactly like a love letter. I never get these kind of dough, with spelt and rye, to grow much, so I never quite know when to stop the fermentation. I divided the dough in two parts and folded them like ciabattas, more or less, trying to deflate them as little as possible, and left them standing for another hour. Then to the oven for 45 minutes, previously heated up to 250 ºC. I put then one in the Römertopf (which had been lying in the oven after soaking) and the other one on the tiles in my oven. The latter got 4 water sprays along the first 10 minutes baking. The result is plain to be seen: The loaf in the pot looks wonderful, it's ripped in the middle without any score and has a white floured surface. And I can tell you I got my glasses all misted up when I opened the pot because of the amount of steam inside. The load outside the pot was a lot uglier, too toasted on some sides, and the flour on the surface is not apparent because of the water spraying, I guess. Also the loaf opened down under, uneducated behaviour, what an ill-mannered loaf.

And... the bread is delicious, with a more airy crumb than ever before, I guess because of the added gluten, I don't know. The crust is perfect for me, neither too soft nor too hard, crispy, crispy... mmmm so thrilling. I've already had two slices and I only regret that I've run out of butter, damn damn damn. It has the sour flavour of sourdough, but I hardly notice the taste of wine, it's not even evident in the color. My fear to add too much wine was pointless. Next time I will soak the bread in wine... hics.

Eager to know more?

Followers

About This Blog

Lorem Ipsum

  © Blogger templates Palm by Ourblogtemplates.com 2008

Back to TOP