Related Posts Widget for Blogs by LinkWithin
Showing posts with label Daring Cooks. Show all posts

Daring Cooks' challenge June: Pâtés and bread

>> Monday, June 14, 2010

Paté spices 1

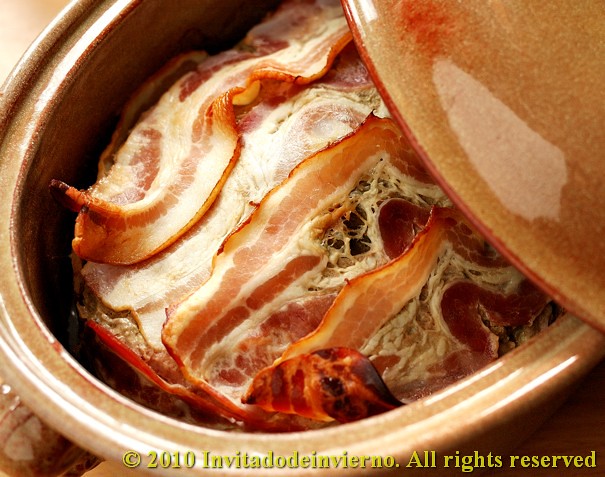
This month the Daring Cooks' challenge has turned out pro-French and I found it's been an excellent proposal, although in reality there were two challenges in one. It so happens that I had recently attempted a campagne-style pâté with a not-so-satisfactory result, so it was a good opportunity to undertake a tried and tested recipe and use a surplus of pork liver that I keep in the freezer since January... And the experience has been a success... I'm still licking my lips.


Being that I always tend to be unruly and disobedient I didn't exactly make baguettes, and I added raisins, which I think divinely combine with pâtés and foie. The possibilities of pâté offered were varied, including vegetarian options. I chose the most genuine, the pig's liver pâté. I also introduced some changes in the paté quantities, but the ingredients are the same.

Our hostesses this month, Evelyne of Cheap Ethnic Eatz, and Valerie of a The Chocolate Bunny, chose delicious pate with freshly baked bread as their June Daring Cook’s challenge! They’ve provided us with 4 different pate recipes to choose from and are allowing us to go wild with our homemade bread choice.

Paté spices 4

Three Spice Liver Pâté
For a 25 x 12,5 cm loaf or pan

  • 350g pork liver (454g in the original recipe, but I was afraid that the liver taste would be overwhelming)
  • 350g minced pork meat (227g in the original recipe)
  • 250g Ibérico pork lard (227g in the original recipe)
  • 2 garlic cloves
  • 2 shallots
  • 1 whole egg y 1 egg yolk
  • 1/2 tsp cinnamon
  • 1/2 tsp cilantro seeds
  • 1/2 tsp cumin
  • 1 tsp salt (3/4 tsp in the original recipe)
  • 1 tbsp peppercorns
  • 2 tbsp sweet wine (cognac in the original recipe)
  • 2 bay leafs
  • 1 package bacon
Paté spices 2
  1. Preheat the oven to 180ºC.
  2. Cut the liver and bacon into pieces and put them in a food processor (I use my Thermomix). Process briefly.
  3. Grind the cilantro and cumin seeds in a coffee-grinder.
  4. Add the minced meat, the peeled garlic cloves, the diced shallots and all the spices and salt, except the peppercorns, in the processor bowl. Process till you obtain a fine puree. Add the wine, the coarsely crushed peppercorns and the eggs and mix thoroughly.
  5. Line a loaf pan or terrine with bacon slices. Place a bay leaf on the bottom and pour the meat-liver mixture in the terrine. Smooth the surface, place another bay leaf and cover with more bacon. Cover with a lid or aluminum foil.
  6. Place a deep dish in the oven and place the terrine on it. Fill with boiling water till it reaches 2/3 of the height. Bake for 1 1/4 hours.
  7. When done, take out the pâté and leave to cool completely. I preferred to leave it to rest overnight in the fridge for the flavors to develop.
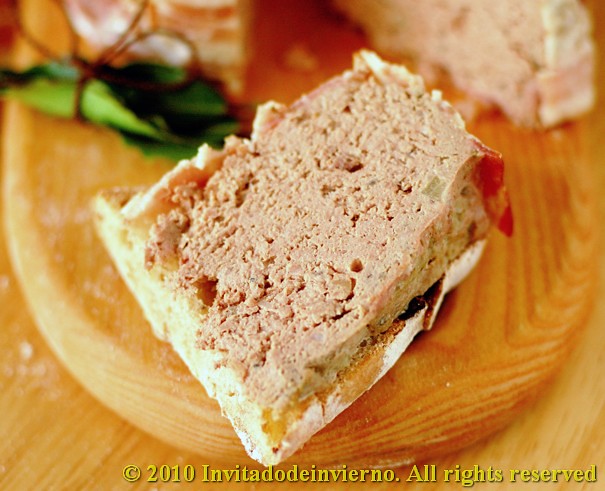
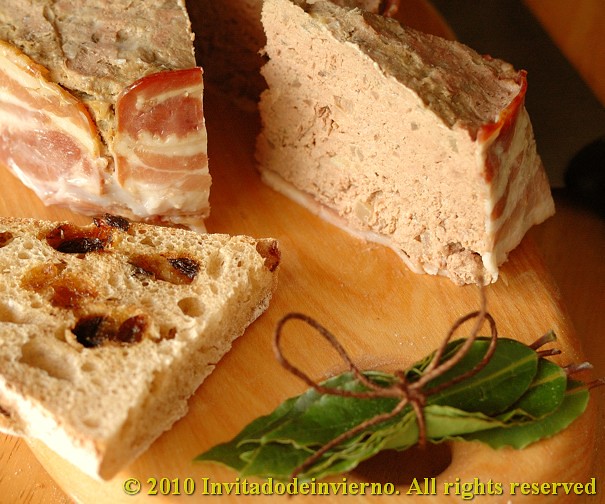
Being that I already have some practice in baking bread, I won't dedicate much attention here to the bread part of the challenge. I used this recipe, but shaped into small batards and I added a couple of handfuls of raisins, previously boiled in sweet wine. The bread was not perfect-looking, but it was delicious with the pâté. The pâté itself was quite addictive, even though I would reduce slightly the amount of cinnamon. I liked the sweet wine instead of the cognac. But I'm a real sweet-wine-geek, I would add it everywhere. If you think the amount of pâté is too much, consider that is freezes beautifully if you don't feel like eating the whole terrine in one go. I will make this recipe again, no doubt.

Paté spices 3

Eager to know more?

Daring Cooks' challenge May: Stacked green chile and chicken enchiladas

>> Thursday, May 13, 2010

Enchiladas 3

I was really excited about this month's challenge. I haven't tried many Mexican dishes, but so far I've always loved what I've tried. I love mole and I love tacos and I love fajitas and I love quesadillas... now I would taste enchiladas for the first time. Wonderful! I was only afraid that this dish would be too hot for me...

MU7WVWJKBEYQ


Our hosts this month, Barbara of Barbara Bakes and Bunnee of Anna+Food have chosen a delicious Stacked Green Chile & Grilled Chicken Enchilada recipe in celebration of Cinco de Mayo! The recipe, featuring a homemade enchilada sauce was found on www.finecooking.com and written by Robb Walsh.

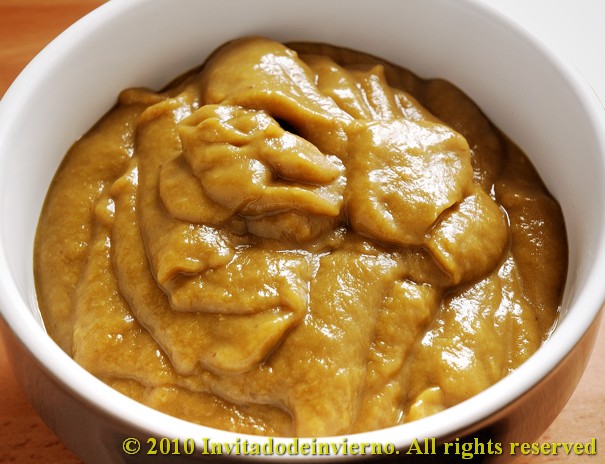
Fine, so the challenge involved making an enchilada sauce consisting mainly of roasted green chiles and tomatillos, grilling some chicken breasts and making some corn tortillas (I already knew about the tortilla part...). The challenge turned out fantastic despite all the mishaps... First, after learning about the challenge, I located an online source of tomatillos in Spain, because I hadn't even seen them in my life. Perfect. Then, when the time arrived for making the enchiladas, I realized I had forgotten to order them, so I had to use green tomatoes and lemon... not the real thing. Shame on me. Second, I searched for green chiles everywhere... but they were nowhere to be found. I used regular green peppers and then add some mildly hot pickled Spanish green guindillas. Third, I wanted to make my own tortillas with my beautiful tortilla press and then I couldn't squeeze into my schedule going down to Madrid to buy the damned tortilla flour... so we had to manage with store-bought tortillas. But still your heroine (that's me) managed to make some delicious enchiladas, my way... here's how.

Enchiladas 2

Stacked green chile & grilled chicken enchiladas
Serves 4

  • 750g green peppers (not bell peppers)
  • 2 green pickled guindillas
  • 250g green tomatoes
  • Juice of 1 lemon
  • 1 clove garlic
  • 1/2 liter vegetable stock
  • 1 small onion
  • 2 tbsp cornstarch
  • 1 tsp dried oregano
  • Salt to taste
  • 2 boneless chicken breasts
  • Olive oil
  • 12 small corn tortillas
  • 200g Manchego cheese (the recipe called for cheeses not easily found in Spain and... what the heck, Manchego is perfect)
Enchiladas 1
  1. To make the sauce, first roast the peppers on an oven tray, at 180ºC, till the skin is dark. Take them out to a pot and cover them till cool. In my case, I also roasted the tomatoes.
  2. When cool, get rid of the skin. Fry the minced onion and garlic in a frying-pan with a couple of tablespoons of oil, till wilted. Here I mixed this with the peeled peppers, the tomatos and the chopped guindillas in a food processor and pureed it.
  3. Then add the lemon juice, the vegetable stock and the salt and boil the mixture for 10 minutes.
  4. Add the cornstarch dissolved in a little water and continue boiling till the sauce thickens, another 10 minutes.
  5. In the meantime, salt and oil the chicken breasts, put them into an oven dish, add a glug or two of white wine and cook them for 20 minutes at 200ºC. When done, cut or shred in little pieces.
  6. Shred the cheese and set aside.
  7. When the sauce and the chicken are both ready, fry the tortillas slightly in 2 or 3 tablespoons olive oil.
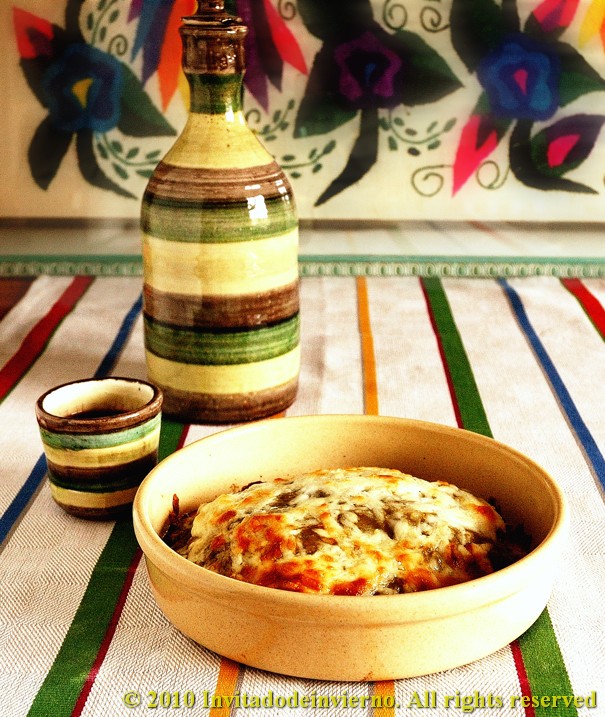
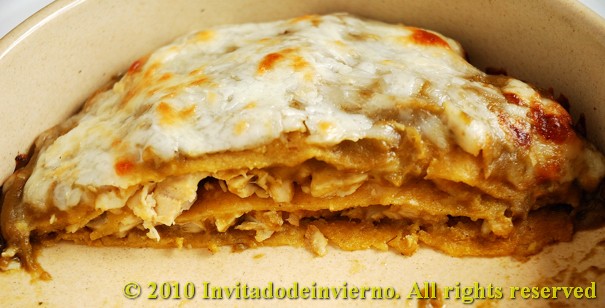
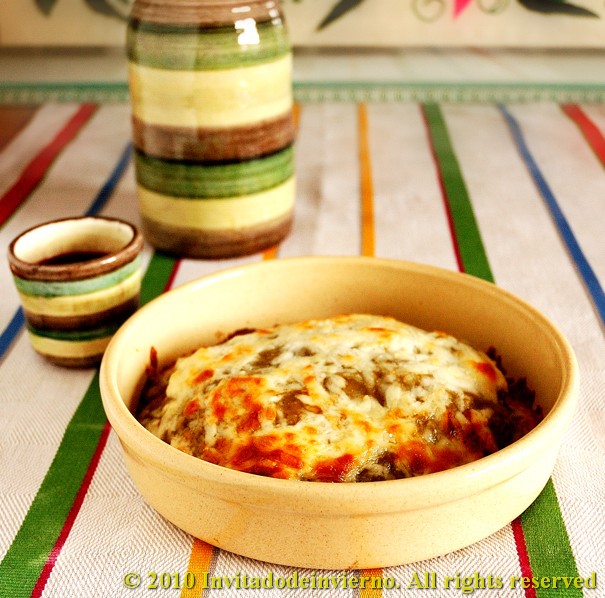
  8. Take a large baking dish enough for 4 tortilla stacks or 4 individual oven plates, like I did. Ladle some sauce on the plate base, then lay the first tortilla. Ladle some more sauce on the tortilla, then some shredded chicken and some shredded cheese. Now lay a second tortilla, ladle some sauce on it, more chicken and more cheese. Top with a third tortilla, more sauce and a generous handful of cheese. Make the other three stacks in a similar fashion.
  9. When you have 4 nice stacks, put the baking dish or plates into the oven and bake for 20 minutes at 180ºC until the cheese is melted and browned on top.
  10. Take the enchiladas out of the oven, let them rest for 10 minutes and... enjoy!
Enchiladas 4

Thanks Barbara and Bunnee for a very interesting and timely challenge!

Eager to know more?

Daring Cooks' challenge April: Brunswick stew

>> Tuesday, April 13, 2010

Brunswick stew 1

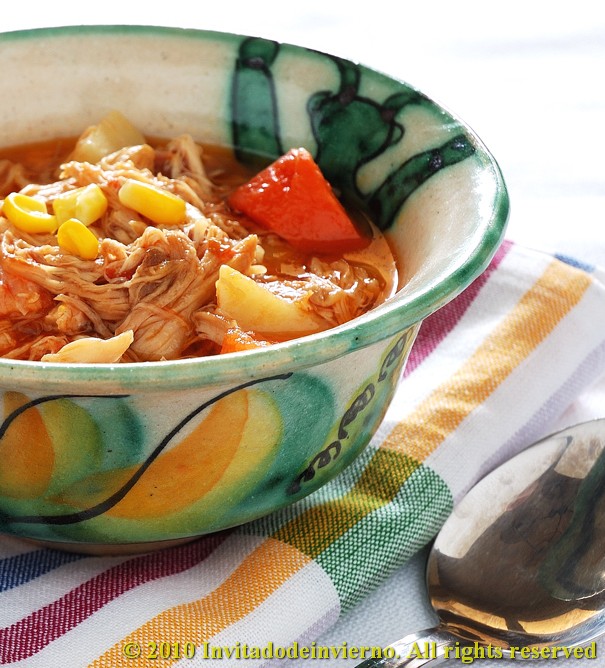
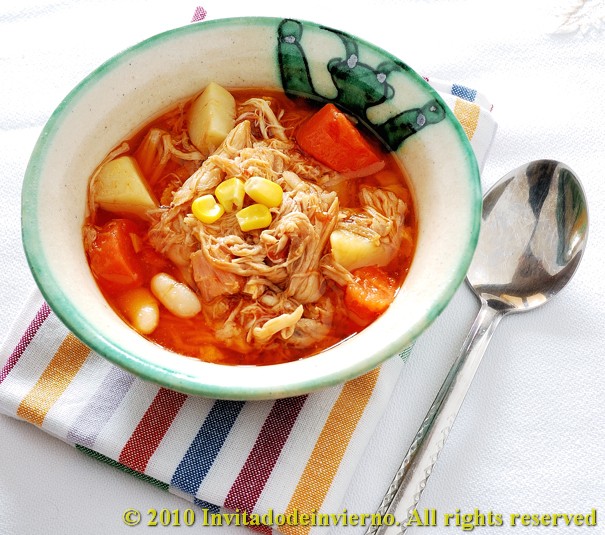
This month's challenge is a United States southeastern classic: Brunswick stew. I must admit I had never heard of it before. But that's not surprising, is it? Have you heard of the Spanish cocido? I thought so. This hearty stew is really not difficult to make... But the essential thing is that it should be so thick that a wooden spoon should be able to stand up in the middle. This recipe yields 12 servings, but somehow I was not aware of it and I didn't halve it... We better like it.


The 2010 April Daring Cooks challenge was hosted by Wolf of Wolf’s Den. She chose to challenge Daring Cooks to make Brunswick Stew. Wolf chose recipes for her challenge from The Lee Bros. Southern Cookbook by Matt Lee and Ted Lee, and from the Callaway, Virginia Ruritan Club.

Brunswick stew, slightly adapted

  • 1/4 lb / 113.88 grams / 4 oz slab bacon, rough diced
  • 2 Serrano, Thai or other dried red chiles, stems trimmed, sliced, seeded, flattened (I used 2 Spanish guindillas, medium hot)
  • 1lb / 455.52 grams / 16oz rabbit, quartered, skinned
  • 1 4-5lb / 1822.08- 2277.6 grams / 64-80oz chicken, quartered, skinned, and most of the fat removed (I used 1500 g only)
  • 1 Tablespoon / 14.235 grams / ½ oz sea salt for seasoning, plus extra to taste
  • 2-3 quarts / 8-12 cups / 64.607-96.9oz Sunday Chicken Broth (see below)
  • 2 bay leaves
  • 2 large celery stalks (I skipped them... sorry, I hate them)
  • 2lbs / 911.04 grams / 32oz potatoes, or other waxy type potatoes, peeled, rough diced
  • 1 ½ cups / 344.88 grams / 12.114oz carrots (about 5 small carrots), chopped (I used 2 large)
  • 3 ½ / 804.72 grams / 28.266oz cups onion (about 4 medium onions) chopped (just used 2 onions)
  • 2 cups / 459.84 grams / 16.152oz fresh corn kernels, cut from the cob (about 4 ears) ( I halved it...)
  • 3 cups / 689.76 grams / 24.228oz butterbeans, preferably fresh (1 ¼ lbs) or defrosted frozen (I added slightly less here)
  • 1 35oz can / 996.45 grams / 4 cups whole, peeled tomatoes, drained
  • ¼ cup / 57.48 grams / 2.019 oz red wine vinegar (I used white vinegar, I find red vinegar too strong)
  • Juice of 2 lemons (I didn't dare to add the lemon juice, I thought it would be too acidic for me)
  • Tabasco sauce to taste (I didn't add any)
Chicken broth:
To make the chicken broth, I simply boiled 2 chicken carcasses along with a piece of hen, plus the carrots and the onions that the stew recipe calls for. Boil everything for 45 minutes, while skimming the foam. You'll get a beautiful fatty and yellow stock. It couldn't be easier.
  1. In the largest stockpot you have (I used my French Le Creuset oven), fry the bacon over medium-high heat until it just starts to crisp. Transfer to a large bowl, and set aside. Reserve most of the bacon fat in your pan, and with the pan on the burner, add in the chiles. Toast the chiles until they just start to smell good, or make your nose tingle, about a minute tops. Remove to bowl with the bacon.
  2. Season liberally both sides of the rabbit and chicken pieces with sea salt and pepper. Place the rabbit pieces in the pot and sear off all sides possible. You just want to brown them, not cook them completely. Remove to bowl with bacon and chiles, add more bacon fat if needed, or olive oil, or other oil of your choice, then add in chicken pieces, again, browning all sides nicely. Remember not to crowd your pieces, especially if you have a narrow bottomed pot. Put the chicken in the bowl with the bacon, chiles and rabbit. Set it aside.
  3. Add 2 cups of your chicken broth or stock, if you prefer, to the pan and basically deglaze the4 pan, making sure to get all the goodness cooked onto the bottom. The stock will become a nice rich dark color and start smelling good. Bring it up to a boil and let it boil away until reduced by at least half. Add your remaining stock, the bay leaves, celery, potatoes, chicken, rabbit, bacon, chiles and any liquid that may have gathered at the bottom of the bowl they were resting in. Bring the pot back up to a low boil/high simmer, over medium/high heat. Reduce heat to low and cover, remember to stir every 15 minutes, give or take, to thoroughly meld the flavors. Simmer, on low, for approximately 1 ½ hours. Supposedly, the stock may become a yellow tinge with pieces of chicken or rabbit floating up, the celery will be very limp, as will the chiles. Taste the stock, according to the recipe, it “should taste like the best chicken soup you’ve ever had”.
  4. With a pair of tongs, remove the chicken and rabbit pieces to a colander over the bowl you used earlier. Be careful, as by this time, the meats will be very tender and may start falling apart. Remove the bay leaf, celery, chiles, bacon and discard.
  5. After you’ve allowed the meat to cool enough to handle, carefully remove all the meat from the bones, shredding it as you go. Return the meat to the pot, throwing away the bones. Add in your carrots, and stir gently, allowing it to come back to a slow simmer. Simmer gently, uncovered, for at least 25 minutes, or until the carrots have started to soften (I skipped this stage, as I already had boiled my carrots).
  6. Add in your onion, butterbeans, corn and tomatoes (and my carrots). As you add the tomatoes, crush them up, be careful not to pull a me, and squirt juice straight up into the air, requiring cleaning of the entire stove. Simmer for another 30 minutes, stirring every so often until the stew has reduced slightly, and onions, corn and butterbeans are tender. Remove from heat and add in vinegar, lemon juice, stir to blend in well. Season to taste with sea salt, pepper, and Tabasco sauce if desired (I thought it didn't need it).
  7. You can either serve immediately or refrigerate for 24 hours, which makes the flavors meld more and makes the overall stew even better. Serve hot, either on its own, or with a side of corn bread, over steamed white rice, with any braised greens as a side.

Brunswick stew 2

My potatos were not starchy enough, so the broth wasn't really thick. In fact you can see the potato dice have kept their shape pretty well through almost 2 hours of boiling. Indeed the whole thing should have been a bit more "amalgamated", but still it was truly stomach-warming.

Eager to know more?

Daring Cooks' challenge February: Mezze

>> Sunday, February 14, 2010

Pita bread 1

I have really enjoyed this challenge. I love Middle Eastern food and almost any Mediterranean food in general, therefore I was really excited about the mezze. Michele, this month's host, says: "if you’re not familiar with mezze, it’s more of a style of eating than a specific recipe or recipes. Mezze is a bunch of small dishes served all at once—sort of like the Middle Eastern version of Spanish Tapas. It can be served as appetizers before a meal, or as the meal itself". So this was really a multiple challenge, because it involved various dishes. The essential part of the challenge involved preparing pita bread and hummus, which I had never prepared before. That's good for me, I need to be pushed every now and then. D. knows a lot about it...


The 2010 February Daring Cooks challenge was hosted by Michele of Veggie Num Nums. Michele chose to challenge everyone to make mezze based on various recipes from Claudia Roden, Jeffrey Alford and Naomi Dugid.

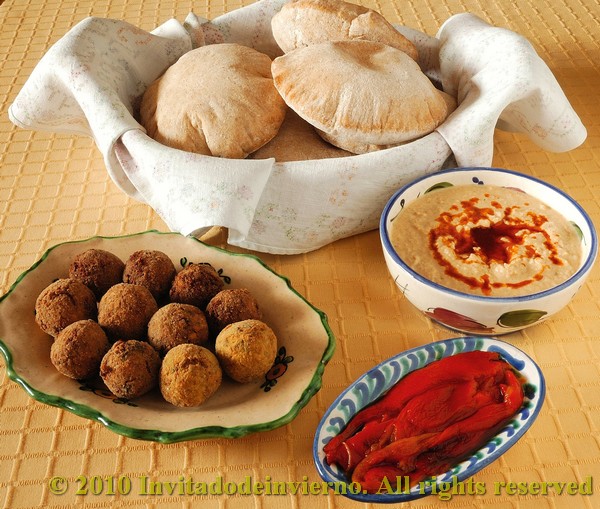
For my mezze, besides the compulsory pita bread and hummus, I prepared roasted red peppers and falafel, both having starred at my table a number of times previously. I'm really hooked on falafel. And I'm not usually a chickpea lover (I'm in love with chickpea flour though), but the flavoring of falafel really gives me a kick. And they are easy to make, you can prepare a lot and freeze part of them for later use, which is very practical when you have kids... or even unexpected visitors. I was planning to prepare dolmades too, but I couldn't find the time to scout for grapevine leaves... they're nowhere to be found in my neighborhood. I'm giving you 3 recipes here, for pita bread, hummus and falafel.

Pita bread, adapted from Flatbreads & Flavors by Jeffrey Alford and Naomi Duguid
Prep time: 20 minutes to make, 90 minutes to rise and about 45 minutes to cook

  • 2 teaspoons regular dry yeast (.43 ounces/12.1 grams) (I used 25g fresh baker's yeast)
  • 2.5 cups lukewarm water (21 ounces/591 grams)
  • 5-6 cups all-purpose flour (17.5 -21 ounces/497-596 grams) (I used spelt here, half white and half whole, and I had to use 7 cups in total)
  • 1 tablespoon table salt (.50 ounces/15 grams)
  • 2 tablespoons olive oil (.95 ounces/29 ml)

Pita bread 2

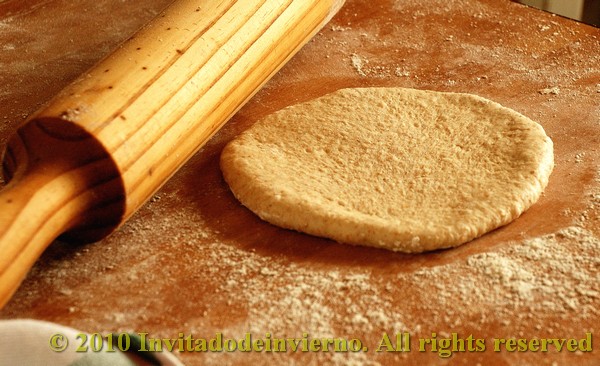
  1. In a large bread bowl, pour the warm water. Crumble the fresh yeast on 3 cups of flour. Stir in the flour, a cup at a time, and homogenize. Let this sponge rest as long as needed, until double in bulk and bubbly (mine took less than 1 hour, but I think the amount of yeast was more on the excess side). The original directions call for a minimum of 10 minutes, I think that's too short.
  2. Sprinkle the salt over the sponge and stir in the olive oil. Mix well. Add more flour, a cup at a time, until the dough is too stiff to stir. Turn it out onto a lightly floured surface and knead for 8 to 10 minutes, until smooth and elastic. Rinse out the bowl, dry, and lightly oil. Return the dough to the bowl and cover with plastic wrap. Let rise until at least doubled in size, approximately 1 1/2 hours.
  3. Place a pizza stone, or two small baking sheets, on the bottom rack of your oven, leaving a 1-inch gap all around between the stone or sheets and the oven walls to allow heat to circulate. Preheat the oven to 450F (230C) (I use old floor tiles as a pizza stone...).
  4. Gently punch down the dough. Divide the dough in half, and then set half aside, covered, while you work with the rest. Divide the other half into 8 equal pieces and flatten each piece with lightly floured hands. Roll out each piece to a circle 8 to 9 inches in diameter and less than 1/4 inch thick. Keep the rolled-out breads covered until ready to bake, but do not stack.
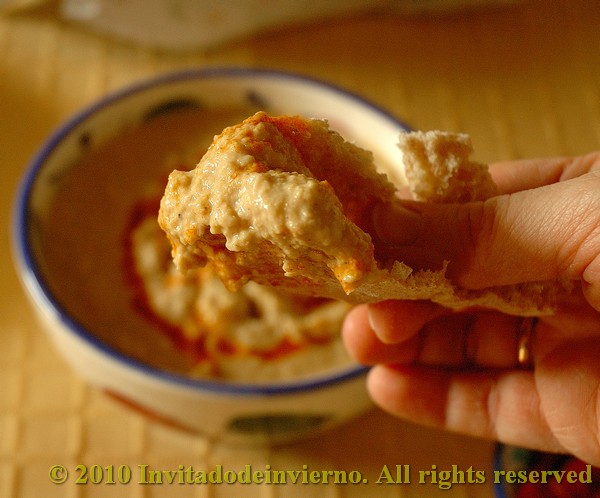
  5. Place 2 breads, or more if your oven is large enough, on the stone or baking sheets, and bake for 2 to 3 minutes, or until each bread has gone into a full balloon (I needed around 12 minutes for the breads to brown). If for some reason your bread doesn't puff up, don't worry it should still taste delicious. Wrap the baked breads together in a large kitchen towel to keep them warm and soft while you bake the remaining rolled-out breads. Then repeat with the rest of the dough. Wow, my breads puffed up so beautifully!

Pita bread 3

Hummus, recipe adapted from The New Book of Middle Eastern Food by Claudia Roden
Prep Time: Hummus can be made in about 15 minutes once the beans are cooked. You can use dried chickpeas or canned boiled chickpeas, but I prefer to soak them and cook them myself.
  • 1.5 cups dried chickpeas, soaked in cold water overnight (10 ounces/301 grams)
  • 2-2.5 lemons, juiced (3 ounces/89ml)
  • 2-3 garlic cloves, peeled and crushed
  • a big pinch of salt
  • 4 tablespoons tahini (sesame paste) (1.5 ounces/45 grams)
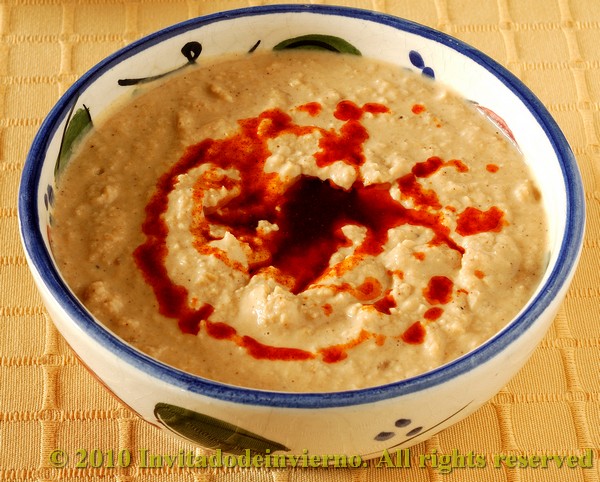
  • Additional flavorings (optional) (I simply garnished it with pimentón oil, 3 or 4 tablespoons of olive oil with half a teaspoon of sweet Spanish pimentón)

Hummus 2

Directions:
  1. Drain and boil the soaked chickpeas in fresh water for about 1 ½ hours, or until tender. Drain, but reserve the cooking liquid.
  2. Puree the beans in a food processor (or you can use a potato masher) adding the cooking water as needed until you have a smooth paste. (I preferred to add the lemon juice here and use the water later to adjust the thickness. If you use the cooking water here to adjust the thickness so that you can process it, maybe the mixture will be too liquid after adding the lemon juice... it's just my idea)
  3. Add the rest of the ingredients and mix well. Adjust the seasonings to taste.
  4. Serve on beautiful pottery and drizzle the surface with the flavored oil.

Hummus 1


Falafel

I didn't use the recipe Michele provided, but the one I usually prepare, from the book Tamasin's Kitchen Bible, by Tamasin Day-Lewis (ambitious name for a book, don't you agree? But I quite like it. And yes, she's Daniel Day-Lewis's sister)
  • 340g chickpeas, soaked overnight
  • 2 medium onions
  • 4 cloves garlic, crushed
  • 2 green chillies, seeded and finely chopped
  • 1 handful flat parsley
  • 1 handful fresh coriander
  • 2 tsp cumin seeds
  • 2 tsp coriander seeds
  • Salt
  • 600ml olive oil
The challenge's recipe included some all-purpose flour too. It's true that the crushed chickpeas mixture can ooze some liquid, but I prefer to drain them a little bit after crushing. Or dry them thoroughly on paper before processing them. And if you don't want to drain the crushed chickpeas, you can also add some chickpea flour, then you keep the falafel gluten-free. In fact I added some this time, that's why my little balls have such a light color, they are rolled in chickpea flour.

Falafel 2

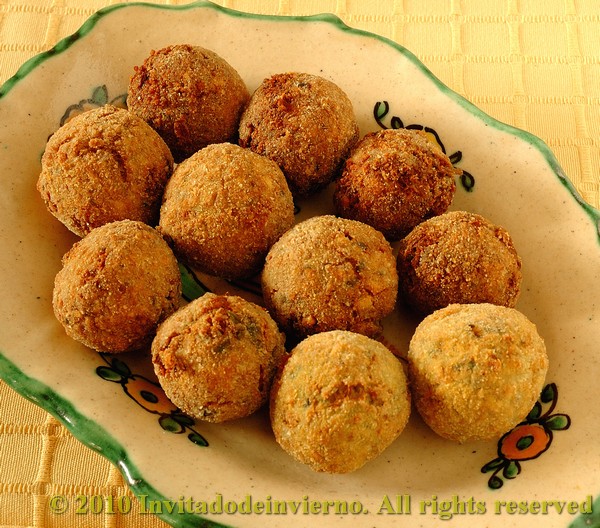
The preparation is really easy: first grind the cumin and the coriander seeds in a mortar. No need to grind them to a powder. Then put all the ingredients together in a food processor or mixer and grind them to a grainy pulp. Don't expect it to be smooth. Take walnut-sized pieces with a spoon and form them into balls. I rolled the balls in chickpea flour to absorb some of the moistness.

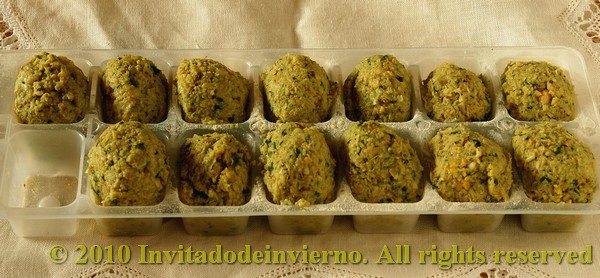
If you're not going to eat all the falafel at once, you can freeze them at this point. I use ice cubes trays for this.

Falafel 1

Heat the oil and fry the balls in batches; brown them thoroughly and drain on kitchen paper. They're delicious dipped in tahini sauce, but that was another failure, because my last tahini paste had gone into my hummus... am I badly organized??

Mezze 1

Eager to know more?

Daring Cooks' challenge January: Thai pork satay with peanut sauce

>> Thursday, January 14, 2010


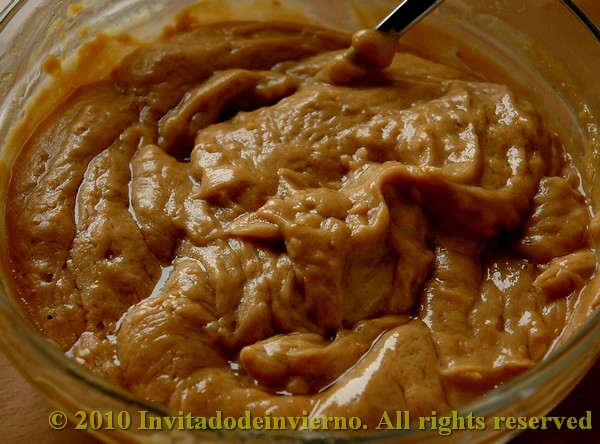
The Daring Cooks proposal for this month was a typical Thai dish, though widely known in other Southeast Asian countries like Indonesia and Malaysia. A satay consists of broiled skewered meat (almost any type), previously marinated in a mixture of onion, garlic and spices. The cooked meat is dipped in a peanut sauce. The meat gets its striking yellow color from the turmeric in the marinade. I had tried this dish an obscene amount of years ago, while living in The Netherlands, where it's a very popular fast food due to the large Indonesian community. I remember at the time I found the sauce the most disgusting thing I had ever tried... something warm with peanut flavor... yikes! Again the Daring Cooks were challenging me with something I'd never even think of cooking if left to my own devices. Nevertheless I've completely changed my mind about it this second time... has time taught me something?


The January 2010 DC challenge was hosted by Cuppy of Cuppylicious and she chose a delicious Thai-inspired recipe for Pork Satay from the book 1000 Recipes by Martha Day.

You could choose any type of meat or tofu, I chose a pound of pork simply because I had some pieces in the freezer. I stuck strictly to Cuppy's directions and didn't add or eliminate any ingredient.

Pork satay with peanut sauce

  • 1 pound pork, sliced or diced
Marinade:
  • 1/2 small onion, chopped
  • 2 garlic cloves, crushed
  • 1 T ginger root, chopped (optional) (2 cm cubed)
  • 2 T lemon juice (1 oz or 30 mls)
  • 1 T soy sauce (0.5 oz or 15 mls)
  • 1 tsp ground coriander (5 mls)
  • 1 tsp ground cumin (5 mls)
  • 1/2 tsp ground turmeric (2-2.5 mls)
  • 2 T vegetable oil (or peanut or olive oil) (30 mls)
Peanut sauce:
  • 3/4 cup coconut milk (6 oz or 180 mls)
  • 4 Tbsp peanut butter (2 oz or 60 mls)
  • 1 Tbsp lemon juice (0.5 oz or 15 mls)
  • 1 Tbsp soy sauce (0.5 oz or 15 mls)
  • 1 tsp brown sugar (5 mls) (my peanut sauce had sugar in it, so I didn't add any and I didn't miss it)
  • 1/2 tsp ground cumin (2.5 mls)
  • 1/2 tsp ground coriander (2.5 mls)
  • 1-2 dried red chilies, chopped (keep the seeds for heat)
First marinate the meat. Cut the meat in pieces. I used pork sirloin and cut it in thick strips. Put all the marinade ingredients in a food processor and process until you get a yellow paste. Put the meat with the marinade in a freezer plastic bag and toss to coat evenly. The minimum time for marinating was 4 hours, but I preferred to leave it in the fridge overnight. By the way, all those who don't like the flavor of coriander or cumin seeds should refrain from trying this recipe. I love them though.

The sauce can be prepared in advance or on the spot, it's very easy and quick. But I must warn you that it's somewhat delicate, as it can separate like mayonnaise if overheated. Yes, it did happen to me. Therefore I recommend you to do it just before serving the satay, then you avoid the risk in reheating it.

Grind the spices in a clean coffee-grinder if you don't have them ground, like myself. Put all the ingredients in a small saucepan and heat very gently for the peanut butter to melt. Watch it carefully to prevent it from boiling. The moment the mixture is more or less homogeneous, turn off the heat and stir. We ate our separated sauce all the same... ahem.


Before making the sauce then, turn the grill on. It must be nice to cook this in a barbecue in the summer, but we had snow. Slide the meat onto the skewers. First soak the skewers in water for 20 minutes if you're using the wooden ones. Lay the skewers under the grill, around 10 minutes on each side, until the edges start to brown. Don't overcook the meat or it will be dry. When done, transfer to a beautiful serving plate and eat immediately, dipped in the peanut sauce. Everybody, including our guests for lunch, loved the satay. I must admit though that the sauce is a bit shocking at first... in Spain we're only used to eat peanuts as one of the most famous tapas of all: panchitos, peanuts fried in oil and salted, extremely popular in all kinds of tabernas. But on the whole the result was very positive, even though I had to buy an imported peanut butter, laden with hydrogenated vegetable fats (peanut butter is not very popular in Spain).... all for the sake of blogging.

Eager to know more?

Daring Cooks' challenge December: Salmon en croûte

>> Monday, December 14, 2009

Salmon en croute
I was very pleased when the Daring Cooks' challenge of this month was revealed, because I love salmon. Therefore I had to love a salmon fillet wrapped in short crust, a.k.a., salmon en croûte. En croûte dishes are typical in French cuisine, the croûte being the dough in which they are wrapped. If there's any French in the room, please correct me if I'm wrong. So here's my take on this scrumptious dish.


The 2009 Daring Cooks challenge was hosted by Simone of Junglefrog Cooking. Simone chose Salmon en Croute (or alternative recipes for Beef Wellington or Vegetable en Croute) from Good Food Online.

Salmon en croûte

  • 150 g mascarpone or any cream cheese
  • 120 g watercress, rocket and spinach
  • 1/2 kg shortcrust pastry (you can use store-bought pastry, but I always make my own, recipe follows)
  • 500 g salmon fillet
  • 1 medium egg
For the shortcrust pastry:
  • 280 g all-purpose flour
  • 125 g cold butter
  • 1 pinch salt
  • 100 g cold water
To prepare the crust, first weigh the flour and butter. Dice the butter and toss it in the flour. Mix it in a food processor until you obtain a crumbly mixture. Add the salt, mix and pour the cold water. I always use the water at fridge temperature. Then mix on high speed until the dough coheres and you get a nice ball. Don't overmix it. Then roll it to at least 1 cm thickness, lay on plastic film and then on a large tray that can fit into the fridge. Cover with another sheet of plastic and put in the fridge to cool.

Salmon en croute
While the dough is resting prepare the filling. Wash the vegetables, pat them dry and mix with the cheese in a food processor, until you get a smooth green cream. I only used spinach and the result was very mild, but I prefer it that way. I'm sure the flavor will be sharper if you add the rocket and watercress too.

The recipe called for making a large package with the whole salmon fillet, so that it could be served in large slices. I preferred to try and make individual little packages, although my size estimation wasn't very... ahem, accurate. In the end each "little" package sufficed for 2 people, because the assembly is quite... nourishing. But anyway I'm sure this would also be a great combination in empanadas size.

Salmon en croute
Heat the oven to 200 ºC. In the meantime, take the dough out of the fridge and roll it thin. Lay the salmon fillet or pieces of fillet on the dough. Sprinkle the salmon with the salt and spread the vegetables-cheese cream on it. Then close the package by brushing the edge with a little water and pressing with the tines of a fork. Transfer the packages to a baking dish. My intention was to make a fish-looking croûte... but I didn't quite succeed. Judge for yourselves. I need some more practice... I'm willing to learn by making this dish some other time... I will make this sacrifice. Back to the point, slash the dough surface in a couple of places so that the steam can come out (I forgot it!). Then beat an egg and use it to brush all the croûte. When the oven is hot enough, put the dish into it and bake for half an hour.

I really liked this dish, we had a family meal and everybody loved it. The flavors meld wonderfully. You can't clearly make out the flavors of the vegetables and cheese and at the same time the salmon flavor is tempered... very tasty result. Wonderful with a good white wine, for an elegant main course on New Year's Eve... remember we have dinner at 10 in Spain... we're crazy.

Eager to know more?

Daring Cooks' challenge November: Sushi

>> Friday, November 13, 2009


To put it mildly I'm not a sushi person. Or rather I should say I'm not a Japanese food person. You can't like everything, right? It doesn't really attract me, therefore there are few dishes that I've tried. Fine, I admit I'd never tried sushi in my life before, mostly because of the raw fish thing... So when I learnt about the November challenge I must admit I felt a bit discouraged. But nevertheless, this is what the Daring Cooks is about: cooking things you wouldn't even think of cooking otherwise (sushi, me?). That's the point, the DC lead you to the verge of the abyss... right beyond your comfort zone. The bad thing is that there's a slight possibility that you end up smashed at the bottom of the precipice.


This time the challenge consisted of three different types of sushi, although the main goal was to learn to make proper sushi rice. Am I weird if I say that I didn't find it difficult? If I may say so myself. On the other hand, I wasn't sure about me finding the results appetizing... that's why I decided to invite my niece M., fond of sushi and lover of many other dishes of various nationalities, for her to help me make the sushi and above all eat it... that's why the photos were taken in a hurry and it shows.

The November 2009 Daring Cooks challenge was brought to you by Audax of Audax Artifex and Rose of The Bite Me Kitchen. They chose sushi as the challenge.

I'm including almost the complete instructions, but visit Audax and Rose's sites for more information.

PART 1 : SUSHI RICE (makes about 7 cups of cooked sushi rice)

Preparation time: 1¾ hours consisting of :-
Rinsing and draining rice: 35 minutes
Soaking rice: 30 minutes (includes 5 minutes making the vinegar dressing)
Cooking and steaming time: 25 minutes
Finishing the rice: 15 minutes

INGREDIENTS:

* 2½ cups uncooked short grain rice
* 2½ cups water
* For superior results use equal volumes of rice and water

Optional Ingredients

* 3 inch (75mm or 15 grams) square dashi konbu (or kombu) (dried kelp seaweed) wipe with a damp cloth to remove white powder & cut a few slits in the sides of the kelp to help release its flavours
* 2½ teaspoons (12.5 mls) of sake (Japanese rice wine)

Sushi vinegar dressing

* 5 Tablespoons (75 mls) rice vinegar
* 5 Teaspoons (25 mls or 21 grams) sugar
* 1¼ Teaspoons (6.25 mls or 4.5 grams) salt

DIRECTIONS:

Rinsing and draining the rice


1. Swirl rice gently in a bowl of water, drain, repeat 3-4 times until water is nearly clear. Don't crush the rice in your hands or against the side of the bowl since dry rice is very brittle.
2. Gently place rice into a strainer and drain well for 30 minutes.

Soaking the rice

1. Gently place the rice into a heavy medium pot with a tight fitting lid (if you have a loose fitting lid use a piece of aluminium foil to make the seal tight).
2. Add 2½ cups of water and the dashi konbu.
3. Set the rice aside to soak for 30 minutes, during this time prepare the sushi rice dressing.

Preparing the Rice Vinegar Dressing

1. Combine the rice vinegar, sugar and salt in a small bowl.
2. Heat on low setting.
3. Stir until the mixture goes clear and the sugar and salt have dissolved.
4. Set aside at room temperature until the rice is cooked.

Cooking the rice

1. After 30 minutes of soaking add sake (if using) to the rice.
2. Bring rinsed and soaked rice to the boil.
3. Reduce heat to the lowest setting and simmer, covered, until all the water is absorbed, 12-15 minutes. Do not remove the lid during this process. Turn off heat.
4. Let stand with the lid on, 10-15 minutes. Do not peek inside the pot or remove the lid. During this time the rice is steaming which completes the cooking process.

Finishing the rice
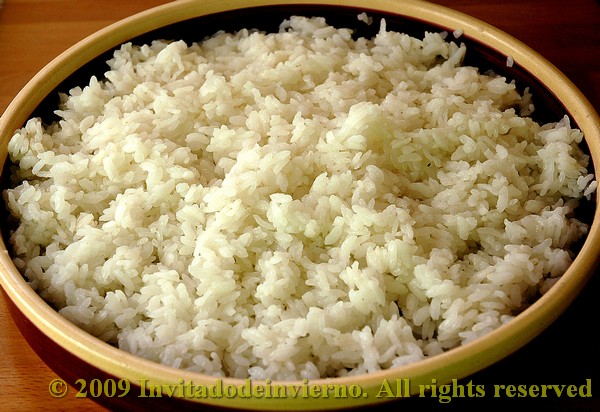
sushi
* Turning out the rice

1. Moisten lightly a flat thin wooden spatula or spoon and a large shallow flat-bottomed non-metallic (plastic, glass or wood) bowl. Do not use metallic objects since the vinegar will react with it and produce sour and bitter sushi rice.
2. Remove the dashi konbu (kelp) from the cooked rice.
3. Use the spatula to loosen gently the rice and invert the rice pot over the bowl, gently causing the cooked rice to fall into the bowl in one central heap. Do this gently so as not to cause the rice grains to become damaged.

* Dressing the rice with vinegar

1. Slowly pour the cooled sushi vinegar over the spatula onto the hot rice.
2. Using the spatula gently spread the rice into a thin, even layer using a 45° cutting action to break up any lumps and to separate the rice. Don't stir or mash rice.
3. After the rice is spread out, start turning it over gently, in small portions, using a cutting action, allowing steam to escape, for about a minute.

* Fanning & Tossing the rice

1. Continue turning over the rice, but now start fanning (using a piece of stiff cardboard) the rice vigorously as you do so. Don't flip the rice into the air but continue to gently slice, lift and turn the rice occasionally, for 10 minutes. Cooling the rice using a fan gives good flavour, texture and a high-gloss sheen to the rice. The vinegar dressing will be absorbed by the hot rice. Using a small electric fan on the lowest speed setting is highly recommended.
2. Stop fanning when there's no more visible steam, and all the vinegar dressing has been adsorbed and the rice is shiny. Your sushi rice is ready to be used. (I didn't fan the rice, I just put the bowl by an open window. And it didn't take as long as 10 minutes, I'm not patient enough. I believe the rice was conveniently sticky and shiny though.)

* Keeping the rice moist

1. Cover with a damp, lint free cloth to prevent the rice from drying out while preparing your sushi meal. Do not store sushi rice in the refrigerator leave on the counter covered at room temperature. Sushi rice is best used when it is at room temperature.

* Tip: To make sushi rice: for each cup of rice use 1 cup of water, 2 Tbs rice vinegar, 2 tsp sugar, ½ tsp salt and 1 tsp sake. For superior results use equal volumes of rice and water when cooking the sushi rice since the weight of rice can vary. Weight of 2½ cups of uncooked rice is about 525 grams or 18½ ounces.

NOTES:
Sushi Rice – choose a short or medium grain rice. Do not use Arborio, long-grain, or parboiled white rice. Medium-grained calrose is a suitable rice. Rice expands (about 3 times) when cooked so make sure your pot is large enough. Washing the rice removes the rice flour that coats the rice and gives a fresh flavour and scent to the cooked rice. Look for rice that is labelled 'sushi' rice. Cooked sushi rice can be placed in plastic bags and frozen for 3 months, microwave when needed. Cooked sushi rice should be sticky, shiny and the individual grains of rice can been see.

Dashi konbu – or ( dashi kombu) – dried kelp, it looks like broad, leathery, wrinkly greenish ribbon often coated with a white powder. The darker green the leaves, the better the quality of kelp. Dashi konbu adds a refreshing light ocean taste to sushi rice. (I had no kelp, so I used wakame instead.)


Rice Vinegar – this gives prepared sushi rice its unique clean, crisp taste. Do not use bottled “sushi vinegar” as it is too harsh and has a bitter after-taste. Look carefully at the label of the rice vinegar it should have NO SALT and NO SUGAR in the product. Apple cider vinegar is a good substitute if rice vinegar is not available. You can use mild white wine vinegar or mild red wine vinegar if you cannot find rice vinegar or apple cider vinegar. DO NOT USE NORMAL WHITE VINEGAR it is too harsh.

Sake – Japanese rice wine. Do not use cooking sake or Chinese cooking rice wine, look for a reasonably priced drinkable sake. Refrigerate opened sake & use within two months. You can use vodka or a mild tasting gin if sake is not available.

Sugar – you can use mild honey or any other vegan substitute to give the equivalent sweetness.

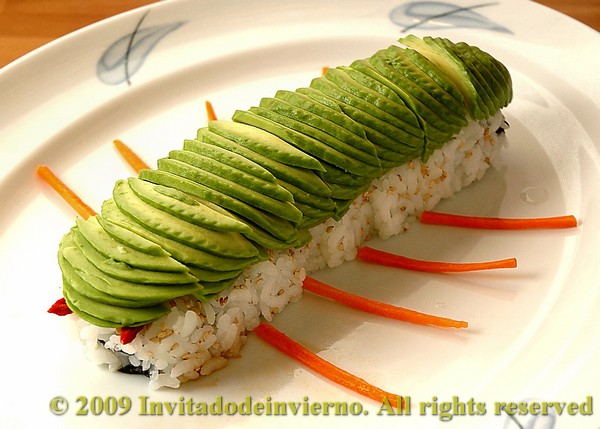
PART 2 : Dragon Rolls (also called Caterpillar Rolls)

Preparation time: 30 minutes, plus 1¾ hours to make the sushi rice
Cooking time: about 5 minutes (grilling the eel)

Yield: 2 inside-out (uramaki) sushi rolls

INGREDIENTS:

* 1 sheet 7”x8” (17.5cmx20cm) of toasted nori (dried seaweed sheets), cut into halves
* 1/2 Japanese cucumber
* 2 cups of prepared sushi rice
* Glazed Barbecued Eel (ungai) (about 3½ ounces or 100 grams)
* 1 Avocado
* Vinegared Water – ½ cup of water combined with a dash of rice vinegar
* Various small amounts of sauces to use as the flames of the dragon (or legs of a caterpillar)

Optional

* 2 tablespoons (25 grams or 1 oz) Fish Roe (Fish eggs)

DIRECTIONS:
1.Cut cucumber into strips ¼ inch (6mm) x 7” (175mm) long, then salt, rinse & dry the strips.
2.Grill (broil) the eel for about 2-5 minutes until bubbling. Cut into two lengthwise strips.
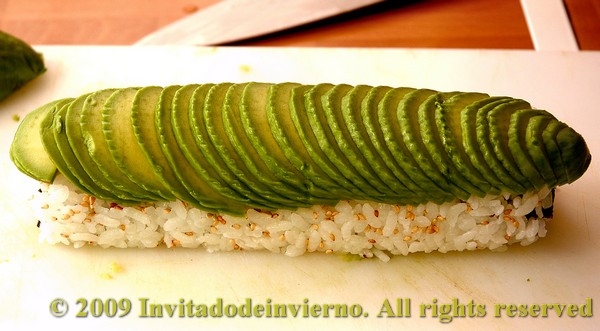
3.Halve, pit and peel the avocado. Cut the avocado halves into thin even 1/8 inch (3 mm) slices. Fan out the cut avocado into a 7 inch (175 mm) overlapping pattern.
4.Cover bamboo mat with plastic wrap. Place a sheet of nori shiny side down, lengthwise, on the edge the mat.
5.At this point I found really essential to follow the video below. So just do it!

sushi
* Tip: The most common mistake is having too much filling the golden rule is less is more when it comes to making sushi it is easier to roll an under-filled roll than an over-filled roll.

* Tip: Dampen your knife with a moist lint-free towel before every cut – this prevents the sushi rice from sticking to your knife. (I simply moistened the knife in tap water, it worked out fine.)


* Tip: Excellent videos on making Dragon Rolls
http://www.youtube.com/watch?v=pQZGRohVNFQ
http://www.youtube.com/watch?v=fo55iBN9FQs&feature=related

NOTES:
Bamboo mat (makisu) – A 10 inch (25cm) square mat made of thin slates of bamboo tied together with string.
Substitutes: a thin magazine cut to size wrapped in plastic wrap or a few layers of parchment paper cut to size about 10 inch (25cm) square.

Nori – Sheets of seaweed (laver) processed into thin sheets about 7 inches x 8 inches (17.5cm x 20cm) in size. Always re-toast the nori sheet over a gas stove on low flame for 5 to 10 seconds, or place nori on a clean oven rack and bake it in a preheated 350F-degree (180C) oven for 30 seconds. (I forgot to toast it!)
Substitutes: Thin cooked egg omelette cut to same size as a nori sheet (7 inches by 8 inches or 17.5cm x 20cm). Also soya bean wrappers, rice paper, tofu wrappers, dosas, crepes or an overlapping layer of thinly sliced cooked vegetables.

Glazed Freshwater Barbecued Eel (unagi) – Deliciously rich and a little like pork they are sold in packs in the freezer (and sometimes the fresh fish) section of Asian markets.
Substitutes: Teriyaki chicken, cooked crab meat, smoked fish, smoked chicken, seared beef with BBQ sauce, deep fried tofu with dark soya sauce, tinned pink or red salmon, smoked salmon, fresh cooked soy beans with a selection of dark sauces, caramelized onions, firm cream cheese, or extra avocado with BBQ sauce as the filling. Any remaining eel should be left in the package re-wrapped in plastic and returned to the freezer as quickly as possible. (I used some scrumptious tea-smoked salmon leftovers instead of the eel. No Asian market in my neighborhood.)

Japanese Cucumber – Japanese cucumbers are thin-skinned, seedless and contain much less water than normal cucumber.
Substitutes: English or hothouse cucumbers which have been peeled, de-seeded and salted as above. If not available try matchsticks of your favourite crisp vegetable.

Avocado –
Substitutes: If not available use slices of roasted capsicum (bell pepper), slices of roasted tomatoes, lightly cooked whole snap (snow) peas, slices of Japanese daikon radish or other cooked thinly sliced vegetables, or slices of 'sushi' grade fish such as tuna, yellow tail and red snapper; smoked salmon, pastrami, salami, various colours of fish roe, or various colours of sesame seeds.

Fish Roe (Fish eggs or caviar) – most roes (fish eggs) are rich so they are served in small portions. Try salmon roe (ikura), smelt roe (masago) or seasoned flying-fish roe (tobiko).
Substitutes: You can use toasted sesame seeds or black onion (nigella) seeds as a vegan choice.

PART 3 : Spiral Sushi Roll
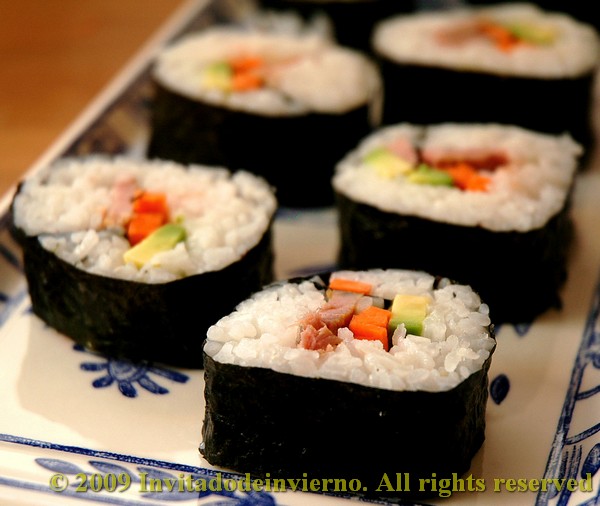
This is easiest 'decorative' sushi roll.

Preparation time: 15 minutes, plus 1¾ hours to make the sushi rice

Yield: One Roll, cut into 8 pieces

INGREDIENTS:

* 2½ cups prepared sushi rice
* 2 sheets of toasted nori, each sized 7”x8” (17.5cmx20cm)
* Six assorted fillings, each filling should be the size of a pencil (see note below)

DIRECTIONS:
1.Join 2 sheets of nori by moistening the adjacent edges and overlapping them about ½ inch (12mm).
2.Place this double sheet shiny side down on a rolling mat, part of the nori will extend beyond the mat.
3.Using moist fingers place 2½ cups of rice on the nori and gently rake your fingertips across grains to spread rice evenly, leaving ¼ inch (6mm) nori showing on the both ends of the sheet. Do not mash or squash the rice onto the nori, the rice should appear loosely packed and be evenly distributed over the entire sheet, you should be able to see the nori sheet in a few places.
4.Using your fingers form six grooves (in the same direction that you will be rolling the mat) at even intervals across the bed of rice. Make the first groove about 2 inches (50 mm) from the edge of the nori sheet. Form the grooves by pushing the rice away, do not mash or squash the rice, leave a loose one grain layer of rice in the bottom of the grooves. Level the areas between the grooves where you have pushed the rice.
5.Place your fillings in the grooves. Fill the grooves a little higher than the surrounding rice bed.
6.Then roll the sushi up from the edge closest to you, this will form a spiral pattern of nori, rice and fillings inside the roll.
7.Slice into 8 pieces with a very sharp wet knife, wiping the blade with a damp cloth after each cut.
8.Place the pieces on a platter and garnish.
sushi
NOTE:
Make each groove about a finger-width wide they will hold about 1-2 tablespoons of filling. Use fillings that compliment each other and are highly coloured. Use parboiled vegetables cut into strips, seafood, left over eel, smoked fish or chicken, whole cooked beans, edible flowers etc....

PART 4 : Nigiri Sushi
Nigiri sushi is the type of sushi most often made in sushi bars. In Japanese, nigiri means “squeeze”.

Preparation time: 30 minutes, plus 1¾ hours to make the sushi rice

Yield: 14-16 pieces of sushi

INGREDIENTS:

* 2 cups prepared sushi rice
* 8 pairs of assorted toppings, 200 gms/7 ozs total of fish, meat or vegetables (see note below)
* 1 tablespoon Wasabi (paste, reconstituted powder) or any other paste to adhere topping to rice

Optional

* Garnishes such as Ginger (pickled), chilli strips, vegetables flowers etc
* Thin strips of nori or vegetables (for tying topping on)

DIRECTIONS:
1.When handling sushi rice, make certain your hands are very clean. To keep the rice from sticking to our hands moisten your hands with vinegared water.
2.Form nigiri sushi by scooping up a small amount (about 2 tablespoons) of rice with your forefinger and second finger of your right hand and placing it in your cupped left palm.
3.Use the fingers and thumb of your right hand to form it into a long, narrow mound (about 2 inches x 1 inch wide or 50mm x 25mm) in your cupped palm.
4.Press enough to make the rice hold firmly together. Place the nigiri on a damp cutting board flat side down. Don't let sushi touch or they'll stick to each other. At this point, you can cover the sushi with plastic wrap, and they'll keep at room temperature (not the refrigerator) for several hours.
5.Smear a thin line of wasabi on top of the rice and place the topping piece on it. You may need to press the topping down lightly with your fingers and adjust the shape of the rice accordingly to form an attractive piece of nigiri sushi. If your topping is very loose like fish roe you can place a strip of nori (higher than the rice) around the nigiri and form 'battleship' sushi. The cavity that the nori forms holds the topping so it does not fall off.
6.Garnish as desired and use strips of nori (or vegetable) to tie the topping to the nigiri if needed.
7.It is customary to make nigiri sushi in pairs, so make two of each variety.

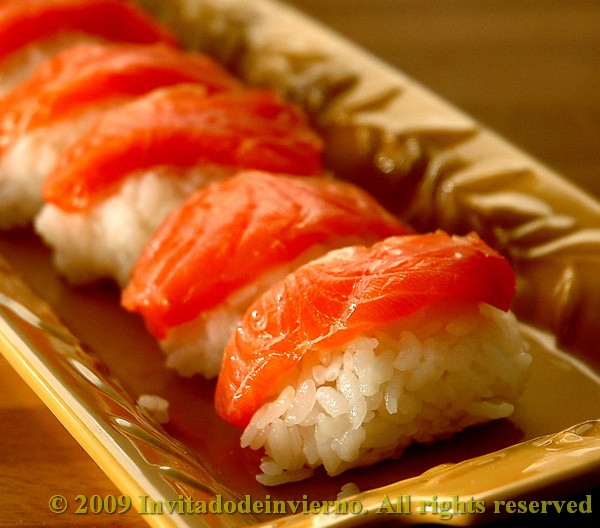
My nigiri sushi were a bit too big. It's easy to criticize me, but you would understand me if you touched that SuperGlue rice that sticks to your hands to death.

* Tips: A great video on making nigiri sushi
http://www.howcast.com/videos/270-How-To-Make-Sushi

NOTES:
Seafood nigiri must use sushi grade (sashimi grade) fish. Try tuna, red sea bream (red snapper), yellowtail or salmon. Cooked shrimp, cooked crab, cooked meat can also be used! You can use any vegetable you wish try asparagus, pumpkin, carrot, avocado, cucumber, shiitake mushroom, tofu, thin sliced egg omelette, etc... Thinly slice or julienne vegetables, parboiling if necessary tie on with a thin (1/4” or 6mm) strip of nori or vegetable strip wrapped around the whole sushi if needed..
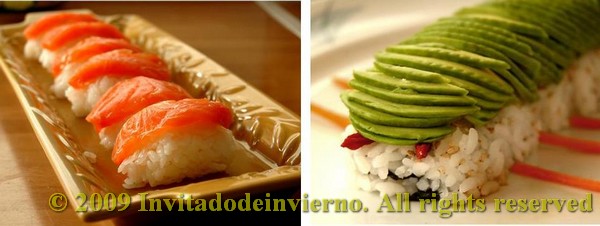

sushi
Not too bad as another experience in life. Now when I'm old (older) I can tell my grandsons about how I once made sushi. Unfortunately I found mine singularly insipid. My niece informed me that it was meant to be like that... really? Well, I had no reference for comparing. Maybe they lacked soy sauce, wasabi, or some other sauce. I thought it would be nice to make a deconstructed paella-sushi next time, with yellow rice, conveniently sticky, and the paella garnishes for filling... I need to try that. The good thing in this challenge is that I got to know that raw fish is not an essential ingredient of sushi. I've got to give them extra flavor next time. But indeed it's not difficult to make. Thanks Audax and Rose!

Eager to know more?

Daring Cooks' challenge October: Vietnamese chicken pho from Steamy Kitchen

>> Wednesday, October 14, 2009


I was missing something in my life... a little bit more chaos perhaps, so I decided to join the Daring Cooks. For my first challenge I had to cook something Vietnamese and that I hadn't even tasted before: a pho from the delightful blog Steamy Kitchen by Jaden. Timely challenge for me, as so far I've never been especially fond of Far East food...


Before this event, I had only tasted Vietnamese food once in my life. When I was 25 and lived in The Netherlands, a Vietnamese girl joined my company. She had had the most peculiar life. She had fled Vietnam in a boat when she was 12 or 13... yes, she had been one of those "boat people" we used to hear about in the news. She had two older brothers approaching the military service age. At the time Vietnam was in a non-declared war with some neighboring country (I don't remember which, she told me this a loooooong time ago). That meant an almost certain death for the two boys. Therefore their parents collected all their savings, bought two boat tickets for the boys and another one for my friend. Yes, she was sent along to take care of the boys, that is to cook, wash, do the laundry and the like, those things a servant... excuse me, a woman usually does in a lot of countries in the world for no wages at all. The boat was rescued by a Dutch ship which took the refugees to The Netherlands, where they were well catered for. They were given refugee status and received acommodation and education. My friend studied Chemical Engineering and ended up working for my company. We didn't work together for a long time, just a few months I believe. When I decided to go back to Spain, I was leaving some furniture and household equipment behind that I gave to her. She then organised a Vietnamese dinner to thank me. I don't seem to have been too impressed by the cooking, because I hardly remember what we had. My memories of her and her husband are a lot more vivid. She was a tremendously happy person, nothing gave away all the misfortunes she had gone through. Her name was Nga. Here's looking at you, kid.


The October 2009 Daring Cooks’ challenge was brought to us by Jaden of the blog Steamy Kitchen. The recipes are from her new cookbook, The Steamy Kitchen Cookbook.

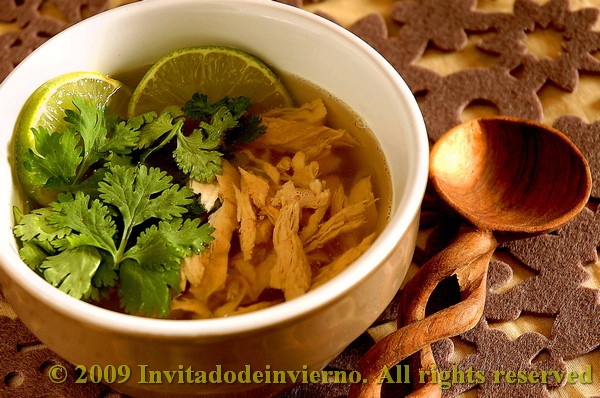
You can find the recipe here. As Jaden says, the most important thing is to obtain a very clear broth though packed with flavor. I chose to make pho with chicken, you could choose among some other varieties like vegetarian, beef or shellfish broth. I know how to make a Spanish chicken broth, but I tell you, the flavor of this broth has nothing to do with it. The spices and condiments are so very different, regardless of the chicken base. Some condiments are really peculiar for me, like the fish sauce and the star anise (in a savory soup? Are you nuts?).


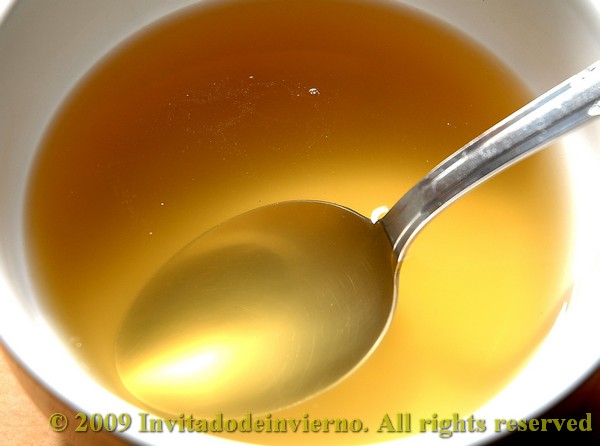
The most important part of the challenge was to obtain a broth packed with aroma while keeping it clear. It seems I did all my skimming well, because the final broth came out quite transparent. The only change I made was to boil two additional carcasses with the whole chicken, to add even more flavor. Well, I'm not telling the truth, I made another change, a mistake in fact. I forgot to toast the spices, shame on me. But the ginger and onion were beautifully charred, don't you think? After the boiling I let the broth cool and left it overnight in the fridge, so that I could easily defat it the next day, it seems my chicken was rather fatty. You know how that's done, don't you? Just get rid of the solidified fat on the surface by spooning it out.


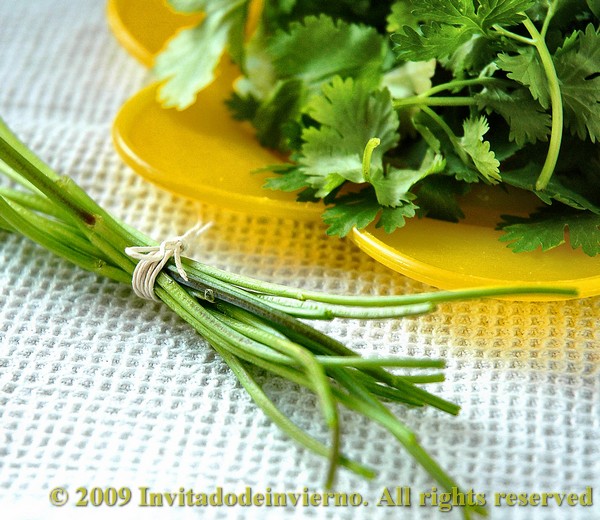
The broth was wonderfully aromatic and tasty. I found it difficult to adjust the seasoning though... how can you tune something when you have no idea of how it should taste? I did the best I could. Regarding the garnish, I couldn't find red onion at this time of the year and I hate bean sprouts, so I skipped them. I only used the noodles, cilantro leaves, shredded chicken and lima slices (the noodles are at the bottom of the bowl, that's why you can't see them). Instead of boiling the noodles in plain water, I boiled them in the broth itself for more flavor. Despite my initial reluctance, I found the soup delicious. The flavor is so different from what I'm used to in a soup, yet so good. I could clearly make out the ginger and the star anise flavors (even though my star anise dates from the 12th century...). This was a very interesting experience for me, as so far I've been a complete ignorant of the Far East cuisine. And it brings some colour to my dull life... Jaden, I hope you're proud of your disciple!

Eager to know more?

Followers

About This Blog

Lorem Ipsum

  © Blogger templates Palm by Ourblogtemplates.com 2008

Back to TOP