Related Posts Widget for Blogs by LinkWithin
Showing posts with label fish. Show all posts

School of Tapas: Catalan cod brandada

>> Thursday, July 5, 2012

Brandada 1

Cod brandada is a kind of fishy, flaky and garlicky mayonnaise, a mixture where the gelatin in the cod fish is used to whip up an emulsion of olive oil and milk, yielding a whitish slightly chunky purée (and you can listen to the word's pronunciation here, by my very self. Oh la la). Nowadays the northeastern region of Catalonia shares a border with France, but in the Middle Ages the county of Roussillon, just north of the Pyrenees, also belonged to the Crown of Aragon. This is to explain that because of a common history the cuisines of both sides of the present border have many dishes in common, and brandada de bacallá (in Catalan) or brandade de morue (in French) is just one of the many possible examples. And a delicious one, by the way, that you could easily sample at the beautiful Costa Brava, for example.

As any emulsified food, brandada can be a bit tricky to make. But not more than homemade mayonnaise. Because of this "trickiness" potato is often added, which aids in binding everything together. So who are you? The bold one who makes brandada without the potato or the faint-hearted who adds potato? Let's find out...

Brandada de bacallá

  • 0.9 pounds (400g) salted or fresh cod
  • 1/3 cup (75g) milk
  • 1 3/4 cup (400g) extra virgin olive oil
  • 3 garlic cloves
  • 1 good pinch nutmeg
  • 1 good pinch pepper
  1. If you use salted cod, you know you need to desalt it first. Soaking it in water at least 12 hours, changing the water at least twice should suffice. Drain it in a colander and set aside.
  2. Place the cod in a bowl with the milk and heat it in the microwave, just 2 or 3 minutes on high. Drain the fish and keep the milk for later. Leave to cool, remove the skin and bones and flake it. Set aside. 
  3. Peel the garlic and mash it. Pour 6 tablespoons of the olive oil in a skillet and heat. Add the garlic and stir-fry lightly on low heat, don't let it brown. Then, while keeping the heat low, add the fish and stir continuously with a wooden spoon, mashing and mixing, until all the oil is absorbed. At this point you can use a hand food processor to make the purée smoother, if you have one.
  4. From then on, start adding the rest of the olive oil (previously heated) and the reserved milk (also warm) little by little, one spoonful of olive oil per half spoonful of milk, alway stirring (or mixing on very low speed) and adding the next spoonful only when the previous one has been absorbed by the mixture.
Brandada 2

The flavors of the fish, the garlic and the olive oil marry beautifully in this Catalan cod brandada... For a succulent tapa, spread the brandada on small bread toasts and grill so that the tops brown lightly. Brandada is very often served with black olives too.

Eager to know more?

Soldaditos de Pavía or codfish beignets

>> Saturday, April 2, 2011

Soldaditos Pavía 1

I have wonderful news to share: I will be a contributor to the new online food magazine Honest Cooking! I am soooo excited! And I am in great company there, with colleagues like Nancy from Spicie Foodie, Simone from Junglefrog Cooking, Joan from Foodalogue, Asha from Fork Spoon Knife or Maria Laitinen from Scandi Foodie among many outstanding bloggers. You can check my published articles anytime by clicking on the cute Honest Cooking logo on my sidebar. For my debut at Honest Cooking I have chosen a very typical dish of my hometown, Madrid, the capital city of Spain. I have lived there most of my life and though in fact I live outside Madrid since 2000, in a small town 40km to the Northwest, I am still in the same province... it feels almost the same. Choosing a dish that is representative of Madrid is not an easy task. Madrid builds upon thousands of immigrants coming from all over Spain through time, so there are not many dishes that are actually exclusively from Madrid. Just take into account that Madrid had around 1 million inhabitants in 1940, after the Spanish Civil War, and it already had 3.1 millions 30 years later, in 1970. More than triple! Everything is mixed.


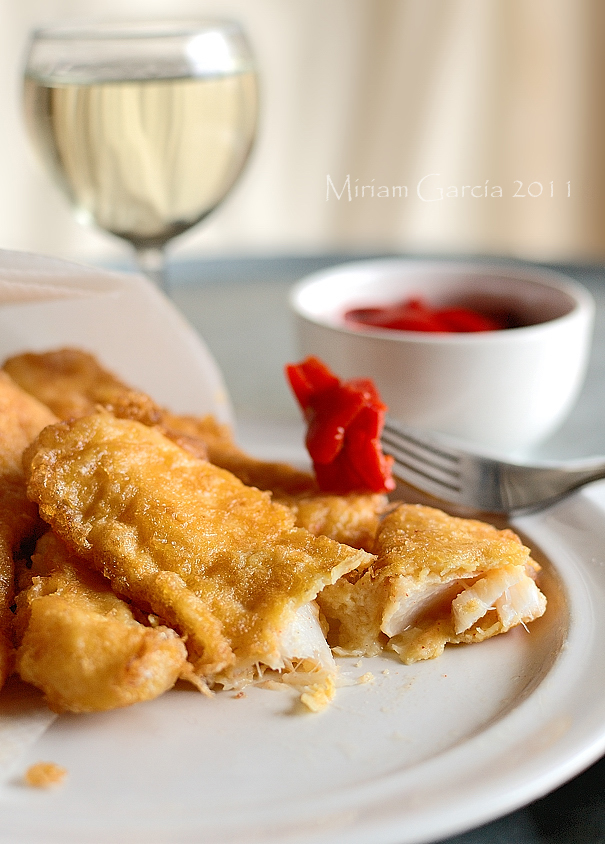
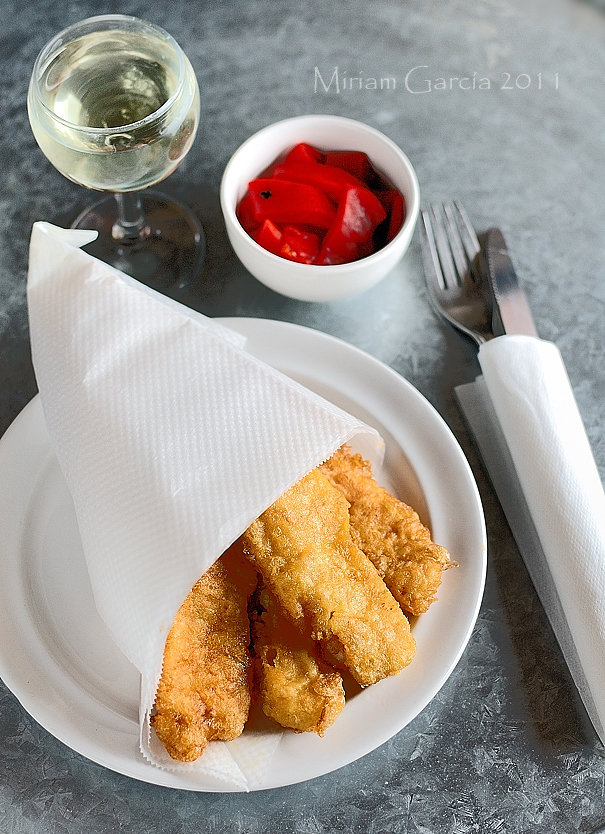
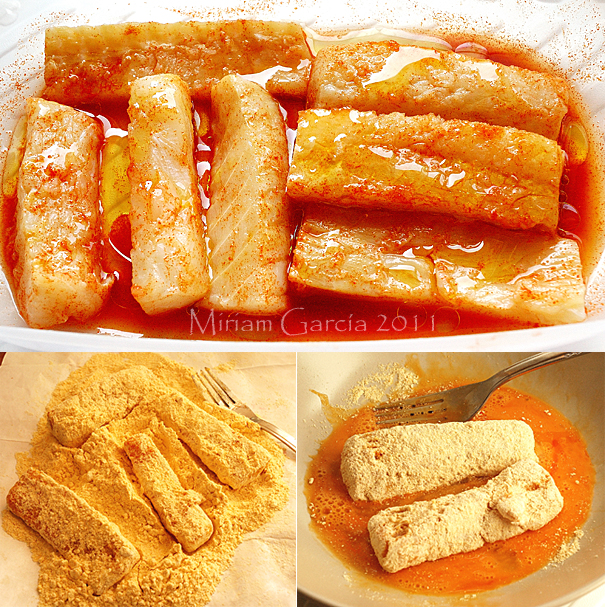
Tercios flagSoldaditos de Pavía, meaning Pavía soldiers, are strips of desalted codfish, marinated in a mixture of lemon juice and Spanish sweet pimentón, then either coated first in flour then in egg, or in a frying batter, deep-fried in olive oil and served with a strip of roasted red pepper around them. About the origin of this funny name there are two theories: the first relates to the color of the soldier uniforms at the time of the battle of Pavia, in 1525. The second relates to the color of the Spanish hussar uniforms during the 19th Century.
(Flag image by courtesy of Wikimedia Commons.)

Cuchilleros

But all this lore is not as important as the recipe for this simple, tasty and healthy appetizer or tapa, found in a lot of bars and tabernas in the old quarters of Madrid. So here it comes:

Soldaditos Pavía 2

Soldaditos de Pavía
Yields 4 tapa-sized servings

  • 1.1 pound (500g) good quality salted codfish
  • Juice of 1-2 lemons
  • 1 1/2 tsp sweet pimentón (or more if you like)
  • A dash of white pepper
  • 3 tbsp olive oil
  • First option - simple beignet coating:
    • 1 beaten egg
    • AP flour or chickpea flour
  • Second option - somewhat-time-consuming beignet frying batter:
    • 2/3 cup (100g) flour
    • 1/4 cup eau-de-vie or similar spirit
    • 3/4 tsp (5g) baker's yeast
    • 1 tbsp olive oil
    • 1 pinch of saffron
    • 1 pinch salt
  • Virgin olive oil for deep-frying (essential for real soldaditos)
  • 1 large roasted red pepper, in strips
Soldaditos Pavía 4
  1. Cut the codfish in strips, put them in a large bowl with cold water and leave them to desalt 24 hours. Better if you can change the water at least 3 times during this period. Believe me, you’d rather have to add some salt to the final fried fish than getting a bunch of unbearably salty and inedible soldaditos.
  2. Prepare the marinade in a shallow dish or container, mix the lemon juice with the pimentón.
  3. Pat dry the fish strips with a paper towel and dip them in the marinade. Toss them to coat. Then drizzle the olive oil on the fish. Marinade for 3 hours.
  4. Rinse the fish strips. You won't normally need to salt the strips, as the fish will still retain some saltiness.
  5. Now you can use one of two methods for making the beignets:
    The most simple is to coat the strips first in plain flour (I use chickpea flour like in many places of Andalusia), then bathe them in beaten egg and put the strips straight into the hot olive oil.
  6. The second method, a bit more elaborate, is to prepare a batter for coating the fish. Sift the flour and mix it with the tablespoon of oil, the saffron, the spirit, the salt and the yeast. Leave to rest in a warm place for the yeast to act. When the mixture has risen slightly and it's bubbly on the surface, dip the fish strips and fry them on medium-hot olive oil. Place the fried fish on a paper towel.
Soldaditos Pavía 3

Serve while still warm with a strip of roasted red pepper across them. I have used piquillo peppers here instead, as they are pretty good with anything. Enjoy the juicy, lemony, flaky goodness of the fish inside the soft crust. The perfect appetizer for a warm Spring noon with a glass of beer or Fino. Better sitting on a patio.

Eager to know more?

Remojón or codfish and orange salad

>> Sunday, July 11, 2010

Remojón 2

There is little doubt that this is the best time of the year for salads, that is in the Northern hemisphere of course. And if they're really nourishing, they can be a whole meal in themselves. That's very convenient when your kitchen is above 29ºC (84ºF) like mine these last days. I'm tending to avoid any meal that requires fire and oven as much as I can. But being away from the kitchen is hard for me, mainly because I'm used to the opposite. I don't seem to know what to do with the spare time I suddenly have in my hands. Today I'm posting a very simple and refreshing salad, ancient and traditional in many places of Andalusia, with such an original combination of sweet and savory flavors that would make many a modern chef envious. That's exactly what popular genius is all about. Being inimitable.


Remojón as a salad (there are also warm brothy versions), as far as I know, has countless variations in the provinces of Almería, Granada and Málaga, which are usually prepared on the basis of oranges and salted cod. In some places, the cod is added without desalting, only flaked, in others the fish is baked in the oven, even raw in some... the variations are endless. By the way, check the pronunciation of remojón here (and yes, it's my own voice).

The presence of oranges talks about a dish that was once typical of the Fall/Winter season, in fact consumed at the time of the yearly pork slaughter, which in many places of Spain occurs around Saint Martin's, on November 11th... but now we have insipid fruit grown in greenhouses at any time of year, or other brought from the far side of the globe spending a lot of resources while the Southern hemisphere farmers are hardy paid enough to live... oops, sorry, I get carried away. In short, in early summer we now have oranges available, so the alleged seasonality of this dish is no longer such.

Remojón
Yields 2 servings

  • 250g good salted codfish
  • 2 smallish oranges or 1 large orange
  • 1/4 onion
  • 1 good handful of whole black olives
  • 2 hard boiled eggs
  • Virgin olive oil
Remojón 1
  1. Desalt the codfish by leaving it to rest in water overnight in the fridge. You can also use unsalted cod, of course, only the dish won't have that distinct saltiness. I like the cod on the salty side, the contrast with the sweet flavors is irresistible. The next day, drain the fish, put in an oven dish, drizzle with olive oil and bake in the oven preheated at 180ºC, taking care not to overbake it. Take out of the oven, let cool, flake it and set aside.
  2. Boil the eggs for 10 minutes, let cool, peel them, cut them in fourths and set aside.
  3. Peel the oranges and get rid of as much pith as you can. Cut them in slices or dice; set aside.
  4. Finely dice the onion.
  5. Pit the olives.
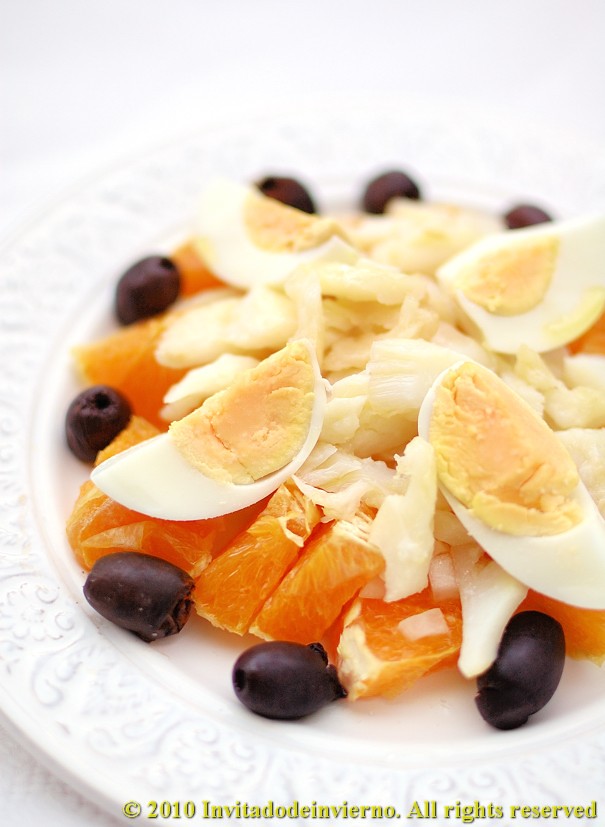
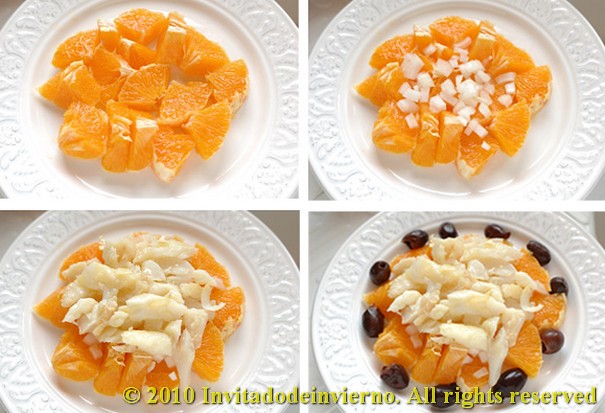
  6. Place the ingredients on the plates in the following order: orange, onion, codfish, olives and eggs. That is if you want to make the salad according to my taste, but if you prefer to contradict me, do as you like. I personally prefer to skip the vinegar with this kind of fruity salads, but adding a good vinegar is the traditional thing. So you have my permission to do it. I'm that magnanimous. And lastly drizzle a fair amount of olive oil on the salad.
Remojón 3

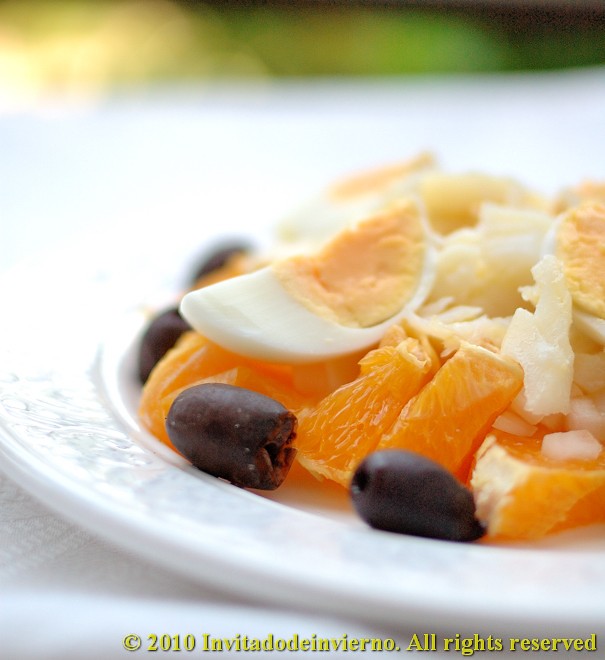
The combination of the sweetness of the orange with the saltiness of the fish, the freshness of the onion and the bitterness of the olives is like an adrenaline dose... I mean it. Just try it.

Eager to know more?

Broccoli, salmon and manchego quiche

>> Sunday, April 11, 2010

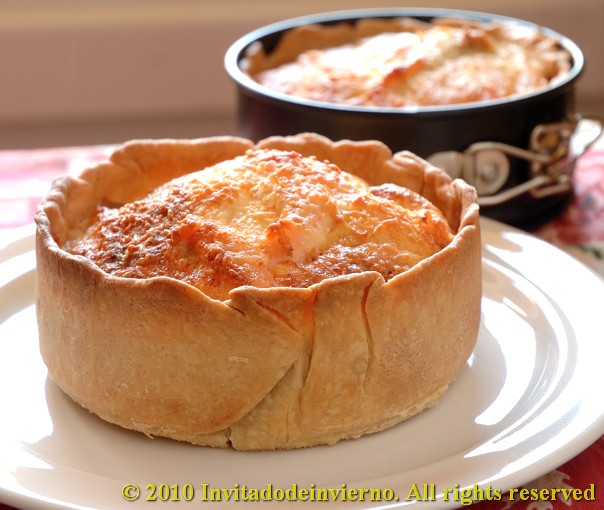
Broccoli salmon quiche 3

Quiche is another staple in my household. Quiches are very versatile and straightforward to make. They're also appealing and eye-catching when on the table, perfect for a dinner party with guests, when you want to impress them (is there any chance when I don't want to impress them?). The original quiche Lorraine, from what all the rest of the quiches in the world are derived, originally uses béchamel sauce in the filling, besides the eggs and the cream... I prefer to keep calories a bit lower (only a bit...) and skip the béchamel. That also makes it quicker to cook.


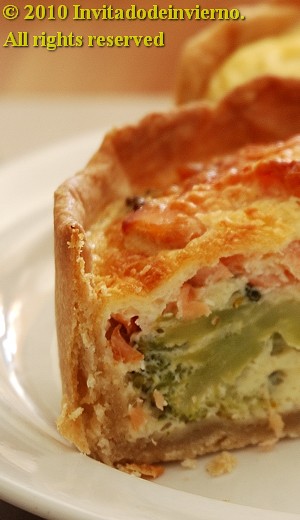
I find the combination of greens and salmon gives a wonderful character to the quiches. And I don't really know what happens to the vegetables when cooked in the company of cream and eggs, but they mellow and yet taste delicious. In fact this is the only way I can get D. to eat broccoli. One of our friends used to tell me that her husband only ate greens when they came for dinner and I would serve quiche. On the other hand, I've been reading lately that broccoli is packed with antioxidants and it's a very healthy vegetable to eat, therefore... I can find no better way to antioxidize myself than putting broccoli into a moist quiche.

Broccoli, salmon and manchego quiche
Yields 2 generous servings

  • 3 eggs
  • 50ml whipping cream
  • 3 slices smoked salmon
  • 100g broccoli
  • 50g manchego cheese
  • Salt to taste
  • Pastry dough (the one I used here)
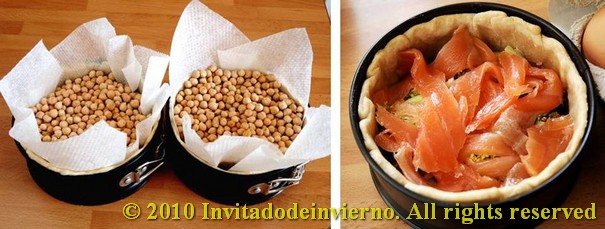
  1. Prepare two individual molds or one medium mold. Butter and flour them. Roll the dough on the floured counter and cut two circles. Then carefully place them on the molds. Press to acommodate and trim the excess. To bake them blank, I put them into the freezer for a while and then I bake them with parchment paper and beans on top (am I too cautious?) to prevent the bottom from rising. In the meantime preheat the oven to 180ºC and then bake them for 10 minutes.
  2. Prepare the filling while the crust is baking. Cut the broccoli in several florettes. I either microwave it or steam it. I can't give you the microwaving time, as I always cook it at 5 minutes intervals, I check everytime because it really depends on the quality of the vegetable. Steaming should last around half and hour, but this is variable too. Set aside when cooked.
  3. Shred the manchego cheese and set aside.
  4. Break the eggs, mix with the cream and add salt to taste. Be careful with the salt, as the salmon and the cheese are already quite salty. Set aside.
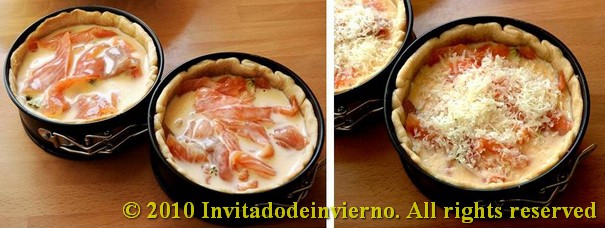
  5. Once the pastry crusts are ready, take them out on the countertop and fill them. Divide the broccoli into yet smaller florettes and lay them on the bottom. Then place the strips of salmon on top. Pour the eggs-cream mixture and tap the molds on the counter for the liquid to distribute evenly. Lastly sprinkle the cheese on top.
  6. The smallish molds will be baked in around 20 minutes. If you use a larger mold, it should be ready in around half an hour, but always test for doneness with a skewer.
Broccoli salmon quiche 1

Broccoli salmon quiche 2

Enjoy!

Eager to know more?

Marinated anchovies or boquerones en vinagre, the ubiquitous tapa

>> Tuesday, January 26, 2010


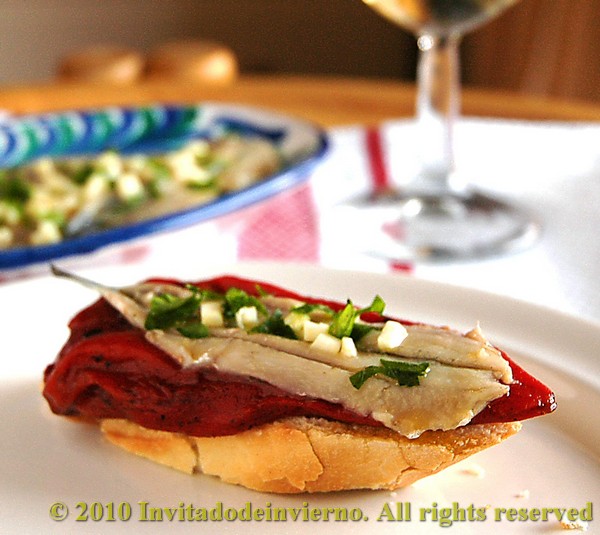
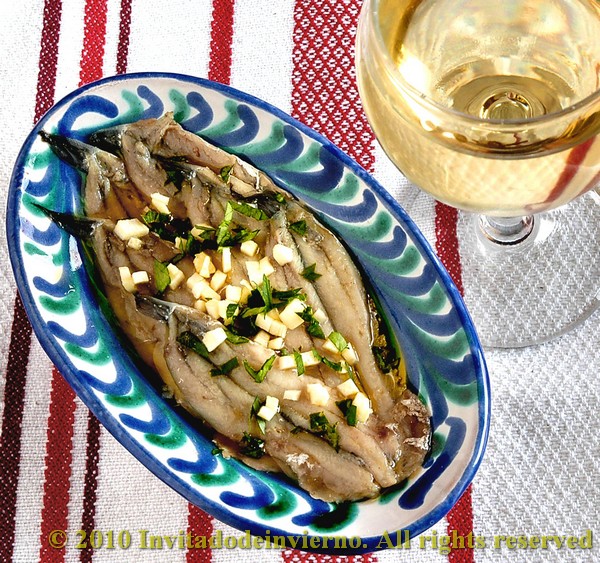
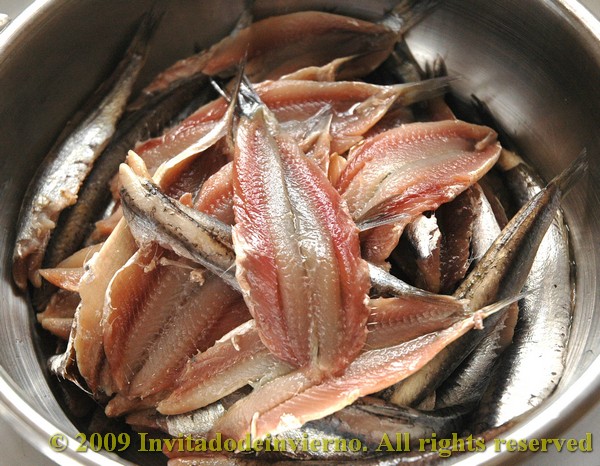
Boquerones en vinagre, meaning fresh anchovies in vinegar, is one of the most typical and easy to make tapas in Spain and one that can be found almost everywhere. I've loved these small fish ever since I was little, and they always remind me of the beer-garlic-olive oil smell in Spanish tabernas. The fish is cured in vinegar for a short time, which gives it a whitish colour and firm consistency, and then left to rest in oil. In Spanish bars they are served in a tiny boat-shaped dish, sprinkled with minced raw garlic and chopped parsley. Either on a slice of bread or on their own... they're delicious.


This kind of marinated fish doesn't feel like raw fish at all, at least not for me. I must say that I usually hate marinated fish, for example marinated salmon, in spite of me being a salmon lover. Marinated salmon feels like raw fish to me, while I don't feel the same about the smoked variety... weird, isn't it?

I've followed the detailed step-by-step recipe of the Spanish web Pepekitchen (in Spanish...). I will try to give you as detailed an account as Pepe does. The method is easy, but you need to follow it closely, please don't improvise because if you for example marinate the fish too long you could end up with a flabby mess.

Boquerones en vinagre (adapted from Pepekitchen)

  • 1kg fresh anchovies
  • 300ml white wine vinegar (I used cider vinegar, it's somewhat milder and it's the type of vinegar I prefer)
  • 100ml water
  • 1 tsp salt
  • Virgin olive oil
  • Garlic and fresh parsley for serving

If you can't find degutted and deboned fresh anchovies, you've got to do it yourself... I have never done it myself, I could... vomit. I usually find a fishmonger to do it for me. Or my mother. Right. The photo sequence at Pepekitchen shows you how to do it: you insert your thumb nail on top of the fish head, break off the head, open the belly with your fingers and pull to extract the guts. Yeah, messy. You have to extract the backbone too, but breaking it off to just leave intact the last piece of tail, with both butterflied fillets attached to it. No, it's not as difficult as it seems. Next you have to wash the fish really well in cold water to extract all the blood. This is an important step for good results. Until a reasonable level of bloodlessness is reached, no need to dissolve the fish in the water...

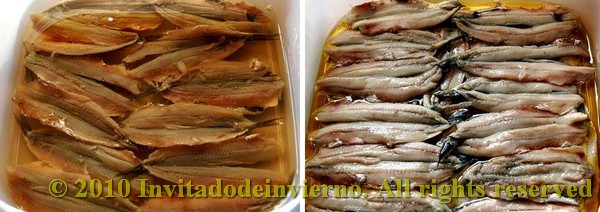
Perfect, now you have a bunch of beautiful beheaded, degutted, deboned, dead, silver little anchovies... Now comes the easy part. Measure the vinegar and the water, mix and add the salt to dissolve. Lay the fish in a plastic container, skin side down, in layers. Add the marinade and lightly tap the bottom of the container for the marinade liquid to fill all the gaps. Cover with a lid and put in the fridge to marinate for 2 hours.


After that time, you'll notice the colour of the fish has changed. Check that all the anchovies have turned whitish all over, that there are no raw portions. If the fish don't look wholly cured, keep marinating somewhat longer. When the curing is done, discard the marinade liquid. Place the anchovies in another container without hardly draining them, again in layers, and finish off each layer by covering it with virgin olive oil. In the fridge they keep longer than one week. You can freeze the fish for at least 24 hours at this stage in case they were completely fresh, to make sure you kill any anisakis (at least that's what we're told to do here in Spain). I didn't freeze them because my anchovies were originally kindly frozen by my mother, who this time bought them for me.


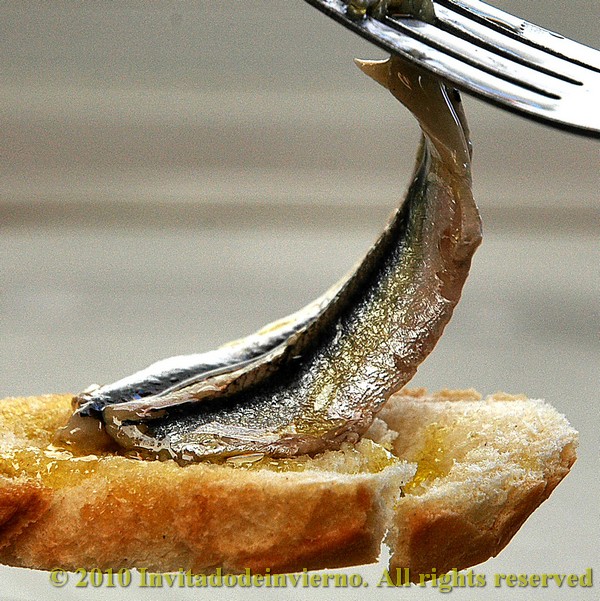
Whenever you wish to serve the boquerones, mince or finely chop one or more peeled cloves of garlic (according to taste), chop a couple sprigs of parsley, and sprinkle on the anchovy fillets, nicely arranged on a plate. Or make a flavorful pincho by placing a couple of fillets on a Piquillo pepper. It's very usual to eat them on their own as an appetizer, soaking the dripping juices by resting each boquerón for a second on a slice of bread held on your left hand (if you're right-handed, that's understood). Enjoy on a sunny day with a beer or a glass of chilled manzanilla, though some will tell you that vinegar and wine are not a good match... I don't care.

Eager to know more?

Salmon escabeche

>> Tuesday, January 19, 2010

salmon escabeche
I've said it before, I'm a real fan of salmon. It's a flavorful fish and very versatile, either smoked or fresh. And besides it's an oily type of fish, brimming with healthy fatty acids. On the other hand, I love those dishes you can keep for several days and that get even better after some time, like escabeches, which by the way are incredibly easy to prepare. There are thousands of escabeche recipes, buy I've used the recipe by Spanish chef Martín Berasategui, from his book Cocina en casa con Martín Berasategui, that I got from my mother a few days ago. Of course I've tweaked it a tiny bit... couldn't help myself. This escabeche is the type that includes Spanish pimentón, like the recipe used for the ubiquitous canned mussels in escabeche, different from the one I use for tuna fish.


I like that this very old preservation method, said to originate in ancient Persia, from where it spread all over the Mediterranean to end up as a dish identified as genuinely Spanish, can help us to make refined dishes today.

Salmon escabeche

  • 850g fresh salmon
  • 2 tbsp coarse salt
  • 1 tbsp black pepper grains
  • 2 bay leafs (I doubled the amount, I love bay)
  • 10 sprigs parsley, chopped
  • 2 sprigs thyme (I used plain dried leaves, a couple of pinches)
  • 1 clove
  • 2 tbsp sweet Spanish pimentón (I strongly recommend you to go for the real thing, the flavor is very distinct)
  • 1l virgin olive oil (I think this amount is just crazy, I covered the salmon in oil and half a liter was more than enough. And please, don't use any. Other. Type. Of. Oil)
  • 4dl cider vinegar (I also changed this to adjust it to the oil amount, I used around 1,5dl)
  • 1dl good white wine (Berasategui doesn't include wine, but I like it!)

Get yourself a good-looking and skinned piece of salmon. Cut the salmon in cubes (let's say 2"-3" pieces) and lay them on a shallow pot, large enough to keep the salmon in one layer. Avoid metallic utensils when using vinegar, as it reacts with some metals. Sprinkle the salt first and then the rest of the herbs and spices. Toss the salmon lightly to distribute more evenly. Then pour all three liquids, wine, vinegar and oil and put the pot on the stove; turn the heat on. Bring slowly to a boil and turn the heat off immediately the moment the first bubble appears. Cover with a lid, set aside and let the salmon cook in the remanent heat while releasing its juices.

salmon escabeche
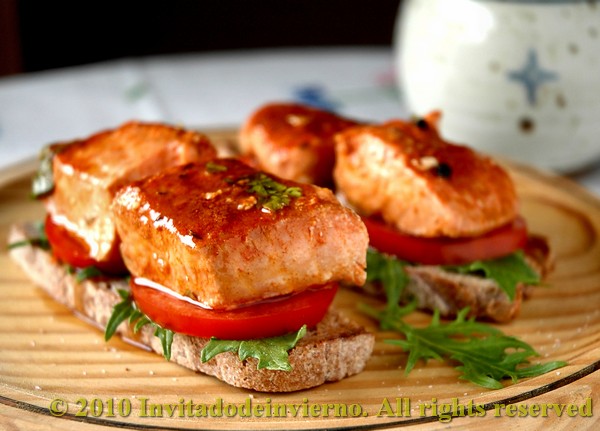
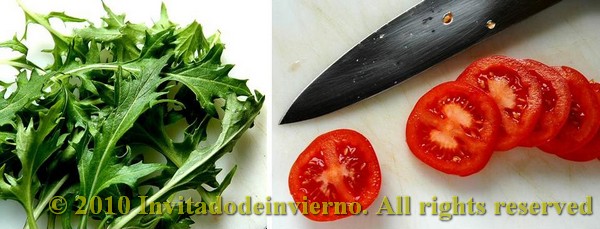
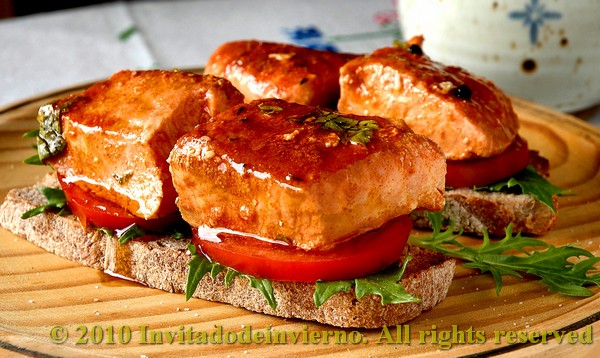
My dear Mr. Berasategui lacks restraint because he instructs to eat the salmon immediately, just after cooling. But I preferred to leave it to rest overnight, just because I have more self-control... ahem. Now seriously, I believe this type of dish needs some time for the flavors to soak into the fish. It easily keeps one week or even longer in the fridge. Escabeche is always eaten at ambient temperature, always let it warm up to ambient. This escabeche is simply delicious as a tapa or pincho on toast with some finely sliced tomato and some greens. It's also brilliant flaked on a salad, on top of boiled and sliced potatoes... just feel free to experiment!

salmon escabeche

Eager to know more?

Daring Cooks' challenge December: Salmon en croûte

>> Monday, December 14, 2009

Salmon en croute
I was very pleased when the Daring Cooks' challenge of this month was revealed, because I love salmon. Therefore I had to love a salmon fillet wrapped in short crust, a.k.a., salmon en croûte. En croûte dishes are typical in French cuisine, the croûte being the dough in which they are wrapped. If there's any French in the room, please correct me if I'm wrong. So here's my take on this scrumptious dish.


The 2009 Daring Cooks challenge was hosted by Simone of Junglefrog Cooking. Simone chose Salmon en Croute (or alternative recipes for Beef Wellington or Vegetable en Croute) from Good Food Online.

Salmon en croûte

  • 150 g mascarpone or any cream cheese
  • 120 g watercress, rocket and spinach
  • 1/2 kg shortcrust pastry (you can use store-bought pastry, but I always make my own, recipe follows)
  • 500 g salmon fillet
  • 1 medium egg
For the shortcrust pastry:
  • 280 g all-purpose flour
  • 125 g cold butter
  • 1 pinch salt
  • 100 g cold water
To prepare the crust, first weigh the flour and butter. Dice the butter and toss it in the flour. Mix it in a food processor until you obtain a crumbly mixture. Add the salt, mix and pour the cold water. I always use the water at fridge temperature. Then mix on high speed until the dough coheres and you get a nice ball. Don't overmix it. Then roll it to at least 1 cm thickness, lay on plastic film and then on a large tray that can fit into the fridge. Cover with another sheet of plastic and put in the fridge to cool.

Salmon en croute
While the dough is resting prepare the filling. Wash the vegetables, pat them dry and mix with the cheese in a food processor, until you get a smooth green cream. I only used spinach and the result was very mild, but I prefer it that way. I'm sure the flavor will be sharper if you add the rocket and watercress too.

The recipe called for making a large package with the whole salmon fillet, so that it could be served in large slices. I preferred to try and make individual little packages, although my size estimation wasn't very... ahem, accurate. In the end each "little" package sufficed for 2 people, because the assembly is quite... nourishing. But anyway I'm sure this would also be a great combination in empanadas size.

Salmon en croute
Heat the oven to 200 ºC. In the meantime, take the dough out of the fridge and roll it thin. Lay the salmon fillet or pieces of fillet on the dough. Sprinkle the salmon with the salt and spread the vegetables-cheese cream on it. Then close the package by brushing the edge with a little water and pressing with the tines of a fork. Transfer the packages to a baking dish. My intention was to make a fish-looking croûte... but I didn't quite succeed. Judge for yourselves. I need some more practice... I'm willing to learn by making this dish some other time... I will make this sacrifice. Back to the point, slash the dough surface in a couple of places so that the steam can come out (I forgot it!). Then beat an egg and use it to brush all the croûte. When the oven is hot enough, put the dish into it and bake for half an hour.

I really liked this dish, we had a family meal and everybody loved it. The flavors meld wonderfully. You can't clearly make out the flavors of the vegetables and cheese and at the same time the salmon flavor is tempered... very tasty result. Wonderful with a good white wine, for an elegant main course on New Year's Eve... remember we have dinner at 10 in Spain... we're crazy.

Eager to know more?

Fish and shellfish soup, Spanish style

>> Monday, November 23, 2009

fish and shellfish soup with picada
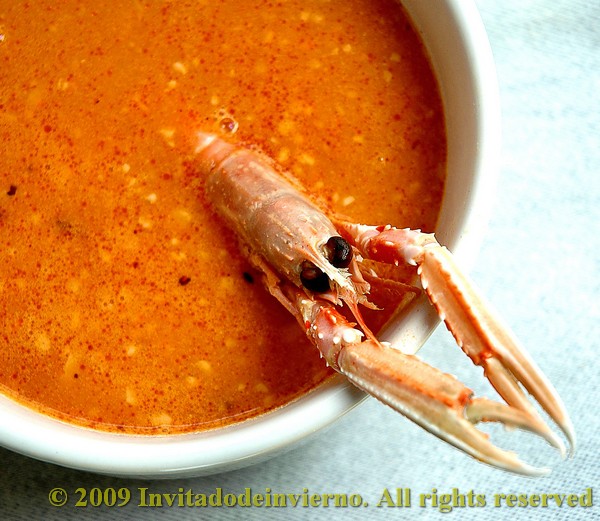
I like the type of fish soup with a somewhat thick and hearty stock, the base for various interesting and floating things like shellfish and pieces of fleshy fish. The Mediterranean in a bowl... yum. My soup includes a base stock made with fish and shellfish, a sofrito made with onion and tomato that's pureed with the stock, a picada that's added almost at the end of the boiling and little pieces of fish, shellfish like mussels or even rice added as garnish to the stock.


Sopa de pescado or fish and shellfish soup (yields around 8 servings)

Base stock:
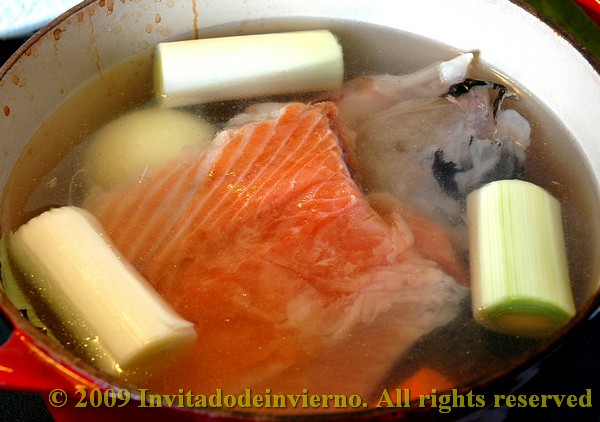
Make a fish stock by boiling the following ingredients in 2 liters of water for half an hour:

  • One large salmon bone and one large monkfish bone (any combination of fish bones is good, but the monkfish is especially flavourful)
  • 1 medium onion
  • 1 carrot
  • 1 leek
  • 1 bay leaf
Discard the solids after the boiling.

fish stock
Then, boil the following shellfish in a different pot, in half a liter of water:
  • 10 shrimps
  • 4 small crawfish
I do this in a different pot only because you have to fish the shrimps and crawfish later and shell them, it's easier if you have them in a smaller recipient. Bring the pot to a boil and turn the heat off immediately. Leave it to cool and shell them.

Then pour a glass of white wine in another pot to steam:
  • 10 small mussels
  • 10 small clams
You can pour yourself a glass of white wine too... that will make for a merrier cooking process. This time I used some leftover cava I had in the fridge instead of the wine. Keep the liquid in the pot and leave aside. Shell the mussels and clams and leave aside.

fish stock
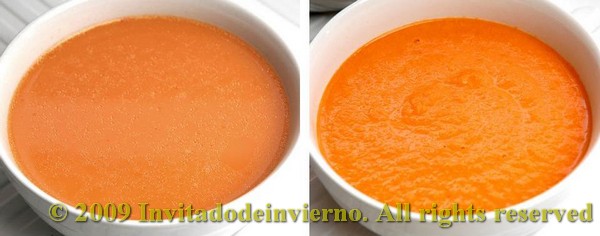
Once all the ingredients are cooked, drain all the three liquids and pour them in one single pot, that is, the fish bones and vegetables stock, the shrimps and crawfish stock and the mussels stock. Then start the sofrito by dicing and frying in olive oil the following ingredients:

Sofrito:
  • 1 medium onion
  • 1 clove garlic
  • 1 tsp ñora flesh
  • 1 cup crushed tomato
Start by frying the diced onion and garlic. When the onion is wilted, add the ñora. Ñoras are typical Spanish sweet round red peppers. They impart a wonderful flavour and are widely used in paellas, for example. They're usually sold dry and they have to be soaked in water for some time before opening them and scraping the pepper's flesh. Anyway, you can skip it if you don't have it. Then add the tomato and fry everything while stirring, around 8-10 minutes, just enough for the water in the tomato to evaporate. It's the tomato and ñora which give the soup its healthy reddish color.

For thickening the base stock I like to add a hake or whiting fillet at the end of the sofrito, to be pureed later with the vegetables. You can also add some potato if you like your stock even thicker. Then puree the sofrito, you can add some fish stock to make it easier. The puree is added to the stock and everything is heated together for around 5 minutes, for the flavours to meld. Then you can add any kind of garnish you prefer, you can even boil a handful of rice in the stock for a heartier soup. In my case I added the shrimps, crawfish, mussels, clams and also some diced cuttlefish and squid, previously stir-fried with some oil. Try the soup for salt and add if needed.

This time I wanted to try and add some picada. The picada is a thick paste made by pounding garlic, almonds, hazelnuts or any other nut, parsley, saffron and toasted bread together in a mortar, then a spoonful of olive oil is added. It's typically added to all kind of dishes if you want more thickness and flavour. Here's a excerpt from Colman Andrews' Catalan Cuisine:

No other European cuisine has anything quite like the picada - which, as noted, is a thickening and flavoring agent made up of such ingredients as garlic, fried bread, olive oil (or some other liquid), and various nuts, herbs, and/or spices, all pounded together with a mortar and pestle. (...) The picada closest relatives are probably Italy's pesto (which likewise involves garlic, nuts and herbs crushed in a mortar) and gremolada ( the Milanese herb-and-garlic mixture traditionally added to osso bucco) - but pesto clearly is a sauce, and both substances, unlike the picada, have limited and highly specialized uses, and a more or less regularized composition.
Picada:
  • 2 cloves garlic
  • 15 almonds, toasted and skinned
  • 15 hazelnuts, toasted and skinned
  • 1 slice toasted bread (I prefer it fried with oil)
  • 1/4 tsp salt
  • 2 stems saffron
  • Olive oil
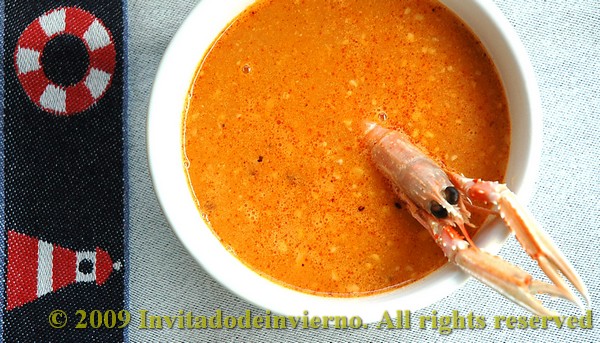
The paste must be thoroughly pounded, until no pieces of nut can be discerned. Hard job for me, I'm quite a weakling. Then add the paste to the soup, boil for a further 2 minutes then turn off the heat. Try for salt again and adjust if necessary. I loved the effect of the picada, you could make out a faint raw garlic flavour, and the nuts give the soup more thickness... delicious.

fish and shellfish soup with picada
Serve the soup in bowls, as rustic as can be. I also love to float a fried slice of bread on top of each bowl... why all things fatty are so good? One of the misteries of the Universe.

Eager to know more?

Daring Cooks' challenge November: Sushi

>> Friday, November 13, 2009


To put it mildly I'm not a sushi person. Or rather I should say I'm not a Japanese food person. You can't like everything, right? It doesn't really attract me, therefore there are few dishes that I've tried. Fine, I admit I'd never tried sushi in my life before, mostly because of the raw fish thing... So when I learnt about the November challenge I must admit I felt a bit discouraged. But nevertheless, this is what the Daring Cooks is about: cooking things you wouldn't even think of cooking otherwise (sushi, me?). That's the point, the DC lead you to the verge of the abyss... right beyond your comfort zone. The bad thing is that there's a slight possibility that you end up smashed at the bottom of the precipice.


This time the challenge consisted of three different types of sushi, although the main goal was to learn to make proper sushi rice. Am I weird if I say that I didn't find it difficult? If I may say so myself. On the other hand, I wasn't sure about me finding the results appetizing... that's why I decided to invite my niece M., fond of sushi and lover of many other dishes of various nationalities, for her to help me make the sushi and above all eat it... that's why the photos were taken in a hurry and it shows.

The November 2009 Daring Cooks challenge was brought to you by Audax of Audax Artifex and Rose of The Bite Me Kitchen. They chose sushi as the challenge.

I'm including almost the complete instructions, but visit Audax and Rose's sites for more information.

PART 1 : SUSHI RICE (makes about 7 cups of cooked sushi rice)

Preparation time: 1¾ hours consisting of :-
Rinsing and draining rice: 35 minutes
Soaking rice: 30 minutes (includes 5 minutes making the vinegar dressing)
Cooking and steaming time: 25 minutes
Finishing the rice: 15 minutes

INGREDIENTS:

* 2½ cups uncooked short grain rice
* 2½ cups water
* For superior results use equal volumes of rice and water

Optional Ingredients

* 3 inch (75mm or 15 grams) square dashi konbu (or kombu) (dried kelp seaweed) wipe with a damp cloth to remove white powder & cut a few slits in the sides of the kelp to help release its flavours
* 2½ teaspoons (12.5 mls) of sake (Japanese rice wine)

Sushi vinegar dressing

* 5 Tablespoons (75 mls) rice vinegar
* 5 Teaspoons (25 mls or 21 grams) sugar
* 1¼ Teaspoons (6.25 mls or 4.5 grams) salt

DIRECTIONS:

Rinsing and draining the rice


1. Swirl rice gently in a bowl of water, drain, repeat 3-4 times until water is nearly clear. Don't crush the rice in your hands or against the side of the bowl since dry rice is very brittle.
2. Gently place rice into a strainer and drain well for 30 minutes.

Soaking the rice

1. Gently place the rice into a heavy medium pot with a tight fitting lid (if you have a loose fitting lid use a piece of aluminium foil to make the seal tight).
2. Add 2½ cups of water and the dashi konbu.
3. Set the rice aside to soak for 30 minutes, during this time prepare the sushi rice dressing.

Preparing the Rice Vinegar Dressing

1. Combine the rice vinegar, sugar and salt in a small bowl.
2. Heat on low setting.
3. Stir until the mixture goes clear and the sugar and salt have dissolved.
4. Set aside at room temperature until the rice is cooked.

Cooking the rice

1. After 30 minutes of soaking add sake (if using) to the rice.
2. Bring rinsed and soaked rice to the boil.
3. Reduce heat to the lowest setting and simmer, covered, until all the water is absorbed, 12-15 minutes. Do not remove the lid during this process. Turn off heat.
4. Let stand with the lid on, 10-15 minutes. Do not peek inside the pot or remove the lid. During this time the rice is steaming which completes the cooking process.

Finishing the rice
sushi
* Turning out the rice

1. Moisten lightly a flat thin wooden spatula or spoon and a large shallow flat-bottomed non-metallic (plastic, glass or wood) bowl. Do not use metallic objects since the vinegar will react with it and produce sour and bitter sushi rice.
2. Remove the dashi konbu (kelp) from the cooked rice.
3. Use the spatula to loosen gently the rice and invert the rice pot over the bowl, gently causing the cooked rice to fall into the bowl in one central heap. Do this gently so as not to cause the rice grains to become damaged.

* Dressing the rice with vinegar

1. Slowly pour the cooled sushi vinegar over the spatula onto the hot rice.
2. Using the spatula gently spread the rice into a thin, even layer using a 45° cutting action to break up any lumps and to separate the rice. Don't stir or mash rice.
3. After the rice is spread out, start turning it over gently, in small portions, using a cutting action, allowing steam to escape, for about a minute.

* Fanning & Tossing the rice

1. Continue turning over the rice, but now start fanning (using a piece of stiff cardboard) the rice vigorously as you do so. Don't flip the rice into the air but continue to gently slice, lift and turn the rice occasionally, for 10 minutes. Cooling the rice using a fan gives good flavour, texture and a high-gloss sheen to the rice. The vinegar dressing will be absorbed by the hot rice. Using a small electric fan on the lowest speed setting is highly recommended.
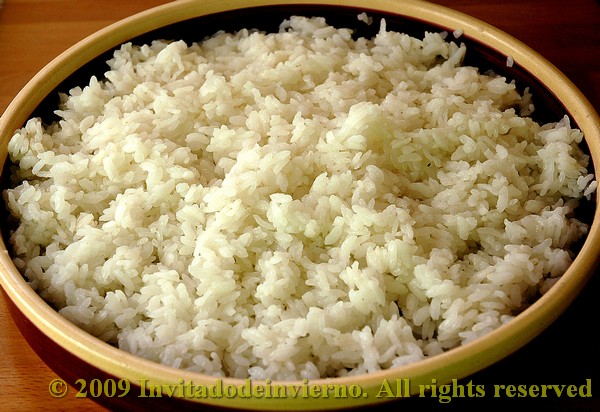
2. Stop fanning when there's no more visible steam, and all the vinegar dressing has been adsorbed and the rice is shiny. Your sushi rice is ready to be used. (I didn't fan the rice, I just put the bowl by an open window. And it didn't take as long as 10 minutes, I'm not patient enough. I believe the rice was conveniently sticky and shiny though.)

* Keeping the rice moist

1. Cover with a damp, lint free cloth to prevent the rice from drying out while preparing your sushi meal. Do not store sushi rice in the refrigerator leave on the counter covered at room temperature. Sushi rice is best used when it is at room temperature.

* Tip: To make sushi rice: for each cup of rice use 1 cup of water, 2 Tbs rice vinegar, 2 tsp sugar, ½ tsp salt and 1 tsp sake. For superior results use equal volumes of rice and water when cooking the sushi rice since the weight of rice can vary. Weight of 2½ cups of uncooked rice is about 525 grams or 18½ ounces.

NOTES:
Sushi Rice – choose a short or medium grain rice. Do not use Arborio, long-grain, or parboiled white rice. Medium-grained calrose is a suitable rice. Rice expands (about 3 times) when cooked so make sure your pot is large enough. Washing the rice removes the rice flour that coats the rice and gives a fresh flavour and scent to the cooked rice. Look for rice that is labelled 'sushi' rice. Cooked sushi rice can be placed in plastic bags and frozen for 3 months, microwave when needed. Cooked sushi rice should be sticky, shiny and the individual grains of rice can been see.

Dashi konbu – or ( dashi kombu) – dried kelp, it looks like broad, leathery, wrinkly greenish ribbon often coated with a white powder. The darker green the leaves, the better the quality of kelp. Dashi konbu adds a refreshing light ocean taste to sushi rice. (I had no kelp, so I used wakame instead.)


Rice Vinegar – this gives prepared sushi rice its unique clean, crisp taste. Do not use bottled “sushi vinegar” as it is too harsh and has a bitter after-taste. Look carefully at the label of the rice vinegar it should have NO SALT and NO SUGAR in the product. Apple cider vinegar is a good substitute if rice vinegar is not available. You can use mild white wine vinegar or mild red wine vinegar if you cannot find rice vinegar or apple cider vinegar. DO NOT USE NORMAL WHITE VINEGAR it is too harsh.

Sake – Japanese rice wine. Do not use cooking sake or Chinese cooking rice wine, look for a reasonably priced drinkable sake. Refrigerate opened sake & use within two months. You can use vodka or a mild tasting gin if sake is not available.

Sugar – you can use mild honey or any other vegan substitute to give the equivalent sweetness.

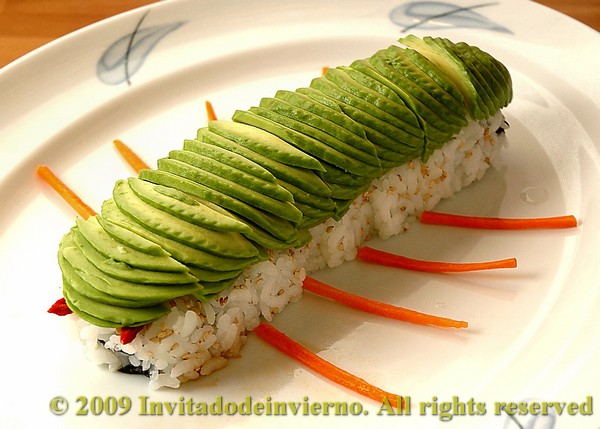
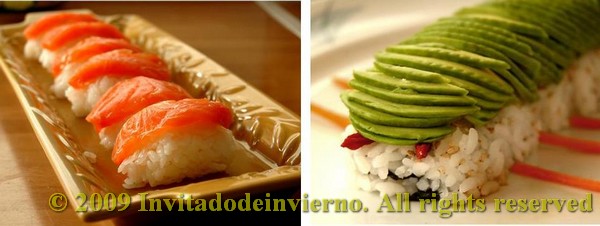
PART 2 : Dragon Rolls (also called Caterpillar Rolls)

Preparation time: 30 minutes, plus 1¾ hours to make the sushi rice
Cooking time: about 5 minutes (grilling the eel)

Yield: 2 inside-out (uramaki) sushi rolls

INGREDIENTS:

* 1 sheet 7”x8” (17.5cmx20cm) of toasted nori (dried seaweed sheets), cut into halves
* 1/2 Japanese cucumber
* 2 cups of prepared sushi rice
* Glazed Barbecued Eel (ungai) (about 3½ ounces or 100 grams)
* 1 Avocado
* Vinegared Water – ½ cup of water combined with a dash of rice vinegar
* Various small amounts of sauces to use as the flames of the dragon (or legs of a caterpillar)

Optional

* 2 tablespoons (25 grams or 1 oz) Fish Roe (Fish eggs)

DIRECTIONS:
1.Cut cucumber into strips ¼ inch (6mm) x 7” (175mm) long, then salt, rinse & dry the strips.
2.Grill (broil) the eel for about 2-5 minutes until bubbling. Cut into two lengthwise strips.
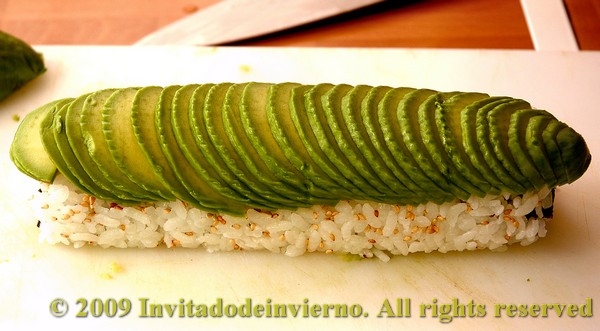
3.Halve, pit and peel the avocado. Cut the avocado halves into thin even 1/8 inch (3 mm) slices. Fan out the cut avocado into a 7 inch (175 mm) overlapping pattern.
4.Cover bamboo mat with plastic wrap. Place a sheet of nori shiny side down, lengthwise, on the edge the mat.
5.At this point I found really essential to follow the video below. So just do it!

sushi
* Tip: The most common mistake is having too much filling the golden rule is less is more when it comes to making sushi it is easier to roll an under-filled roll than an over-filled roll.

* Tip: Dampen your knife with a moist lint-free towel before every cut – this prevents the sushi rice from sticking to your knife. (I simply moistened the knife in tap water, it worked out fine.)


* Tip: Excellent videos on making Dragon Rolls
http://www.youtube.com/watch?v=pQZGRohVNFQ
http://www.youtube.com/watch?v=fo55iBN9FQs&feature=related

NOTES:
Bamboo mat (makisu) – A 10 inch (25cm) square mat made of thin slates of bamboo tied together with string.
Substitutes: a thin magazine cut to size wrapped in plastic wrap or a few layers of parchment paper cut to size about 10 inch (25cm) square.

Nori – Sheets of seaweed (laver) processed into thin sheets about 7 inches x 8 inches (17.5cm x 20cm) in size. Always re-toast the nori sheet over a gas stove on low flame for 5 to 10 seconds, or place nori on a clean oven rack and bake it in a preheated 350F-degree (180C) oven for 30 seconds. (I forgot to toast it!)
Substitutes: Thin cooked egg omelette cut to same size as a nori sheet (7 inches by 8 inches or 17.5cm x 20cm). Also soya bean wrappers, rice paper, tofu wrappers, dosas, crepes or an overlapping layer of thinly sliced cooked vegetables.

Glazed Freshwater Barbecued Eel (unagi) – Deliciously rich and a little like pork they are sold in packs in the freezer (and sometimes the fresh fish) section of Asian markets.
Substitutes: Teriyaki chicken, cooked crab meat, smoked fish, smoked chicken, seared beef with BBQ sauce, deep fried tofu with dark soya sauce, tinned pink or red salmon, smoked salmon, fresh cooked soy beans with a selection of dark sauces, caramelized onions, firm cream cheese, or extra avocado with BBQ sauce as the filling. Any remaining eel should be left in the package re-wrapped in plastic and returned to the freezer as quickly as possible. (I used some scrumptious tea-smoked salmon leftovers instead of the eel. No Asian market in my neighborhood.)

Japanese Cucumber – Japanese cucumbers are thin-skinned, seedless and contain much less water than normal cucumber.
Substitutes: English or hothouse cucumbers which have been peeled, de-seeded and salted as above. If not available try matchsticks of your favourite crisp vegetable.

Avocado –
Substitutes: If not available use slices of roasted capsicum (bell pepper), slices of roasted tomatoes, lightly cooked whole snap (snow) peas, slices of Japanese daikon radish or other cooked thinly sliced vegetables, or slices of 'sushi' grade fish such as tuna, yellow tail and red snapper; smoked salmon, pastrami, salami, various colours of fish roe, or various colours of sesame seeds.

Fish Roe (Fish eggs or caviar) – most roes (fish eggs) are rich so they are served in small portions. Try salmon roe (ikura), smelt roe (masago) or seasoned flying-fish roe (tobiko).
Substitutes: You can use toasted sesame seeds or black onion (nigella) seeds as a vegan choice.

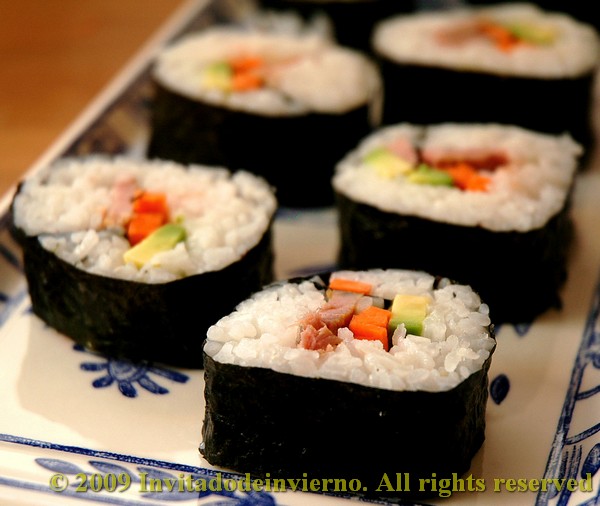
PART 3 : Spiral Sushi Roll
This is easiest 'decorative' sushi roll.

Preparation time: 15 minutes, plus 1¾ hours to make the sushi rice

Yield: One Roll, cut into 8 pieces

INGREDIENTS:

* 2½ cups prepared sushi rice
* 2 sheets of toasted nori, each sized 7”x8” (17.5cmx20cm)
* Six assorted fillings, each filling should be the size of a pencil (see note below)

DIRECTIONS:
1.Join 2 sheets of nori by moistening the adjacent edges and overlapping them about ½ inch (12mm).
2.Place this double sheet shiny side down on a rolling mat, part of the nori will extend beyond the mat.
3.Using moist fingers place 2½ cups of rice on the nori and gently rake your fingertips across grains to spread rice evenly, leaving ¼ inch (6mm) nori showing on the both ends of the sheet. Do not mash or squash the rice onto the nori, the rice should appear loosely packed and be evenly distributed over the entire sheet, you should be able to see the nori sheet in a few places.
4.Using your fingers form six grooves (in the same direction that you will be rolling the mat) at even intervals across the bed of rice. Make the first groove about 2 inches (50 mm) from the edge of the nori sheet. Form the grooves by pushing the rice away, do not mash or squash the rice, leave a loose one grain layer of rice in the bottom of the grooves. Level the areas between the grooves where you have pushed the rice.
5.Place your fillings in the grooves. Fill the grooves a little higher than the surrounding rice bed.
6.Then roll the sushi up from the edge closest to you, this will form a spiral pattern of nori, rice and fillings inside the roll.
7.Slice into 8 pieces with a very sharp wet knife, wiping the blade with a damp cloth after each cut.
8.Place the pieces on a platter and garnish.
sushi
NOTE:
Make each groove about a finger-width wide they will hold about 1-2 tablespoons of filling. Use fillings that compliment each other and are highly coloured. Use parboiled vegetables cut into strips, seafood, left over eel, smoked fish or chicken, whole cooked beans, edible flowers etc....

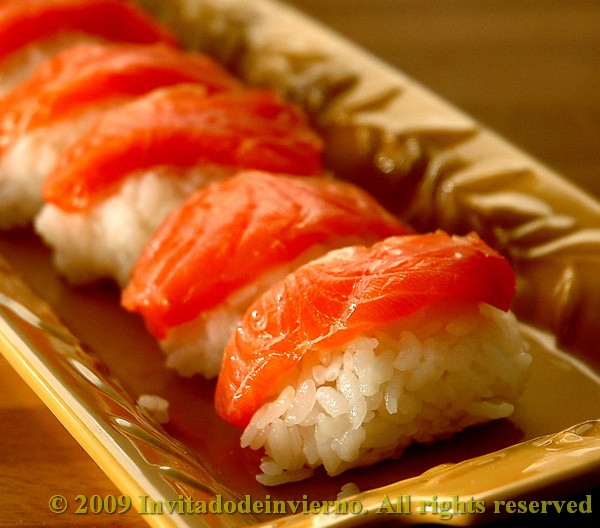
PART 4 : Nigiri Sushi
Nigiri sushi is the type of sushi most often made in sushi bars. In Japanese, nigiri means “squeeze”.

Preparation time: 30 minutes, plus 1¾ hours to make the sushi rice

Yield: 14-16 pieces of sushi

INGREDIENTS:

* 2 cups prepared sushi rice
* 8 pairs of assorted toppings, 200 gms/7 ozs total of fish, meat or vegetables (see note below)
* 1 tablespoon Wasabi (paste, reconstituted powder) or any other paste to adhere topping to rice

Optional

* Garnishes such as Ginger (pickled), chilli strips, vegetables flowers etc
* Thin strips of nori or vegetables (for tying topping on)

DIRECTIONS:
1.When handling sushi rice, make certain your hands are very clean. To keep the rice from sticking to our hands moisten your hands with vinegared water.
2.Form nigiri sushi by scooping up a small amount (about 2 tablespoons) of rice with your forefinger and second finger of your right hand and placing it in your cupped left palm.
3.Use the fingers and thumb of your right hand to form it into a long, narrow mound (about 2 inches x 1 inch wide or 50mm x 25mm) in your cupped palm.
4.Press enough to make the rice hold firmly together. Place the nigiri on a damp cutting board flat side down. Don't let sushi touch or they'll stick to each other. At this point, you can cover the sushi with plastic wrap, and they'll keep at room temperature (not the refrigerator) for several hours.
5.Smear a thin line of wasabi on top of the rice and place the topping piece on it. You may need to press the topping down lightly with your fingers and adjust the shape of the rice accordingly to form an attractive piece of nigiri sushi. If your topping is very loose like fish roe you can place a strip of nori (higher than the rice) around the nigiri and form 'battleship' sushi. The cavity that the nori forms holds the topping so it does not fall off.
6.Garnish as desired and use strips of nori (or vegetable) to tie the topping to the nigiri if needed.
7.It is customary to make nigiri sushi in pairs, so make two of each variety.

My nigiri sushi were a bit too big. It's easy to criticize me, but you would understand me if you touched that SuperGlue rice that sticks to your hands to death.

* Tips: A great video on making nigiri sushi
http://www.howcast.com/videos/270-How-To-Make-Sushi

NOTES:
Seafood nigiri must use sushi grade (sashimi grade) fish. Try tuna, red sea bream (red snapper), yellowtail or salmon. Cooked shrimp, cooked crab, cooked meat can also be used! You can use any vegetable you wish try asparagus, pumpkin, carrot, avocado, cucumber, shiitake mushroom, tofu, thin sliced egg omelette, etc... Thinly slice or julienne vegetables, parboiling if necessary tie on with a thin (1/4” or 6mm) strip of nori or vegetable strip wrapped around the whole sushi if needed..

sushi
Not too bad as another experience in life. Now when I'm old (older) I can tell my grandsons about how I once made sushi. Unfortunately I found mine singularly insipid. My niece informed me that it was meant to be like that... really? Well, I had no reference for comparing. Maybe they lacked soy sauce, wasabi, or some other sauce. I thought it would be nice to make a deconstructed paella-sushi next time, with yellow rice, conveniently sticky, and the paella garnishes for filling... I need to try that. The good thing in this challenge is that I got to know that raw fish is not an essential ingredient of sushi. I've got to give them extra flavor next time. But indeed it's not difficult to make. Thanks Audax and Rose!

Eager to know more?

Tea-smoked salmon

>> Friday, October 30, 2009


I love salmon, especially smoked. Some time ago we were lucky to be served a delicious homemade hot-smoked salmon by my brother-in-law H., who's a great cook. Home hot-smoking? I even hadn't any idea that such a thing as hot-smoking existed. So my little children, if you're as little informed as I was, I warn you that there are two techniques for smoking fish: hot- and cold-smoking, with utterly different results. H. explained to me that he used some kind of gadget he had bought in Sweden, along with a bag of sawdust, for smoking... but, I don't know... Sweden is not on my way, I'm too busy today... Nevertheless I had been so deeply impressed by the hot-smoked salmon that I had to find some way to make it.


Here's a short explanation on the fish smoking subject, from this web site:

The preservation of fish has been an integral part of every seafaring culture. Over the course of thousands of years of drying, salting and smoking fish the technique has developed to a point where once common food has become a delicacy. In this article let's look at hot smoked fish. Cold smoking requires temperatures of around 80 degrees F. for several days. Hot smoking however can be done at temperatures of up to 200 degrees F. and only takes a few hours. It is best to start with a saltwater brine. The brining process is quick so don't worry about having to start out the day before. Plan on the fish being in the brine for about 15 minutes per 1/2 inch of thickness. Also plan on 1 quart of brine per pound of fish.
On my quest for the best way to hot-smoke fish at home, I happened to find a recipe for tea-smoking in an Argentinian blog, here. And I said to myself: if she can do it, you can do it. Therefore I opted for a delicate tea-smoking instead of the sawdust smoking (sawdust? what a lack of distinction). Using tea leaves for smoking food seems to be an ancient Chinese technique. Besides I had a bag of green tea in my pantry. I had bought it because of its antioxidizing action, so that I could antioxidize myself... Unfortunately I was stopped by a recurrent issue: no matter how many times I try it, I-don't-like-tea. So there was the tea, quietly resting without exerting any antioxidizing power on me... So this would be a good opportunity to get rid of it (do burnt antioxidants do any good?). You only need a deep pan or casserole with a tight lid, I guess a wok would be great.

Tea-smoked salmon
  • 600g salmon
  • 3 handfuls rice
  • 3 handfuls sugar
  • 3 tbsp green tea leaves (I guess any kind of tea would do)
  • Salt to taste
  • Aluminum foil

Line the pan or casserole with aluminum foil. Sprinkle a layer of rice, sugar and tea. Put a circle of aluminum foil on top, so that the rice, sugar, tea mixture is covered. Salt the fish thoroughly. The best thing is to rest the fish on a grid or rack that fits into the container, so that the fish oil can drip and the smoke contact surface is larger. I didn't have any, so I laid the pieces on the foil. Then cover the pan and put on the heat on medium. You'll soon start noticing smoke spirals (if your pan has a glass lid like mine). My fish took around 20 minutes to cook, although the time depends on the thickness of the pieces. The fish is cooked and aromatized at the same time. And trust me, the result is worthwhile, the tea gives the fish a wonderful flavor. The only disadvantage is that a nice burnt smell pervades the whole house... maybe my pieces of fish took a bit too long to cook and the rice burnt completely. I'll make smaller pieces next time. I'm sure my neighbours were on the verge of calling the fire brigade. Well, maybe it would be a good chance to make friends...


My brother-in-law served this salmon with some mayonnaise on a toast... but the possibilities are endless. I had some after preparing it with just some soft-fried potatoes, nothing more... simple and delicious.

Eager to know more?
Tapa or ración? Boquerones fritos or fried fresh anchovies

>> Saturday, September 19, 2009


What's the difference between tapa and ración? I guess a lot of people out of Spain already know that tapa is a small serving of food, served along with the drinks in most of Spanish bars. The price of the tapa is included in the price of the drink and it's something you don't need to ask for (well, most of the time) . In fact a tapa can be made with nearly anything, from some olives to fried chicken wings, as long as the amount is small. There are places though that are known for their enormous tapas, like the town of Granada, where you can make a substantial meal just by taking a tour through different bars.


A ración is a different thing. It's a bigger portion of food which is usually shared by several people and something you have to pay for separately. At a bar it is quite usual to have a whole meal just by piling up some raciones on the table, instead of a formal meal with first course, second course and so on.


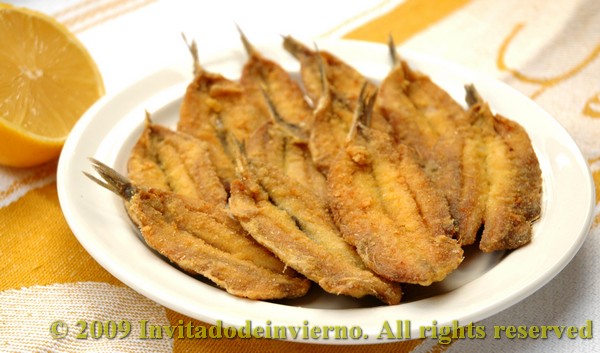
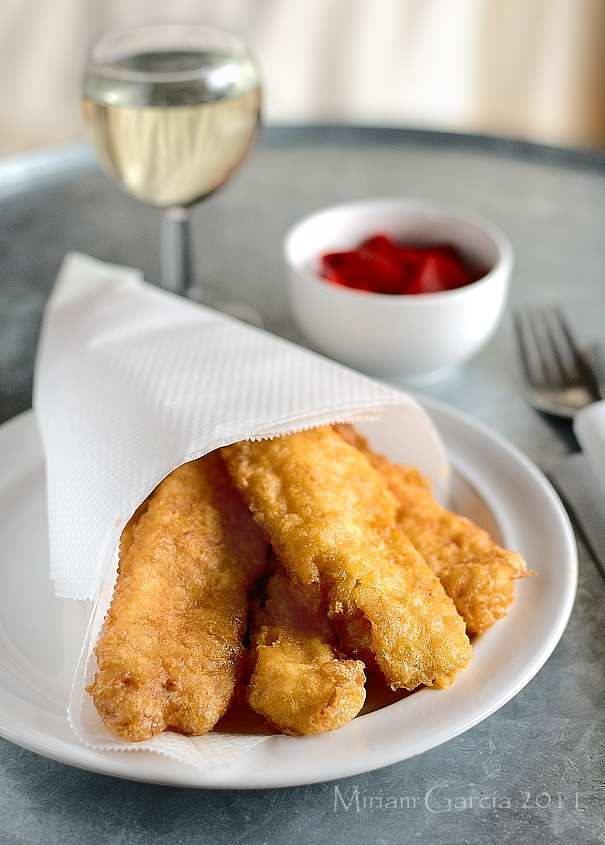
After this cultural introduction to raise the level of the blog, ever so poor, one of my favorite ración or tapa has always been anchovies, either fried or in vinegar. Both are very typical all over Spain. For those who haven't tried them, the flavor of fresh anchovies has little to do with that of the more common salted and cured fish. It is a lot milder. Fried fresh anchovies were quite a staple at home when I was small, as it was inexpensive and tasty. Oily fish like anchovies, sardines, mackerel and tuna are very much appreciated in Spain. And now I give them to my kids, because this type of fish is supposed to be very healthy... until some brainy research demonstrates the opposite.

Boquerones fritos (makes 4 normal servings)

  • 1kg fresh anchovies, gutted and clean (I'm lucky that my fishmonger guts them for me)
  • All-purpose flour or chickpea flour for coating
  • Salt
  • Virgin olive oil for frying
  • A wedge of lemon for garnish

Wash the fish in cold water to get rid of the blood. I usually take off the central bone also and open them. Be careful to leave intact the final part of the bone, ending in the tail. It's normal practice to break the bone just before the tail and leave it so that it can be used to grab the fish for eating. Yes, it's typical to use your hands for eating fried anchovies... we're not civilized, I know. We still kill bulls for fun, don't we?


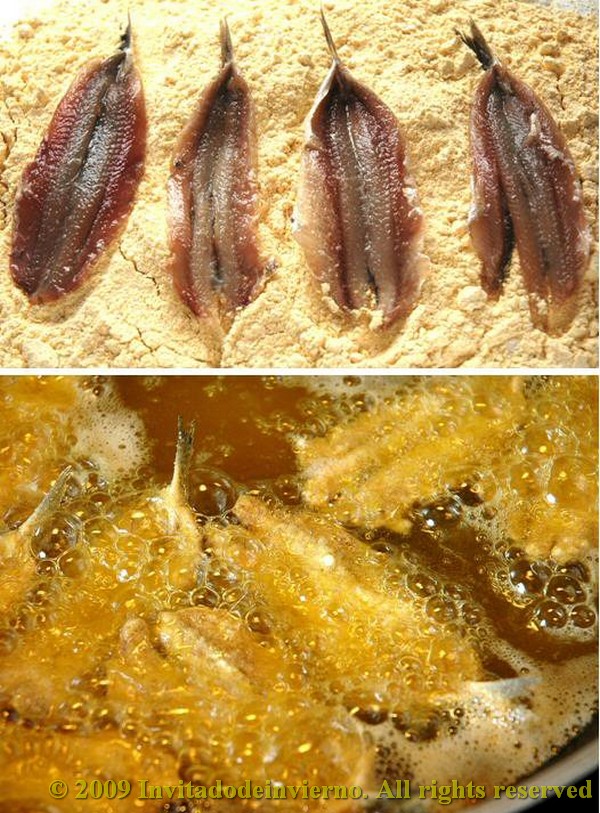
Let the fish drain the water for a while on a colander, salt and coat them with the flour. Chickpea flour is very commonly used for coating fish in Andalusia, either alone or mixed with plain flour. Pour oil in a pan till you have a level of 1cm more or less. Put the pan on high-medium heat and fry the fish in batches. I like them quite crispy, but that's very personal. You can lay them on a paper towel to soak some of the oil if you prefer. Drizzle with some lemon juice and enjoy with a beer or a glass of Spanish white wine, like fino or manzanilla... mmmm.

Eager to know more?

Bean and smoked salmon salad

>> Monday, August 24, 2009


I know I'm not being original (am I ever?) with my proposal today, but this weather prevents me from thinking hard... and also nobody feels like having anything remotely warm. I can't even think of using the oven. I've been wanting to bake bread for some days, but I don't even dare because when the kitchen is over 90 ºF my brain malfunctions. And let's not talk about elaborate recipes... I don't remember the last time I felt so lazy. On the other hand, this dish is a very lovely option to eat pulses in the summer, a very important part of the Mediterranean diet. Beans, chickpeas and the like are cooked in stews during cold weather, with lots of meat, Spanish ham and chorizo, only this type of dish is not exactly what you feel like eating right now...


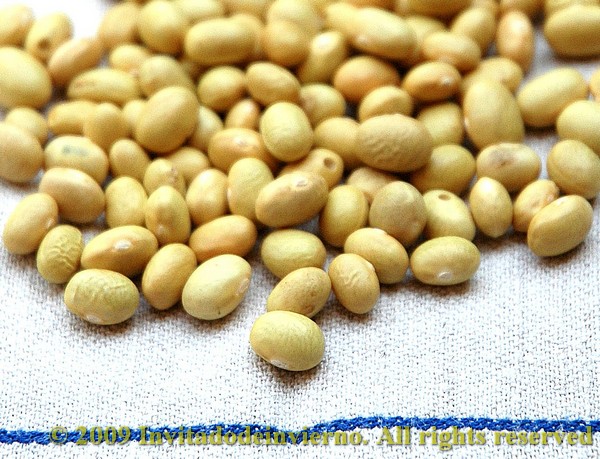
So this is a very simple and traditional recipe, only somewhat tweaked with a special vinaigrette. It's a good chance to use up some of the beans I brought from my holiday in Asturias, called "cena del cura" beans, meaning "priest's supper". I brought with me loads of beans and chickpeas. Yes, it's time to stock up with food for the winter.

Bean and smoked salmon salad

  • 100 g beans
  • 2 cloves garlic
  • 1 bay leaf
  • 100 g good smoked salmon
  • 1 tsp honey
  • 2 tsp mustard (I used Dijon)
  • 2 tbsp balsamic vinegar
  • 1/2 cup virgin olive oil
  • Salt to taste
You know I love to pretend I'm original, so I decided to make a different vinaigrette from the classical Spanish one, with just olive oil, plain vinegar, garlic and minced green pepper. I opted for a mustard vinaigrette. I love their sweet-sour touch. I found this vinaigrette delicious, in spite of the sickly colour resulting from the mixture of the yellow mustard and the brown balsamic vinegar... ahem. Serious, the color looks so unhealthy that I didn't dare to take a picture. I didn't want you to think that I added motorcycle oil to the salad. The amounts for the vinaigrette yield a fair amount of mixture, while the weight of beans corresponds to only 2 servings (of course my kids wouldn't even get near the salad). Adjust both to the number of guests.


Well, leave the beans to soak overnight, this makes the boiling much shorter. The next day put them in a pot with cold water and bring them to a boil, along with a couple of cloves of garlic and a bay leaf, as long as needed to tenderize the beans. The boiling time will depend on the kind of bean and its freshness. Then put off the heat and leave them aside to cool while you prepare the vinaigrette. You can salt the beans at the end or at mid-boiling. Mix all the vinaigrette ingredients except the salt. Mix thoroughly, till all the oil is emulsifyed. I like the mayonnaise-like consistency of mustard vinaigrettes. Lastly add the salt little by little, tasting to adjust. The color and sweetness of this vinaigrette, added to the beans, reminded me of baked beans. It's a pity that these beans lose their nice yellow color after boiling.

But... what I really loved about cooking this dish: to use my brand new pastry rings for the setting... wow! Such a beautiful thing. Mix the beans with the vinaigrette in a bowl, with as much dressing as you prefer, and stir well. Put the ring on the plate (I oiled the inside, I'm not sure it's necessary) and then... what an excitement! Pour half the vinaigrette beans inside. Nicely lay the smoked salmon on top, cut in whatever size you prefer. Then flatten the assembly slightly, lift the ring... et voilà! These simple pleasures make me so happy... :-)

Eager to know more?

Tuna fish in escabeche

>> Sunday, July 19, 2009


In the summer I always make tuna in escabeche. Served on top of a nice bed of salad it is a wholesome and delicious dish, good as single course. Perfect for hot weather and nourishing at the same time. Regarding the explanation about the different tuna species included in this previous post, I can tell you I have used both northern bluefin and albacore and the latter works much better.


Tuna fish in escabeche

  • 1,350 kg white tuna (the original recipe calls for 1 kg; I had bought three beautiful tuna tails and used them all)
  • 1 medium onion
  • 1 large carrot
  • 3 cloves garlic
  • A good dash of virgin olive oil for the sofrito
  • 250 g cider vinegar (I prefer cider vinegar to wine vinegar, it is softer)
  • 250 g good white wine
  • 150 g water
  • 3 bay leaves
  • 1 tbsp black peppercorns
  • Salt to taste


This is adapted from a recipe by Thermomix. It calls for steaming the fish with the escabeche sauce. This means that first you prepare the sofrito, then the whole escabeche sauce and then it is used to steam the fish on top of it. The traditional method for escabeche is to boil the fish directly in the sauce. If you use the steaming method, the fish must be allowed to rest in the sauce at least one whole day, so that it soaks the juices and the flavours mingle. Escabeche is always tastier after some days rest.

So... make a sofrito with the onion, carrot and garlic, all finely diced, in the olive oil. When the vegetables are soft, add the liquid ingredients: water, wine and vinegar, along with the bay leaves, the peppercorns and the salt. Put the tuna to steam o directly into the liquid, whichever method you prefer. Bring the liquid to a boil and then leave for 20-25 minutes. The cooking time depends on the size of the fish pieces. Mine took 25 minutes. After 20 minutes, test for doneness (cut the center of a piece so that you can see the inner color). Leave for some more time if it is not cooked. Leave to cool. If you have steamed the tuna, put it now into the sauce. Leave to rest for a day, then enjoy this scrumptious and very Spanish dish. It is superb accompanied by shredded cabbage and carrot.


I put a portion into jars for preserving, which I sterilized in a pressure cooker this time... I don't know why but I hardly ever use my pressure cooker, it gives me the creeps. It makes no sense, because I'm a chemist and I've done far worse things when I was at college. When I use it I need to stay in the kitchen and watch it closely. It seems I want to be there if it explodes and be hit... Should consult my therapist. And this much stress is useless anyway, the preserved escabeche won't last very long...

Eager to know more?
How to make preserved tuna in oil

>> Tuesday, July 14, 2009


Canned tuna... I love the word... In Spain everybody likes tuna in oil or escabeche... in a salad, in stuffed eggs, in a pincho, oozing juices on the bread... mmm, I get carried away. All peculiar people in the world who don't like canned tuna, please stop reading this post, because it deals with how to preserve tuna fish. The concept and recipe comes from the blog Milcolores, although I made a mix with some recommendations from the blog Mercado Calabajío. I love these mixes... first you read 12 recipes about the same dish, then you do the average, you trim here, you add there, add a pinch of salt and check what comes out. Some times it turns out like Frankenstein, but some others the result is a real success, like in this case.


Ah... tuna fish. I'm bound to tuna fish by unbreakable bonds. I still recall a certain tuna fish festival we attended at Burela, Galicia, a few years ago. For a ridiculous price you could get a very elegant plastic plate with tuna empanada, two or three chunks of Galician bread and two or three chunks the size of my fist of tuna fish from Burela in escabeche... and a glass of Valdepeñas wine. The tuna fish was so sturdy that you could feel it soaking your vital juices, but in spite of that the empanada... the sunset... the atmosphere... the wine oozing out the corner of my mouth ... I will never forget that tuna fish... I can cry when I recall that tuna... I love you, tuna.


If you want to know about the different species of tuna, check this link. What I used for my tuna fish pie was northern blue fin tuna, and also for this recipe.

Now to the point, here's what I did:

  • Here in Spain tuna fish is present in the market mainly in the Summer and it can be specially cheap at the end of it; buy a fair amount of tuna whenever you find it at a good price. Ask for the fish to be cut in rounds or on any way that let you fit it comfortably into a large pan. I bought 1,5 kg in rounds of 1 inch thick approx.
  • Lay an awful lot of bay leaves on the bottom of the pan. I used an enameled Le Creuset pan.
  • Lay the chunks of tuna fish on top of the bay and cover with water. It is important to measure the amount of water added, in order to calculate the salt to be added. The recommended amount is 85-95 g salt per liter of water. I used this ratio and I was satisfied with the result, although saltiness is a very personal thing.
  • Cover the fish with another lot of bay leaves. Don't restrain yourself, the bay flavour is not strong in the final result, in spite of adding so many leaves.
  • Boil the fish for 20-30 minutes, depending on the size of the pieces. Then put off the heat and let it cool.
  • When the fish is cool to the touch, take it off the pan, drain it and eliminate skin and bones, in case you have boiled it whole.
  • In the meantime you should have sterilized the glass jars you've chosen for the preserving, boiling the jars and lids in water for half an hour. Just drain them on a clean towel, in an upside down position, don't dry them in any way.
  • In some blogs there's a recommendation for letting the tuna fish harden in the fridge overnight, wrapped in aluminum foil. I was impatient and I didn't follow this instruction. The result was very good anyway, so I don't deem this step really necessary. Then put the tuna fish pieces on a cutting board and try to cut rectangular pieces that can fit into the jars. The pieces must fit tightly so that you don't need to use a lot of olive oil.
  • Once all the tuna pieces are acommodated, fill the jars with olive oil. Some people use sunflower oil, but I think no other oil gives the same flavour.
  • Cover tightly with the lids and sterilize again the filled the jars in a pan with boiling water, on bain marie, for half an hour. Use the same water you used for the previous sterilization (recycling!), keep the water level just below the lids. Sterilization can also be done in a pressure cooker, at a higher temperature, but I haven't tried this method.
  • Let the jars cool and keep in the fridge, just in case. It shouldn't be necessary if the sterilization has been correctly done, but in my case some jars oozed a little bit of oil when I took them out of the pan, which led me to suspect that maybe they were not tightly sealed. And I prefer to be on the safe side.
And now you're ready to enjoy a homemade oil-preserved tuna, free from preserving and colouring agents... containing only all the heavy metals and chemicals that the poor fish swallows in the ocean... sigh (sorry, I have a pessimistic day). The making of tuna preserves is easier than you think, and if you have some doubt about the process, don't hesitate to ask me... :-)

Eager to know more?
Followers

About This Blog

Lorem Ipsum

  © Blogger templates Palm by Ourblogtemplates.com 2008

Back to TOP