Related Posts Widget for Blogs by LinkWithin
Showing posts with label fruit. Show all posts

Plum sorbet with "pacharán"

>> Monday, June 25, 2012

Plum sorbet with pacharán

Have you ever heard of pacharán? Pacharán is a liqueur made by macerating sloe berries in anisette (patxaran as spelled in the Basque Country and Navarra). It comes from the region of Navarra in the north of the country, but it is popular all over Spain and it is also brewed in La Rioja, Aragón and the Basque Country (something you could enjoy in a short break in Bilbao, for example). For this plum sorbet with "pacharán" I've followed a recipe by our common friend Jamie Oliver, who uses sloe gin, though it's not exactly the same as pacharán. Pacharán is better...

As Jamie says, sloe berries belong to the same fruit family as plums and they make indeed a good match. The sorbet is made with frozen plums that are processed whole, that's the reason for the red speckles. Spanish mothers used to tell their kids that the fruit skin has a lot of vitamins, I tell my kids too. And the skin is a damn nuisance to get rid of... ahem. I've sweetened the sorbet with honey instead of sugar, which makes it ever healthier and it's a wonderful flavor pairing too. The plums came from my brand new CSA... wow.

Plum sorbet with "pacharán"
Serves 10

  • 2 pounds (1kg) ripe plums
  • 4 heaped tablespoons honey
  • 6 tablespoons pacharán or sloe gin
Plum sorbet with pacharán
  1. One day in advance, wash, cut in half and core the plums. Lay them on a freezer container and freeze overnight.
  2. The next day, throw the frozen pieces of plum in a powerful food processor or blender, one that can crush ice cubes. I use my Thermomix for that. Then add the honey and liqueur and process until you get a smooth sorbet. More or less, it doesn't get completely smooth.
  3. You might need to process the plums in 2 batches. Then equally distribute the honey and liqueur among them.
Plum sorbet with pacharán

The sorbet can be eaten as it is, with a soft consistency, or can be poured into a container again and frozen somewhat longer. It doesn't get very hard though because of the alcohol in it. Serve the plum and "pacharán" sorbet with another tiny splash of more pacharán... delicious.

Plum sorbet with pacharán

Eager to know more?

School of tapas: Sauteed watermelon with honey and mint

>> Tuesday, May 22, 2012

Sauteed watermelon with honey and mint

Watermelon marinated in honey, vinegar and mint, then sauteed. This watermelon sauteed with honey and mint is a recipe for Michelin-starred French chef Michel Trama, quoted by Spanish chef Miguel López Castanier, chef at the Madrilenian Taberna de Liria in one of his books. Alright, I can't say it is strictly a Spanish tapa, and it's not traditional at all, but it perfectly fits the modern tapa concept. You could easily find it in any posh restaurant in any Malaga holidays, for example. And it is strikingly delicious and refreshing. I'm no fan of watermelon, I find it bland (in any case, I 'm not much of a fruit lover ). But the marinade in this recipe gives the watermelon precisely the spark I'm missing.

This is a simple, refreshing and surprising way to eat a watermelon, worth trying. And when warm weather starts to come in, you crave for these quick recipes. Serve this appetizer with a chilled beer and your guests will be delighted. Cross my heart. To the point:

Ingredients
Serves 4

  • 1/2 peeled, sliced ​​watermelon
  • 1 heaping tablespoon of honey
  • 2 tablespoons Spanish Sherry vinegar (or plain white wine vinegar)
  • 1 good bunch of mint leaves
  • Salt to taste
  • Olive oil for sauteeing

Instructions
  1. Arrange slices of watermelon on a large dish. Wash and dry the mint, then mince finely with a knife.
  2. In a bowl, mix honey, vinegar and chopped mint. Stir vigorously. Spread the slices of watermelon well with this marinade and let stand at least fifteen minutes.
  3. In a nonstick skillet, pour a little oil and brush the entire surface with a kitchen brush. Put the pan on high heat and when hot, place the watermelon slices wetted in the marinade. Let the slices sautee 3 or 4 minutes per side, you'll notice them change color.
  4. Once done, remove to a platter and cut into bite-sized pieces or the size you prefer. Serve as an appetizer on a hot day, warm or at ambient temperature.
Sauteed watermelon with honey and mint

The combination of flavors is amazing in this recipe. Especially the mint gives it a great twist. And do not think I'm overdoing the mint, the taste is diluted a bit with the heat of sauteeing, and it perfectly matches the flavor of watermelon.

Eager to know more?

School of Tapas: Apple paste with Manchego cheese

>> Thursday, March 15, 2012

Dulce de manzana con queso manchego

This apple paste or dulce de manzana is a typical recipe from the northern part of Spain, especially Asturias. This is a humid, lusciously green apple-growing region, best known for its delicious cider, brewed all over the place by large and small apple growers. It is also known for its strong and amazing blue cheeses, like Cabrales. This apple paste is similar to the famous quince paste, dulce de membrillo, a true staple food in many Spanish regions (I'm sure you'd be treated to this dulce in the Spanish villas in the region of Castilla La Mancha...). Similarly apple paste and strong cheeses go together like a horse and a carriage. Here I have paired dulce de manzana with a hearty Manchego cheese. An easy tapa not to be missed.

Here follows the recipe for the apple paste. No, I won't give you the recipe for Manchego cheese, it's a state secret.

Dulce de manzana

  • 1.3 pound (600g) apples (some tangy variety, like Reinette)
  • 1 lemon
  • 0.4 cup apple cider (100g)
  • 1 pound sugar (500g) 

Dulce de manzana

  1. Peel the lemon and get rid of as much pith as you can. cut in half and extract the pips.
  2. Peel and core the apples. cut in large chunks and sprinkle with some of the lemon juice to prevent them from browning. Add the cider and sugar, stir to mix. Process the mixture in a food processor or blender till smooth.
  3. Put the pureed fruit in a heavy saucepan. Turn on the heat to low and simmer 35-40 minutes uncovered, stirring often. 
  4. When the paste is ready, the pureé will acquire a deep redish golden color. To test for doneness, take a teaspoonful of the mixture and drop it on a plate. Wait until it's cold. If the drop is firm enough to the touch and detaches from the plate in one piece when pushed with your finger (a lot more solid than jam consistency), then it's done. If the pureé is too soft, just proceed with the simmering 2-5 minutes longer or as long as needed.
  5. When ready, pour the paste into a shallow container large or small enough to form it into the shape of a thin ingot (the thickness of the portion in the photos is the final thickness) and let it cool completely. I recommend you use a lidded container, as the paste tends to dry quite a bit. Well, unless you intend to eat it all in one go. You can also use a loaf pan lined with plastic so that you can unmold it on a plate. But always keep it covered if you're not going to finish it right away.
  6. Slice the cheese and slice pieces of the apple paste of similar size. Top the cheese with the dulce de manzana and enjoy!
Dulce de manzana con queso manchego

It is essential to use tangy apples in order to offset the sweetness of all the sugar needed for the pureé to gel.

Dulce de manzana con queso manchego

And let me add a last tip: dulce de manzana goes really well with all kinds of meat or liver terrines and foie...

Eager to know more?

School of tapas: Ibérico ham and figs on potato nests

>> Friday, October 7, 2011

Nidos de jamón con higos

I recently devised these Ibérico and fig nests for a sponsored entry on my Spanish blog. And they were a success, if I may say so, not only at home but with my readers, that's why I'm posting them here as a delicious tapa. Maybe you're still in time to catch up with the last figs of the season... Ibérico ham with figs is a match made in heaven, as simple as that.


Be sure to get yourself a premium Ibérico ham, you'll notice the difference.

Nidos jamón higos

To the point:

Ibérico ham and figs on potato nests
Ingredients needed per nest:

  • 1 medium potato
  • 3 small mozzarella slices
  • 3 slices Ibérico ham
  • 1 fresh fig
  • Salt to taste
At least in Spain, to prepare the nests with straw potatoes special molds are used that look really like two small strainers, one inside the other. Well, I don't own such a gadget. Incredible, but true (Christmas is around the corner, just a hint). However, this doesn't prevent you from making the nests, as they can be baked in some small casseroles in the oven.

Nidos jamón higos
  1. Peel the potatoes and cut the straws with a blade slicer or a similar gadget. Sauté them slowly or cook them in the microwave until cooked and soft. I added fresh rosemary for additional flavor (if you want to see how to make a tart case with straw potatoes, see this wonderful post by my friend Colette, in English).
  2. Oil the ramekins or small casseroles or line them with parchment paper to avoid sticking. Then line the pan with the cooked straw potatoes, smoothing the surface and pressing them with a spoon. Salt them. 
  3. Put the casseroles into a preheated oven at 340ºF (170ºC) and bake 40 minutes. Watch them closely and adjust temperature and time if necessary so that they brown evenly.
  4. When the nests are baked, place the mozzarella and ham slices in them; bake slightly, for the cheese to soften, but don't overdo it, so not to thoroughly cook the ham. I prefer to add the figs raw, after taking the nests out of the oven, so that they don't soften excessively.
  5. Lastly, enjoy the nests along a good Spanish red wine, with the fig juices oozing out the corners of your mouth.
Nidos jamón higos

Eager to know more?

School of tapas: Melon soup shots

>> Friday, July 15, 2011

Melon soup 1

This is no traditional tapa. But due to the wild popularity tapas enjoy and the endless variations on the same theme found nowadays, sometimes small glasses or shots of cold soups or creams are also seen served as a tapa or appetizer before a copious meal. When summer is already at full speed and you long for cold and fresh drinks and dishes, a shot of chilled soup might be exactly what you need. This simple melon soup is prepared by processing melon, white wine, honey, lemon juice and salt to a pureé. It doesn't call for the use of any heat in the kitchen, which is something I am quite thankful for when temperature rises above 85 degrees.


Melon soup 2

The recipe is inspired in this Spanish website for Mediterranean cuisine.


Melon soup shots 
Yields 8 servings

  • 1 small melon *
  • 2/5 cup (100ml) good white wine
  • 1 tbsp honey
  • Juice of 1 lemon
  • 2 pinches salt
  • 1 thin slice good Serrano ham
Melon soup 3
  1. Cut the melon in wedges and discard the seeds. Scoop out the flesh and transfer it to a food processor or blender.
  2. Add the wine, the honey, the lemon juice and the salt. Process to a fine pureé. Chill thoroughly before serving. 
  3. For the jamón serrano garnish, place a slice of jamón on a plate lined with 2 sheets of kitchen paper. Cover with more paper and microwave it briefly, until dry and crispy. Crumble the jamón by hand and sprinkle the "shards" on top of the melon soup shots. 
* Regarding the melon used, Spanish melons are egg shaped and quite large in size. A "small" melon can easily weigh 5 pounds.

Porrón

For a more "sophisticated" experience, previously chill the serving glasses in the freezer. The contrast between the sweetness of the soup and the saltiness of the jamón is simply superb. Serve with a glass of chilled dry Sherry. And enjoy...

Eager to know more?

Apple cream, John Barry and Valentine's day

>> Thursday, February 10, 2011

Apple cream 1

I have a nasty cold. I am a wreck. And I do feel that way. This has not prevented me from feeling an urgent desire to make a dessert with apples though, being them one of my many addictions. I've said it before, inspiration is a very peculiar animal and comes whenever she wants to, not when it is convenient for you. Serves no programs or schedules. Just like death. That is why John Barry died on January 31st, the composer of such famous film scores as Out of Africa and well-known arranger of the original James Bond theme, when it was completely untimely for him to die... Any movie fan knows his music. He was also British and, as some say, that's a plus. Among his not so well-known compositions is the evocative soundtrack to the movie Robin and Marian, an utterly romantic movie with Sean Connery (sigh...) and Audrey Hepburn (another sigh...). Yes, the quintessential love story. I recommend you watch it, you will not regret it now that honeyed Valentine's day is on its way. Because the movie is not cloying in any way, it shows us the reunion of Marian and Robin Hood after his return from the Crusades, both middle-aged and already-done-it-all. But that does not prevent... sparks from flying between them. Delightful. Wonderful. Sublime. Totally underrated. And another excuse to enjoy the voice of Sir Sean Connery... a religious experience (although I might be thinking of something more profane). This is your homework for this cloying, sugary week. No complaining. Search for this movie and watch it, little children. And if you like it, you can watch it on every Valentine's day with your partner from now on. Though I don't wait till Valentine's day to celebrate.


You may wonder what is the relationship of the apple cream with everything that I mentioned earlier. Well, in the opening scene of the movie we see some fresh apples on a window sill that are displayed later rottening as a symbol of a world that is falling apart, Robin and Marian's. Okay, the relationship is difuse. But the ways of the subconscious are mysterious. And mine is even more mysterious, I tell you. Do not wish to know further. Also, I write my own scripts, just like Pedro Almodóvar. And that is obvious for both.

The recipe for this rather symbolic cream comes from an interesting monograph on reinette apples by a Spanish chef, famously cultivated among other regions in the north Castilian area of El Bierzo. Reinette apples are known for their tart and peculiar taste, the best for cooking desserts. Though who knows where the apples I find in my area come from. Maybe they are brought from the other side of the world, where the growers get a ridiculous revenue from them and then loads of fuel are wasted in bringing them here so that the oil companies are very happy... thanks to us. But that's another story. To the point:

Apple cream

  • 4 large tart cooking apples
  • 1 bottle natural cider (0,75 liters)
  • 200g sugar
  • 6 large egg yolks
Apple cream 2
  1. Put the cider in a saucepan and add the sugar. Bring to a boil.
  2. Peel and core the apples, cut them in chunks and add to the cider. Process everything to a runny puree.
  3. Boil the mixture to a compote consistency, about 10-15 minutes. The puree must be somewhat thick, although it will thicken further with the addition of the yolks.
  4. Once you have the required consistency, turn off the heat and add the yolks while stirring vigorously for the egg yolks to mix and set without forming threads. Leave to cool.
Apple cream 3

This simple cream is as versatile as pastry cream, because it is really quite similar. I like it well in small pots, but it can be used to fill cakes, pastries and whatever you can think of. Although to make it as pot de creme, I use a more fluid consistency than that of pastry cream, as a smooth cream for the sick... It has the pleasant color of coffee with milk, but it surprises you with the taste of apple and cider. And I've added one teaspoon of sugar on top of the cream that was conveniently caramelized with my brand new blowtorch, a gentle gift from my mother, in a créme brulée fashion.

Apple cream 4

And... celebrate your love everyday, not only when the department stores tell you to.

Firma 200px

Eager to know more?

German rote grütze with waffles

>> Saturday, September 18, 2010

Rote grutze 1

One of D's sisters lives in Kiel, north of Hamburg, in Schleswig-Holstein (I love that name...). As I told you before, this year we spent a week up there. Most of the family gathered there, 19 individuals in total, with cousins, friends, girlfriends and other animals, to explore the region of North Frisia. Friesland, the coastal area that borders the southeast corner of the North Sea, is a historical region that was divided in 1815 in Friesland in the Netherlands, and in East Friesland and North Friesland, Germany (this blog is sooo intelectual). This is a most flat region. The plain goes on into the sea and the coast is made of very large shoals, with many beaches where you can walk miles from the shore and the water won't reach up your knee. There are islands battered by the wind, beaches with sand so fine that it seems flour, full of fiery kites, colorful lighthouses, bright green meadows brimming with cows and sheep, and endless skies. A perfect place to relax.


Germany 2

I can't speak of all Germany, as I know little more than this small area in the north, but I can assure you here they are excellent bakers and pastry makers. The bäckerei-conditorei, that is bakeries and pastry shops, are a constant temptation with their array of varied breads and kuchen. As for the bread... I was almost in tears one day that, while sniffing among the various bread flours in a supermarket of the mini-village where we were staying (not too bad, not speaking German), I stumbled into some sourdough on sale, in liquid and solid state, ready to go... Now it seems so logical that this country is at the top of Europe. They deserve it! At least when it comes to bread, they rule...

Germany 4

Germany 5

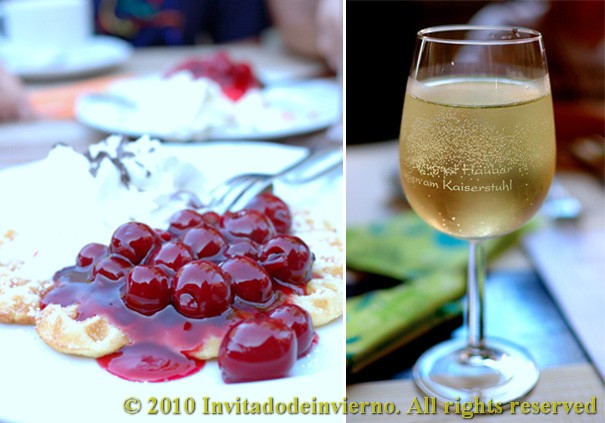
Oh, and they also have waffles with sour cherry sauce...
Germany 6

Have I told you that they make some waffles with sour cherry sauce that make you levitate?

Germany 3

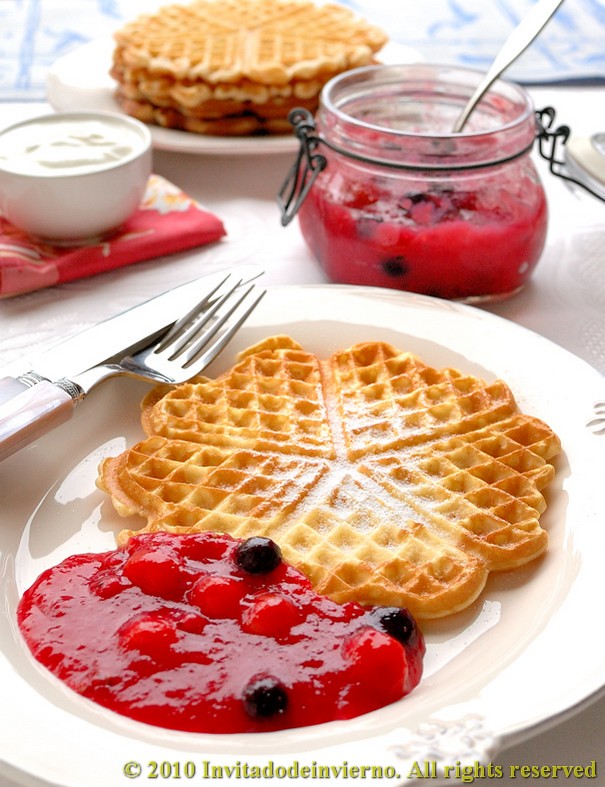
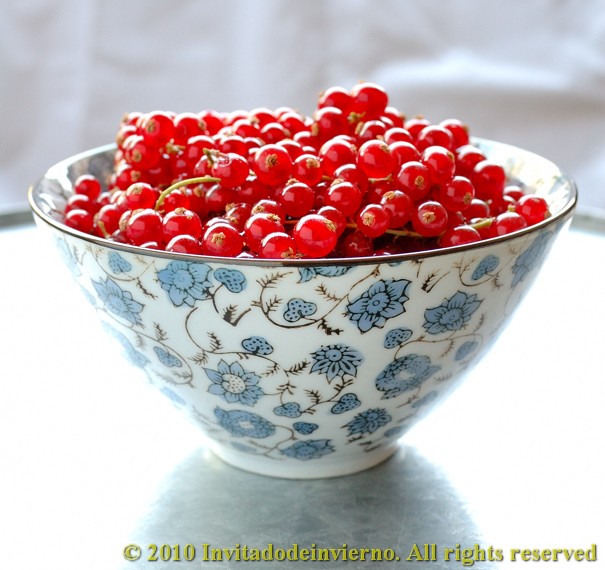
So... what better way to commemorate our trip to Germany than to cook a traditional dessert popular in the area (although it's also consumed in other parts of Germany), rote grütze... Rote grütze means something like red porridge (gruel or porridge made of coarse flour or hulled grain), because this dish was originally a pudding or porridge whose thickness could vary, but it was some kind of cereal cooked in seasonal red berries juice, plentiful in the area, that is currants, raspberries, sour cherries, etc. (although usually without strawberries). It is now more often found as a sauce, with a dense core of fruit juice thickened with corn starch and abundant whole red berries. The recipe comes from a German book I bought on a previous trip. As I said, I don't speak German, but I know most of the names of the ingredients and the rest... well, you just put a bit of imagination to work or get it into Google Translate. Nor is it so difficult, the recipes consist of a few simple instructions, the book is not a study by Goethe.

Germany 1

Rote grütze is traditionally accompanied by a vanilla sauce, but it's no heresy to have it with ice cream or cream cheese. And in this case also some delicate waffles on Northern German style, which I call light not because they are light in themselves, but because they're light to me compared with the leaden Belgian waffles.
Rote grutze 2

Rote grütze with waffles
For rote grütze (adapted from this book):

  • 500g assorted red berries (cranberries, sour cherries, redcurrants, raspberries, etc.)
  • 1 liter water
  • 4 tbsp corn starch
  • 1 dash red wine or rhum
  • Sugar or sweetener to taste (I used 100g agave syrup, but this is very personal)
Rote grutze 3
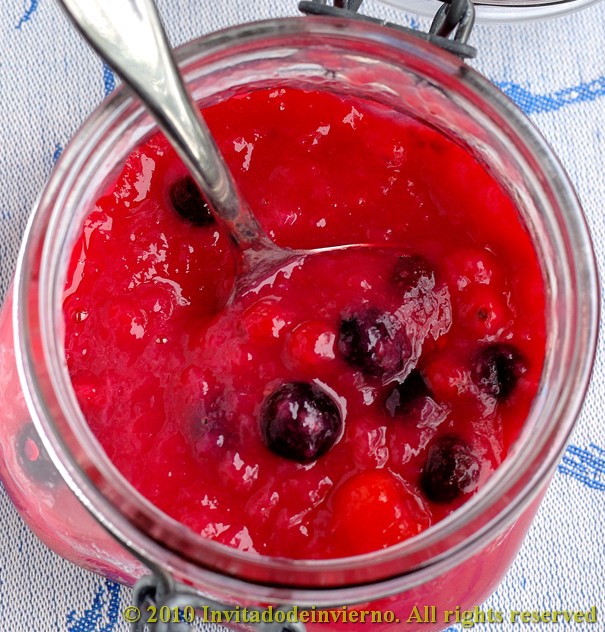
  1. Wash and drain the fruit. Separate the little stems. Set aside about 150g of fruit to add at the end. Place the rest of the fruit in a saucepan with the water and bring it to a boil. Cook half an hour, stirring frequently.
  2. About five minutes before ending the boiling, add the wine or rum, to make sure that the alcohol evaporates. After half an hour remove from the heat and pass the mixture through a food mill to remove all the hard bits of the fruit. You'll obtain a somewhat thick juice (or a liquid purée, depending how you look at it). Put it on the heat again.
  3. Dissolve the cornstarch in the minimum amount of water and add it to the boiling juice, stirring vigorously to avoid any lump. If it's not very smooth, you can always blend it. Add the sugar or sweetener you like and test for sweetness. Please note that it should be on the sweet side, because after cooling the sweetness is always less noticeable.
  4. Then add the reserved fruit and let it cool, so that the fruit softens slightly. Keep it in the fridge.
Please note that this concoction is quite perishable, since it doesn't have the cooking time nor the concentration of sugar in a jam, so you need to keep it in the refrigerator and eat it within a few days. But... I don't think it will last too long, do you?

For the waffles (adapted from this book), yields around 10 waffles:
I modified the recipe to use agave syrup, that being a liquid affects the other ingredient's ratios. I know, what's the use of ruling out sugar when you add scoops of butter... but that's one of my typical contradictions. So I'm giving you both recipes, with sugar and with agave syrup... because you make my day.

With sugar:
  • 150ml boiling water
  • 300g all-purpose flour
  • 4 large eggs
  • 160g sugar
  • 200g melted butter
  • 1 tsp baking powder
With agave syrup:
  • 150ml boiling water
  • 300g all-purpose flour
  • 4 large eggs
  • 100g agave syrup
  • 180g melted butter
  • 1 tsp baking powder
Of my own will I added 2 large pinches of powdered vanilla and another 2 of cinnamon.
  1. I couldn't quite understand the purpose of the boiling water, I guess is to scald the flour, but the recipe doesnt indicate the order to add the ingredients, but just calls for you to mix everything at once... So I brought the water to a boil and threw in my flour, obtaining a funny paste.
  2. Then I added the butter and eggs, mixed thoroughly in a good blender or stand mixer to homogenize, and then everything else. I mixed again and turned on the waffle iron.
  3. Spread a little butter on the hot waffle iron and proceed to cook the waffles as directed on the appliance manual. When possible, try to serve the waffles warm, because they're so more delicious. Although my children eat them even the next day.
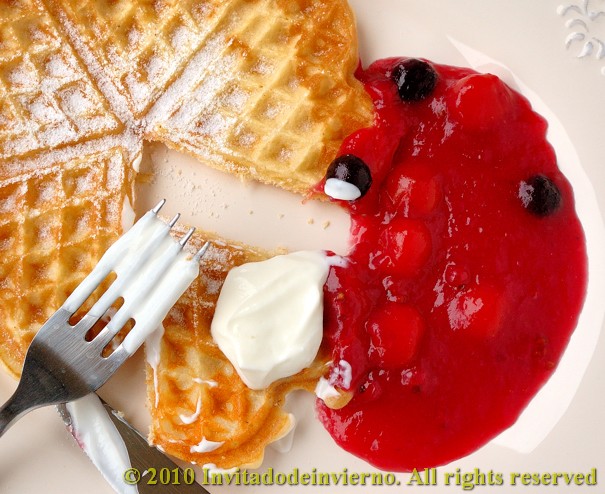
  4. So for a nice German kaffee und kuchen, between 3 and 4 in the afternoon, serve a dish of waffles, another dish with rote grütze and some other accompaniment, then help yourself to one waffle, generously sprinkle it with powdered sugar, add a heaped serving of rote grütze and... just eat everything using the waffle as a spoon.
Rote grutze 4

And by the way, if you visit this part of the globe do not fail to eat waffles with sour cherry sauce. Had I told you before?

Eager to know more?

Danish crumble and... 2 awards received!

>> Saturday, September 4, 2010

Danish crumble 2

Yes, these holidays we've been to Denmark, only four days, but that's better than nothing. No, we didn't dine at restaurant Noma in Copenhagen, elected this year the best restaurant in the world (but because we didn't want to...). Yes, the weather wasn't perfect, one day it poured so heavily we had to stay at home. No, we didn't enjoy the light and interesting new Danish cuisine, we travel with children and that explains everything. Yes, I bought quite a few kitchen towels and a couple of cookbooks. No, we didn't see the famous Little Mermaid because the little rascal was spending her vacation at the Expo in Shanghai, what a shame. Yes, you all should watch the Danish film Babette's Feast, not only because it's charming, but because knowing the austere Calvinist history of gastronomy in this country we can really appreciate how much it has improved. And yeah... Vikings are damn good looking. The looks of Viggo Mortensen make all the sense now.


And now to the awards: I have won one of the categories of August's DMBLGIT . And three days ago I got the news that my recipe of migas has been chosen among the 100 out of 1500 submissions and will be published in the Food Bloggers Cookbook by Foodista (and you can already pre-order the book on Amazon)... what a great way to start the course, don't you think?

Denmark 1

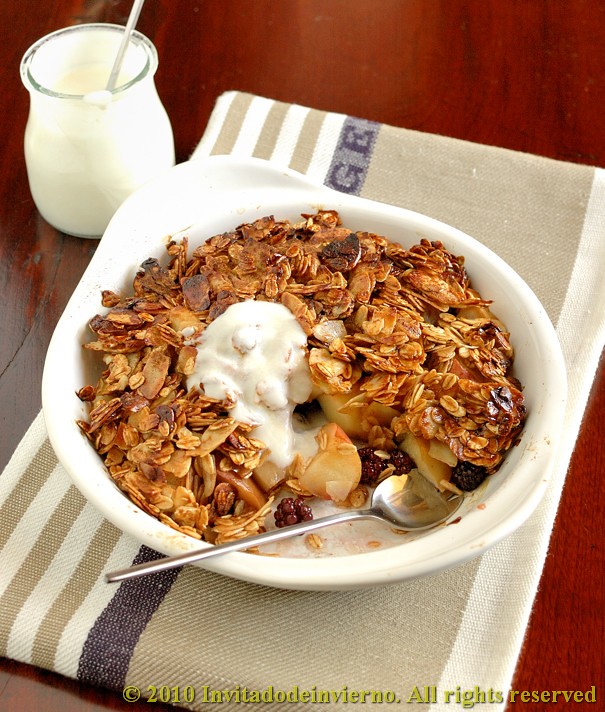
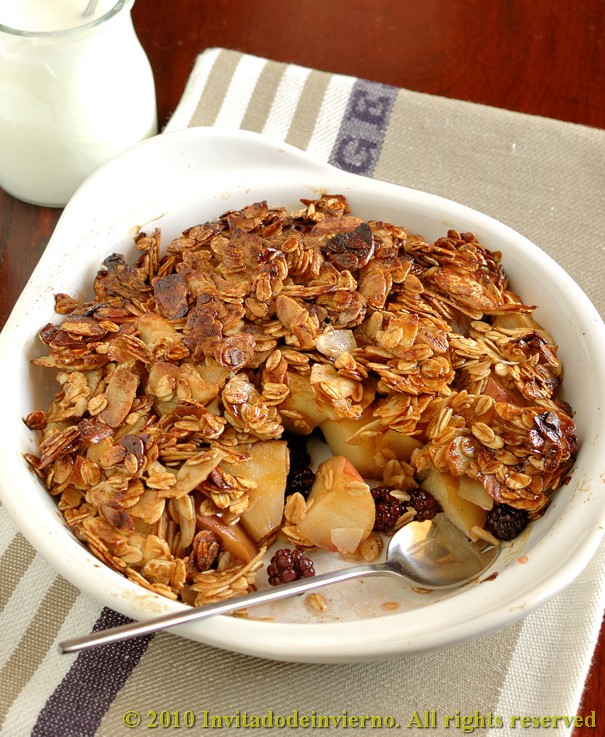
To get good advantage of a small shipment of wild blackberries, a gentle gift from my sister, beginning to ripen now, I thought of using them to make a simple crumble for breakfast with a Danish inspiration. Then I could shoehorn some photos of the trip. You may wonder what's Danish in this crumble. Well, the recipe was inspired by a book I bought in Copenhagen with delicious recipes prepared with typically Danish ingredients, in this case rolled oats. This dish is perfect to enjoy the fruits that
now begin to be in season. Maybe they'll have some flavor. It's also quite light, very appropriate after the culinary excesses of summer. What? You haven't put on any more weight? Well, I have. And as everybody knows, it's so simple to make an infant could make it. So bring on an infant...

Denmark 2

Apple and blackberry crumble (adapted from The nordic diet, Trina Hahnemann)
Yields 2 large portions or 4 more tepid ones

  • 1 apple and 1 pear or 2 apples *
  • 2 handfuls wild blackberries
  • 100g rolled oats
  • 2 heaped tbsp apple syrup **
  • 3 tsp agave syrup
  • 60g sliced almonds
  • 1 tsp cinammon
  • 25g butter
  • Greek yoghurt or whipped cream to garnish (optional)
* I love really tart cooking apples, but they require more sweetening. In this case I used Royal Gala and the amount of sweetener goes accordingly. You'll need further sweetening if you use more tart apples.

** I buy apple/pear syrup at the health store. It's a natural sweetener obtained by concentrating the fruit juice to molasses consistency. As I said before, it's perfect to add flavor to any dessert with apples, if you don't object to darkening the color of the dish, as the syrup has the color of motorcycle grease... You can also use any other sweetener to your taste, like honey, agave syrup, maple syrup or even sugar. Although you'll need to adjust the amount, of course.

Danish crumble 1
  1. Preheat the oven to 190ºC (convection).
  2. Cut the fruit in cubes, unpeeled, and mix in the blackberries.
  3. Butter a small oven dish or two individual dishes. Scatter the fruit and drizzle with the agave syrup.
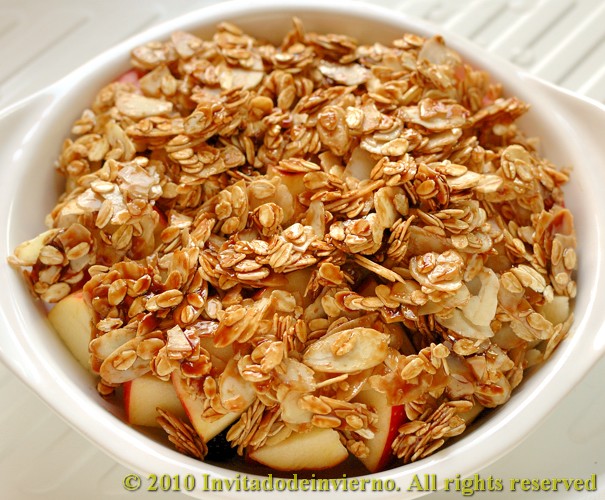
  4. Put the rolled oats, the apple syrup, the almonds and the cinammon in a bowl and toss to mix. Distribute the mixture evenly on top of the fruit and top with the diced butter.
  5. Cover the dish with aluminum foil (apple syrup caramelizes easily), put the dish in the oven and bake 30-40 minutes. Serve warm or cold, on its own or with a dollop of thick yoghurt or cream. Or if you dare ruin its lightness, add a scoop of vanilla icecream. Divine.
Danish crumble 3

When I told my kids about the awards I had won they asked me: But what will you get? 10 000 bucks?... Errrr... no. But I'm more than thrilled all the same.

Eager to know more?

Remojón or codfish and orange salad

>> Sunday, July 11, 2010

Remojón 2

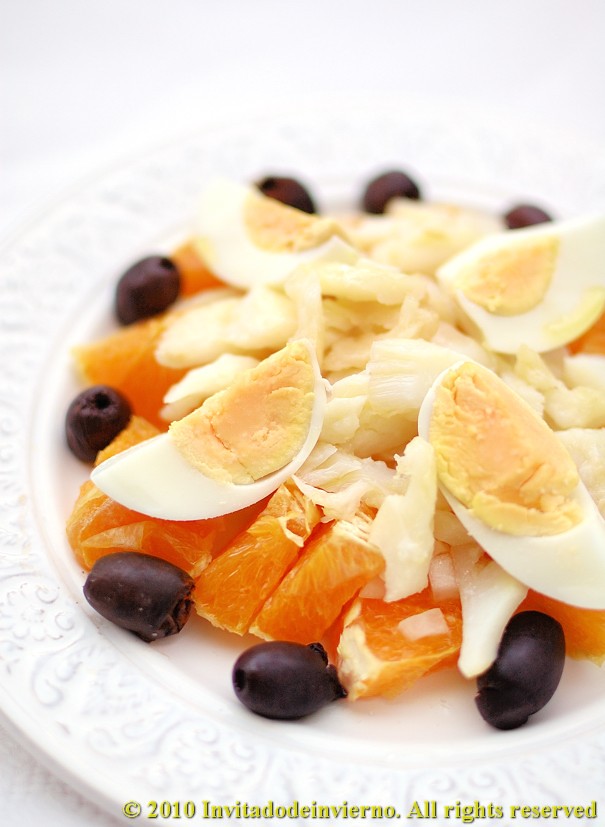
There is little doubt that this is the best time of the year for salads, that is in the Northern hemisphere of course. And if they're really nourishing, they can be a whole meal in themselves. That's very convenient when your kitchen is above 29ºC (84ºF) like mine these last days. I'm tending to avoid any meal that requires fire and oven as much as I can. But being away from the kitchen is hard for me, mainly because I'm used to the opposite. I don't seem to know what to do with the spare time I suddenly have in my hands. Today I'm posting a very simple and refreshing salad, ancient and traditional in many places of Andalusia, with such an original combination of sweet and savory flavors that would make many a modern chef envious. That's exactly what popular genius is all about. Being inimitable.


Remojón as a salad (there are also warm brothy versions), as far as I know, has countless variations in the provinces of Almería, Granada and Málaga, which are usually prepared on the basis of oranges and salted cod. In some places, the cod is added without desalting, only flaked, in others the fish is baked in the oven, even raw in some... the variations are endless. By the way, check the pronunciation of remojón here (and yes, it's my own voice).

The presence of oranges talks about a dish that was once typical of the Fall/Winter season, in fact consumed at the time of the yearly pork slaughter, which in many places of Spain occurs around Saint Martin's, on November 11th... but now we have insipid fruit grown in greenhouses at any time of year, or other brought from the far side of the globe spending a lot of resources while the Southern hemisphere farmers are hardy paid enough to live... oops, sorry, I get carried away. In short, in early summer we now have oranges available, so the alleged seasonality of this dish is no longer such.

Remojón
Yields 2 servings

  • 250g good salted codfish
  • 2 smallish oranges or 1 large orange
  • 1/4 onion
  • 1 good handful of whole black olives
  • 2 hard boiled eggs
  • Virgin olive oil
Remojón 1
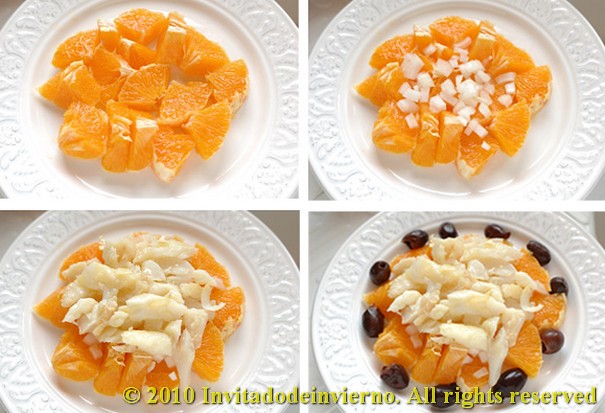
  1. Desalt the codfish by leaving it to rest in water overnight in the fridge. You can also use unsalted cod, of course, only the dish won't have that distinct saltiness. I like the cod on the salty side, the contrast with the sweet flavors is irresistible. The next day, drain the fish, put in an oven dish, drizzle with olive oil and bake in the oven preheated at 180ºC, taking care not to overbake it. Take out of the oven, let cool, flake it and set aside.
  2. Boil the eggs for 10 minutes, let cool, peel them, cut them in fourths and set aside.
  3. Peel the oranges and get rid of as much pith as you can. Cut them in slices or dice; set aside.
  4. Finely dice the onion.
  5. Pit the olives.
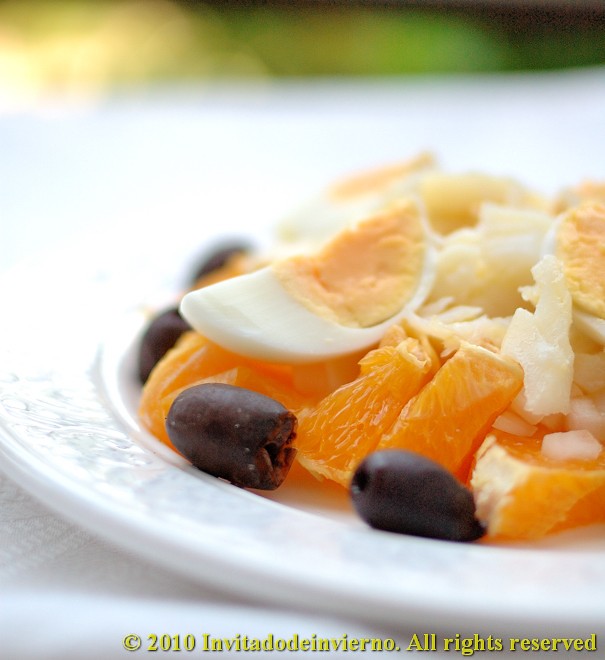
  6. Place the ingredients on the plates in the following order: orange, onion, codfish, olives and eggs. That is if you want to make the salad according to my taste, but if you prefer to contradict me, do as you like. I personally prefer to skip the vinegar with this kind of fruity salads, but adding a good vinegar is the traditional thing. So you have my permission to do it. I'm that magnanimous. And lastly drizzle a fair amount of olive oil on the salad.
Remojón 3

The combination of the sweetness of the orange with the saltiness of the fish, the freshness of the onion and the bitterness of the olives is like an adrenaline dose... I mean it. Just try it.

Eager to know more?

Peach gazpacho and a giveaway!

>> Sunday, June 20, 2010

Peach gazpacho 1

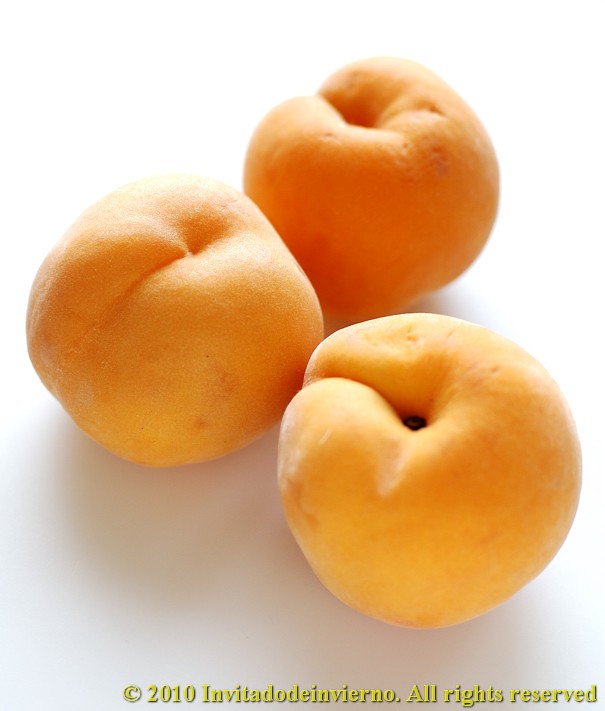
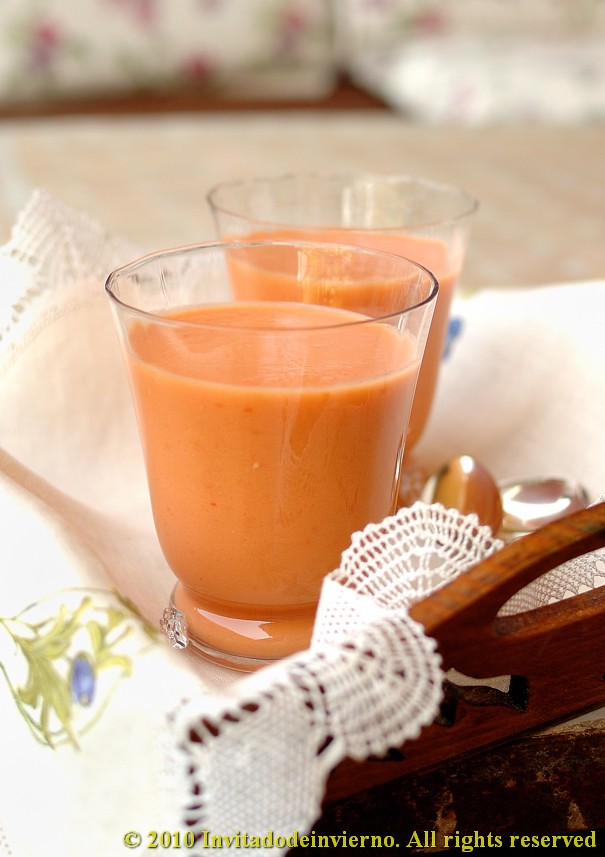
This year I'm in the mood for fruity gazpachos or so it seems. I happened to have some delicious peaches which were almost past its prime and I had seen an interesting peach gazpacho recipe by famous Basque chef Martín Berasategui, so I set to work. Just to compare with the cherry gazpacho I made recently... I should innovate, because at home we have gazpacho and salmorejo every other day. The only house inhabitant who doesn't eat gazpacho is my youngest boy. He says he doesn't like it. But he's never tasted it... does it sound familiar?

And... I'm announcing a giveaway!


Again, CSN stores have been so kind to consider me for a $80 gift certificate to give away to my readers! First of all, I should say finding readers out there every day is such a thrill... because it still feels unexpected to me! Although CSN pretty much have everything you can think of (bed being one of the items) I've been browsing through their cookware site and I wouldn't find it hard to choose something for my kitchen... I never have enough gadgets and I know most of you have the same illness!

So, what to do to enter the giveaway? Nothing too difficult, making it complicated would definitely be beyond my skills. Just start dreaming about what item you'd choose at CSN websites and leave a comment about it here, including your e-mail address. And one more thing: in order to count your name twice, I just kindly ask you to visit Kiva's site, check if it speaks to you in any way and leave me word of it. That's it.

The giveaway is open to any person living in the USA and Canada, and the deadline is Monday 28th, 11pm GMT. I will assign a number to each comment and use this site to generate a random number. The winner will be announced on Tuesday 29th.

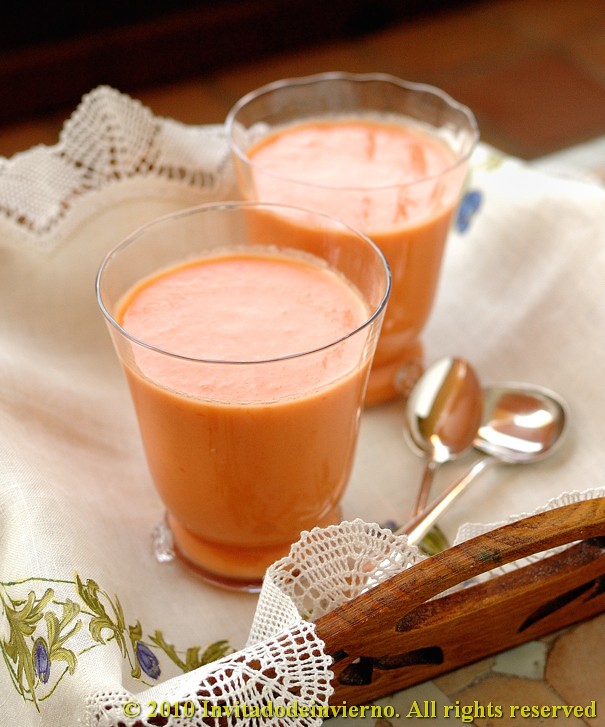
Back to my point, this gazpacho has such a balanced flavor that when I first tasted it I could distinctly make out every ingredient: the peaches, the tomatos, the green pepper... And that doesn't happen often, but maybe my palate is not sensitive enough. The color was beautiful, salmon-like, iridiscent-but-like-riding-into-the-sunset... ahem.

Peaches 3

Peach gazpacho

  • 500g peaches, peeled and pitted
  • 500g tasty tomatos
  • 15g green sweet pepper
  • 40g onion
  • 1 small clove garlic
  • 30g cider vinegar
  • 50g virgin olive oil
  • Salt to taste
  1. Weigh the peeled and pitted peaches and set aside. Cut the tomatos in chunks. Cut the pepper and the onion. Peel the garlic clove.
  2. Throw everything, except the salt, together in a food processor. Process to a very smooth puree. Pass it through a food mill or a sieve if you want it really fine. Add one teaspoon salt, taste and adjust if needed. Saltiness is a very personal matter, so I only give a starting point.
I wish you luck for the giveaway!

Peach gazpacho 2

Eager to know more?

Cherry gazpacho

>> Tuesday, May 25, 2010

Cherry gazpacho 1

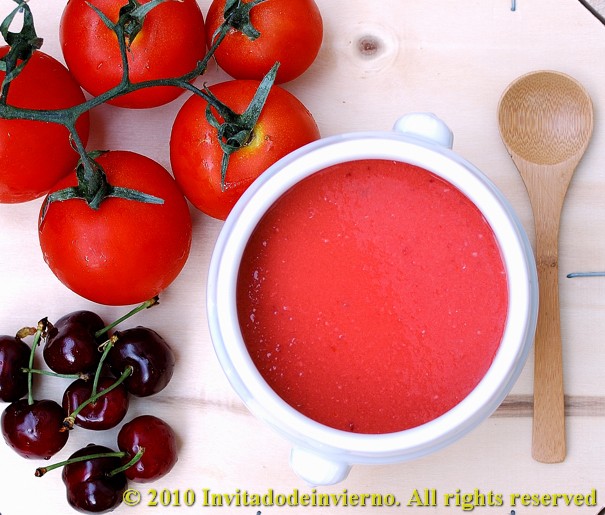
It seems that the fair weather is here to stay. This pleasant warmth announces the return of one of my favorite fruits (and I don't have many): cherries. On the other hand, at home salmorejos and gazpachos are essential items when the weather gets too hot. There is nothing better than sipping one of these refreshing soups on the terrace, watching the blackbirds and... almost touching nirvana with my fingertips. And you'll be wondering by now, what do cold soups, heat and cherries have in common? Mmm, that in order to add a colorful note to our grey and monotonous lives, and use the first cherries that I found on the market, I decided to try this daring variation of gazpacho, with cherries of course, from the famous Basque chef Martin Berasategui.


Here's the recipe:

Cherry gazpacho 2

Cherry gazpacho by Martín Berasategui

  • 1kg ripe tomatos
  • 220g sweet cherries (the original recipe calls for 200g, I wanted more...)
  • 5g green pepper
  • 5g onion
  • 1 clove garlic
  • 55g bread crumb
  • 1 tbsp cider vinegar (Sherry vinegar in the original recipe, but it's a bit too strong for me)
  • 3 tbsp virgin olive oil
  • Salt to taste
Cherry gazpacho 3
  1. Pit the cherries, cut all the ingredients in chunks, place in a large bowl and leave overnight, except the vinegar and salt.
  2. The next day, process everything together in a food processor (Thermomix in my case, of course), and put it through a fine sieve if you don't like it chunky. Refrigerate for a couple of hours at least, as it's better served well cooled.
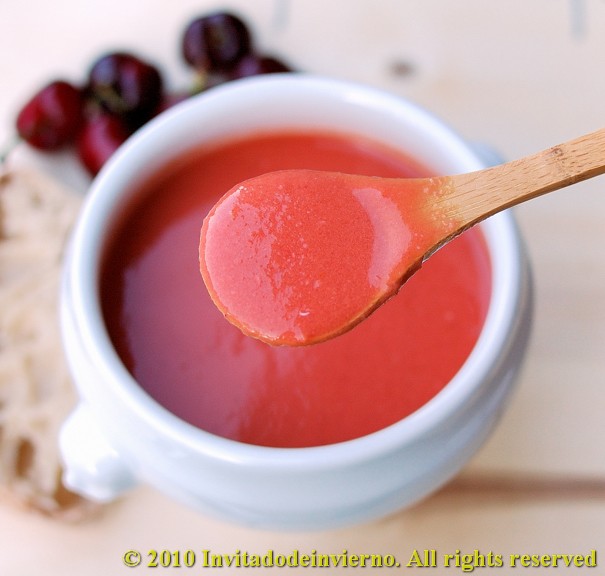
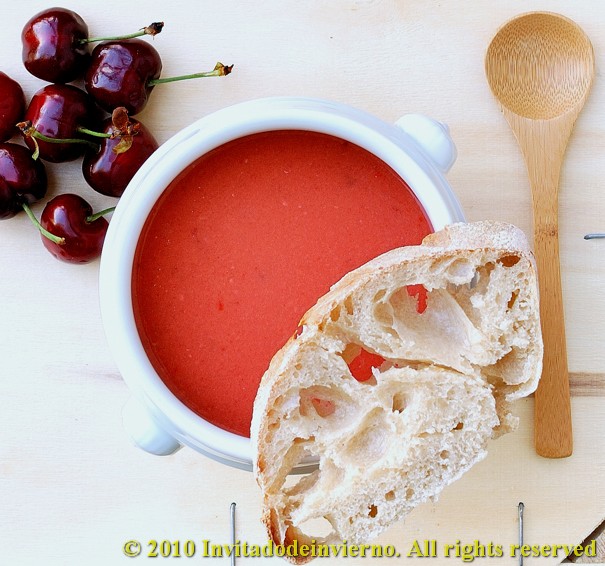
The cherries tame and sweeten the somewhat fiery flavor of traditional gazpacho... and give it such a beautiful color... that I'd love to put it in a frame... none of those so very contemporary artists has invented liquid art? So much for this art, damn it.

Cherry gazpacho 4

I take this opportunity to share some images from my garden. Everything's bloomed all at once, hardly noticed... and this year we had almost forgotten how flowers looked like! Have a happy warm weather, everyone.

Eager to know more?

Raspberry espuma by Ferrán Adriá

>> Friday, May 21, 2010

Raspberry espuma Adriá 1

Maybe you've never heard about this gadget. It's the iSi Whip, which I use for making whipped cream since some years ago, because there's no other device as good for serving perfectly whipped cream, straight from the bottle. It will impress all your guests and will leave them utterly flabbergasted. I don't get paid for this, I'm that silly and I do it for free. I simply love this gadget. Mr. Ferrán Adriá, one of the most famous cooks in the world, in a quest to provide espumas, foams, mousses, or whatever you want to call them keeping the purest possible taste of the main ingredient, thought this artifact could be used to avoid air-entraining additives such as egg whites or similar things, and prepared various concoctions directly whipped in this device.


But the bad news is that this recipe can only be prepared with the mentioned device. You know that I'm the maniac for this kind of junk, even though I seem to have some childhood trauma that prevents me from buying a scale... For I am the proud owner of one of these artifacts from time immemorial, but so far I had not dared to make an Adriá style espuma. I'd been wanting to make a humble tribute to him for quite some time already and the time has come for it. Because, regardless of all the arguments about his molecular cooking, its prices and the temporary closing of his restaurant, this guy has contributed greatly to put Spain on the culinary map of the world. And I really appreciate it. As simple as that.

I have substituted agave syrup for the sugar, to make for an even lighter espuma. It's excellent as dessert or as palate-cleanser.

Raspberry espuma Adriá 2

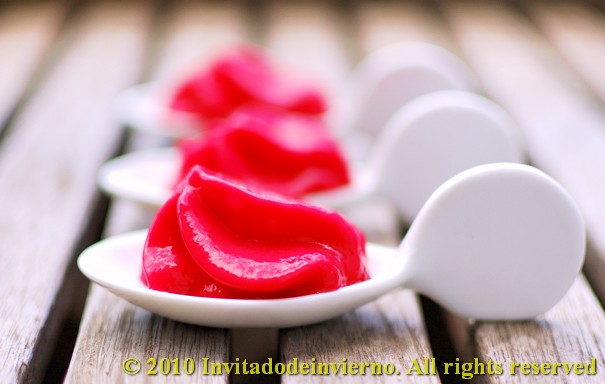
Raspberry espuma
Yields 4 normal servings or a handful of ridiculous spoons

  • 250g fresh raspberries
  • 50g sugar (you can use 40g agave syrup instead)
  • 100g water
  • 2 gelatine sheets
  1. Put the raspberries in a saucepan with the sugar or sweetener and cook in a water bath for one hour. I did it in my Thermomix at 80ºC. I don't know at what temperature the puree was supposed to be in a bain-marie, but I guess pretty close to 100ºC. I didn't dare to go that high though. Allow to cool.
  2. Pass the puree through a sieve fine enough to remove the seeds. I put it through a food mill first and then through a sieve and the result was a pretty smooth puree. I also added half the water to the puree to facilitate the process. Mr. Adriá says that with the 250g of raspberries and 50g of sugar you obtain 300g of raspberry puree... This man is an optimist. In the food mill and in the sieve you lose quite some puree even after patiently scratching the bottom of both, but that can't be helped.
  3. Cut the gelatin sheets into strips and place in a bowl with cold water for 10 minutes. When they are soft, warm the remaining water and dissolve the gelatin in it. I wanted to experiment and substituted 10g of water for the same amount of wine, but it was barely noticeable in the final result. The next time I will add more wine (I often get to this conclusion ... food for thought).
  4. Pour the puree into the iSi whip, close tightly and apply a gas canister. Shake vigorously and set aside in the fridge. That's what Mr. Adriá instructs you to do... But what happens then is that the mousse solidifies into a block in the bottom of the bottle and no agitation gets it off (at least, I didn't manage to). So I had to depressurize the device and stir the espuma with a spoon to loosen it. Then I used another canister to pressurize it. And it worked... I guess the best thing to do is to visit the fridge every now and then while the foam is solidifying and give the bottle a vigorous wiggle.
  5. Then choose a nice container where the espuma can shine in all its splendor, invert the bottle, as connoisseurs already know..., press the handle with caution and... serve a beautiful pile of espuma. The espuma must be eaten almost immediately, since it deflates slowly but inexorably. I have to try adding more jelly next time.
  6. Then you're ready to devour the espuma...
You certainly get a mousse with a pure raspberry flavor, frankly airy, which melts in the mouth, very light, volatile ... oh, ah, uh, I go into ecstasy.

There's a nice little e-book with Adriá's foam recipes in Spanish, but there doesn't seem to be an available English translation. Publishers out there, I could certainly aid in that translation... ahem.

Eager to know more?

Followers

About This Blog

Lorem Ipsum

  © Blogger templates Palm by Ourblogtemplates.com 2008

Back to TOP