Related Posts Widget for Blogs by LinkWithin
Showing posts with label meat. Show all posts

School of tapas: Chorizo a la sidra

>> Friday, June 24, 2011

Chorizo a la sidra

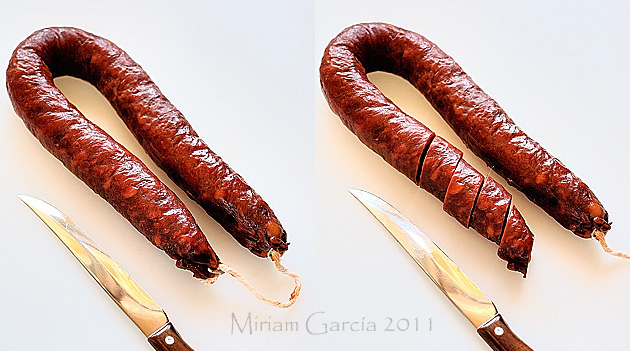
Traditional Spanish cooking is uncomplicated most of the times as it basically relies upon premium quality ingredients. Like good chorizo. Chorizo a la sidra or chorizo cooked in cider is one of the simplest tapas and simplest pairings you can find, fine charcuterie fried in good virgin olive oil and then stewed in cider until the liquid is reduced and the slight sweetness of the drink infuses the chorizo… heaven in a tapa. Skeptical? Don’t judge before you try it. This is a tapa that originates in the northern region of Asturias, a lusciously green, misty and humid area where apple orchards are abundant and so are sidrerías or cider houses. Asturian natural cider is a mildly alcoholic beverage made by fermenting apple juice; it is traditionally poured from the bottle from a certain height so that the liquid crashes into the glass and gets somewhat oxygenated. This fizzying effect only lasts a few seconds, that’s why the cider glassful must be gulped down in one go… Fortunately cider can be enjoyed in this tapa in a less compromising way.


Chorizo a la sidra

Chorizo a la sidra

  • 1 good quality chorizo (not the drier type, but tender)
  • 1 cup natural cider
  • 1 tbsp virgin olive oil
Chorizo a la sidra
  1. Slice the chorizo in 1/2 inch slices and set aside.
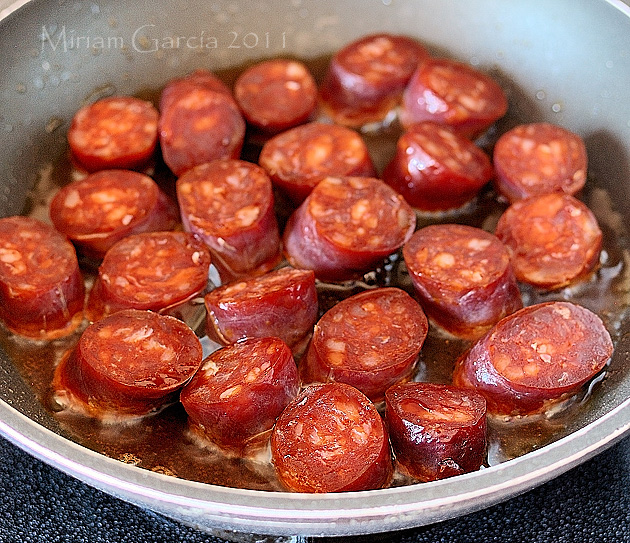
  2. Pour the oil on a skillet and heat on medium. Add the chorizo slices and fry until they change in color, but don’t overdo it.
  3. Add the cider and toss to coat the chorizo. Boil for 10-15 minutes, until the sauce has reduced by one fourth.
  4. Serve in small bowls while still warm, though chorizo a la sidra can also be served at ambient too.
Pour yourself a good glass of red wine or cider and enjoy! And don’t forget to finish the resulting sauce by dunking large pieces of bread in it, what is called mojar in Spanish, literally to wet. I believe the act of mojar is in our genes…

Eager to know more?

Morcilla beignets by Santi Santamaría and the giveaway winner

>> Tuesday, March 1, 2011

Buñuelos morcilla 1

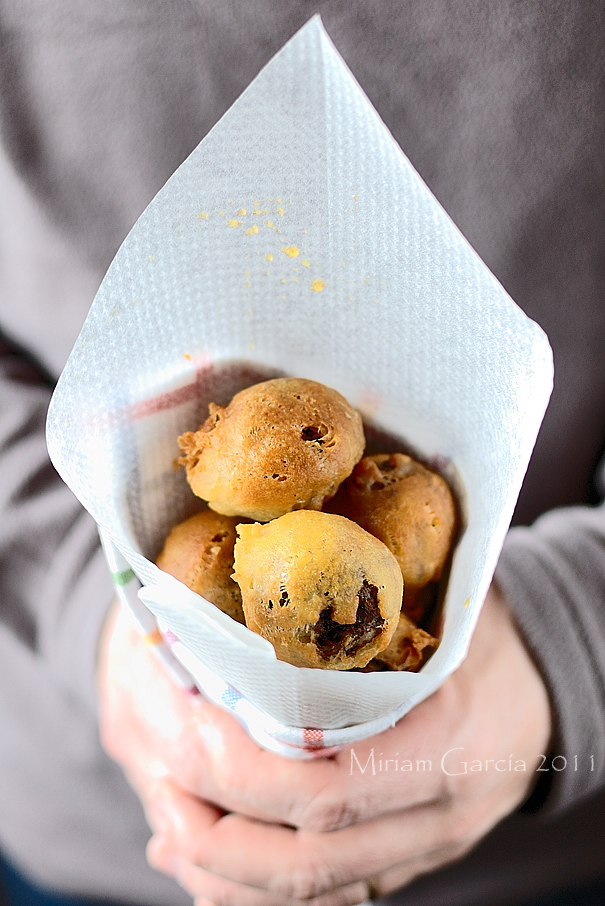
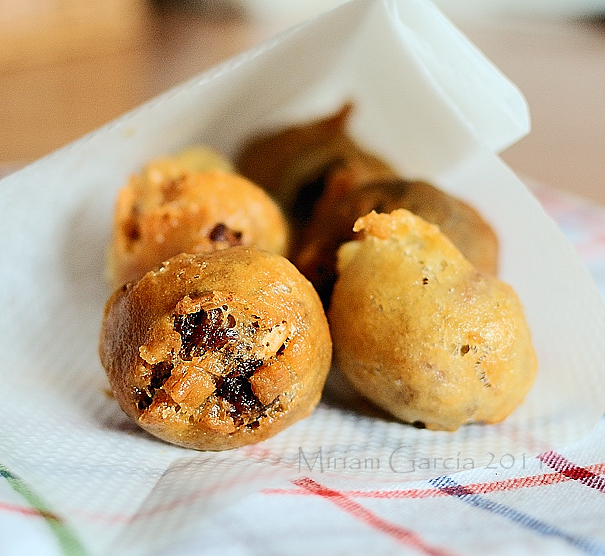
This entry is a humble homage to a good chef, who's recently died at a too early age... Three-star Michelin chef Santi Santamaría was a Catalan chef famous for his restaurant Can Fabes, close to Barcelona. When I learned of his death some days ago, I immediately thought of making one of his recipes, being that I have a couple of his books. But as unity is strength, I decided to participate in the common homage effort started by the Catalan blog De cuina, to get a lot of blogs to cook a Santamaría recipe on the same day. And the initiative was a success. I had been craving for some dish with morcilla, the typical Spanish blood sausage or black pudding (don't sneer), for quite a while, so when I saw Santamaría had a recipe for some wonderful tapa of morcilla beignets my search was over. And the result was well worth the effort.


First to the winner of the CSN giveaway! The lucky winner of the $75 gift code is Prerna, from the very lovely blog Indian Simmer! Congratulations, Prerna, I hope you buy something to help you create even more delightful recipes for us to enjoy.

CSN giveaway

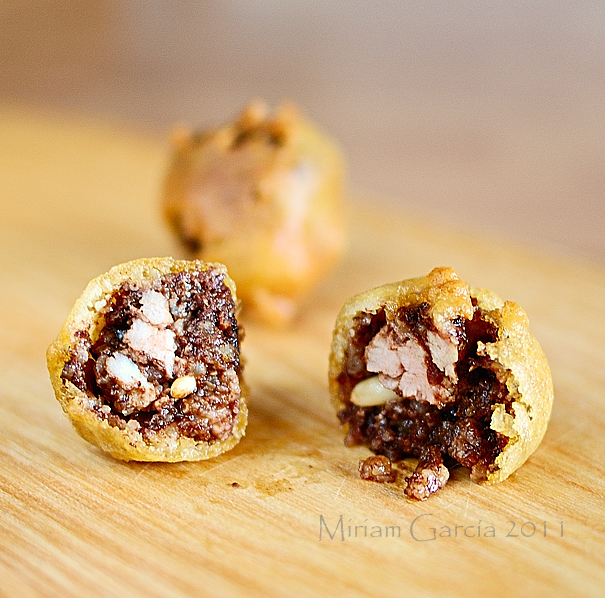
I guess morcilla is one of those things that can make you cringe when haven't grown up with it. I admit the color is not very inviting... humans don't really eat many black foods. In Spain morcilla is a soft sausage made with onion, rice, pork lard, pork blood, salt and quite some spices such as pimentón, pepper, origan, cumin and aniseed in varying amounts. I don't see why this could be more disgusting than having fish raw, or eating slimy creatures like octopus. Or sea urchins. Or even moldy blue cheeses. It's a cultural thing and an acquired taste. And a chance for the ones that have never tried it to be a little more... adventurous (maybe I should ask myself whether or not I am adventurous foodwise before advising the rest of the world to be... I still fill nauseated at the memory of Anthony Bourdain gobbling down a snake heart). I have taken the liberty to modify the filling slightly, eliminating the bread soaked in milk (something I've never really liked in meat balls) and egg. I found my Burgos morcilla unctuous enough to perfectly bind the filling mixture. And I had no desire to lighten the fierce flavor of the sausage, which I love. I added a handful of pine kernels, which to my taste combine wonderfully with morcilla. I am including the directions for the original recipe anyway, in case anyone prefers it that way. And the formula for the frying batter was superb, tasty and unbelievably crispy, undoubtedly a keeper because it stays crisp for a long time.

Buñuelos morcilla 2

Morcilla beignets
Yields 25-30
For the filling:

  • 200g good rice morcilla
  • 120g pork meat (only 100g in the original)
  • 1 good handful pine kernels
  • Salt to taste
  • (in the original: also 100g bread crumb soaked in milk and 1 egg)
For the frying batter:
  • 200g AP flour
  • 25g instant mashed potatoes flakes
  • 15g baking powder
  • 10g sugar
  • 5g salt
  • 45ml olive oil
  • 200-250ml water (depends on the flour absorption ability)
Buñuelos morcilla 3
  1. Grind the pork meat or dice it very finely with a knife.
  2. Peel off the casing of the morcilla, put the morcilla filling in a bowl with the pork meat and mash the soft morcilla filling with a fork. Mix thoroughly. Add the pine kernels and season to taste.
  3. To prepare the frying batter, mix the solids with the olive oil using a mixer. Then add the water little by little in a steady stream while mixing. The final consistency should be that of a thick custard. Leave to rest 20 minutes, for the flours to hydrate and the baking powder to start acting.
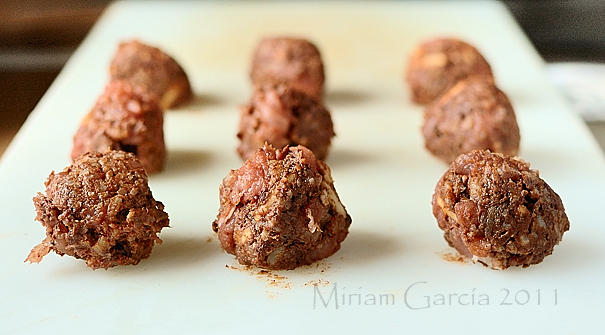
  4. Using 2 teaspoons, shape small meatballs the size of a small walnut and set aside.
  5. Heat plenty of olive oil in a skillet for deep-frying the beignets or use a deep-fryer, to approximately 180ºC.
  6. Place the frying batter in a shallow bowl or container and dip the meatballs. Coat them in the batter thoroughly and dip them in the hot oil with a teaspoon.
  7. When golden, take them out to a paper towel to soak some of the oil. And eat them while warm!
Buñuelos morcilla 4

You see, Mr. Santamaría, we will always have your recipes.

Firma 200px

Eager to know more?

Trinxat, Catalan cabbage and potato dish

>> Sunday, October 31, 2010

Trinxat 1

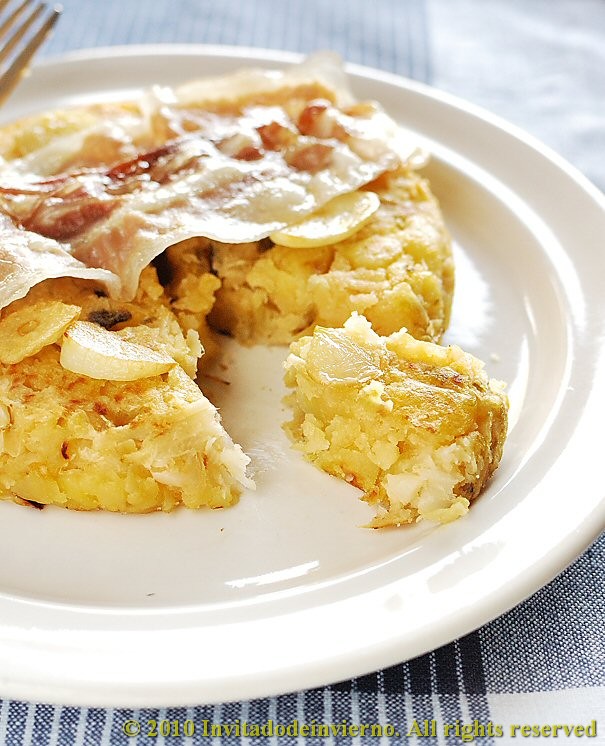
I like cabbage in various ways, in spite of its supremely stinky smell when cooking. I like it raw in salads, sautéed with pimentón and otherwise. But this preparation is one of the best I know. Trinxat is a typical dish from Catalonia, more exactly from the region of Cerdanya, humble and simple, a sort of non-egg omelette made with boiled potatoes and cabbage, then roughly mashed, stir-fried and accompanied by garlic and charcuterie. It is also tasty and cheap for these times, and accompanied by grilled fish or fried egg makes up a wholesome and delicious dinner. It is ideal too for a windy and cool autumn day. Trinxat even has a festivity of its own, celebrated at the town of Puigcerdá... It is well deserved...


I recommend this dish to all those who claim that they do not like cooked cabbage... like my partner. The first time I prepared this dish he said: you don't notice it is cabbage... So maybe you will also change your mind. It is never too late. And this dish can not be easier. Even a six-year old could make it... so bring a six-year old.

Trinxat 2

Trinxat de la Cerdanya
Yields 4 servings

  • 1/2 large cabbage
  • 3 large potatos
  • 4 somewhat thick slices of bacon
  • 4 garlic cloves
  • Olive oil for frying
  • Salt
  1. Cut the cabbage into pieces, removing the thicker stalks, and cook in salted water along with the potatoes, skinned and cut into large chunks.
  2. Meanwhile, chop the bacon into small pieces (or leave it in large rashers) and sauté in a skillet over low heat with the very fat it renders, until crisp to your liking.
  3. Peel garlic and cut into slices, and sauté in the same bacon fat, add oil if necessary. When done, remove and set aside.
  4. When thoroughly cooked, put the drained cabbage and potatoes in the skillet where you just fried the garlic. Sauté everything slowly while mashing it roughly with the side of a spatula. Stir continuously for the flavors to meld, until you have a coarse puree. Add salt to taste.
  5. When you consider that it is well mashed and mixed with the bacon fat and oil, use a spoon or spatula to pat it into a sort of flat cake like a Spanish tortilla and let it get brown (you may need to add a little more oil), over a somewhat stronger heat. When done on one side, turn it carefully with a lid or plate, so that the other side browns too.
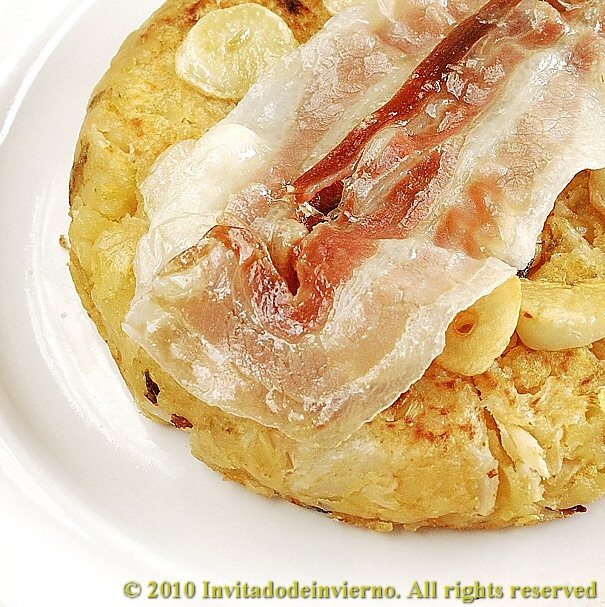
  6. Serve it warm with the bacon and garlic on top. You can also make individual or small snacks and serve them as tapas... delicious. To make small patties you can use pastry rings or egg molds, which are placed on the pan itself.
Trinxat 3

And again, if you have not ever tasted it you will be surprised, because the mixed flavor of cabbage with potatoes, garlic and bacon is fantastic. This is what I call culinary sinergy.

And by the way, stop by lovely Nancy's blog, Spicie Foodie, for a great roundup of Your Best Recipe for October including a recipe of mine, enjoy!

Eager to know more?

Sephardic veal stew

>> Wednesday, October 13, 2010

Sephardi stew 2

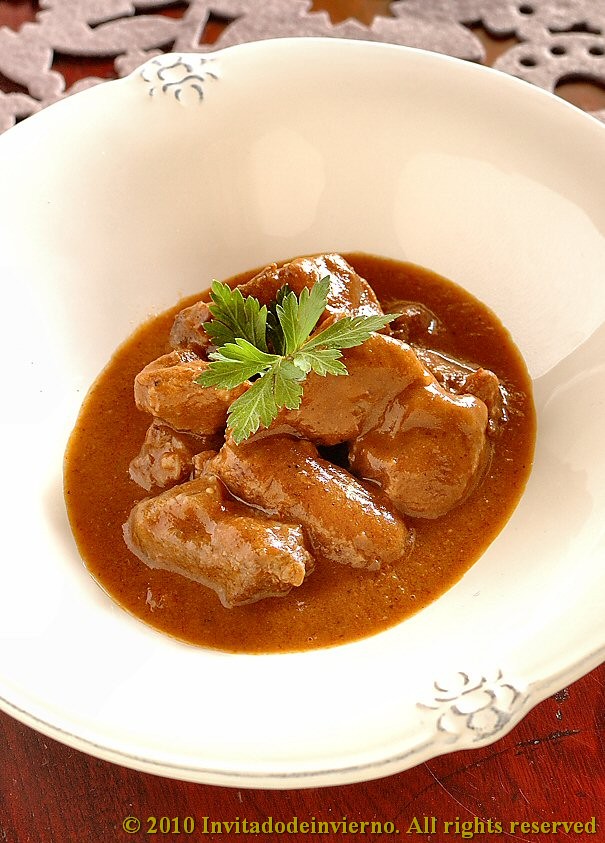
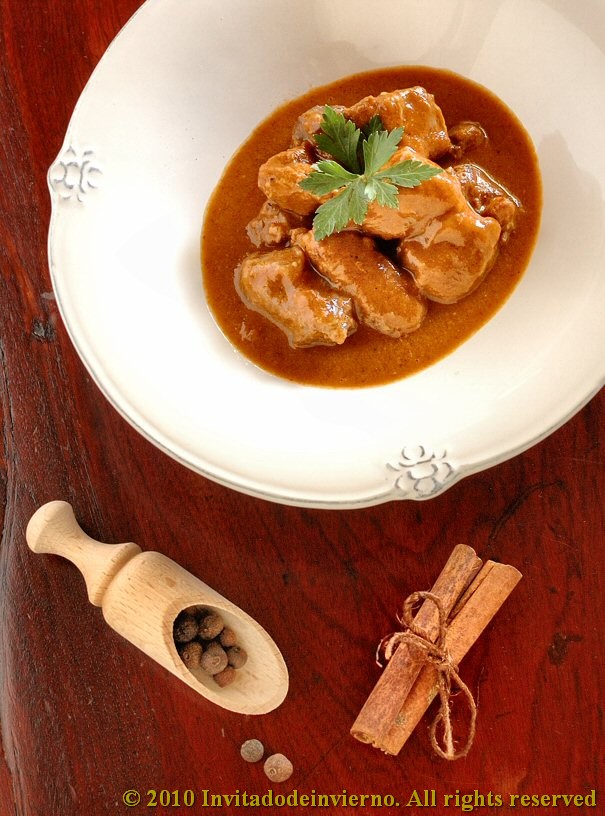
This dish has been a classic in my family for some time already. It comes from one of my favorite cookbooks, in my collection for over 10 years, The Sephardic Kitchen, by Rabbi Robert Steinberg. It's one of those cookbooks that reads like a novel, and brings us closer to the kitchen of a culture that keeps many ties with Spain. The writing is very entertaining and the recipes are mingled with Sephardic folktales. It contains lots of very healthy and tasty dishes, many of those I still have to attempt... This hearty stew is one of those cases where the result is more than just the sum of its parts. A paradigmatic representation of this is a good torrija (Spanish style French toast), which makes you doubt that its creamy interior can consist only of bread soaked in milk. The succulent sauce of this stew is a perfect combination of ingredients, without any dominating over the others, and in which they all combine to create "something else" beyond the mere mixture of red wine, vegetables, honey and spices. You see, this amazing sauce inspires me and brings out the poet in me... Mmm, yum. Olé to this sauce...


And now to some historical background (an excerpt from this site), because in Spain most people know what Sephardim are, but I doubt the same holds outside Spain:

Sepharad is the Hebrew word for the Iberian peninsula that includes Spain and Portugal. (...) Jews lived in Spain long before the Visigoth (Germanic) tribes invaded in 412, however after the Moorish invasion of Spain in 700, there was a large influx of Jews immigrating to Spain. In the tenth and eleventh centuries, Spanish Judaism flourished under Muslim rule, producing poets, scholars, and courtiers - what is known as "the golden age of Jewry." By the mid-thirteenth century, however, the Christians controlled all of the Peninsula except for a small area from Granada to the Mediterranean. In March, 1492, King Ferdinand and Queen Isabella decreed the expulsion of the Jews from Spain. Many Jews converted or left while others went to Portugal, where Judaism could still be practiced freely. But Portugal expelled its Jews in 1497, and the tiny kingdom of Navarre followed suit in 1498. Judaism could be practiced openly nowhere in the Peninsula. Driven from home, the Sephardim established their own congregations in such places as Morocco, Italy, Egypt, the Ottoman Empire, the Land of Israel, and elsewhere.

Mr. Steinberg tells us about this sopado, original name of this dish in ladino, the Judeo-Spanish language:
It is a sweet and spicy veal stew, a typical Sephardic dish that was popular throughout the Jewish Mediterranean. The seasoning varies from one community to another. The recipe that follows is that used in Thessaloniki, Macedonia and northern Greece. Sopado reminds of Hungarian goulash, which only differs in the amount of onion and paprika employed.
Claudia Roden, in The book of Jewish food, tells us about Sephardic cooking:
What we call Sephardi cooking today is the cooking of Mediterranean and Oriental Jews. There are four broad styles. Judeo-Spanish, which is Turkish and Balkan, is the cooking of the Jews of Iberian ancestry who went on to live in the Ottoman heartlands. North African or Maghrebi Jewish cuisine includes Moroccan, Tunisian, Algerian and Libyan. Then there is Judeo-Arab cooking, which is at its best in Syria and Lebanon, and the Jewish cooking of Iraq and Iran. (...) Sephardi cooking is sensual, aromatic and colourful. It makes use of anything that gives flavour - seeds, bits of bark, resins, pods, petals, pistils and flower waters. The Sephardim had a sunny, hedonistic nature (...) good eating has always been part of their traditional Jewish life. Their cooking is of a kind that lifts the spirits. The warm and sunny world they lived in had something to do with this, as had their way of life and historical experience.

Sephardi stew 3

Sephardic veal stew
  • 1,5kg veal or beef for stewing, cut into large dice
  • 8 scallions
  • 500g onions
  • 4 cloves garlic, peeled
  • 2 tsp Spanish sweet pimentón
  • 1/2 tsp Spanish hot pimentón (if the stew is aimed for children as well, you can ommit this and add the same amount to the sweet pimentón)
  • 1/2 tsp allspice
  • 1/4 tsp ground cloves
  • 1 stick cinnamon
  • 2 bay leaves
  • 1 cup beef stock
  • 1 heaped tbsp honey
  • 2 cups tomato sauce
  • 1 large glass red wine
  • Olive oil for frying
  • Salt to taste
It's an easy dish to prepare:
  1. Season the meat and heat the oil in a saucepan with a lid to medium-high heat. Stir-fry the meat in batches to seal (I use a cocotte or Dutch oven, which works great for this task). Set aside.
  2. Cut the veggies and stir-fry in the rendered meat fat. When the vegetables are thoroughly soft, add both pimentones and fry the mixture for another 2-3 minutes, but not longer otherwise the pimentón can get a bitter taste. Add the allspice and ground cloves and sauté another minute.
  3. If you are making the sauce in a pan, at this point add the broth and deglaze the bottom. If you are using the Thermomix, also add the stock and at this point you can process the sauce to smooth. I prefer it that way, like a thick, velvety sauce, but I leave it to your taste. Although I do it, the original recipe does not calls for processing.
  4. Then add all remaining ingredients: cinnamon stick, bay leaves, honey, tomato sauce and red wine. Stir well.
  5. Return the reserved meat to the pan, cover well and cook over low heat for about two hours, it may be longer or shorter depending on the toughness of the meat (for example, the last time I cooked this dish one and a half hour was enough). It is not usually necessary to add more liquid, as the mixture of wine, stock and tomato is usually sufficient for a suitable consistency.
  6. When the meat is tender, add salt, further heat for a couple of minutes for the salt to mix and dissolve and check the seasoning. Adjust if necessary. The original recipe calls for a quarter cup of lemon juice at the end of the cooking, but I never add it because I don't quite like the idea and don't miss it in the finished stew.
Sephardi stew 1

Like most stews, this stew is more tasty the next day, when all the flavors have developed and permeated the meat. For that, and because it is delicious, it is a dish that I cook often whenever I have guests, because I can prepare it the day before. Accompanied by a good rice or baked potatoes with herbs it makes a real fiesta dish.

Like a Sephardim would say: Berajá i salú...

Eager to know more?

Magras con tomate, a tapa of Spanish ham on tomato sauce

>> Tuesday, September 28, 2010

Magras tomate 4

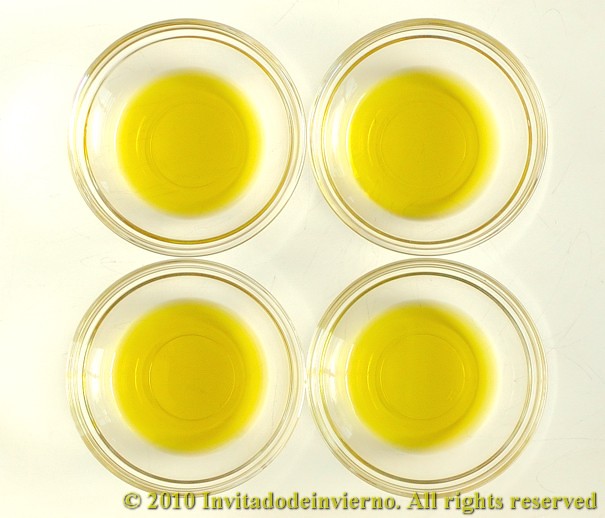
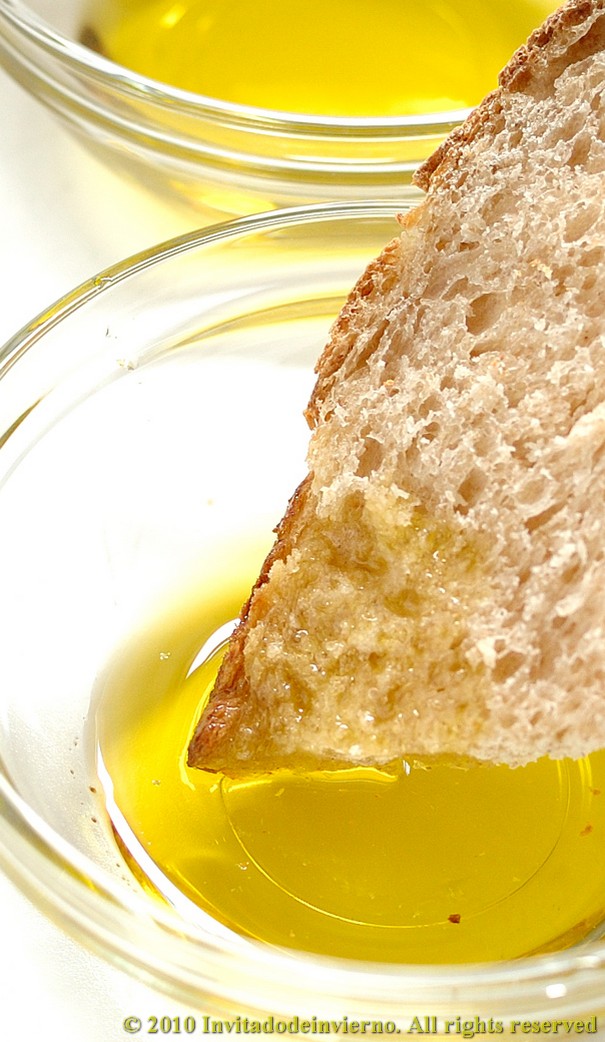
I recently won a pack of Spanish extra virgin olive oil in a food photo contest, of four different varieties. So I decided to make an oil tasting with some homemade bread, a sourdough one, now that the weather is not so hot and I can use my oven without suffering a heat stroke in my own kitchen. Besides the time has come to stop publishing foreign and sweet recipes and make something Spanish to the core, as well as simple and nourishing, to put my new oil to good use: magras con tomate... before I go on a diet. Yes, my dear little children, I've repeatedly commited the sin of gluttony along the past summer and this summer in particular has placed me in the launchpad to hell. So I compulsorily need to lose some body bacon before the next great culinary orgy: Christmas. That's the story of my life... inflating and deflating.


Cata aceite 1

The bread recipe isn't relevant here. Only the magras recipe is essential for mankind.
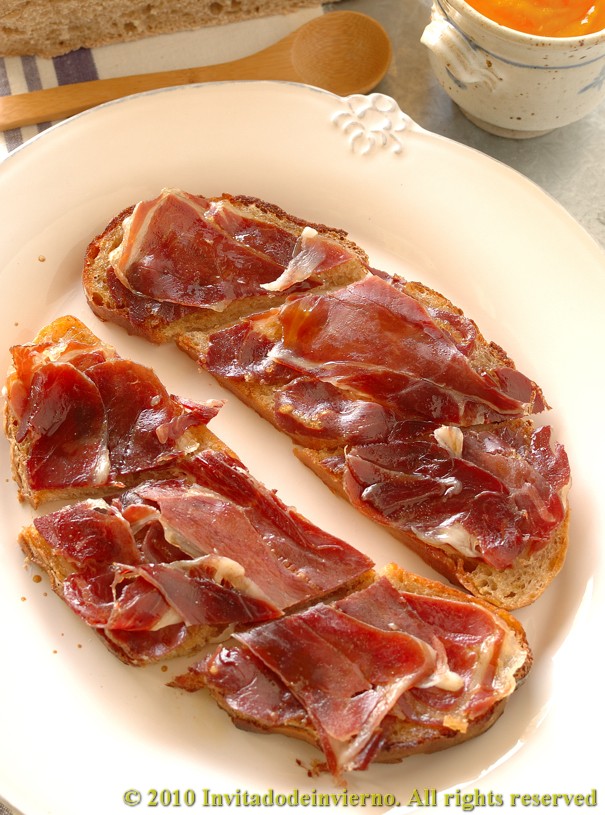
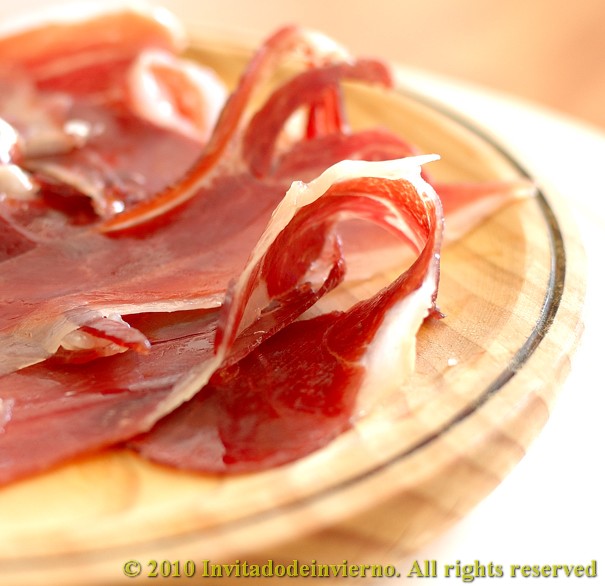
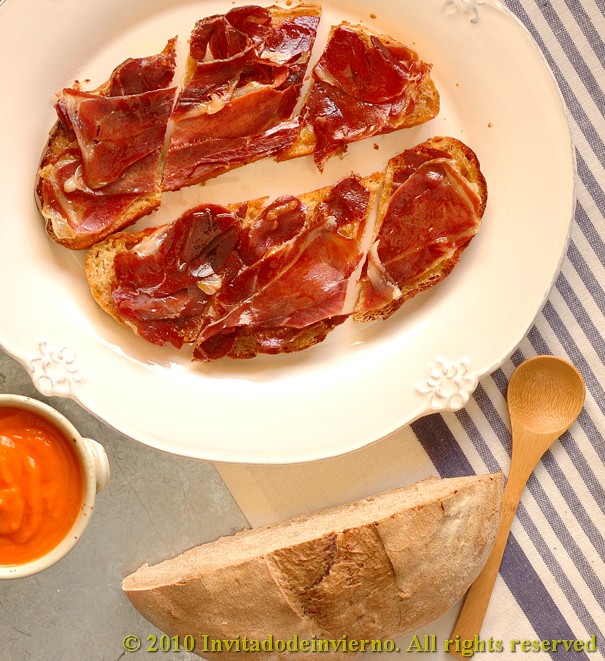
Magras con tomate are typical from Navarra and Aragón, two historic regions in Northeastern Spain and they consist of some large Spanish serrano ham slices of varying thickness, lightly fried in oil and then eaten on some large bread toast with a sugary-winey sauce and tomato sauce on the side, or simply heated in the tomato sauce after frying, without the bread and the wine sauce. I prefer the first version. By the way, don't mistake serrano ham for Ibérico ham. The latter comes from a native breed of pigs and it's more expensive (and succulent) than simple serrano ham. For this dish regular serrano ham can be used. No need to buy a very expensive ham, as you're going to fry it.

Cata aceite 2

Magras tomate 1

For making these magras con tomate I recommend to use a nice, thick, homemade tomato sauce. The net is packed with recipes, so just choose the one you prefer. And homemade bread is a good addition too. If you're not willing to make your own bread, buy a good one, but not whole wheat bread. The whiter the better.

Magras tomate 2

Magras con tomate
Yields 4 servings:

  • 4 large slices of serrano ham or more, as needed to cover the bread slices
  • 4 large bread slices, not too thick
  • 2 tbsp vinegar
  • 2 tsp sugar
  • 1/2 glass white wine
  • Extra virgin olive oil
  • Thick tomato sauce to taste
  1. Serrano ham gets very salty when fried, because of the water loss, that causes the salt to concentrate. This can be avoided by soaking the slices in tepid milk for 10 minutes before frying. Then drain and pat dry with kitchen paper. I don't mind the saltiness, so I don't do it. Pour a couple tablespoons oil in a frying pan and lightly fry the slices on low heat. No need to overdo it, just let them change color, then take out of the pan onto a plate. Cover to keep them warm.
  2. Lightly fry the bread slices in the rendered fat, set aside and keep warm too.
  3. Without turning off the heat, add the sugar and stir to caramelize. If the bread has soaked all the fat, you can add some drops of oil. When the sugar is toasted, turn off the heat and add the vinegar and wine; cover the pan as the liquids will splash a bit. Then put on low heat again and reduce the sauce while the caramel dissolves in it, for 2-3 minutes.
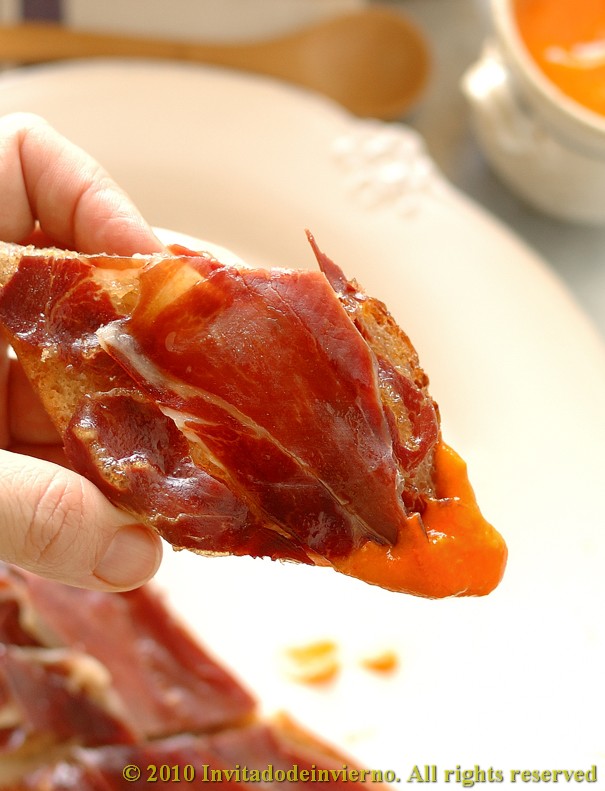
  4. Place the ham on the bread slices, drizzle with the hot wine sauce and serve with the warmed tomato sauce on the side, as a dip. Enjoy!
Magras tomate 5

I think the sweet-sour sauce on the salty ham makes a fantastic combination. And don't think my tomato sauce is radioactive, its orange color comes from a lot of onion and carrots I use in the making.

Eager to know more?

Daring Cooks' challenge June: Pâtés and bread

>> Monday, June 14, 2010

Paté spices 1

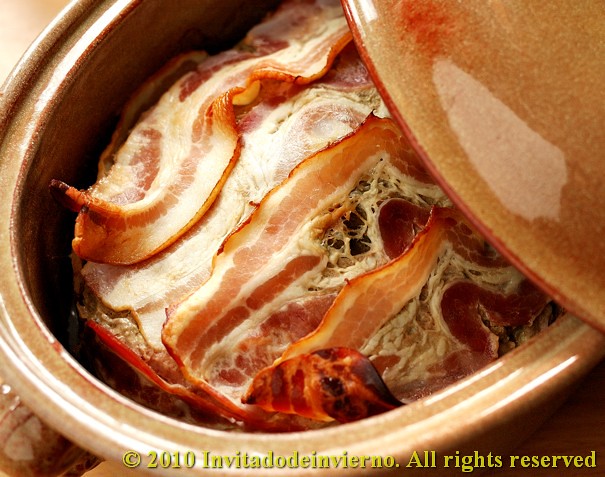
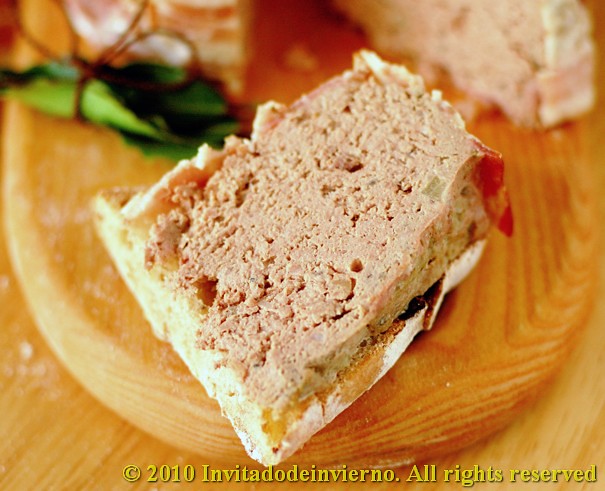
This month the Daring Cooks' challenge has turned out pro-French and I found it's been an excellent proposal, although in reality there were two challenges in one. It so happens that I had recently attempted a campagne-style pâté with a not-so-satisfactory result, so it was a good opportunity to undertake a tried and tested recipe and use a surplus of pork liver that I keep in the freezer since January... And the experience has been a success... I'm still licking my lips.


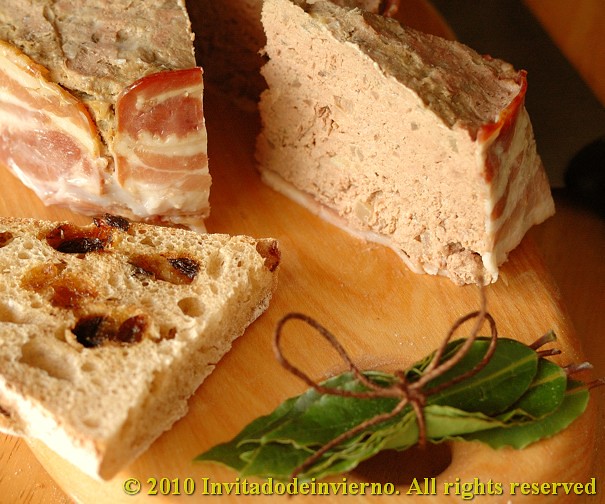
Being that I always tend to be unruly and disobedient I didn't exactly make baguettes, and I added raisins, which I think divinely combine with pâtés and foie. The possibilities of pâté offered were varied, including vegetarian options. I chose the most genuine, the pig's liver pâté. I also introduced some changes in the paté quantities, but the ingredients are the same.

Our hostesses this month, Evelyne of Cheap Ethnic Eatz, and Valerie of a The Chocolate Bunny, chose delicious pate with freshly baked bread as their June Daring Cook’s challenge! They’ve provided us with 4 different pate recipes to choose from and are allowing us to go wild with our homemade bread choice.

Paté spices 4

Three Spice Liver Pâté
For a 25 x 12,5 cm loaf or pan

  • 350g pork liver (454g in the original recipe, but I was afraid that the liver taste would be overwhelming)
  • 350g minced pork meat (227g in the original recipe)
  • 250g Ibérico pork lard (227g in the original recipe)
  • 2 garlic cloves
  • 2 shallots
  • 1 whole egg y 1 egg yolk
  • 1/2 tsp cinnamon
  • 1/2 tsp cilantro seeds
  • 1/2 tsp cumin
  • 1 tsp salt (3/4 tsp in the original recipe)
  • 1 tbsp peppercorns
  • 2 tbsp sweet wine (cognac in the original recipe)
  • 2 bay leafs
  • 1 package bacon
Paté spices 2
  1. Preheat the oven to 180ºC.
  2. Cut the liver and bacon into pieces and put them in a food processor (I use my Thermomix). Process briefly.
  3. Grind the cilantro and cumin seeds in a coffee-grinder.
  4. Add the minced meat, the peeled garlic cloves, the diced shallots and all the spices and salt, except the peppercorns, in the processor bowl. Process till you obtain a fine puree. Add the wine, the coarsely crushed peppercorns and the eggs and mix thoroughly.
  5. Line a loaf pan or terrine with bacon slices. Place a bay leaf on the bottom and pour the meat-liver mixture in the terrine. Smooth the surface, place another bay leaf and cover with more bacon. Cover with a lid or aluminum foil.
  6. Place a deep dish in the oven and place the terrine on it. Fill with boiling water till it reaches 2/3 of the height. Bake for 1 1/4 hours.
  7. When done, take out the pâté and leave to cool completely. I preferred to leave it to rest overnight in the fridge for the flavors to develop.
Being that I already have some practice in baking bread, I won't dedicate much attention here to the bread part of the challenge. I used this recipe, but shaped into small batards and I added a couple of handfuls of raisins, previously boiled in sweet wine. The bread was not perfect-looking, but it was delicious with the pâté. The pâté itself was quite addictive, even though I would reduce slightly the amount of cinnamon. I liked the sweet wine instead of the cognac. But I'm a real sweet-wine-geek, I would add it everywhere. If you think the amount of pâté is too much, consider that is freezes beautifully if you don't feel like eating the whole terrine in one go. I will make this recipe again, no doubt.

Paté spices 3

Eager to know more?

Daring Cooks' challenge May: Stacked green chile and chicken enchiladas

>> Thursday, May 13, 2010

Enchiladas 3

I was really excited about this month's challenge. I haven't tried many Mexican dishes, but so far I've always loved what I've tried. I love mole and I love tacos and I love fajitas and I love quesadillas... now I would taste enchiladas for the first time. Wonderful! I was only afraid that this dish would be too hot for me...

MU7WVWJKBEYQ


Our hosts this month, Barbara of Barbara Bakes and Bunnee of Anna+Food have chosen a delicious Stacked Green Chile & Grilled Chicken Enchilada recipe in celebration of Cinco de Mayo! The recipe, featuring a homemade enchilada sauce was found on www.finecooking.com and written by Robb Walsh.

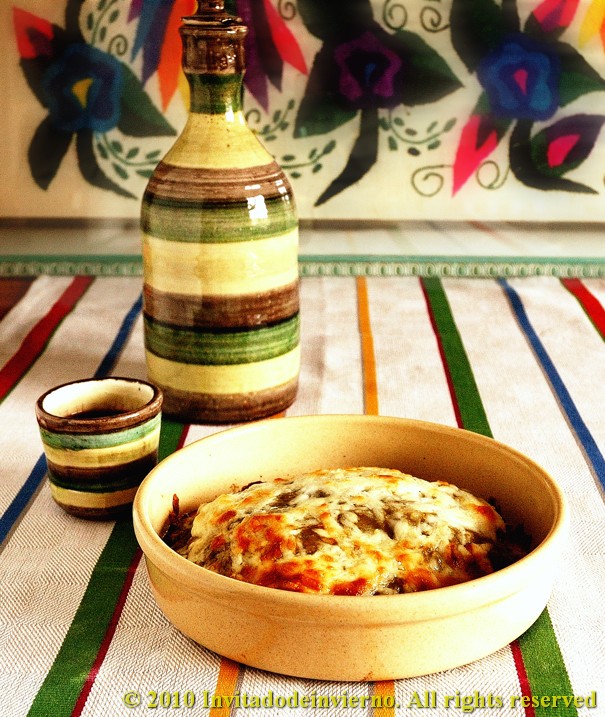
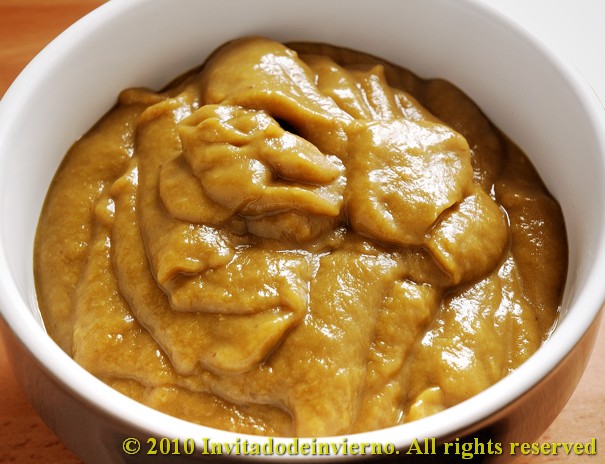
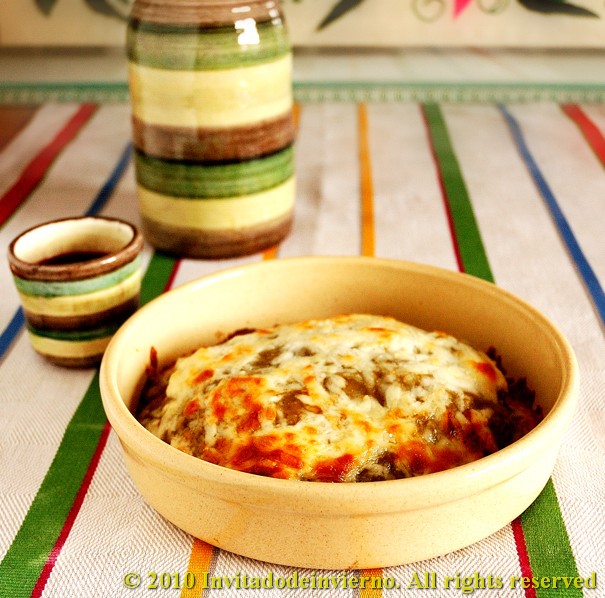
Fine, so the challenge involved making an enchilada sauce consisting mainly of roasted green chiles and tomatillos, grilling some chicken breasts and making some corn tortillas (I already knew about the tortilla part...). The challenge turned out fantastic despite all the mishaps... First, after learning about the challenge, I located an online source of tomatillos in Spain, because I hadn't even seen them in my life. Perfect. Then, when the time arrived for making the enchiladas, I realized I had forgotten to order them, so I had to use green tomatoes and lemon... not the real thing. Shame on me. Second, I searched for green chiles everywhere... but they were nowhere to be found. I used regular green peppers and then add some mildly hot pickled Spanish green guindillas. Third, I wanted to make my own tortillas with my beautiful tortilla press and then I couldn't squeeze into my schedule going down to Madrid to buy the damned tortilla flour... so we had to manage with store-bought tortillas. But still your heroine (that's me) managed to make some delicious enchiladas, my way... here's how.

Enchiladas 2

Stacked green chile & grilled chicken enchiladas
Serves 4

  • 750g green peppers (not bell peppers)
  • 2 green pickled guindillas
  • 250g green tomatoes
  • Juice of 1 lemon
  • 1 clove garlic
  • 1/2 liter vegetable stock
  • 1 small onion
  • 2 tbsp cornstarch
  • 1 tsp dried oregano
  • Salt to taste
  • 2 boneless chicken breasts
  • Olive oil
  • 12 small corn tortillas
  • 200g Manchego cheese (the recipe called for cheeses not easily found in Spain and... what the heck, Manchego is perfect)
Enchiladas 1
  1. To make the sauce, first roast the peppers on an oven tray, at 180ºC, till the skin is dark. Take them out to a pot and cover them till cool. In my case, I also roasted the tomatoes.
  2. When cool, get rid of the skin. Fry the minced onion and garlic in a frying-pan with a couple of tablespoons of oil, till wilted. Here I mixed this with the peeled peppers, the tomatos and the chopped guindillas in a food processor and pureed it.
  3. Then add the lemon juice, the vegetable stock and the salt and boil the mixture for 10 minutes.
  4. Add the cornstarch dissolved in a little water and continue boiling till the sauce thickens, another 10 minutes.
  5. In the meantime, salt and oil the chicken breasts, put them into an oven dish, add a glug or two of white wine and cook them for 20 minutes at 200ºC. When done, cut or shred in little pieces.
  6. Shred the cheese and set aside.
  7. When the sauce and the chicken are both ready, fry the tortillas slightly in 2 or 3 tablespoons olive oil.
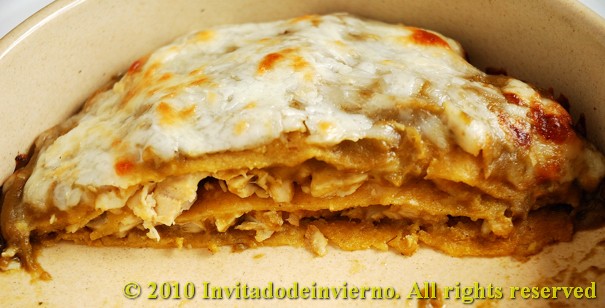
  8. Take a large baking dish enough for 4 tortilla stacks or 4 individual oven plates, like I did. Ladle some sauce on the plate base, then lay the first tortilla. Ladle some more sauce on the tortilla, then some shredded chicken and some shredded cheese. Now lay a second tortilla, ladle some sauce on it, more chicken and more cheese. Top with a third tortilla, more sauce and a generous handful of cheese. Make the other three stacks in a similar fashion.
  9. When you have 4 nice stacks, put the baking dish or plates into the oven and bake for 20 minutes at 180ºC until the cheese is melted and browned on top.
  10. Take the enchiladas out of the oven, let them rest for 10 minutes and... enjoy!
Enchiladas 4

Thanks Barbara and Bunnee for a very interesting and timely challenge!

Eager to know more?

Daring Cooks' challenge April: Brunswick stew

>> Tuesday, April 13, 2010

Brunswick stew 1

This month's challenge is a United States southeastern classic: Brunswick stew. I must admit I had never heard of it before. But that's not surprising, is it? Have you heard of the Spanish cocido? I thought so. This hearty stew is really not difficult to make... But the essential thing is that it should be so thick that a wooden spoon should be able to stand up in the middle. This recipe yields 12 servings, but somehow I was not aware of it and I didn't halve it... We better like it.


The 2010 April Daring Cooks challenge was hosted by Wolf of Wolf’s Den. She chose to challenge Daring Cooks to make Brunswick Stew. Wolf chose recipes for her challenge from The Lee Bros. Southern Cookbook by Matt Lee and Ted Lee, and from the Callaway, Virginia Ruritan Club.

Brunswick stew, slightly adapted

  • 1/4 lb / 113.88 grams / 4 oz slab bacon, rough diced
  • 2 Serrano, Thai or other dried red chiles, stems trimmed, sliced, seeded, flattened (I used 2 Spanish guindillas, medium hot)
  • 1lb / 455.52 grams / 16oz rabbit, quartered, skinned
  • 1 4-5lb / 1822.08- 2277.6 grams / 64-80oz chicken, quartered, skinned, and most of the fat removed (I used 1500 g only)
  • 1 Tablespoon / 14.235 grams / ½ oz sea salt for seasoning, plus extra to taste
  • 2-3 quarts / 8-12 cups / 64.607-96.9oz Sunday Chicken Broth (see below)
  • 2 bay leaves
  • 2 large celery stalks (I skipped them... sorry, I hate them)
  • 2lbs / 911.04 grams / 32oz potatoes, or other waxy type potatoes, peeled, rough diced
  • 1 ½ cups / 344.88 grams / 12.114oz carrots (about 5 small carrots), chopped (I used 2 large)
  • 3 ½ / 804.72 grams / 28.266oz cups onion (about 4 medium onions) chopped (just used 2 onions)
  • 2 cups / 459.84 grams / 16.152oz fresh corn kernels, cut from the cob (about 4 ears) ( I halved it...)
  • 3 cups / 689.76 grams / 24.228oz butterbeans, preferably fresh (1 ¼ lbs) or defrosted frozen (I added slightly less here)
  • 1 35oz can / 996.45 grams / 4 cups whole, peeled tomatoes, drained
  • ¼ cup / 57.48 grams / 2.019 oz red wine vinegar (I used white vinegar, I find red vinegar too strong)
  • Juice of 2 lemons (I didn't dare to add the lemon juice, I thought it would be too acidic for me)
  • Tabasco sauce to taste (I didn't add any)
Chicken broth:
To make the chicken broth, I simply boiled 2 chicken carcasses along with a piece of hen, plus the carrots and the onions that the stew recipe calls for. Boil everything for 45 minutes, while skimming the foam. You'll get a beautiful fatty and yellow stock. It couldn't be easier.
  1. In the largest stockpot you have (I used my French Le Creuset oven), fry the bacon over medium-high heat until it just starts to crisp. Transfer to a large bowl, and set aside. Reserve most of the bacon fat in your pan, and with the pan on the burner, add in the chiles. Toast the chiles until they just start to smell good, or make your nose tingle, about a minute tops. Remove to bowl with the bacon.
  2. Season liberally both sides of the rabbit and chicken pieces with sea salt and pepper. Place the rabbit pieces in the pot and sear off all sides possible. You just want to brown them, not cook them completely. Remove to bowl with bacon and chiles, add more bacon fat if needed, or olive oil, or other oil of your choice, then add in chicken pieces, again, browning all sides nicely. Remember not to crowd your pieces, especially if you have a narrow bottomed pot. Put the chicken in the bowl with the bacon, chiles and rabbit. Set it aside.
  3. Add 2 cups of your chicken broth or stock, if you prefer, to the pan and basically deglaze the4 pan, making sure to get all the goodness cooked onto the bottom. The stock will become a nice rich dark color and start smelling good. Bring it up to a boil and let it boil away until reduced by at least half. Add your remaining stock, the bay leaves, celery, potatoes, chicken, rabbit, bacon, chiles and any liquid that may have gathered at the bottom of the bowl they were resting in. Bring the pot back up to a low boil/high simmer, over medium/high heat. Reduce heat to low and cover, remember to stir every 15 minutes, give or take, to thoroughly meld the flavors. Simmer, on low, for approximately 1 ½ hours. Supposedly, the stock may become a yellow tinge with pieces of chicken or rabbit floating up, the celery will be very limp, as will the chiles. Taste the stock, according to the recipe, it “should taste like the best chicken soup you’ve ever had”.
  4. With a pair of tongs, remove the chicken and rabbit pieces to a colander over the bowl you used earlier. Be careful, as by this time, the meats will be very tender and may start falling apart. Remove the bay leaf, celery, chiles, bacon and discard.
  5. After you’ve allowed the meat to cool enough to handle, carefully remove all the meat from the bones, shredding it as you go. Return the meat to the pot, throwing away the bones. Add in your carrots, and stir gently, allowing it to come back to a slow simmer. Simmer gently, uncovered, for at least 25 minutes, or until the carrots have started to soften (I skipped this stage, as I already had boiled my carrots).
  6. Add in your onion, butterbeans, corn and tomatoes (and my carrots). As you add the tomatoes, crush them up, be careful not to pull a me, and squirt juice straight up into the air, requiring cleaning of the entire stove. Simmer for another 30 minutes, stirring every so often until the stew has reduced slightly, and onions, corn and butterbeans are tender. Remove from heat and add in vinegar, lemon juice, stir to blend in well. Season to taste with sea salt, pepper, and Tabasco sauce if desired (I thought it didn't need it).
  7. You can either serve immediately or refrigerate for 24 hours, which makes the flavors meld more and makes the overall stew even better. Serve hot, either on its own, or with a side of corn bread, over steamed white rice, with any braised greens as a side.
Brunswick stew 2

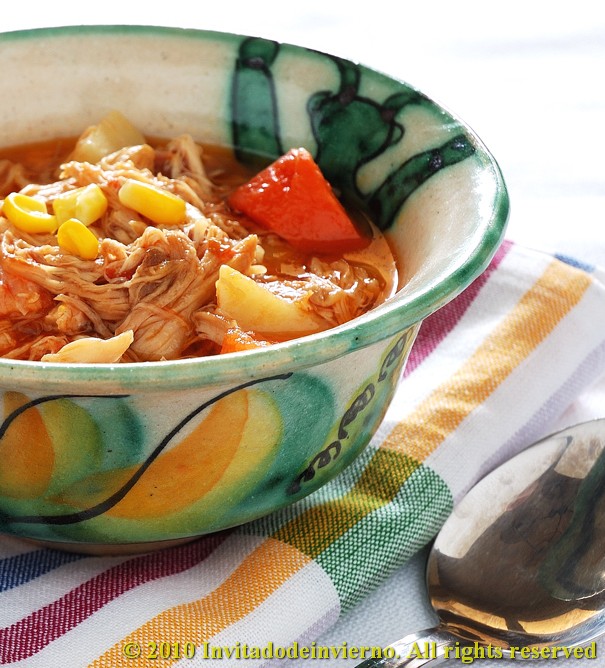
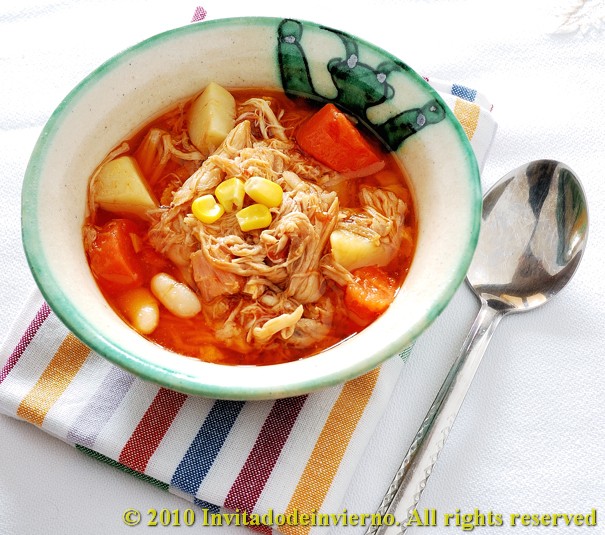
My potatos were not starchy enough, so the broth wasn't really thick. In fact you can see the potato dice have kept their shape pretty well through almost 2 hours of boiling. Indeed the whole thing should have been a bit more "amalgamated", but still it was truly stomach-warming.

Eager to know more?

Mini Ibérico pork pot pies and a giveaway!

>> Thursday, February 4, 2010

Mini potpie 2

This is my first giveaway ever and in spite of my usual "British" composure (although I'm nothing like British), I must admit I'm pretty excited. I was recently contacted by the people from CSN Stores, which boasts over 200 specialty web-based stores (check out their stools! I have a high table in my kitchen with bar stools, and I wish the variety of bar stools was that wide in Europe). If you visit their site, you'll find a lot of things you need and a lot of things you don't need, but would kill to have! After browsing their stores looking for some interesting goodies to giveaway, I've opted for the cutest Le Creuset ramekins. I happen to own a couple of them myself, two vibrant-red cuties, which make a lovely setup for individual soufflés and gratins, miniature pot pies, clafoutis or cream desserts. And now I'm giving away 6 of these lovely pieces of bakeware to my readers. So keep on reading to learn about how to enter.


Giveaway details: The only thing you have to do to enter the giveaway is to leave a comment about the kind of dish you'd love to use these ramekins for. Easy, isn't it? ;-). Please include your e-mail or make it visible in your profile. As usual, each comment will be given a number and I will post one winner, which will be chosen at random by a random number generator.

But there's more. Besides the mandatory entry to enter the giveaway, you can increase your chances by making extra entries. Just leave a comment letting me know the following:

  • You've suscribed to my blog on Google friend connect
  • You've tweeted about the giveaway (please leave the link!)
This giveaway is only open to US and Canada (sorry, other international readers) till February 20th at midnight (CET). The prize will be sent by CSN. I will collect all comments and use random.org to draw the winner.

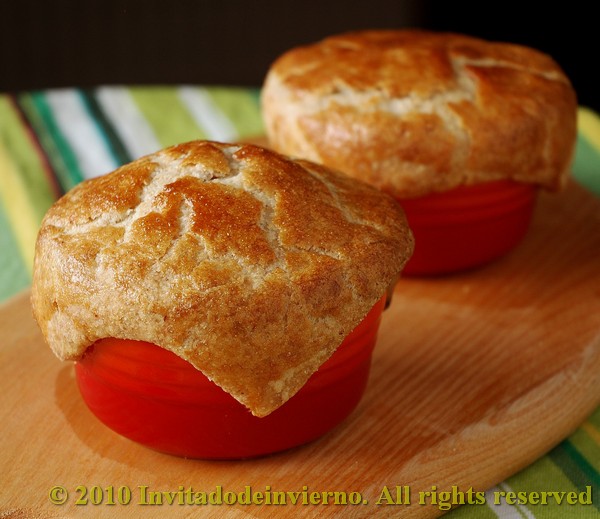
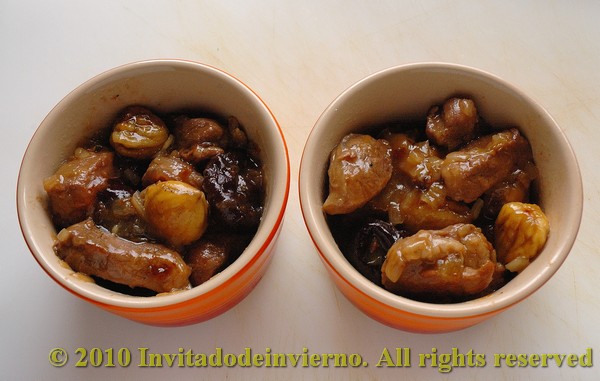
And now to the recipe. I found it would be a good idea to use my ramekins to prepare something that could illustrate how beautiful any dish looks in them. So here's a simple and comforting recipe for cold winter days, a tapa-sized pot pie type of dish without cream nor butter, with a Spanish twist coming from the sweet wine used in the sauce and the Iberico pork meat. Lovely served for brunch or as an appetizer.

Mini potpie 3

Mini Ibérico pork pot pies
Yields 4 servings
  • 1/2 kg diced pork sirloin (I used Iberico pork, which is an indigenous free-roaming pork breed, fed mostly on acorns, widely known for its wonderful flavor, like in Ibérico ham. Of course any type of pork will do, only the dish will taste different)
  • 16 prunes, pitted (or more, just figure out how many you want in your ramekin and multiply by 4)
  • 3 scallions
  • 1 large handful chestnuts (if uncooked, you can roast them in the microwave oven for a while. First cut a slit on the shell to prevent them from bursting)
  • 1 cup sweet white wine (Spanish moscatel is best)
  • 1/2 tbsp all-purpose flour
  • 2 pinches thyme
  • Virgin olive oil for frying
  • Salt
  • A sheet of puff pastry for the pot cover (I used some leftovers of homemade flaky pastry)
  • 1 egg for brushing the pastry
Lightly salt the pork dices. Pour 3-4 table spoonfuls of olive oil in a heavy pot (I use my French oven) and fry the chopped scallions on low till wilted. When done, add the pork and stir-fry it on high heat, to seal the juices. Then add the flour and stir for the flour to toast lightly. Add the shelled chestnuts and the prunes, pour the wine and add water enough to cover the meat. Add a teaspoon of salt and let the whole thing simmer on low heat till the sauce is thickened (don't let it thicken completely, as it will thicken further in the oven) and the meat is tender, around half an hour, depending on how tender the meat actually was. Some of the prunes may fall apart in the process, but this only adds to the sauce richness. If you prefer to find firmer prunes on your plate, just add them half way of the cooking. Check for saltiness when the meat is cooked and adjust if needed.

Mini potpie 1

Heat up the oven to 200ºC in the meantime. Divide the stew among the ramekins, fill them almost to the top. Add a little water if you find the stew to be too thick. Roll the puff pastry on a floured surface till 0.5cm thick or thicker if you prefer. Find yourself a round cutter, cup or glass that can yield circles of pastry slightly larger than the ramekins. Cut four circles and set aside (you can see I was lazy and ended up cutting squares... they add to the pot pies rustic look). Brush the edge of the ramekins with some beaten egg and lay the pastry circles on them, pressing the outer edge to seal. Brush the surface with some more beaten egg. Then bake in the oven for 20-25 minutes, until the pastry is golden. Hmmmm, I thoroughly enjoy the moment of breaking the crust... in awe... and releasing all the aromas... Have a forkful of stew and a bite of the crust at the same time... yum.

Eager to know more?

Daring Cooks' challenge January: Thai pork satay with peanut sauce

>> Thursday, January 14, 2010


The Daring Cooks proposal for this month was a typical Thai dish, though widely known in other Southeast Asian countries like Indonesia and Malaysia. A satay consists of broiled skewered meat (almost any type), previously marinated in a mixture of onion, garlic and spices. The cooked meat is dipped in a peanut sauce. The meat gets its striking yellow color from the turmeric in the marinade. I had tried this dish an obscene amount of years ago, while living in The Netherlands, where it's a very popular fast food due to the large Indonesian community. I remember at the time I found the sauce the most disgusting thing I had ever tried... something warm with peanut flavor... yikes! Again the Daring Cooks were challenging me with something I'd never even think of cooking if left to my own devices. Nevertheless I've completely changed my mind about it this second time... has time taught me something?


The January 2010 DC challenge was hosted by Cuppy of Cuppylicious and she chose a delicious Thai-inspired recipe for Pork Satay from the book 1000 Recipes by Martha Day.

You could choose any type of meat or tofu, I chose a pound of pork simply because I had some pieces in the freezer. I stuck strictly to Cuppy's directions and didn't add or eliminate any ingredient.

Pork satay with peanut sauce

  • 1 pound pork, sliced or diced
Marinade:
  • 1/2 small onion, chopped
  • 2 garlic cloves, crushed
  • 1 T ginger root, chopped (optional) (2 cm cubed)
  • 2 T lemon juice (1 oz or 30 mls)
  • 1 T soy sauce (0.5 oz or 15 mls)
  • 1 tsp ground coriander (5 mls)
  • 1 tsp ground cumin (5 mls)
  • 1/2 tsp ground turmeric (2-2.5 mls)
  • 2 T vegetable oil (or peanut or olive oil) (30 mls)
Peanut sauce:
  • 3/4 cup coconut milk (6 oz or 180 mls)
  • 4 Tbsp peanut butter (2 oz or 60 mls)
  • 1 Tbsp lemon juice (0.5 oz or 15 mls)
  • 1 Tbsp soy sauce (0.5 oz or 15 mls)
  • 1 tsp brown sugar (5 mls) (my peanut sauce had sugar in it, so I didn't add any and I didn't miss it)
  • 1/2 tsp ground cumin (2.5 mls)
  • 1/2 tsp ground coriander (2.5 mls)
  • 1-2 dried red chilies, chopped (keep the seeds for heat)
First marinate the meat. Cut the meat in pieces. I used pork sirloin and cut it in thick strips. Put all the marinade ingredients in a food processor and process until you get a yellow paste. Put the meat with the marinade in a freezer plastic bag and toss to coat evenly. The minimum time for marinating was 4 hours, but I preferred to leave it in the fridge overnight. By the way, all those who don't like the flavor of coriander or cumin seeds should refrain from trying this recipe. I love them though.

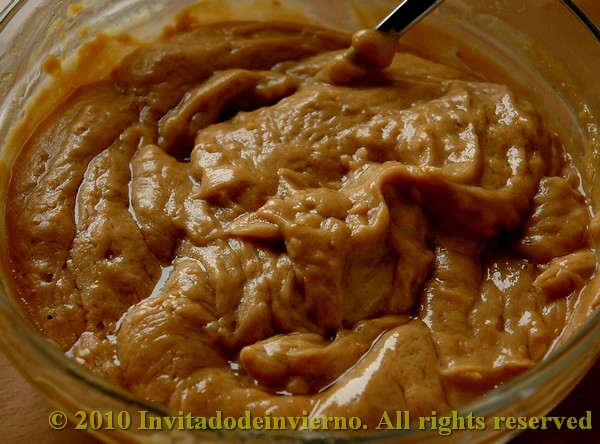
The sauce can be prepared in advance or on the spot, it's very easy and quick. But I must warn you that it's somewhat delicate, as it can separate like mayonnaise if overheated. Yes, it did happen to me. Therefore I recommend you to do it just before serving the satay, then you avoid the risk in reheating it.

Grind the spices in a clean coffee-grinder if you don't have them ground, like myself. Put all the ingredients in a small saucepan and heat very gently for the peanut butter to melt. Watch it carefully to prevent it from boiling. The moment the mixture is more or less homogeneous, turn off the heat and stir. We ate our separated sauce all the same... ahem.


Before making the sauce then, turn the grill on. It must be nice to cook this in a barbecue in the summer, but we had snow. Slide the meat onto the skewers. First soak the skewers in water for 20 minutes if you're using the wooden ones. Lay the skewers under the grill, around 10 minutes on each side, until the edges start to brown. Don't overcook the meat or it will be dry. When done, transfer to a beautiful serving plate and eat immediately, dipped in the peanut sauce. Everybody, including our guests for lunch, loved the satay. I must admit though that the sauce is a bit shocking at first... in Spain we're only used to eat peanuts as one of the most famous tapas of all: panchitos, peanuts fried in oil and salted, extremely popular in all kinds of tabernas. But on the whole the result was very positive, even though I had to buy an imported peanut butter, laden with hydrogenated vegetable fats (peanut butter is not very popular in Spain).... all for the sake of blogging.

Eager to know more?

Chocolate chili con carne

>> Thursday, December 3, 2009

chile con carne y chocolate
Although it's not a very Spanish dish, I love chile con carne. When my partner and I were dating, we used to frequent one of those fast-food pseudo-American restaurants in Spain (so what?... they were cheap... we were young and in need of money... ahem) and I always ordered chile con carne, that was served at cauterization temperature in an earthenware little cazuela, with a hamburger on top and a slice of cheese with a radioactive color. Yes, disgusting. I'm not saying chile con carne is junk food, just that the quality of the restaurant wasn't... the best. Well, I've come to develop a somewhat finer palate over the years, which doesn't mean that I don't like some junk food once in a while. In fact, this type of restaurant is among my kids' favorites... what's the use of so much palate evolution? Never mind, for me to fight nostalgia for the old times when the fat I ate didn't love to accumulate around my waist as much as it does now, I prepare a homemade chile con carne, much yummier than that restaurant's chile and with an irresistible addition: chocolate.


This recipe comes from a cookbook called The Bittersweet World of Chocolate, though it's undergone some tweaking. I recommend this book, it not only includes scrumptious sweet and savoury recipes with chocolate, but tells some very interesting things about cocoa growing and trade. It makes a good Christmas present... hint. The addition of chocolate in this dish relates it to the amazing Mexican mole, one of the most incredibly delicious sauces I've ever tried. I still recall the first time I tasted it, in a Mexican restaurant in a backroad... picture it, Sicily 1920... no, New Jersey, last century... tears spring to my eyes when I remember that spicy mole de pollo... the impression was so unforgettable that I even remember the name of the restaurant 12 years later: Kiki Rios...

Chile con carne and chocolate

  • 750g minced meat
  • 250g boiled Pinto beans, with the resulting stock (you can use canned beans)
  • 1 red pepper (the recipe calls for a green one)
  • 2 medium onions
  • 4 cloves garlic
  • 800 g canned pureed tomatoes (the recipe calls for 2 tbsp only)
  • 1 tbsp ketchup
  • 4 dried chilis (the recipe calls for 1 tsp of chili powder. The result is a lightly hot dish. The hotness can be adjusted to your taste)
  • 2 tbsp unsweetened cocoa (more can be used, I add 3 tbsp)
  • 2 tsp ground cumin
  • 1 tsp dried oregano
  • 1/2 tsp ground cloves (this amount is a bit excessive for me, taking into account that the allspice that's also added has a similar taste)
  • 1/8 tsp nutmeg
  • 1/2 tsp allspice (you better grind it or add it wrapped in a net or inside a tea strainer, so that you don't bite into the grains)
  • 1 tbsp vinegar
  • 2 tsp sugar (I don't add this and I don't miss it)
  • 120 ml bean stock
  • Olive oil
  • Salt
I also added a glass of red wine, a good addition for any dish... well, almost.

Start by peeling the garlic and then smash it. Dice the onions and red pepper. Pour some olive oil in a pan or even in a large casserole and fry the vegetables until wilted. I add the garlic nearly at the end so that it doesn't burn. Take the vegetables out of the pan and leave aside. Use the flavored oil to fry the meat on high heat. Stir to coat all the meat in oil and brown it. When done, return the vegetables to the pan or casserole and add the rest of the ingredients: beans (previously cooked in water with a bay leaf and some salt), tomato puree, ketchup and all the spices, along with the bean stock. Stir thoroughly, cover and bring to a boil. When boiling, turn the heat to low and simmer for 45 minutes. Watch the inside every now and then and stir if necessary, so that the mixture doesn't stick to the bottom. Add some water if it gets too dry. Or, if you can't resist your primal instincts... some more red wine.


After 45 minutes, try the seasoning and add salt if needed. You can serve it with boiled rice, but I prefer mine with an oven roasted potato... yum. This is a super easy dish, perfect for feeding a large bunch of people. And also fit for warming you up in this chilly Autumn... who could ask for more?

Eager to know more?

Moroccan style lamb tagine

>> Monday, June 22, 2009


I've wanted to make a tagine for long, and I finally found the drive to do it thanks to the monthly roundup of the Spanish blog Hecho en mi cocina. The proposal for June was Arabic and Middle East food, so I couldn't resist any longer. Maybe I'm losing the sense of taste as I grow older, but I like spicy and hot food more and more every day. The story of my choosing this dish begins some time ago...


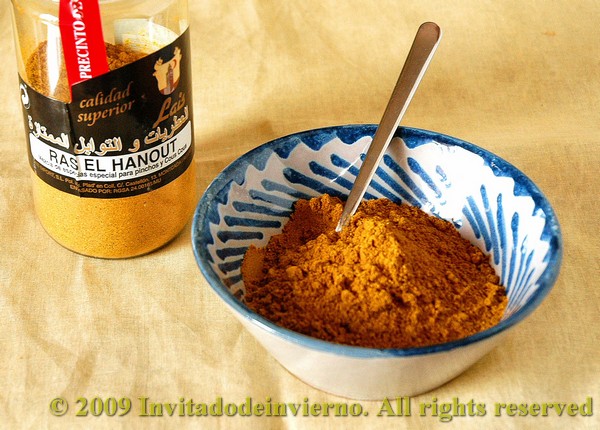
The thing is that one of my books on bread (one of many!) includes a recipe for a Moroccan bread with "ras el hanout". This lead me to do some research (ahem...) on this serious matter. For those of you who didn't know about it, like me, ras el hanout is a misterious spice mix, with as many formulas as Moroccan households. During my research and investigation... I found many interesting recipes along the way, the one I present here was among them. Then, some time later, while leisurely wondering in a supermarket my eyes fell upon a jar of... ras el hanout! My eyes nearly popped out of my head! I never thought I could find it in a regular supermarket. This is thanks to the many Moroccan immigrants we have. I had to buy it. When I arrived home I noticed the ingredients were not listed on the label... don't they push the secret-formula-thing a bit too far? Especially because it is compulsory to state the ingredients in the label.


Anyway, with my ras el hanout of unknown composition I decided to gamble with my family's health as well as my own and try this thing on a tagine. Tagines are a type of stew, typically cooked in these very beautiful pots with conic lid. Oops, this is a kind of pot I don't have! Well, to the point:

Moroccan style lamb tagine with ras el hanout (adapted from the blog Soulsman.com)

For the from-scratch ras el hanout:

  • 1 1/4 tsp allspice
  • 1 nutmeg
  • 20 strands saffron
  • 1 tsp cayenne pepper
  • 2 tsp black pepper
  • 1 1/2 tsp mace
  • 1 stick cinnamon
  • 2 tsp cardamom seeds
  • 2 2-in pieces dried ginger (or 1 piece grated fresh ginger)
  • 1 tsp ground turmeric
  • 1 tsp dried rose petals
For the tagine:
  • 1 kg lamb shanks, cut into slices about 1 1/2 in thick (I had a whole leg... and I didn't have the tools nor the strenght necessary to cut it in smaller pieces, so there it went into the pot...)
  • 4 tsp ras el hanout
  • 125 g carrots, peeled and cut in chunks
  • 2-3 onions, sliced
  • 2 cloves garlic, crushed
  • 4-5 potatoes, peeled and cut in chunks
  • 250 g tomatoes, thickly sliced
  • 75 g dried apricots (I doubled the amount, 150 g, I thought it was too little)
  • 2 tsp honey
  • 1 liter chicken or vegetable stock (I used plain water)
  • 3 bay leafs
  • 1 tsp salt (to little, I added at least 3 tbsp to overcome all the sweetness of the vegetables. You have to adjust depending on whether or not you use salted stock)

The recipe includes some couscous for garnish, but you can use rice also. I prepared some spelt couscous, but I must admit... again... that couscous is not my cup of tea.

To make the ras el hanout: mix all the spices and process them in a powerful food processor or coffee mill (clean the coffee mill before using it for this. Grinding some rice would do the trick). I've already told you how I had some smuggled ras el hanout, to add some color to my colorless life. Therefore no spices, no mill, no nothing.

Salt the lamb. Put some olive oil in a large pan, large enough to hold all the ingredients inside, and brown the lamb. Once it is as crisp as you like, put it aside. Stir-fry the onion till tender and translucent. Add the crushed garlic, fry a little, then add the ras el hanout... everything turns yellow! And the aroma is hard to describe... I suddenly felt like doing a belly dance... Then continue stirring and frying the yellowish mix for a minute or two so that the spices release their aromas, then add the rest of the vegetables along the dried apricots. Stir well for the vegetables to soak the spices, leave for another minute, then add the meat on top of the vegetables and add the stock or water. Lately I refuse to use any store-bought stock full of additives and glutamates. Being that I didn't have any frozen homemade stock in stock... I added water. It must cover the lamb almost completely. Then add the bay leafs, the honey and salt. You can adjust the salt later as you go.

Bring to a gentle boil and let simmer for 1.5-2 hours. After one and a half hour try the lamb for tenderness. I had to take out the lamb and vegetables and let the sauce reduce somewhat further, because it was a bit too liquid.


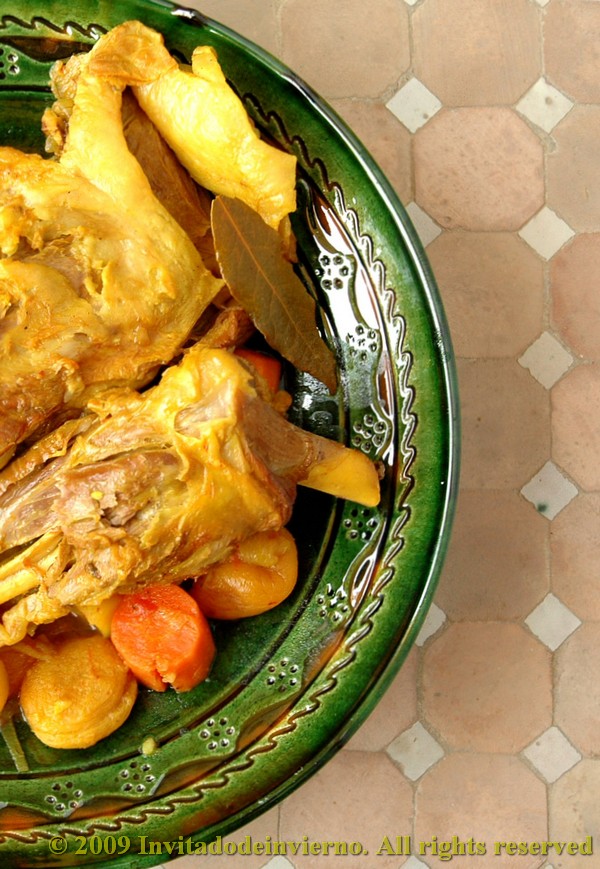
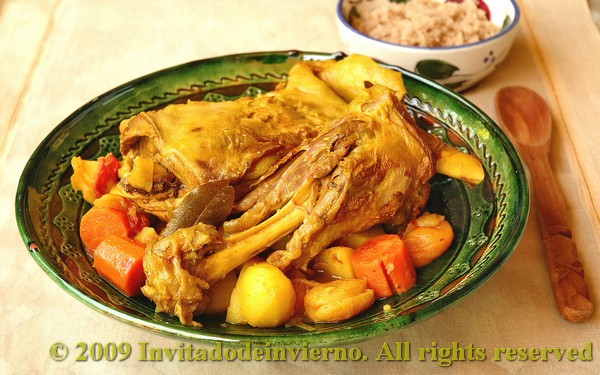
Don't you think my earthenware dish from Úbeda is simply gorgeous? Please, say yes.

Result: the vegetables garnish and the sauce are de-li-cio-us, addictive, with the precise hot touch. Not cutting the lamb was, on the other hand, a bad idea. The center of the shank was a bit hard. Besides, small chunks of meat tend to soak the flavour of the sauce more. I knew... but I couldn't do it any other way. Anyway, now I have an awful lot of scrumptious sauce with vegetables, I'm thinking about processing it and making a wonderful Moroccan soup...

Eager to know more?

Followers

About This Blog

Lorem Ipsum

  © Blogger templates Palm by Ourblogtemplates.com 2008

Back to TOP