Related Posts Widget for Blogs by LinkWithin
Showing posts with label dried fruit. Show all posts

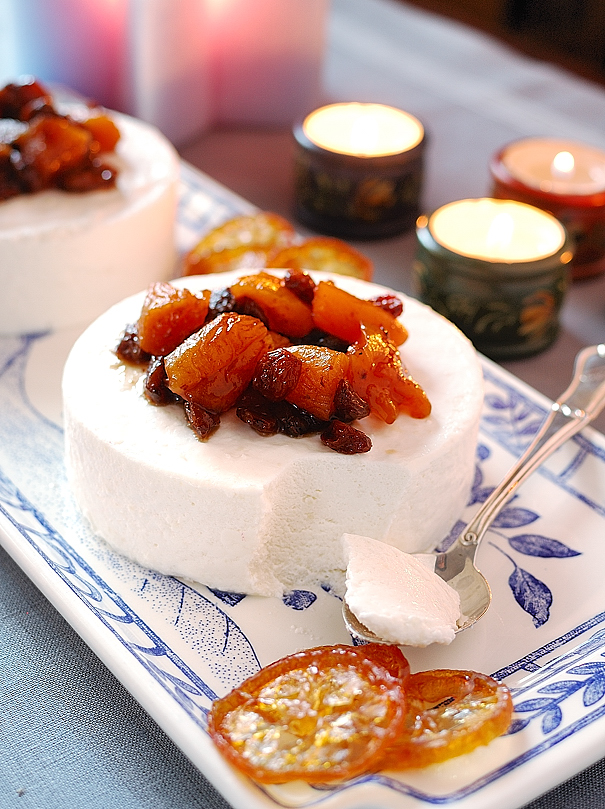
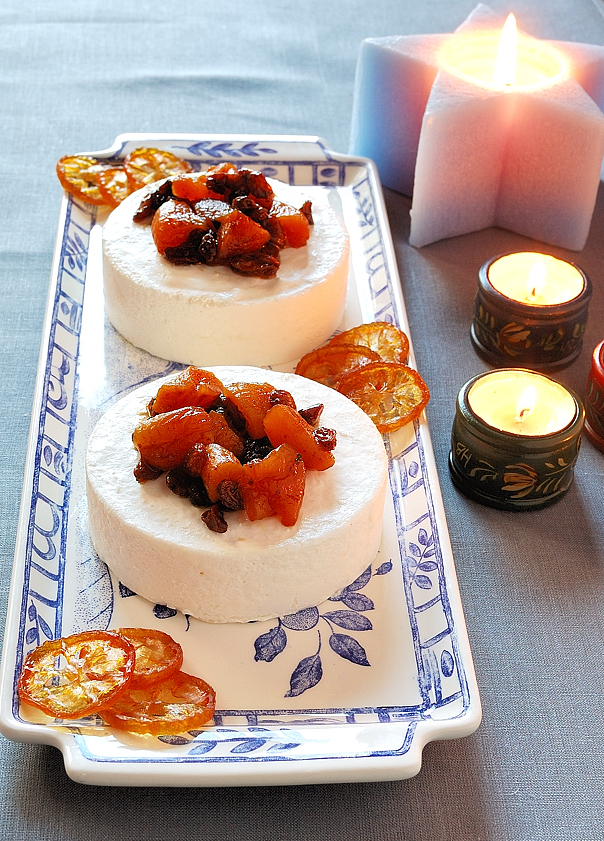
Marzipan mousse with Christmas compote

>> Wednesday, December 8, 2010

Marzipan mousse 1

This is a reinterpretation of two typical Spanish Christmas sweets, marzipan and dried fruit compote, combined in one scrumptious dessert. The mousse recipe comes from a book by famous Spanish pastry chef Paco Torreblanca and for the sauce I used my method of cooking the dried fruit in sweet wine, without sugar added as marzipan already has plenty of it. Also it is a great alternative for those who find marzipan overly sweet or heavy... this is a lighter way to eat it.


Marzipan is one of those culinary treasures that we do not appreciate in full because here in Spain we all grow up with it and that makes it all too familiar for us... and we take it for granted. As Claudia Roden tells us, Spain is the largest commercial producer of marzipan in the world, with the beautiful town of Toledo as the center of this trade. In Toledo there is a marzipan museum, where this delicacy is described as the ancient symbol of harmony between Arabs, Jews and Christians in the city during the Middle Ages. In Toledo marzipan is made by grinding equal weights of blanched almonds and sugar until the almond oil that is released turns the mixture into a smooth paste. This paste is modeled with traditional molds and baked in the oven until it browns on top. I will say that the Germans (I have relatives in Germany) also have popular varieties of marzipan, with the peculiarity that their marzipan always carries a tiny ratio of bitter almonds, unlike the common Spanish marzipan. I assure you that bitter almonds give it a very interesting twist.

This mousse caught my attention because it seemed a very different way to taste something so ubiquitous and familiar to Spaniards as marzipan.

For the mousse:

  • 400g milk
  • 500ml whipping cream
  • 250g marzipan
  • 8 sheets of gelatin
For the compote:
  • 100g dried apricots
  • 100g seedless raisins
  • Sweet wine, preferably Muscat
Marzipan mousse 2
  1. Soak the gelatin sheets in cold water as per the package instructions.
  2. Heat the milk to 50°C approx., cut marzipan into pieces and add to the milk. Beat well in a blender or electric mixer until completely dissolved. The mixture must be fine and without very noticeable chunks.
  3. Add the drained gelatin sheets to the mixture and stir well to dissolve. Leave to cool to about 30°C.
  4. When the warm milk and marzipan mixture is tempered, whip the cream to stiff peaks. Add the liquid to the whipped cream in four or five batches and mix gently each time, being careful not to deflate the cream too much.
  5. When everything is homogenized, pour the mousse into whatever molds you want to use. Pastry rings are great for these matters, especially if we want to make small portions, but it is also possible to use a rectangular loaf dish and cut the mousse into slices. The mousse can also be poured into a round mold to use it as a layer in a cake. To easily unmold the mousse first cool it in the refrigerator and then freeze it in the freezer, better overnight. I place the pastry rings on a baking paper placed on a tray. If you use another type of mold, it’s better to line it with plastic wrap to easily unmold the mousse.
  6. The compote-sauce is prepared by cooking the dried fruit covered with the wine. Cook until the fruits are softened and the wine has thickened to your taste and turned into a beautiful syrup. I cut the fruit in small pieces for a more homogeneous look. Let cool. You can make this several days before use, for it is better to leave it to rest so that the flavors mingle.
  7. The day you want to serve the mousse, take it out of the freezer at least 2 hours in advance and transfer it to the fridge. Serve it on a beautiful dish and then top with the compote. This mousse, besides being a different way of eating marzipan (not exactly lighter...), can take advantage of all the marzipan leftovers after the Christmas celebrations.
There you have a very elegant dessert made with most traditional ingredients... this is going to turn into a classic at my household, I am sure. I hope you enjoy it in the upcoming Christmas.

Eager to know more?

L'Alsace is a kugelhopf

>> Wednesday, September 1, 2010

Kugelhopf 2

Where do you start when you have so much to tell? These holidays have been dense in events and encounters. They started out in Strasbourg, continued in Heidelberg, lingered in the German Nordfriesland, continued briefly in Denmark and culminated in the Netherlands... what a journey. 7000km of roads and feelings, fine rain and high winds, stifly heat and watery cloudy days, endless skies, close friends, relatives and associates, jokes, Nordic blues, bright greens, misty horizons, sunsets, ships, lighthouses, shoals, islands, castles, Vikings, channels, rowing boats, pools, bicycles, waffles, berries, fish sandwiches, barbecues... So many things? 25 days go a long way or so it seems. So I returned with my eyes filled with images, my suitcase full of ingredients from distant lands and heaps of recipes to try... Yes, proper cooking is the only thing I've really missed in this trip.

Strasbourg 5

So I have the intention of writing several posts illustrating the places we have visited on vacation. Although I don't make any commitment about it, because of the naturally chaotic flow of my mind and the demands of the times ahead, with the start of school involving a million things to do.
Strasbourg 3

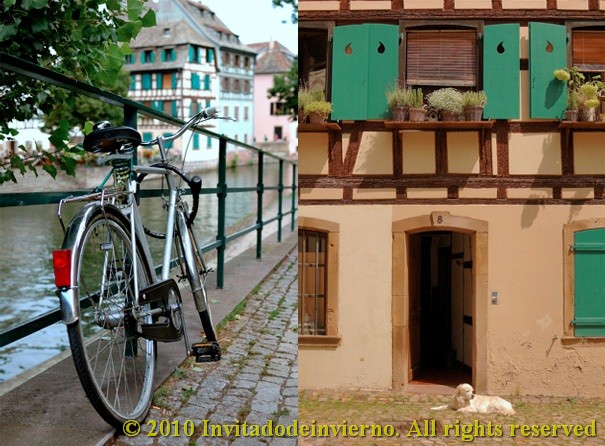
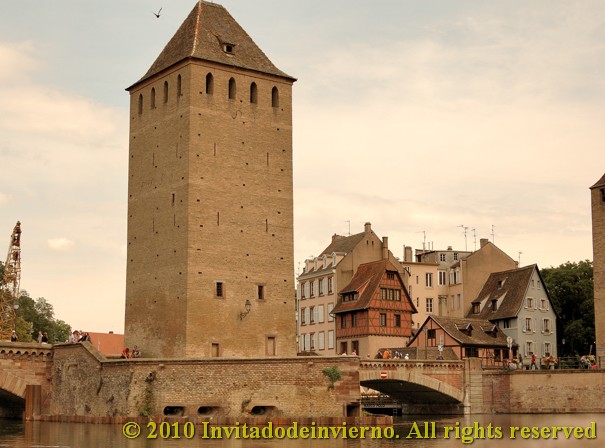
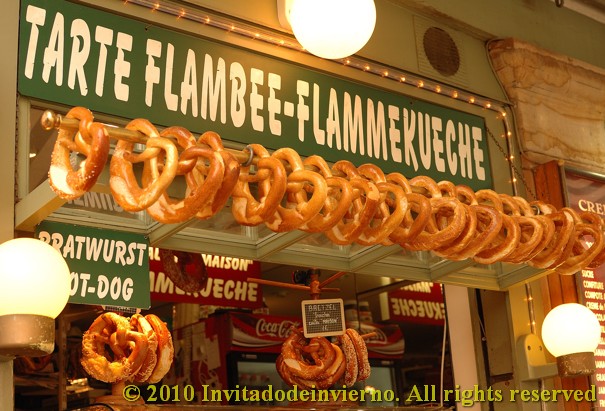
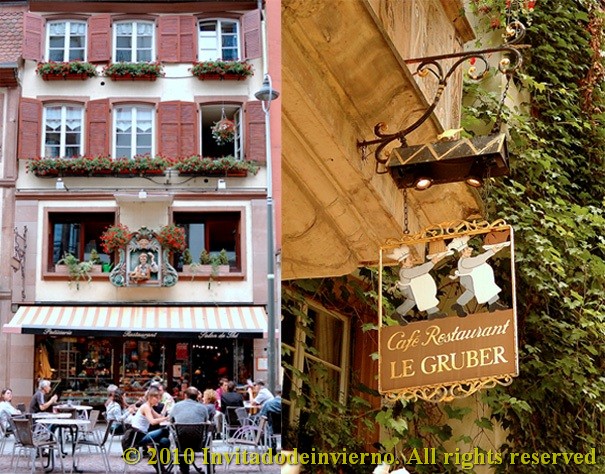
At our first stop, Strasbourg, Alsace, France, we stayed at a cute little hotel some thirty kilometers of the city, in a lovely Alsatian region called Little Switzerland. A dog and two cats dwelt in that hotel, and my kids fell in love with them all. A charming innkeeper looked after us very well. The city of Strasbourg, a name that we are used to connect to the headquarters of the European parliament, houses a beautiful old quarter, criss-crossed by numerous canals deriving from the River Rhine and full of medieval houses in half-timbered façades. I don't know why, but in these old streets I was all the time expecting to find a stinking mob cheering some poor prisoner's execution just around every corner...
Strasbourg 2

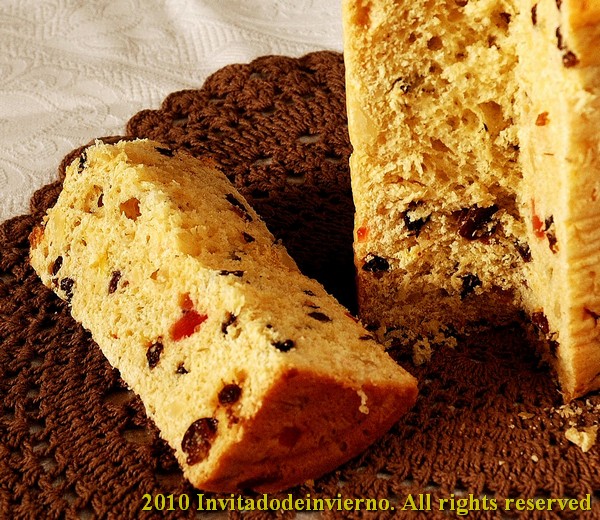
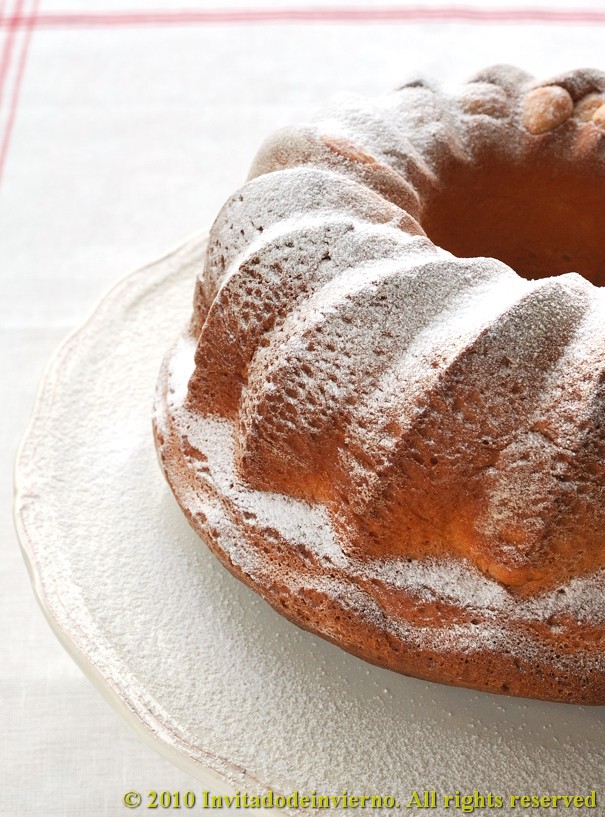
Perhaps the only frustration this trip has left in me, apart from having spent too little time with friends, is not having bought a traditional kugelhopf mold in Strasbourg. Does this word sound familiar? For those who've never heard about it, kugelhopf is a sweet bread enriched with butter and eggs, related to brioche, with a characteristic grooved shape and a central hole. Its introduction in France is attributed to Marie Antoinette (originally from Austria, therefore) and its name appears to derive from its resemblance to a hat used in the Middle Ages, named gugelhut. This cake is completely naturalized now in the Alsace region, where there is no family gathering or celebration without it. It is baked in a terracotta glazed mold from Soufflenheim, nicely decorated. I didn't buy one not only because they're not exactly cheap, but especially for its bulky size.
Strasbourg 4

But as I did buy a book with typical Alsatian recipes, here goes the famous bread. I do have a kugelhopf-like silicone mold, although less tall.
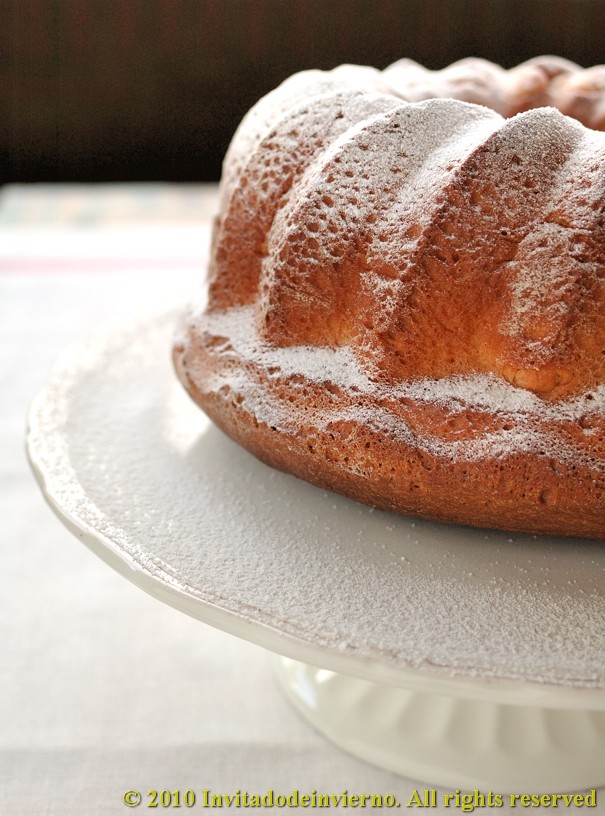
Kugelhopf 3

Kugelhopf or Köjlupf (recipe from Mon Alsace gourmande, Simone Morgenthaler)
For 2 molds of about 20cm diameter

  • 900g bread flour
  • 150g sugar
  • 15g salt
  • 300g unsalted butter
  • 4 medium eggs
  • 400ml milk
  • 40g fresh baker's yeast
  • 150g raisins (I didn't add them, my kids wouldn't have eaten the bread)
  • 75g whole almonds
  • 1 small glass kirsch (optional)
  • Icing sugar for sprinkling
  1. Let all the ingredients get to room temperature.
  2. Prepare a leaven with the yeast, half the milk and the right amount flour to make a batter-dough of medium consistency (I added 120g, but according to the subsequent results, I advise to add at least twice as much for the reasons explained below). Leave to ferment, well covered in a warm place.
  3. In a different bowl mix the remaining flour with the salt, sugar, eggs and remaining milk. This second dough was tough as a brick in my case, even after having reduced the amount of flour in 100 grams from the original. I think I messed up and more flour is needed in the leaven, so that the second dough is more manageable. Or maybe larger eggs should be used... Knead for 15 minutes. In my case I was on the verge of getting hurt because of the toughness of the dough and I added a bit more milk.
  4. When the leaven has doubled in volume, add it to this second dough. I sweated and toiled to mix something as soft as the leaven into something so hard, I almost lost my tendons in the attempt. And I appreciate my tendons a lot, they've been with me all my life... But surely the funniest task of all was adding the butter, after the leaven was incorporated... I had great fun, as well as getting sore hands and get into butter up to my eyebrows. I had to do this in three runs, because the dough was rebellious and shameless. After a while (I lost track of time...) the dough was reasonably uniform and elastic, so after ignoring the window-pane test, I locked the dough in a bowl (step back, you rogue!) and covered it in case it wanted to escape... or attack me. I left it to proof. Although I knew it would proof only if it wanted to... such a character. It took about two hours.
  5. Once doubled, tip the dough on the countertop and flatten with your hands to deflate, and incorporate the raisins and kirsch if desired. Anything containing alcohol is a good addition. I tell you. Although I should have added the alcohol to the damn dough while kneading, to narcotize it... Butter and flour the molds. I only have one Kugelhopf-like mold, so I used a loaf pan too. Placed the almonds on the bottom of both molds. Divide the dough and place it in the molds, which should be filled to something in between 2/3 and 3/4 of the height.
  6. Preheat the oven to 200ºC (air) while the dough undergoes the second fermentation, it should reach the edge of the pans. Bake in the oven about 20 minutes, after which the temperature can be lowered to 190ºC if the tops brown in excess. Continue baking another 20 minutes, that is 40 minutes baking in total. You can also cover the breads with foil. Remove the breads from the oven and unmold on a wire rack. Leave to cool and sprinkle with the icing sugar.
The breads were a bit too brown because of not having used the super-perfect-dreamy terracotta mold... when I say I "need" something it's because life is difficult without it. The bread is delicious, not sweet at all and with a salty punch. And if you have leftovers, it's perfect for French toasts... yum.
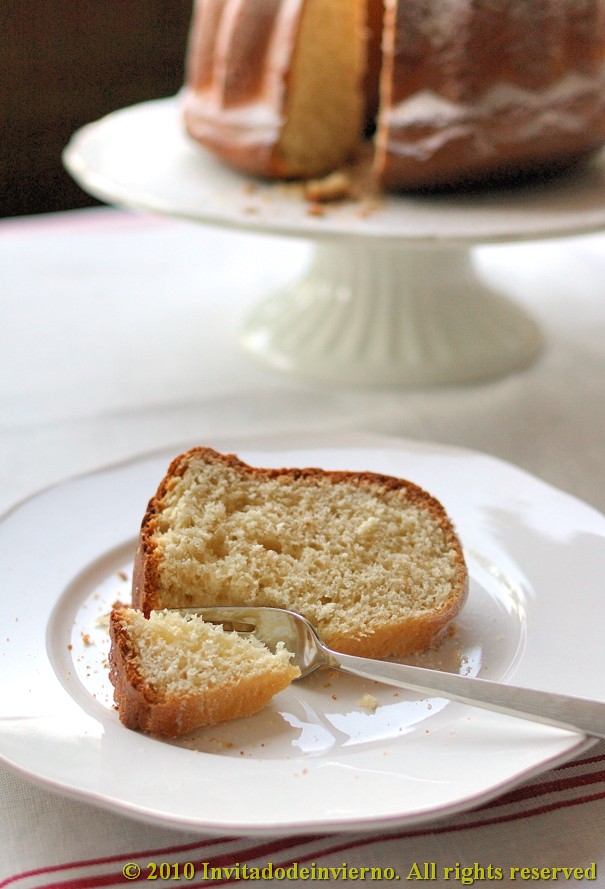
Kugelhopf 1

I'm sending this bread to Susan's Wild Yeast for the weekly YeastSpotting.
Strasbourg 1

Eager to know more?

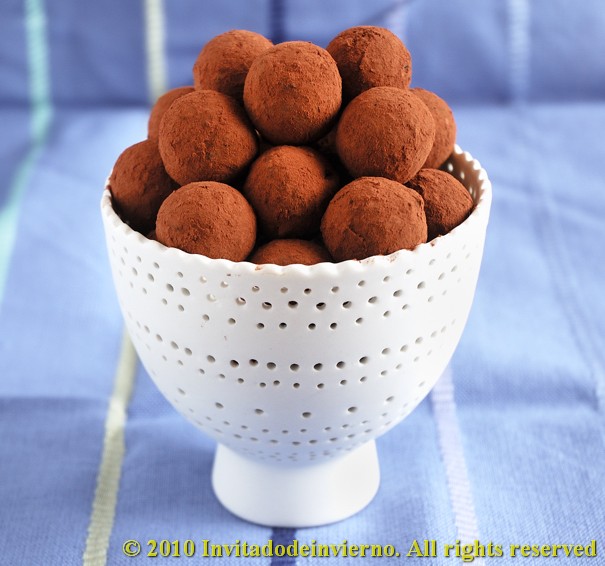
Date, coconut and spice truffles

>> Sunday, April 4, 2010

Date truffles 2

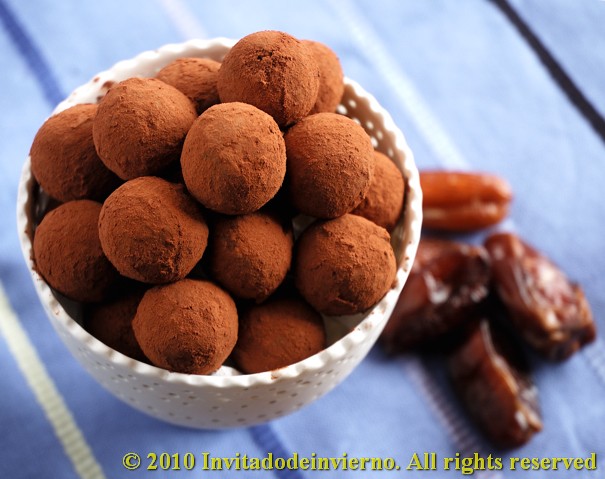
I guess you know that traditional truffles mainly consist of sweet chocolate and cream... a lot of cream. But vegans and raw vegans invented a healthier type of truffle already some time ago... yes, you can make truffles without the cream and the sugar. And I find they are a truly interesting kind of sweet, even though I'm neither vegan nor raw vegan. You've got to absorb any knowledge potentially good for you. Empty your mind, like Bruce Lee used to teach... Strip yourselves of prejudices like you peel the paper off a cupcake... To lend body and softness to the truffles, avocado or dates are used instead. Dates have been used in these truffles, to give them sweetness and tenderness.


The concept is adapted from this gorgeous vegetarian blog. I've substituted dry for fresh dates, cocoa butter for part of the coconut oil and ras el hanout for the hot chili (is this getting close to an addiction? No, why?). Sure curry powder would work too... I thought about adding hot pimentón, but I didn't dare. I've recently stumbled upon some spicy bonbons (they seem to be fashionable right now) and I really liked them. After all, Mesoamericans used to have their hot chocolate with chili. But you can skip the ras el hanout if you don't like spicy chocolate (prejudiced!). Being that these sweets aren't cooked in any way, the ingredients should all be premium quality, organic when possible. Okay, I'm a bit of a purist...

Date, coconut and spice truffles
Yields 30 small truffles

  • 20 organic dried dates
  • 1 tbsp organic coconut oil
  • 1 tbsp organic cocoa butter
  • 2 tbsp unsweetened cocoa (better if organic)
  • 30g shredded coconut
  • 1/2 tsp cinammon
  • The content of half a vanilla pod, scraped
  • 1/2 tsp ras el hanout
Date truffles 1

And you were wondering... is it really a good idea to leave the cream out and use coconut oil instead? Well, apparently coconut oil, after being considered a very harmful saturated fat for years (coming from the wrong belief that ALL saturated fats were harmful, especially promoted in the 60's by large producers of poliinsaturated vegetable fats... what a coincidence), is changing its reputation due to recent scientific research.
  1. Soak the dates in water for a while if they're too dry. Melt the coconut oil and the cocoa butter in a double boiler or bain-marie. Put the oils in a blender or processor with the drained dates and process till almost smooth. Don't expect the dates to disintegrate completely, some chunky bits will remain.
  2. Add the rest of the ingredients to the date mixture and process again, till a more or less homogeneous paste forms.
  3. Flatten the paste on a plate and refrigerate until the oils are solid again, around half an hour.
  4. When the paste is cool, use a teaspoon to break down little pieces and shape them into balls, rolling them between your palms (you can make them larger if you want).
  5. When they're all shaped, coat them either in more shredded coconut or in cocoa. To do this, put a couple tablespoons coconut or cocoa in a plate, place the truffles on it and move the plate for the truffles to roll and coat.
These truffles keep well in the fridge, but, as any traditional truffle, they are best if left to temper for a while before eating. The flavor of ras el hanout was hardly noticeable in the batch I made, I guess the cocoa flavor is too strong to offset, but a slight heat revealed at the end of each bite... Next time I will add more heat... yummy. And by the way, if you want to see the face of your less adventurous guests when they bite into one of these truffles, let them believe these are regular ones... it's your chance to have a good laugh.

Eager to know more?

Kulich, a Russian Easter bread

>> Tuesday, March 30, 2010

Kulich 1

No, I don't have any Russian relatives, friends, not even an acquaintance... pity. But last Saturday I attended an excellent course on Easter breads at La Cocina de Babette, an alternative cooking school in Madrid. We prepared Russian kulich, British hot cross buns and Jewish challah. We had a grand time, though we did work hard. Making three leavened breads in just one day is quite an effort!


The course was taught by Paul Merry, an Australian baker based in England, owner of a baking school in Dorset (my dream life...). And baking side by side with a professional, you always "absorb" some expertise... at least that's what I like to believe. Kulich is a typical leavened sweet bread eaten at Orthodox households on the Easter Vigil. This Merry man knows this bread at first hand, as one of his aunts is married to a Russian. According to Tatiana M. Maslenikof, owner of the Russian restaurant El Cosaco, in Madrid:

On Holy Saturday, during the day, it can be quite hectic at a Russian home while preparing for the grand night. Children paint eggs and mark them with the letters X. B., the initials of Xristos Boscrecie (Christ is risen). The housewife has already been preparing the various dishes for several days, among them the traditional desserts paskha and kulich; the first one need to be pressed under some weight for two days... Fish is forgotten and hams, piglets, poultry and lamb take over the kitchens.
It's time for a general house cleaning and for adorning every corner with flowers. The table is covered with a white tablecloth and the colourful delicacies are laid on it.

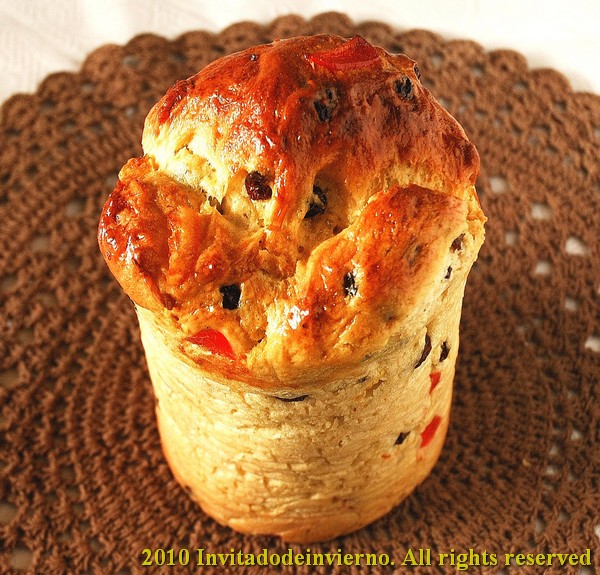
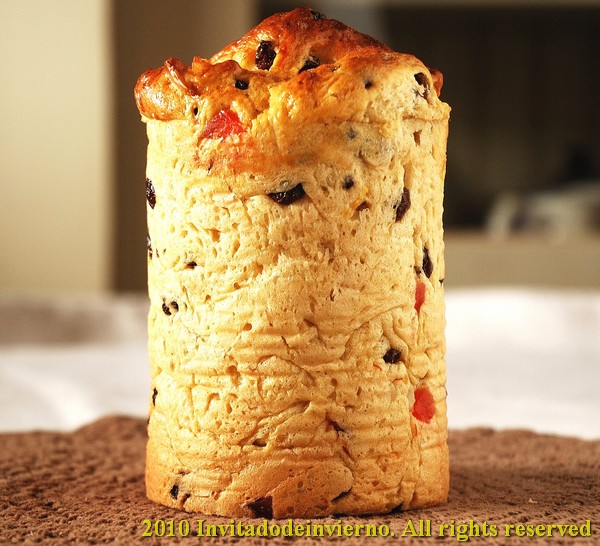
I wonder about the age this is describing... I doubt this would be possible under the communist rule. I found this sweet bread is something in between stollen and brioche, with a soft inside and bursting with almonds and dried fruit. I loved to learn how to prepare it, as I had been eyeing the recipe in Tatiana's book for ages, but never had the guts to make it. The kulich recipe in the book is slightly different, with a lot more egg yolks. I'll try it some time. The main problem here in Spain is the bread shape. It's almost impossible to find a commercial mold with that height ratio (double height than width), so at the school we used empty tomato cans, scrubbed clean and lined with parchment paper.

Kulich according to Paul Merry
Makes 2 medium-sized kulich

First sponge

  • 150ml milk
  • 250g bread flour
  • 10g fresh baker's yeast
Mix everything, cover and leave to ferment overnight at ambient temperature.

Second sponge

  • 150ml milk
  • 100g bread flour
  • 30g fresh baker's yeast
The next day, mix the ingredients together and then add to the first sponge. Leave it to ferment for an hour, until the surface is bubbly.

Final dough

  • 650g bread flour
  • 1 pinch salt
  • 50ml vodka
  • 100ml honey
  • 100g vanilla sugar
  • 250g butter, at ambient temperature
  • 4 eggs
  • 150g sultanas
  • 100g raisins
  • 1 tsp saffron threads
  • Zest of 2 lemons
  • 50g candied peel
  • 100g blanched almonds
  • 15-20 cardamom pods
Kulich 3
  1. While the second sponge is rising, prepare the rest of the ingredients. First put the saffron to soak in the vodka. Coarsely chop the almonds and zest the lemons. Cut the candied peel in small pieces. Open the cardamom pods and grind the seeds in a mortar or coffee grinder.
  2. Mix all the liquid ingredients, which must be at ambient temperature. Warm up the honey if needed to make it more fluid. Add the vodka with the saffron and the eggs. Mix the liquids with the second sponge and then add the rest of the flour, the salt and the ground cardamom.
  3. Knead thoroughly till you have a homogeneous and smooth dough. Then add the butter cut in chunks. Knead to incorporate the butter.
  4. Once the gluten has developed, add the raisins, sultanas, almonds, lemon zest and candied peel. Distribute them evenly.
  5. Form the dough into a ball, then place it into an oiled bowl and leave to double in bulk (around an hour).
  6. Prepare the molds in the meantime. Line the inside with parchment paper, cut a circle for the bottom and a large strip for the sides. Let the paper extend over the tin edge as needed if the tin is not tall enough. Use double paper if you like.
  7. When the dough has doubled, divide it in two; then loosely shape each portion into a cylinder that can be inserted into the mold. Let it carefully fall inside and press it a little bit to fill all the gaps. The tin should be half full approximately.
  8. Leave to proof again, loosely covered in plastic so that the dough has place to rise 3-4cm above the tin or paper edge.
  9. Heat the oven to 170-180 ºC. Then bake for around 40 minutes. Check for doneness with a wooden skewer. If the kulich tops brown too quickly, cover them with foil.
  10. When they're done, take them out and leave to rest in the mold for 15 minutes. Then carefully tip the molds onto a wire rack and extract them from the mold in a horizontal position. Put them in an upright position and check that they're set enough to stand (otherwise they would need some more time in the oven).
  11. You can optionally ice them with a mixture of water and sugar once they've cooled.
Kulich 2

Eating kulich is a wonderful way to celebrate Easter... though that doesn't mean we won't be making Spanish torrijas this year, no, no, no. We are gluttonous...

I'm sending this Easter bread to Susan's YeastSpotting.

Eager to know more?

Mini Ibérico pork pot pies and a giveaway!

>> Thursday, February 4, 2010

Mini potpie 2

This is my first giveaway ever and in spite of my usual "British" composure (although I'm nothing like British), I must admit I'm pretty excited. I was recently contacted by the people from CSN Stores, which boasts over 200 specialty web-based stores (check out their stools! I have a high table in my kitchen with bar stools, and I wish the variety of bar stools was that wide in Europe). If you visit their site, you'll find a lot of things you need and a lot of things you don't need, but would kill to have! After browsing their stores looking for some interesting goodies to giveaway, I've opted for the cutest Le Creuset ramekins. I happen to own a couple of them myself, two vibrant-red cuties, which make a lovely setup for individual soufflés and gratins, miniature pot pies, clafoutis or cream desserts. And now I'm giving away 6 of these lovely pieces of bakeware to my readers. So keep on reading to learn about how to enter.


Giveaway details: The only thing you have to do to enter the giveaway is to leave a comment about the kind of dish you'd love to use these ramekins for. Easy, isn't it? ;-). Please include your e-mail or make it visible in your profile. As usual, each comment will be given a number and I will post one winner, which will be chosen at random by a random number generator.

But there's more. Besides the mandatory entry to enter the giveaway, you can increase your chances by making extra entries. Just leave a comment letting me know the following:

  • You've suscribed to my blog on Google friend connect
  • You've tweeted about the giveaway (please leave the link!)
This giveaway is only open to US and Canada (sorry, other international readers) till February 20th at midnight (CET). The prize will be sent by CSN. I will collect all comments and use random.org to draw the winner.

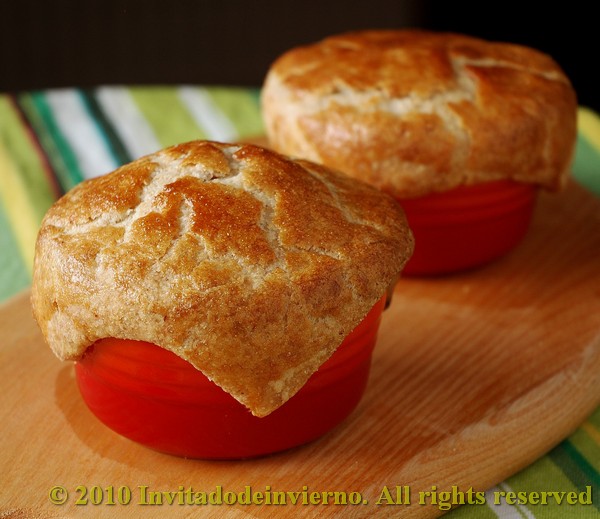
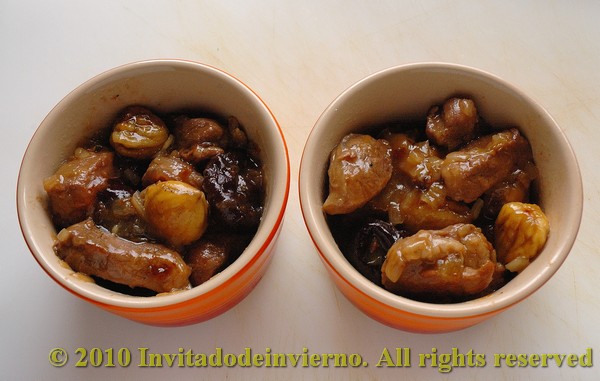
And now to the recipe. I found it would be a good idea to use my ramekins to prepare something that could illustrate how beautiful any dish looks in them. So here's a simple and comforting recipe for cold winter days, a tapa-sized pot pie type of dish without cream nor butter, with a Spanish twist coming from the sweet wine used in the sauce and the Iberico pork meat. Lovely served for brunch or as an appetizer.

Mini potpie 3

Mini Ibérico pork pot pies
Yields 4 servings
  • 1/2 kg diced pork sirloin (I used Iberico pork, which is an indigenous free-roaming pork breed, fed mostly on acorns, widely known for its wonderful flavor, like in Ibérico ham. Of course any type of pork will do, only the dish will taste different)
  • 16 prunes, pitted (or more, just figure out how many you want in your ramekin and multiply by 4)
  • 3 scallions
  • 1 large handful chestnuts (if uncooked, you can roast them in the microwave oven for a while. First cut a slit on the shell to prevent them from bursting)
  • 1 cup sweet white wine (Spanish moscatel is best)
  • 1/2 tbsp all-purpose flour
  • 2 pinches thyme
  • Virgin olive oil for frying
  • Salt
  • A sheet of puff pastry for the pot cover (I used some leftovers of homemade flaky pastry)
  • 1 egg for brushing the pastry
Lightly salt the pork dices. Pour 3-4 table spoonfuls of olive oil in a heavy pot (I use my French oven) and fry the chopped scallions on low till wilted. When done, add the pork and stir-fry it on high heat, to seal the juices. Then add the flour and stir for the flour to toast lightly. Add the shelled chestnuts and the prunes, pour the wine and add water enough to cover the meat. Add a teaspoon of salt and let the whole thing simmer on low heat till the sauce is thickened (don't let it thicken completely, as it will thicken further in the oven) and the meat is tender, around half an hour, depending on how tender the meat actually was. Some of the prunes may fall apart in the process, but this only adds to the sauce richness. If you prefer to find firmer prunes on your plate, just add them half way of the cooking. Check for saltiness when the meat is cooked and adjust if needed.

Mini potpie 1

Heat up the oven to 200ºC in the meantime. Divide the stew among the ramekins, fill them almost to the top. Add a little water if you find the stew to be too thick. Roll the puff pastry on a floured surface till 0.5cm thick or thicker if you prefer. Find yourself a round cutter, cup or glass that can yield circles of pastry slightly larger than the ramekins. Cut four circles and set aside (you can see I was lazy and ended up cutting squares... they add to the pot pies rustic look). Brush the edge of the ramekins with some beaten egg and lay the pastry circles on them, pressing the outer edge to seal. Brush the surface with some more beaten egg. Then bake in the oven for 20-25 minutes, until the pastry is golden. Hmmmm, I thoroughly enjoy the moment of breaking the crust... in awe... and releasing all the aromas... Have a forkful of stew and a bite of the crust at the same time... yum.

Eager to know more?

Lola's easy apple pie

>> Sunday, January 31, 2010

apple pie
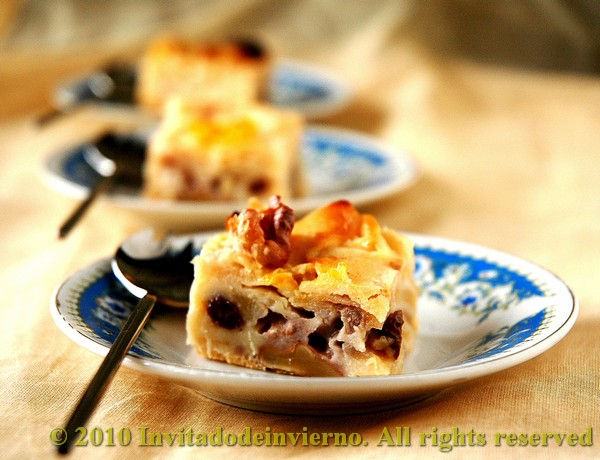
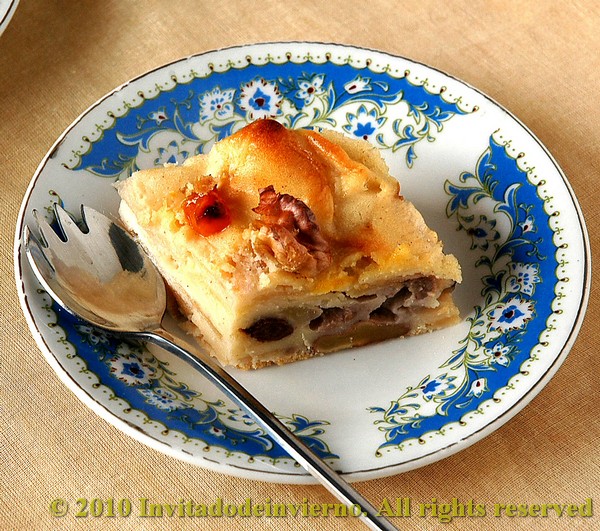
I love almost any dessert with apple in it. This simple apple pie is similar to an apfelstrudel, only without the dough wrapping. It's something in between cake and pudding, with an enormous amount of apple, mixed with raisins and walnuts, and just enough batter/dough to keep the whole thing together. I've adapted it from this lovely blog, tweaked the ingredients a little bit and subtituted agave syrup for the sugar (fantastic photo blog, I recommend it). By the way, I tell you... it 's hard for me to follow cup measurements... and I'm not getting used to it, but this pie was worth the effort.


Easy apple pie adapted from Lola Mansurov's
Yields around 8 servings

  • 1 cup all-purpose flour
  • 3/4 cup rhum to soak the dried fruits (the original calls for plain water, but... I don't know, I think this is a bit too cruel on the fruits ;-))
  • 4 medium cooking apples
  • 60g raisins (I would add more next time)
  • 60g dried apricots
  • 1/2 tsp rising agent
  • 1 pinch salt
  • 1/2 cup shelled and chopped walnuts (I would also add more of this next time)
  • 4 medium eggs
  • 7 tbsp melted butter (or 8 if you're using sugar)
  • 1/3 cup agave syrup (or 1/2 cup sugar)
  • 1/2 tsp cinammon

Place raisins and dried apricots in a bowl and cover with the rhum. I microwave them for a minute or so on full power to aid the soaking and leave the whole thing to infuse. Leave to cool. Peel, core and slice the apples. Sprinkle the slices with some lemon juice to prevent them from oxidizing. Set aside. Cream the eggs and sweetener until light and fluffy. Sift the flour with the baking powder and add them to the cream. Lastly add the melted butter and delicately stir to incorporate.

apple pie
Preheat the oven in the meantime, to 160ºC if using agave syrup and to 180ºC if using plain sugar. This distinction doesn't work for me, my oven doesn't make any difference between 200ºC and 150ºC, it just goes back and forth... Well, then mix the apple with half the walnuts, the raisins and the dried apricots, drained from the rhum. I made a mistake by laying the dried apricots on top of the cake for a nice touch of color and indeed I got it... a beautiful black color because they simply charred, so... just mix them with the rest of the ingredients. I had to get rid of my charred apricot bits and cut off the top of the least damaged ones. Let's see... where was I? Then add the egg mixture on the fruits and toss carefully to mix. Butter and flour a large pie dish. I used for the first time a beautiful Le Creuset dish I bought last summer... soooo cute. When everything is acommodated in the dish, sprinkle the remaining walnuts and bake for 40-45 minutes (at least that time was enough for me). Try for doneness with a skewer and take it out of the oven. It can be left to cool in the mold.

apple pie
The result is a delicious pie with a predominant apple flavor, of course, and a little bit of crunchiness because of the walnuts. This type of pie is my favourite, light and brimming with fruit. Have a serving while still warm, with a scoop of good vanilla ice cream... and a dash of maple syrup or a sprinkle of cinammon...

apple pie

Eager to know more?

Sweet sourdough bread with cinnamon, sugar-free

>> Monday, January 11, 2010


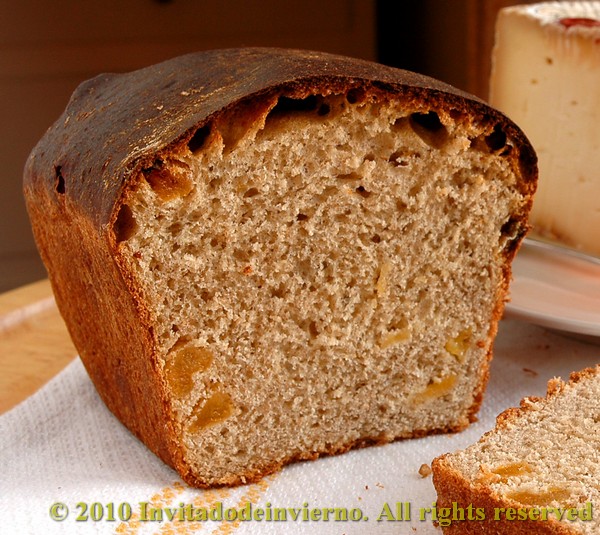
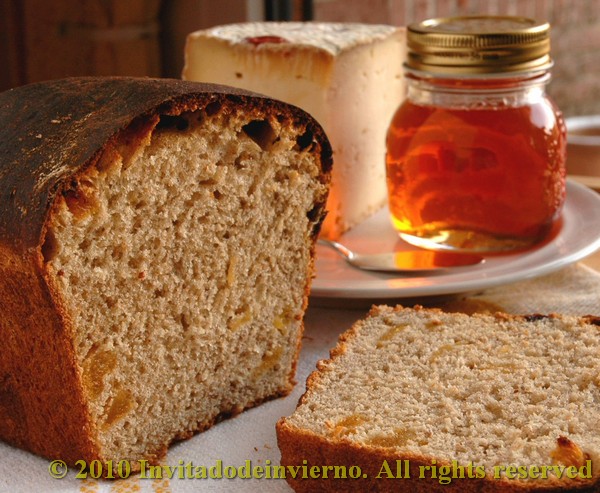
I made this bread last Christmas for the first time and it's bound to become a classic at my household, because it's delicious. In spite of the name, it's not very sweet. It's excellent as toast for breakfast, with some ham or a sharp cheese... I found the recipe at this blog (thanks Tess for the great idea and check out her amazing painted breads!) and it originally contained ginger and orange. As I usually do, I took her recipe and turned it upside down, so that the result is almost unrecognizable. But that's what globalization is about... you pick ideas and concepts here and there, shake them in a cocktail shaker and pour the concoction on your cultural heritage, don't you?


Sweet sourdough bread with cinammon and dried apricots, sugar-free

  • 100g white flour sourdough (baker's percentage: 100%)
  • 160g light spelt
  • 130g bread flour
  • 130g whole spelt
  • 8g fresh yeast (I didn't trust my sourdough in this cold)
  • 9-10 dried apricots, soaked in Cointreau or Triple Sec (the original included candied ginger instead, but I'm no big fan)
  • 65ml maple syrup (dark molasses in the original recipe)
  • 40ml agave syrup (1/4 cup sugar in the original recipe)
  • 65ml melted butter
  • 200ml water (250ml if sugar is used instead of the agave)
  • 1 tsp Cointreau from the apricots soaking
  • 1/2 tsp anise seeds
  • 1 tsp cinnamon
  • 1/2 tsp salt

If you don't want to use such a ridiculous mixture of flours, just follow the original recipe, which is more sensible. But you know I loooove spelt. If you happen to dislike dried apricots, you can of course substitute for any other dried fruit or even nuts. These would be a great match too.

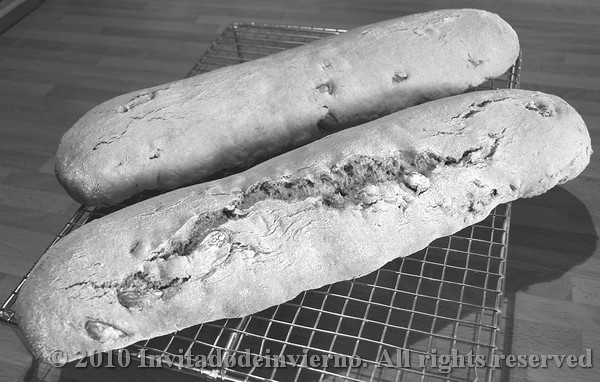
Weigh your solid ingredients and mix them. Crumble the yeast on top of them. Add the sourdough. In other bowl mix the liquid ingredients with the melted butter. Knead well, around 10 minutes by hand or 6-8 in a stand mixer, till you have an elastic and smooth dough. Then add the drained apricots. Make a ball, put it into a well oiled bowl, cover and leave to proof. My bread took 4 hours to double in bulk, because my kitchen is quite chilly these days. When doubled, I made a roll and dumped it into a loaf pan, covered it with a plastic cap and put it in the fridge to raise overnight. The next day the bread had nearly doubled, so I immediately turned on the oven to 180ºC, and there went the bread. Bake it around 40-45 minutes, depending on your oven's fierceness (watch it closely at the end of the baking so that the top doesn't brown excessively). You can test the inner temperature for doneness. The original recipe calls for an inner temperature of 75ºC. But maybe because of the change in ingredients, my bread was not thoroughly baked at 75ºC (I checked it with a skewer), but at 90ºC, so watch out. When done, unmold it carefully and leave to cool on a wire rack.


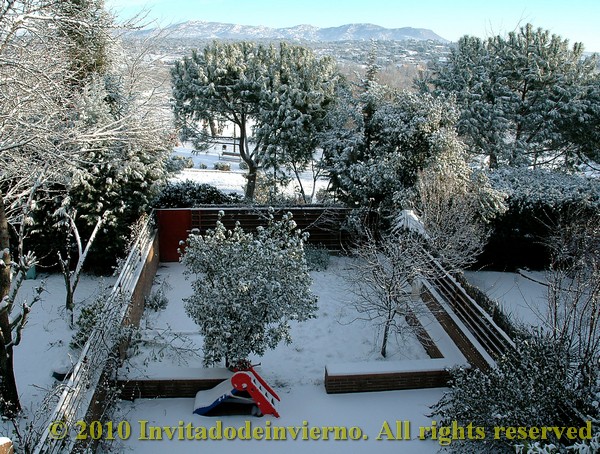
The consistency of this bread is very cake-like and the dried fruit gives it a delicious touch. Today I had a toasted slice, with cheese and quince jelly, while gazing at our snow-covered garden...

I'm sending this bread over to Susan's Yeastspotting, at Wild Yeast.

Eager to know more?
Spelt carquinyolis or Catalan cantuccini

>> Tuesday, January 5, 2010


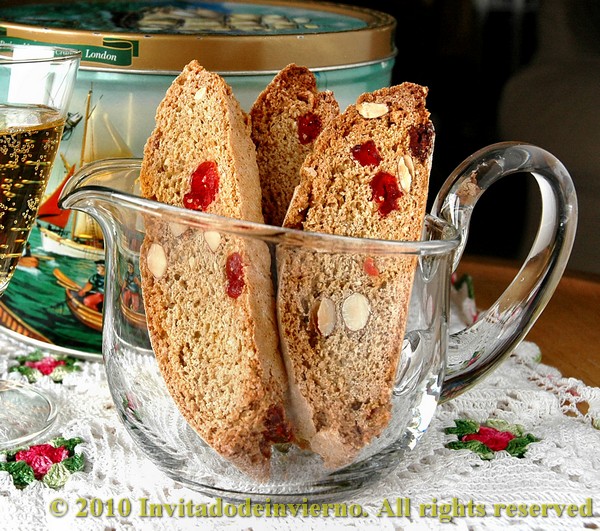
No, no, no... these are not cantuccini... these are carquinyolis... totally different... (ahem). I'd been wanting to make these typical Catalan cookies for a long time (do I start my posts like this too often?...). As you probably know, this type of twice baked cookies, first as a loaf and then sliced, are known as cantuccini in Italy and they also exist in Jewish ashkenazi cookery, with the name of mandelbrot, almond bread. They are typical in Catalonia, on the Northeast corner of Spain. When I was a child we used to spend part of our summer holiday camping in Catalonia and my parents used to buy carquinyolis. I didn't eat them though... didn't know what I was missing.


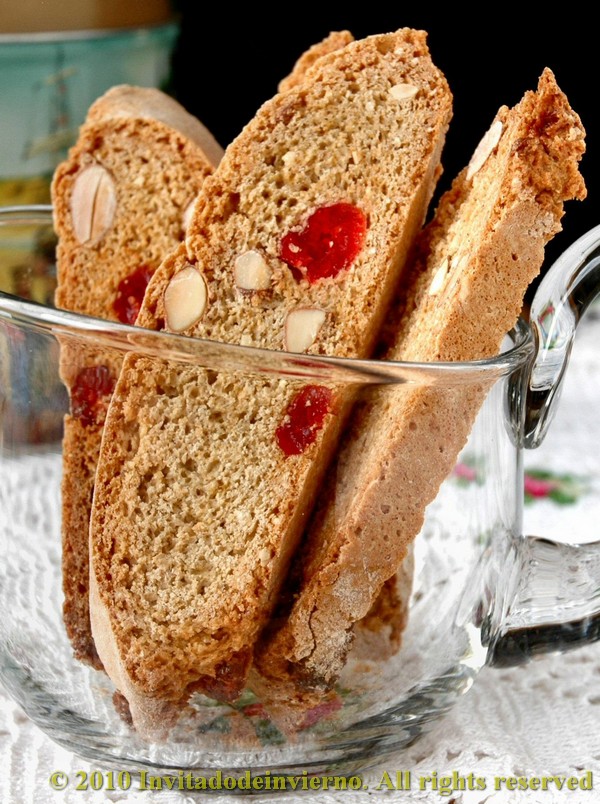
I've found the recipe at the lovely Catalan blog La cuina vermella. I've increased the amounts by 50 %, I've used white spelt instead of regular flour, and I've "adulterated" the cookies by adding some dried cherries... just to add a colour touch (heresy! I beg the Catalans pardon... please bear with me).


Spelt carquinyolis (yields approx. 35 carquinyolis)

  • 600g spelt flour, white (all-purpose flour can be substituted, of course)
  • 350g sugar
  • 90g almond meal or ground almonds (what's the right name?)
  • 100g unskinned, unroasted almonds
  • 90g dried cherries (or any other colorful dried fruit)
  • 1 tbsp leaven, not completely heaped
  • 3/4 tbsp cinammon
  • Lemon zest
  • 4-5 medium eggs (it depends on the size of the eggs, the dough mustn't be dry, but sticky) and another egg for brushing the loafs before baking
Put the almonds in a bowl with water to soak. Weigh the dry ingredients and make a well in the middle. Add the eggs in the well and mix slowly and carefully with the dry ingredients. Knead the resulting dough until all the liquid has been absorbed. If the result is too crumbly, just add another egg. Finally add the almonds, rinsed and dried with a paper towel, and the cherries. Knead to incorporate.


In the meantime heat the oven to 180 ºC. Divide the dough in two and, on a well-floured counter, form two loafs that can fit in one baking sheet. Transfer the loafs to the sheet, lined with parchment paper. Brush the loafs with the beaten egg (I forgot this step!). Put the loafs in the oven and bake half an hour. The loafs have to be somewhat thin, as they rise quite a lot in the oven. After 30 minutes, try for doneness with a toothpick. Take them out to a cooling rack and leave to rest for 5 minutes. Then slice them with a good serrated knife into 1 cm-thick slices, more or less. I'm not capable of cutting thinner slices. Then put the slices back on the baking sheet and back into the oven for 10 minutes to brown. Turn them once when half baked, to brown on both sides. When done take them out to cool on a rack.


For those who've never had this type of cookie before, they are hard and very crunchy. Catalans dunk them in mistela... mmm. I vouch that at home we have dunked them in cava last Christmas. A lot of cava. Really a lot. Loads of cava. I don't know if this is accepted as a traditional way to have carquinyolis, but what the hell, they're delicious that way...

Eager to know more?
Sugar-free Christmas compote, Spanish style

>> Tuesday, December 15, 2009

Christmas compote
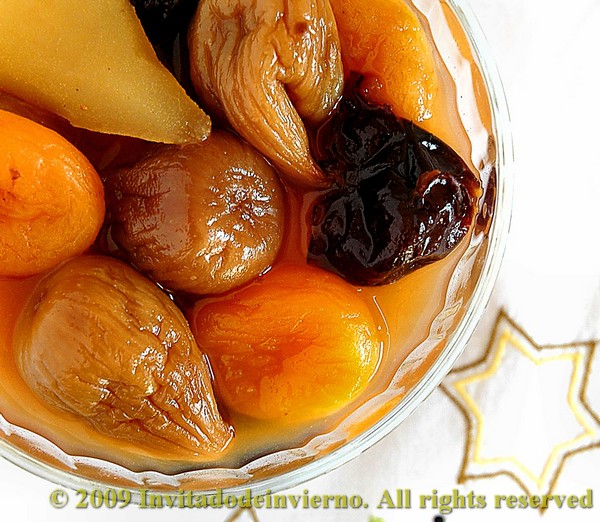
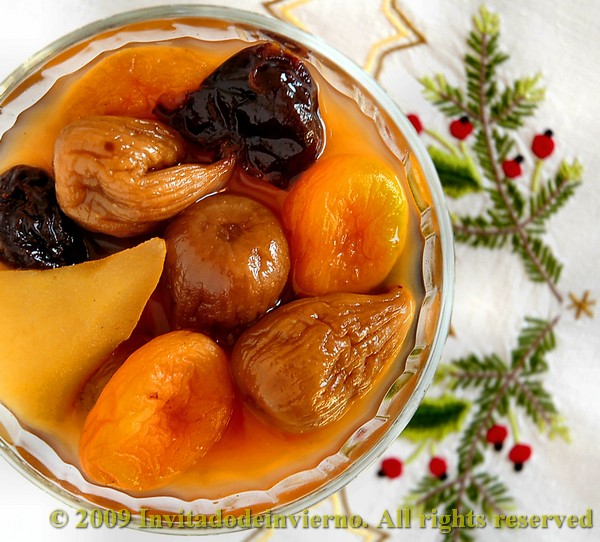
This is a very classic dessert in many countries of Europe, with different tweakings. In my crusade against common sugar, I decided to try and make it sugar-free. It's incredibly easy and you can get as tipsy as ever while eating alcohol-oozing-fruits, but with less bad conscience... my family is gonna give me a medal for that, I know it. Well, most of the alcohol just evaporates during the cooking. Pity. Instead of using red wine for poaching the fruit, which is the traditional ingredient in Spain, I prefer sweet wine, preferrably light in color for a nicer look and a milder taste. I looove sweet wine and besides you don't need to add as much sugar or sweetener in this case, as the sweet wine is... well, sweet, brimming with healthy fruit sugars.


Regarding the fruity ingredients, it's totally up to you. I'm giving here the fruits of my choice, but that's very personal. Some people prefer it with more fresh fruit, others with more dried fruit... Here's my take on this dish:

Sugar-free Christmas compote, Spanish style

  • 250 g pitted dried apricots
  • 100 g pitted dried dates
  • 100 g pitted dried prunes
  • 200 g dried figs
  • 2 firm pears (Conference for example)
  • 500 ml white sweet wine like moscatel (you can use a tawny port too)
  • 500 ml water
  • 1 stick cinammon
  • 1 tsp allspice (optional)
  • 1 dash orange extract or 1 tsp orange zest (also optional)
Some people like to add apple too, but the apples must have a very firm flesh, so that they don't "deconstruct". Please use the best quality dried fruit available. It makes a difference. In Spain dried fruit is very popular and usually of good quality. Dried fruit is eaten in tons around Christmas.

The preparation is pretty straightforward. Peel the pears, quarter them and put all the ingredients together in an enameled pot. Bring to a boil. Simmer until all the fruit is tender, around 40-50 minutes depending on the ripeness of the fresh fruit and the freshness of the dried fruit. I boil the compote without any sweetener and then try for sweetness when done, because you can always adjust it later. In this case the result was, in my humble opinion, sweet enough, which means I was using a VERY sweet wine. So I didn't add anything else. If more sweetness is needed, please avoid filthy synthetic sweeteners like aspartame and use natural sweeteners like agave syrup and maple syrup.

Christmas compote
If you find the liquid too thin, just add some powdered gelatin or agar-agar to thicken it a bit. Remember that without sugar you don't get a syrupy liquid.

There's something that's often overlooked when subtituting sweeteners, whether natural or synthetic, for sugar: its preserving properties. Sugar is a hygroscopic substance, which means that it "scavenges" the water surrounding its molecules. Therefore the sugar molecules "steal" the water that microorganisms need to thrive. I can't give you the reference where I found this... I don't remember. Believe me, I'm a chemist... (pause)... (silence)... you, at the end of the class, I won't tolerate any giggling... Well, that's why this sugar-free compote must be kept in the fridge and I guess its "shelf-life" will be shorter than if it was sugar-full. Of course, you can always store it in jars and sterilize them, like any other preserve. But I'm sure the compote will have no time to go bad at my home. This compote is delicious served with vanilla ice-cream or on a waffle cup with custard... yum.

Eager to know more?
Postre de músico or musician's dessert

>> Wednesday, September 23, 2009


The Autumn has arrived, my favorite season, and it feels like eating those foods that used to be seasonal, like nuts, which started to be available around this time of the year after the harvest. All fruits and nuts were seasonal not so long ago and we always related them to a certain time of the year. Now we can find almost anything at any time of the year and to tell the truth... a lot of the charm is gone. And I won´t talk about the luxury in bringing food from the Southern hemisphere to the Northern so that you can pamper yourself with oranges in Summer, for example. Nor of how fruit kept in industrial freezers have their season artificially prolonged, so that what we eat is not at its best regarding ripeness and flavor nor of course has the optimal nutrient content. These matters could fill one hundred posts (sigh).


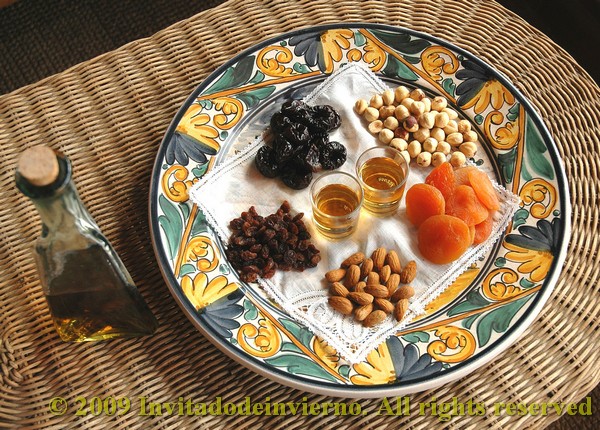
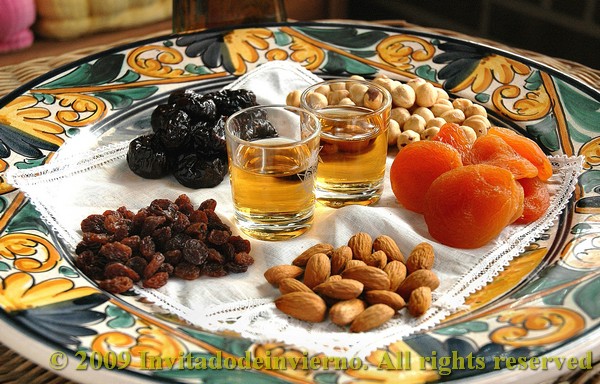
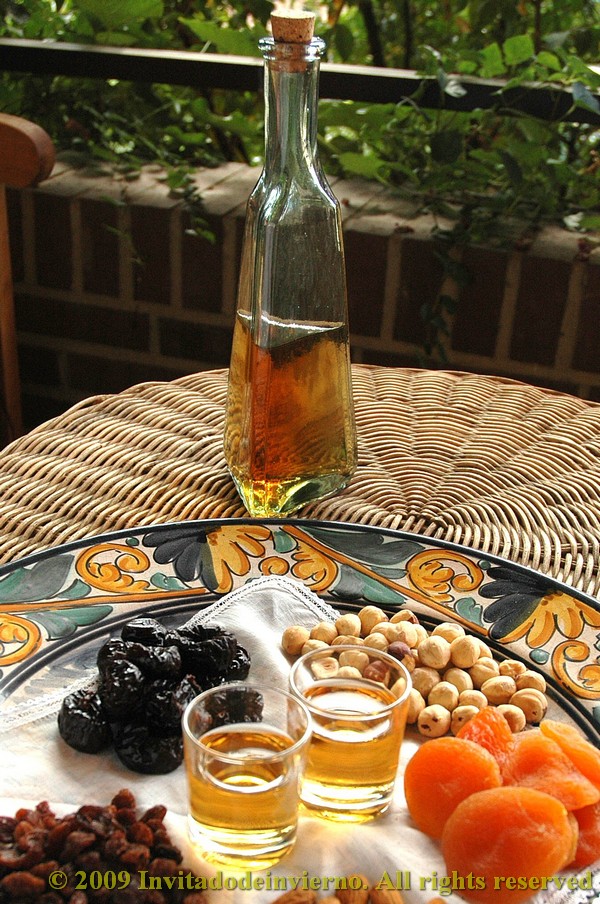
I believe I first tried this dessert in Andorra a long time ago. D. and I love nuts, we eat a lot of them at home. So a selection of our favorite nuts and dried fruits is a very good option for dessert, especially if you combine them with a glass of moscatel... That's exactly postre de músico (músic in Catalan), which means musician's dessert literally, a very traditional dessert in Catalonia. I've hardly found any information about it in the net, but it seems the name comes from the times when traveling musicians used to play in village celebrations and they were invited to eat whatever nuts and dried fruits people had in their homes.


Postre de músico

One handful of each of the following nuts and dried fruits (much better if they're organic):

  • Hazelnuts
  • Pine kernels
  • Almonds
  • Walnuts
  • Dried apricots
  • Dried grapes
  • Dried figs
  • Dried plums

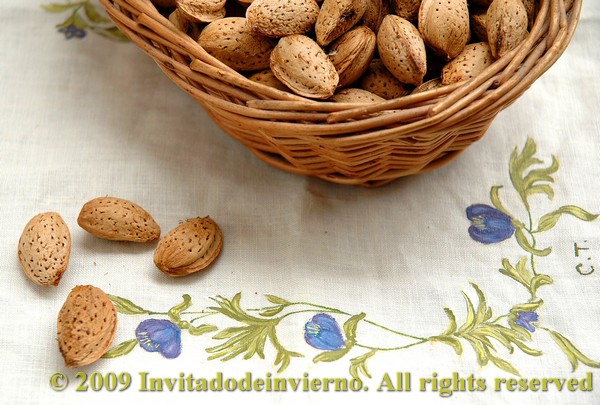
Of course you can vary the ingredients according to your preference or what you have at hand. Put the fruits handfuls on a beautiful large dish, without mixing them, along with the moscatel glasses or a bottle for serving. It couldn't be easier. I used some delicious almonds from my neighbor. A couple of huge branches of his almond-tree overlook my garden. The crop has been enormous this year, the largest in the 9 years we've been living here. It's so frustrating that we are forced to eat such a large amount of scrumptious, hyper-organic and super-natural almonds... We frugal people.


If you have a real sweet tooth you can eat the dessert on waffles, adding honey, maple syrup, custard... you name it. Although there's no need for much garnish if the food is of good quality. And if you have the chance to eat postre de músico on a Sunday afternoon, on a veranda under the already not so warm sun, smelling the Autumn... You should try it.

Eager to know more?
Followers

About This Blog

Lorem Ipsum

  © Blogger templates Palm by Ourblogtemplates.com 2008

Back to TOP