Related Posts Widget for Blogs by LinkWithin
Showing posts with label legumes. Show all posts

Lentil salad with olivada

>> Monday, April 11, 2011

Lentil salad 1

I am in a process of vindicating a more frequent consumption of legumes... before myself. I have never been very fond of this ingredient, though in the last years I have come to love some pulse dishes like falafel and Asturian beans with clams. The Asturian bean, one of man's best friends... woman's too. I still remember with tears in my eyes a few days spent with friends who own a house in Colunga, Asturias. They took us for lunch to a typical merendero, and as I always do when visiting Asturias, ordered some Asturian beans with clams. You should know that in the Principality of Asturias this kind of dishes are customarily served in huge amounts in an enourmous pot, good enough for several people, so you can eat as many servings as you want... or can. It seems that day my stomach was extensible such as a boa constrictor's, because I had all the pot by myself (of at least four servings, no kidding), while my table mates stared at me with one hand on the mobile phone to call an ambulance in case I suffered a stroke. Well, it might be the sun, the fresh air, the good company, the excellent food... a planetary alignment or something, because it has not happened again after that. But back to the topic at hand, we know that vegetable salad recipes get mixed results. That is why I consider this recipe found at the French magazine Elle à Table a great success, also because I have discovered a new addiction: salt preserved lemons.


Yes, I had kept some Moroccan style homemade preserved lemons in store for almost a year, still had not found time to open the jar and this was the right time. I had never tried these lemons before, but when I opened the jar I could not believe it... The aroma was amazing! All the essence of the lemons in a highly concentrated form. Unbelievable. Exciting. I was speechless. The flavor is so concentrated that a tiny bit of lemon adds lots of sparkle to the dishes.

Besides, these lentils are coupled with some beautiful phyllo cones stuffed with olivada...

Lentil salad with olivada (adapted from Elle à Table)
Yields 4 servings

For the olivada:

  • 250g black olives, unpitted (you better pit them at home, they will have more flavor)
  • 2 tsp pickled capers
  • 2 anchovy fillets (I had none and I used the same amount of nori flakes)
  • 1 large garlic clove
  • 50g virgin olive oil
  1. Peel the garlic, then pit the olives, if needed, mix everything and process to the desired fineness.
  2. With the food processor on lower speed, add the oil in a steady stream. Set aside.
For the lentils:
  • 120g lentils (French lentils like Puy are best)
  • Some fresh cilantro sprigs
  • 1 bay leaf
  • 1 tsp ground cumin
  • 1 tsp strong mustard
  • 1 quarter preserved lemon peel*
  • Salt to taste
Salt curing lemons

*Lemons preserved in salt are a very typical ingredient of the Moroccan cuisine which can be found in specialty stores, but that are also very easy to make at home. There are tons of recipes in the net, for example this one. You only have to take into account that the lemons need to cure or mature for a minimum period of 2 weeks.
  1. Leave the lentils to soak in water overnight. The next day, change the water and cook them with the bay leaf, until tender.
  2. Drain and salt to taste. Then add the mustard, the ground cumin and toss to distribute evenly.
  3. Dice the lemon peel (and only the peel) and add too. Then cut the cilantro and sprinkle on top of the salad.
  4. Set aside.
Lentil salad 3

For the phyllo cones:
  • 2 or 3 phyllo sheets
Olivada in phyllo 4
  1. Cut the sheets in 10cm squares or to your liking.
  2. Place a teaspoon of the olivada and wrap it in the phyllo dough, shaping it into a cone. Place the finished cones on an oiled oven dish.
  3. Bake in the oven preheated to 180ºC for 10 minutes or until brown.
Serve the salad side by side with the olivada cones and take alternate bites: lentils, cone, lentils, cone... Amazing. I believe I am in love with cumin, do you think it can be serious?

Lentil salad 2

Eager to know more?

Daring Cooks' challenge February: Mezze

>> Sunday, February 14, 2010

Pita bread 1

I have really enjoyed this challenge. I love Middle Eastern food and almost any Mediterranean food in general, therefore I was really excited about the mezze. Michele, this month's host, says: "if you’re not familiar with mezze, it’s more of a style of eating than a specific recipe or recipes. Mezze is a bunch of small dishes served all at once—sort of like the Middle Eastern version of Spanish Tapas. It can be served as appetizers before a meal, or as the meal itself". So this was really a multiple challenge, because it involved various dishes. The essential part of the challenge involved preparing pita bread and hummus, which I had never prepared before. That's good for me, I need to be pushed every now and then. D. knows a lot about it...


The 2010 February Daring Cooks challenge was hosted by Michele of Veggie Num Nums. Michele chose to challenge everyone to make mezze based on various recipes from Claudia Roden, Jeffrey Alford and Naomi Dugid.

For my mezze, besides the compulsory pita bread and hummus, I prepared roasted red peppers and falafel, both having starred at my table a number of times previously. I'm really hooked on falafel. And I'm not usually a chickpea lover (I'm in love with chickpea flour though), but the flavoring of falafel really gives me a kick. And they are easy to make, you can prepare a lot and freeze part of them for later use, which is very practical when you have kids... or even unexpected visitors. I was planning to prepare dolmades too, but I couldn't find the time to scout for grapevine leaves... they're nowhere to be found in my neighborhood. I'm giving you 3 recipes here, for pita bread, hummus and falafel.

Pita bread, adapted from Flatbreads & Flavors by Jeffrey Alford and Naomi Duguid
Prep time: 20 minutes to make, 90 minutes to rise and about 45 minutes to cook

  • 2 teaspoons regular dry yeast (.43 ounces/12.1 grams) (I used 25g fresh baker's yeast)
  • 2.5 cups lukewarm water (21 ounces/591 grams)
  • 5-6 cups all-purpose flour (17.5 -21 ounces/497-596 grams) (I used spelt here, half white and half whole, and I had to use 7 cups in total)
  • 1 tablespoon table salt (.50 ounces/15 grams)
  • 2 tablespoons olive oil (.95 ounces/29 ml)

Pita bread 2

  1. In a large bread bowl, pour the warm water. Crumble the fresh yeast on 3 cups of flour. Stir in the flour, a cup at a time, and homogenize. Let this sponge rest as long as needed, until double in bulk and bubbly (mine took less than 1 hour, but I think the amount of yeast was more on the excess side). The original directions call for a minimum of 10 minutes, I think that's too short.
  2. Sprinkle the salt over the sponge and stir in the olive oil. Mix well. Add more flour, a cup at a time, until the dough is too stiff to stir. Turn it out onto a lightly floured surface and knead for 8 to 10 minutes, until smooth and elastic. Rinse out the bowl, dry, and lightly oil. Return the dough to the bowl and cover with plastic wrap. Let rise until at least doubled in size, approximately 1 1/2 hours.
  3. Place a pizza stone, or two small baking sheets, on the bottom rack of your oven, leaving a 1-inch gap all around between the stone or sheets and the oven walls to allow heat to circulate. Preheat the oven to 450F (230C) (I use old floor tiles as a pizza stone...).
  4. Gently punch down the dough. Divide the dough in half, and then set half aside, covered, while you work with the rest. Divide the other half into 8 equal pieces and flatten each piece with lightly floured hands. Roll out each piece to a circle 8 to 9 inches in diameter and less than 1/4 inch thick. Keep the rolled-out breads covered until ready to bake, but do not stack.
  5. Place 2 breads, or more if your oven is large enough, on the stone or baking sheets, and bake for 2 to 3 minutes, or until each bread has gone into a full balloon (I needed around 12 minutes for the breads to brown). If for some reason your bread doesn't puff up, don't worry it should still taste delicious. Wrap the baked breads together in a large kitchen towel to keep them warm and soft while you bake the remaining rolled-out breads. Then repeat with the rest of the dough. Wow, my breads puffed up so beautifully!

Pita bread 3

Hummus, recipe adapted from The New Book of Middle Eastern Food by Claudia Roden
Prep Time: Hummus can be made in about 15 minutes once the beans are cooked. You can use dried chickpeas or canned boiled chickpeas, but I prefer to soak them and cook them myself.
  • 1.5 cups dried chickpeas, soaked in cold water overnight (10 ounces/301 grams)
  • 2-2.5 lemons, juiced (3 ounces/89ml)
  • 2-3 garlic cloves, peeled and crushed
  • a big pinch of salt
  • 4 tablespoons tahini (sesame paste) (1.5 ounces/45 grams)
  • Additional flavorings (optional) (I simply garnished it with pimentón oil, 3 or 4 tablespoons of olive oil with half a teaspoon of sweet Spanish pimentón)

Hummus 2

Directions:
  1. Drain and boil the soaked chickpeas in fresh water for about 1 ½ hours, or until tender. Drain, but reserve the cooking liquid.
  2. Puree the beans in a food processor (or you can use a potato masher) adding the cooking water as needed until you have a smooth paste. (I preferred to add the lemon juice here and use the water later to adjust the thickness. If you use the cooking water here to adjust the thickness so that you can process it, maybe the mixture will be too liquid after adding the lemon juice... it's just my idea)
  3. Add the rest of the ingredients and mix well. Adjust the seasonings to taste.
  4. Serve on beautiful pottery and drizzle the surface with the flavored oil.

Hummus 1


Falafel

I didn't use the recipe Michele provided, but the one I usually prepare, from the book Tamasin's Kitchen Bible, by Tamasin Day-Lewis (ambitious name for a book, don't you agree? But I quite like it. And yes, she's Daniel Day-Lewis's sister)
  • 340g chickpeas, soaked overnight
  • 2 medium onions
  • 4 cloves garlic, crushed
  • 2 green chillies, seeded and finely chopped
  • 1 handful flat parsley
  • 1 handful fresh coriander
  • 2 tsp cumin seeds
  • 2 tsp coriander seeds
  • Salt
  • 600ml olive oil
The challenge's recipe included some all-purpose flour too. It's true that the crushed chickpeas mixture can ooze some liquid, but I prefer to drain them a little bit after crushing. Or dry them thoroughly on paper before processing them. And if you don't want to drain the crushed chickpeas, you can also add some chickpea flour, then you keep the falafel gluten-free. In fact I added some this time, that's why my little balls have such a light color, they are rolled in chickpea flour.

Falafel 2

The preparation is really easy: first grind the cumin and the coriander seeds in a mortar. No need to grind them to a powder. Then put all the ingredients together in a food processor or mixer and grind them to a grainy pulp. Don't expect it to be smooth. Take walnut-sized pieces with a spoon and form them into balls. I rolled the balls in chickpea flour to absorb some of the moistness.

If you're not going to eat all the falafel at once, you can freeze them at this point. I use ice cubes trays for this.

Falafel 1

Heat the oil and fry the balls in batches; brown them thoroughly and drain on kitchen paper. They're delicious dipped in tahini sauce, but that was another failure, because my last tahini paste had gone into my hummus... am I badly organized??

Mezze 1

Eager to know more?

Bean and smoked salmon salad

>> Monday, August 24, 2009


I know I'm not being original (am I ever?) with my proposal today, but this weather prevents me from thinking hard... and also nobody feels like having anything remotely warm. I can't even think of using the oven. I've been wanting to bake bread for some days, but I don't even dare because when the kitchen is over 90 ºF my brain malfunctions. And let's not talk about elaborate recipes... I don't remember the last time I felt so lazy. On the other hand, this dish is a very lovely option to eat pulses in the summer, a very important part of the Mediterranean diet. Beans, chickpeas and the like are cooked in stews during cold weather, with lots of meat, Spanish ham and chorizo, only this type of dish is not exactly what you feel like eating right now...


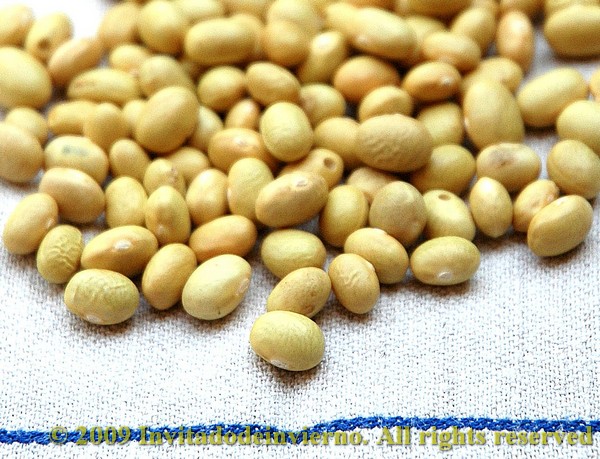
So this is a very simple and traditional recipe, only somewhat tweaked with a special vinaigrette. It's a good chance to use up some of the beans I brought from my holiday in Asturias, called "cena del cura" beans, meaning "priest's supper". I brought with me loads of beans and chickpeas. Yes, it's time to stock up with food for the winter.

Bean and smoked salmon salad

  • 100 g beans
  • 2 cloves garlic
  • 1 bay leaf
  • 100 g good smoked salmon
  • 1 tsp honey
  • 2 tsp mustard (I used Dijon)
  • 2 tbsp balsamic vinegar
  • 1/2 cup virgin olive oil
  • Salt to taste
You know I love to pretend I'm original, so I decided to make a different vinaigrette from the classical Spanish one, with just olive oil, plain vinegar, garlic and minced green pepper. I opted for a mustard vinaigrette. I love their sweet-sour touch. I found this vinaigrette delicious, in spite of the sickly colour resulting from the mixture of the yellow mustard and the brown balsamic vinegar... ahem. Serious, the color looks so unhealthy that I didn't dare to take a picture. I didn't want you to think that I added motorcycle oil to the salad. The amounts for the vinaigrette yield a fair amount of mixture, while the weight of beans corresponds to only 2 servings (of course my kids wouldn't even get near the salad). Adjust both to the number of guests.


Well, leave the beans to soak overnight, this makes the boiling much shorter. The next day put them in a pot with cold water and bring them to a boil, along with a couple of cloves of garlic and a bay leaf, as long as needed to tenderize the beans. The boiling time will depend on the kind of bean and its freshness. Then put off the heat and leave them aside to cool while you prepare the vinaigrette. You can salt the beans at the end or at mid-boiling. Mix all the vinaigrette ingredients except the salt. Mix thoroughly, till all the oil is emulsifyed. I like the mayonnaise-like consistency of mustard vinaigrettes. Lastly add the salt little by little, tasting to adjust. The color and sweetness of this vinaigrette, added to the beans, reminded me of baked beans. It's a pity that these beans lose their nice yellow color after boiling.

But... what I really loved about cooking this dish: to use my brand new pastry rings for the setting... wow! Such a beautiful thing. Mix the beans with the vinaigrette in a bowl, with as much dressing as you prefer, and stir well. Put the ring on the plate (I oiled the inside, I'm not sure it's necessary) and then... what an excitement! Pour half the vinaigrette beans inside. Nicely lay the smoked salmon on top, cut in whatever size you prefer. Then flatten the assembly slightly, lift the ring... et voilà! These simple pleasures make me so happy... :-)

Eager to know more?

Followers

About This Blog

Lorem Ipsum

  © Blogger templates Palm by Ourblogtemplates.com 2008

Back to TOP