Related Posts Widget for Blogs by LinkWithin
Showing posts with label sourdough. Show all posts

Bread with sparkling water

>> Sunday, October 3, 2010

Vichy bread 1

Picture this: you have guests for lunch or dinner and you offer them a drink when they arrive. With the kindness and the greatness that distinguishes you, you offer to prepare some glasses of water with coloring agent, carbon dioxide and tons of sugar or aspartame. Mmm, your guests are sure to salivate at the prospect of tasting this delicious beverage. Well, that sounds exactly like one of the many sodas whose drinking we've come to find normal, though I won't mention its name. Doesn't it sound disgusting? Perhaps it is. You're probably wondering what's this all about. Well, a few days ago a respected Spanish mineral water company offered to send me a bottle of Vichy Catalán. I accepted for three reasons: first because D. and I have been drinking Vichy Catalán for 20 years, the second because I was assured that by the acceptance of this gift I committed to nothing, and the third that this company has the good sense to use glass to bottle the water. And the prospective of talking or not talking about the water in my blog made me reflect on what we drink and why.


At present I only drink water and wine (and gallons of cava when the gods are propitious..., and I don't drink beer because it tastes like pee...). Don't think that this has always been that way, in the past I used to drink that soda whose name I don't remember. Until I started having weight problems and became interested in nutritional issues. And to wonder what foods and drinks are harmful, not only for weight, but for your overall health. I know, many of you will tell me that one can't always stop and think about everything he does. Well, it depends. If I were invited to dinner by George Clooney it wouldn't take me very long to decide if it's good or bad for my body (a few milliseconds, plus it's neither good nor bad, it's sheer science fiction), but when it comes to what I put into my body, you might as well think about it. Others could object that I shouldn't drink alcohol then. Certainly I don't drink it every day, but I take my dose of red wine antioxidant... To cut a long story short, I've been drinking this sparkling water for 20 years because it's delicious, with a nice salty touch of its own. I think it was one of my sisters-in-law who introduced it in the family and her oldest daughter baptized it as spiked water when she was little... It's sad that spring water producers have to fund studies to prove that the mineral water is good for your health... my grandmother knew that. Michael Pollan is right to advise us not to eat anything your grandmother wouldn't consider edible... But it seems that humans have no common sense and we need to be reminded of the obvious.

Vichy bread 2

Stop the musings. This gift seemed an ideal opportunity to test the action of carbonated water in a homemade bread, so that's what I did. I used an organic flour that I brought from my trip to Denmark because it showed some nice little pictures of bread in the package... but had rather little gluten, so I noticed when the time came to use it, at least the package read 10% (mmm, and the Roskilde supermarket was a bit out of my way to return the flour...).

Vichy bread 4

Bread with sparkling water

  • 300ml good sparkling water
  • 480g bread flour
  • 135g sourdough starter 100% hydration (50/50 wt.)
  • 2 tbsp oil
  • 5g salt
  1. Mix all the ingredients except the salt, leave to autolyze. I used Dan Lepard's kneading system, shaped the dough into a ball and left it to ferment, covered.
  2. After one hour proofing, I folded the dough once and put it in the fridge to retard overnight.
  3. The next day I left it at room temperature to warm up and resume the fermentation (around 3 hours). When doubled, I shaped it into a plump batard.
  4. Once the bread had doubled, I put it into my oven at 250°C. Since my oven is disastrous, as soon as I opened it four or five times to spray water, the temperature dropped to 230° and remained so throughout the baking. The bread took 40 minutes to score an inner temperature of 92ºC.
Vichy bread 3

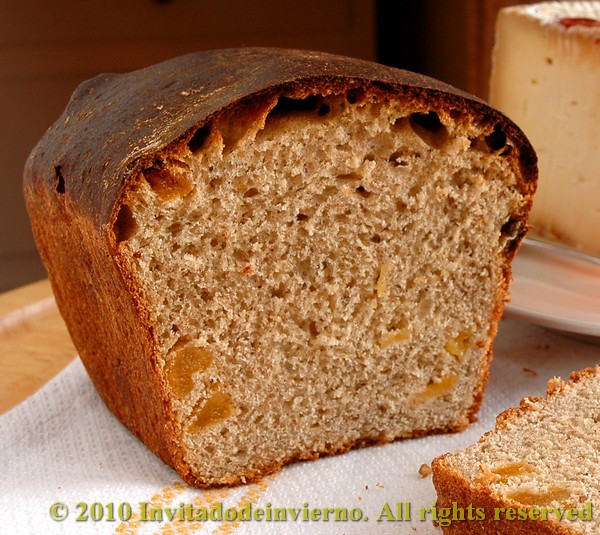
The result was a fairly densely crumbed bread, very tasty and with a nice crispy crust. As yesterday it wasn't my most brilliant day, my results are inconclusive because in order to check the difference sparkling water can make in a bread I should have used my regular flour, as I haven't the basis to compare, because the Danish flour was a bit weird. On one hand I mentioned it showed a very low percentage of protein in the package, on the other hand while kneading it gave me the feeling that the dough was very strong. Perhaps the density of the crumb is due to not having done a thorough kneading... I should have waited till the next day to eat the bread, but I couldn't restrain myself and half of it disappeared on the midday meal. It was gorgeous, despite its faults...

This one I'm sending to Wild Yeast's Yeastspotting.

Eager to know more?

Sourdough blinis

>> Wednesday, April 28, 2010

Blinis sourdough 1

Blinis ... how they're yummy. These pancakes typical of the Russian cuisine, similar to American pancakes or, in flatter versions, to crepes (just similar), served as accompaniment to savory dishes, have several features that distinguish them. The main one is that they rely on bakers' yeast and beaten egg whites to raise, and another characteristic is that they often include buckwheat flour in their composition, which gives them an intriguing herbaceous smell. Well, here I use blinis to use up a fraction of the massive amounts of sourdough that sourdough geeks need to throw away when they don't make bread every day (my case).


Sourdough is just a mixture of flour and water, so if we do have leftovers at some point, they can be added to any preparation that carries flour and water in its composition and that can't be disturbed by its special flavor. "Recycling" extra sourdough instead of throwing it away is a perfect excuse to make blinis, don't you agree? To raise the intellectual level of the blog, here's a quote on blinis from Tatiana Maslenikoff's book La cocina rusa:

As in most European civilizations, Russia gathered and assimilated the beliefs and pagan traditions with its Christian equivalents, which were imported from the Byzantine Empire in the 10th century.
After the long winter, when the first signs of thawing were felt, the northern tribes coming out of their lethargy prepared a feast in honor of the Blazing Sun. Pancakes as round and golden as suns, made with mixed flours, were cooked and offered to Sun God for him not to forget to warm Mother Earth. This would in turn make the next harvest sprout. These pancakes (blini) were then eaten with butter, dried fish and meat. According to historians and archaeologists, the tribes celebrated a sort of costume party where the burning of an effigy of the Prince of Winter took place.
In the Christianized Russia, this feast was moved to the beginning of Lent (...) Blinis are served with smoked herring or caviar, but never meat.

Blinis sourdough 3

The idea of using sourdough on blinis is not originally mine, but found in the book Breads from La Brea Bakery, by Nancy Silverton. I've adapted the recipe, because she adds baking soda and baking powder to avoid a long time rising and speed up the process. She also adds far too much sugar to my taste, that I consider unnecessary, apart from not being very faithful to traditional recipes. I usually have that problem with American recipes, they're too sweet for me. I've also halved the amounts, because the original recipe produces eight dozen small blinis ... yes, you read that right. I only made around 40 small blinis. Here's the recipe:

Sourdough blinis
  • 250ml milk
  • 3/4 tbsp fresh bakers' yeast
  • 185g sourdough (100% bakers' percentage, mine was spelt's, but any white bread flour will do)
  • 85g all-purpose flour
  • 1 tsp agave syrup or 1 1/2 tsp sugar
  • 70g buckwheat flour (60g if you use sugar instead of agave syrup)
  • 1/2 tsp salt
  • 2 medium eggs
You know that the amount of liquid depends on the absorption capacity of the flours, so maybe you'll need to adjust the final thickness. The batter must be almost as thick as pancake batter.
  1. Lightly warm up the milk and add the fresh yeast, crumbled. Blend until dissolved. Add the sourdough and mix well. Add all the flours and the agave syrup, cover and let it ferment until double in bulk and bubbly, depending on ambient temperature and activity of yeast, something between 1 hour and 1.5 hour.
  2. Break the eggs and separate the whites from the yolks. Add these to the batter along with the salt and let it ferment again, I think one hour is enough. Leave the egg whites in the fridge in the meantime.
  3. When the batter is risen again, beat the egg whites to stiff peaks and gently add them to the batter, so as not to deflate them.
  4. Heat a skillet or pancake pan and add half tablespoon of butter. The traditional method is to coat the skillet with pork fat, but I didn't have any. Ladle small portions of dough to make the blini size you choose. I made little ones, 2 or 3-bite sized, but they can be made much larger. So you decide. They cook quickly, you have to turn them over with a spatula within seconds and cook them on the other side. It is recommended to lay them on a kitchen towel as you go, covered to prevent them from cooling, and also put them just outside a hot oven to keep them warm.
Blinis sourdough 2

They're delicious when warm, very light and airy, thanks to the egg whites. They have a rich bread-like flavor, with the sour note from the sourdough, and a very tender consistency. A surprising and addictive combination with savory accompaniments. With a good smoked salmon they are simply superb. We did make a lot of tiny sandwiches of salmon, even without the typical addition of sour cream ... We apologize to any Russian in the room for our heresy. We only missed the vodka ... ¡na zdorovje!

Eager to know more?

San Francisco sourdough bread

>> Wednesday, April 7, 2010

San Francisco sourdough 1

Those of you out there who are among the followers of the Holy Sourdough know that the only rite of passage that allows you to qualify for a gold-plated bread-scoring tool is to make a San Francisco sourdough bread... I admit I had always wondered, somewhat skeptically, if San Francisco yeastie beasties would be much different from the ones in the Spanish plateau (the rain in Spain doesn't stay mainly in the plain...). But I've been lucky enough to get some of these bugs from my generous friend Bea... so that I could check myself. I haven't reached a definite verdict though.


Here's what baker Peter Reinhart says about the bugs and San Francisco sourdough:

(...) a wild strain of yeast called Saccharomyces exiguus is used to make sourdough bread, as opposed to S. cerevisiae used in regular breads. But the complex sour flavor is not created by the wild yeast. Other bacterian organisms, specifically lactobacillus and acetobacillus, create lactic and acetic acids as they feed off the enzime-released sugar in the dough, and these are responsible for the sour flavor. San Francisco sourdough bread, for example, has a particular type of local bacteria called Lactobacillus sanfrancisco (...) that gives this bread a different quality, more sour with a thicker crust, than any other wild-yeast bread made in other parts of the world.
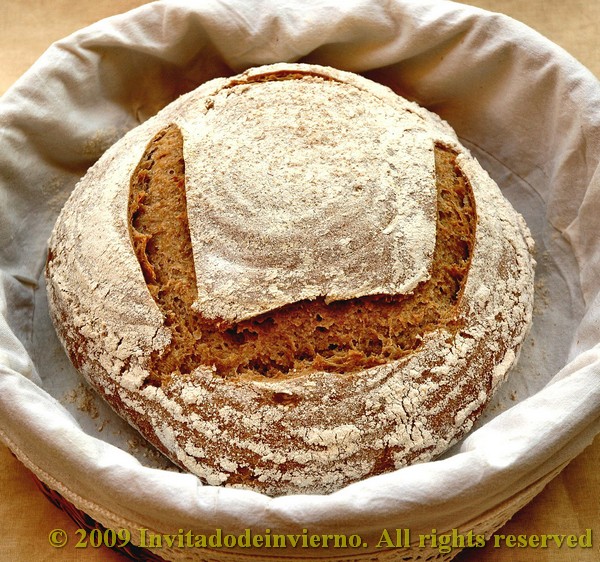
If Reinhart says so... The peculiar flavor that this sourdough imparts comes from one of those bacterias, from the lactobacillus type. Well, I only know that I have baked two breads with this sourdough so far and either I've finally learnt to bake decent bread or this sourdough is really special. Both breads were wonderful, with a delicious flavor that caused them to disappear in no time. The recipe I used is nothing special:

San Francisco sourdough 2
  • 200g San Francisco sourdough, fed with spelt for several days (baker's percentage: 100%)
  • 300g water
  • 500g white bread flour (I had to add 50g more)
  • 2 tsp salt
  1. Mix all the ingredients and knead by hand or in a stand mixer, till the gluten is well developed. Make a ball and put it inside an oiled bowl, cover with a plastic shower cap and put in the fridge. Leave to proof overnight.
  2. Take the dough out of the fridge the next morning and leave it to temper on the counter and to further proof. It must double in bulk. It will take at least 2 hours.
  3. When doubled in bulk, tip the dough on a well floured counter and shape in whatever shape you like. Then put the formed loaf on a floured cloth, a bannetone or a large bowl, depending on the bread shape, and leave to rise again.
  4. I usually bake my loafs in a Dutch oven. Preheat the oven to 250ºC (that's the maximum reached by my oven) with the Dutch oven inside. When the loaf is doubled, take the Dutch oven out on the counter and slide the bread into it. Score it, cover with the lid and put it back into the oven. This bread hardly took 30 minutes to bake. Check the inner temperature, it should be at least 92ºC (large tears rolled down my cheeks when I opened the Dutch oven to find such a stunning bread... I had never baked such a beautiful bread before... so well risen, with such an appealing color...).
  5. Then let the loaf cool on a wire rack and... devour it. I can't express how delicious it was with butter...
And being that I am a studious little girl, I'm more than willing to try this sourdough again just to check if its flavor and aroma are really special or not... as many times as needed. Sorry, I must be going, I've got some baking to do. Bye.

San Francisco sourdough 3

I almost forgot! I'm sending this bread to Susan's Yeastspotting... don't forget to check it tomorrow for a weekly showcase of breads!

Eager to know more?

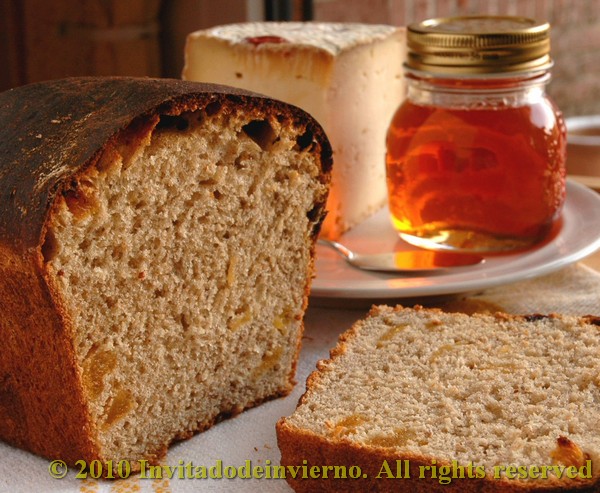
Sweet sourdough bread with cinnamon, sugar-free

>> Monday, January 11, 2010


I made this bread last Christmas for the first time and it's bound to become a classic at my household, because it's delicious. In spite of the name, it's not very sweet. It's excellent as toast for breakfast, with some ham or a sharp cheese... I found the recipe at this blog (thanks Tess for the great idea and check out her amazing painted breads!) and it originally contained ginger and orange. As I usually do, I took her recipe and turned it upside down, so that the result is almost unrecognizable. But that's what globalization is about... you pick ideas and concepts here and there, shake them in a cocktail shaker and pour the concoction on your cultural heritage, don't you?


Sweet sourdough bread with cinammon and dried apricots, sugar-free

  • 100g white flour sourdough (baker's percentage: 100%)
  • 160g light spelt
  • 130g bread flour
  • 130g whole spelt
  • 8g fresh yeast (I didn't trust my sourdough in this cold)
  • 9-10 dried apricots, soaked in Cointreau or Triple Sec (the original included candied ginger instead, but I'm no big fan)
  • 65ml maple syrup (dark molasses in the original recipe)
  • 40ml agave syrup (1/4 cup sugar in the original recipe)
  • 65ml melted butter
  • 200ml water (250ml if sugar is used instead of the agave)
  • 1 tsp Cointreau from the apricots soaking
  • 1/2 tsp anise seeds
  • 1 tsp cinnamon
  • 1/2 tsp salt

If you don't want to use such a ridiculous mixture of flours, just follow the original recipe, which is more sensible. But you know I loooove spelt. If you happen to dislike dried apricots, you can of course substitute for any other dried fruit or even nuts. These would be a great match too.

Weigh your solid ingredients and mix them. Crumble the yeast on top of them. Add the sourdough. In other bowl mix the liquid ingredients with the melted butter. Knead well, around 10 minutes by hand or 6-8 in a stand mixer, till you have an elastic and smooth dough. Then add the drained apricots. Make a ball, put it into a well oiled bowl, cover and leave to proof. My bread took 4 hours to double in bulk, because my kitchen is quite chilly these days. When doubled, I made a roll and dumped it into a loaf pan, covered it with a plastic cap and put it in the fridge to raise overnight. The next day the bread had nearly doubled, so I immediately turned on the oven to 180ºC, and there went the bread. Bake it around 40-45 minutes, depending on your oven's fierceness (watch it closely at the end of the baking so that the top doesn't brown excessively). You can test the inner temperature for doneness. The original recipe calls for an inner temperature of 75ºC. But maybe because of the change in ingredients, my bread was not thoroughly baked at 75ºC (I checked it with a skewer), but at 90ºC, so watch out. When done, unmold it carefully and leave to cool on a wire rack.


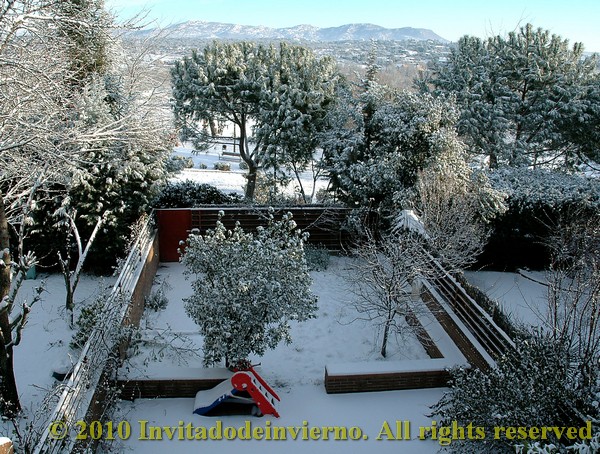
The consistency of this bread is very cake-like and the dried fruit gives it a delicious touch. Today I had a toasted slice, with cheese and quince jelly, while gazing at our snow-covered garden...

I'm sending this bread over to Susan's Yeastspotting, at Wild Yeast.

Eager to know more?

Staititai or Ancient Roman pizza

>> Wednesday, September 23, 2009


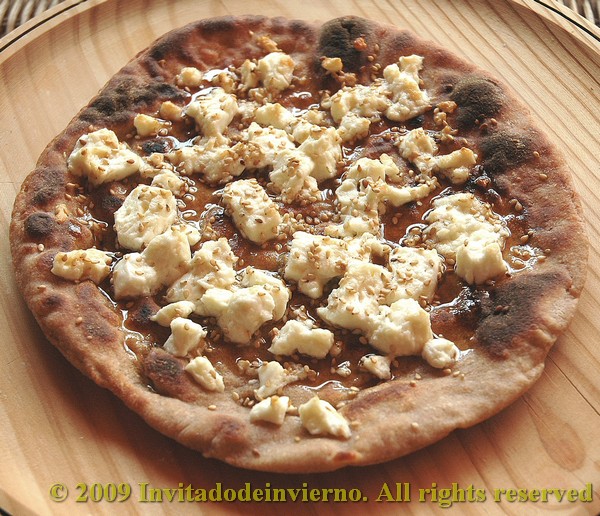
Some time ago I bought a book about Ancient Roman cookery, called exactly Roman Cookery, by Mark Grant, who is a British classics teacher. It includes quite a lot of interesting recipes, but the most interesting thing to me was to realize how different Mediterranean cooking was before the discovery of America and the spreading in Europe of crops that we now feel so naturally Mediterranean like tomato, pepper and many more. Take pizza for example... think about it, without tomato? Well, no problem, that's white pizza. But the dough would be made with spelt instead of white wheat. And you'd have neither red nor green pepper to add for garnish. There's a very simple and delicious pizza-like recipe in this book, cooked on a skillet instead of baked, named Staititai, coming from a book called The partying professors, by the Greek writer Athenaeus. According to Mr. Grant, this Greek book would be widely known in Rome.


The recipe calls for baker's yeast, but I used sourdough instead, because anyway that's what the Romans would have used. I'm trying to be more authentic than the author...

Staititai from Roman Cookery (tweaked for sourdough)

  • 200g authentic spelt sourdough, 100% hydration (baker's percentage)
  • 400g authentic spelt flour (I used whole spelt for more, you know... authenticity)
  • 200ml authentic water
  • 1 tsp authentic sea salt
Filling for one pizza (20cm wide)
  • A handful of crumbled feta cheese (to your taste)
  • 1 tbsp sesame seeds
  • 1 tbsp runny honey

Mix the sourdough with the flour and the water. Leave to autolyse for 15-20 minutes. Then knead around 10 minutes by hand or 7-8 minutes with a blender, until the gluten is developed. Place into an oiled bowl, turn the dough so that the oil covers all the surface, cover with a plastic shower cap and leave till double in bulk. Mine took quite long to double, at least 6 hours. Then tip the dough on the counter, make a neat roll and divide the roll in 5 pieces. These pieces make small pizzas, around 20cm diameter. You can change the size of the pieces if you like by dividing the dough in more pieces (or less). Remember the pieces must fit into a skillet.


At this point I wrapped 4 of the pieces in plastic and put them in the freezer for a rainy day. I left one to proof in my refrigerator overnight, to eat it the next day. I work at home and I eat alone (sounds like an existentialist rhyming couplet). The next day I took the dough out and left it to temper for half an hour. Then I rolled it with a rolling pin to a 20cm-disc, more or less. I put a skillet on low heat, sprinkled it with olive oil and lay the disc of dough. It started to puff up nicely. When the underside showed quite some browned spots, I brushed some oil on the upperside and turned the disc. I waited for the whole thing to brown and cook, it puffed in a similar way to a pita bread. Switch on the oven grill in the meantime.

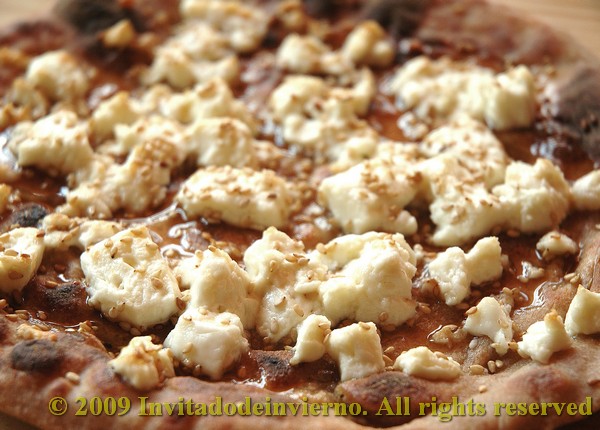
Fine, now you have a nice browned bread base where you can put the cheese and sprinkle the sesame seeds. The recipe's direction is to add the honey at this point too, but I preferred to add it after grilling. Then put the base with the filling under a hot grill and let the cheese get soft for 5 minutes or so, to your taste. Remember that feta doesn't really melt. You'll start noticing the wonderful smell of the roasting sesame seeds. If you're anything like me, the aromas will make you feel like pouring yourself a glass of white wine... ahem (I did). When it is sufficiently grilled (keep an eye on it, otherwise the bread can brown excessively), take it out of the oven and drizzle with the honey while warm.


I must admit that I found the result stunning, much better than expected. I didn't think that such a simple combination of ingredients would make such a delicious dish. Trust me, the combination of the toasted sesame seeds with the cheese and the sweet touch of the honey makes a wonderful assembly! I could have eaten another one, no doubt. And this pizza cut in wedges and piping hot can make a very interesting appetizer... alongside some spiced olives... and a glass of wine... yes, I picture myself dressed in a tunic, sitting under a holm oak... overlooking some cliff by the sea... softly playing a lyre... don't you smell the Mediterranean? Wow, I get carried away!

This bread goes to Susan/Wild Yeast for this week's YeastSpotting.

Eager to know more?

Peter Reinhart's 100% rye sourdough bread

>> Friday, September 4, 2009


First of all, Mr. Reinhart, are you cheating on us? Because in spite of the name, this bread includes a small ratio of wheat flour and, though included in the sourdough section of The bread baker's apprentice, it carries normal bread yeast too. Reinhart, you should be punished... :-).


This is a 2-3-day bread, since it requires a sponge that needs to sleep in the fridge overnight and the second fermentation is retarded in the fridge too. I made the bread in two days because my kitchen was very warm and the second fermentation was really speedy... so much that the bread overfermented while waiting for my bloody oven to get the right temperature. Pathetic. When I'm rich I will revamp my kitchen and install a professional 90 cm oven that reaches at least 1000 ºC in the shade, a volcano of an oven.

But you're wondering, I know... if the bread came out wrong, why is she posting it? Because you can learn from my errors, be patient. And I can do it better next time if I record all my mistakes now. And because in spite of everything the taste was delicious.


100% rye sourdough bread from "The bread baker's apprentice"

Sponge

  • 100 g sourdough 50% hydration (Reinhart's is made out of wheat, I had rye's and that's what I used. It worked out fine)
  • 130 g bread flour
  • Vegetable oil
Soaker
  • 55 g whole rye flour, coarsely ground (I didn't have coarsely ground rye flour, I used 20 g mixed grain and the rest of flour)
  • 120 ml water at ambient temperature (funny, ambient temperature is not the same in August as in January, not very accurate hint...)
Final dough
  • Sponge
  • Soaker
  • 380 g white rye flour
  • 1 1/2 tsp salt
  • 2 tsp dried bread yeast
  • 175-240 ml warm water (32-38 ºC)
  • 2 tsp caraway seeds (I preferred not to. Chicken.)
Prepare the sponge. Mix all the ingredients and add some water if needed to make a ball. The ball must be firm, not very sticky. Just mix, don't knead it very much. Oil a bowl, put the ball in, turn it for all its surface to oil, cover with some plastic film and leave it to ferment until doubled. Once fermented, leave it in the fridge overnight.

Prepare the soaker by mixing the flour, seeds and water. Put some plastic film on it and leave it overnight at room temperature. According to Reinhart, the soaker helps condition the grain and allows for the enzimatic activity to develop, so that more sugar in the flour is released.

Now, did you already get up and do you have your soaker and sponge at hand and ready? Reinhart recommends to cut the sponge in a few pieces and leave it at room temperature for a while for it to temper more easily. I didn't do it because of the heat in my kitchen and because I'm an unruly girl. Mix everything (adjust the amount of water according to the dough consistency) and knead by hand for 4 or 5 minutes, a bit shorter if you use a mixer. Put the dough in an oiled bowl, cover with plastic film and let it double its volume. Mine took only two hours and a half.


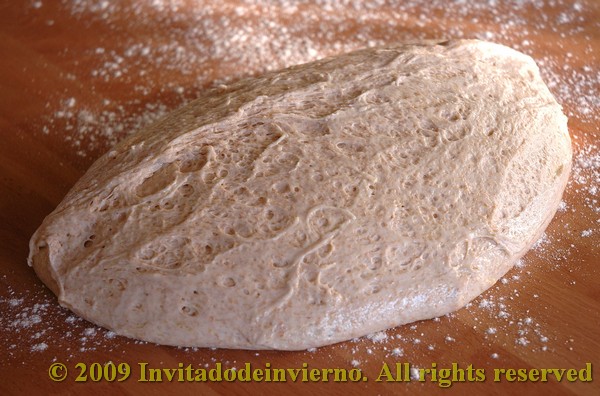
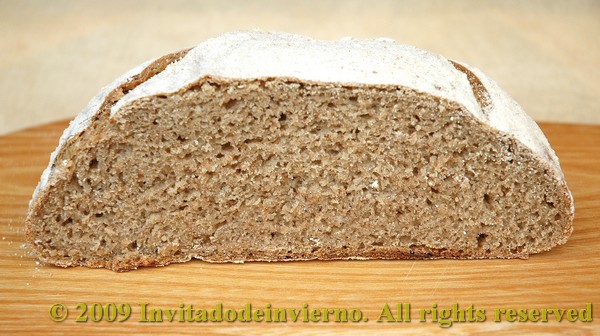
Once the dough has doubled, tip it on the counter and shape two bâtards, trying not to degass too much. I preferred to put all the dough in a loaf pan. So I left it to double and that was my main mistake... I went away to another room and forgot about it. I thought it would take at least one hour more and it didn't. At this point you can also put the wrapped bread into the fridge and leave it to proof overnight. The thing is that when I went to have a look at the bread it was nearly doubled in size and then I immediately turned on the oven and had to wait for it to reach the righ temperature. At some point I thought I couldn't wait any longer because I didn't have the guts to see my bread sinking to the bottom of the pan and then I put it in the oven when it had barely reached 200 ºC (Reinhart advises to start the baking at 260 ºC, spray water in the oven several times after putting the bread in and then go down to 230 ºC). In short, I tried to do my best. As can be seen in the pictures, the bread had no oven spring at all. It even sunk a little bit because of the overfermentation, and the crust was a bit too hard because of the longer baking at a low temperature. It took 40 minutes to bake, when the advised time is less than 30.

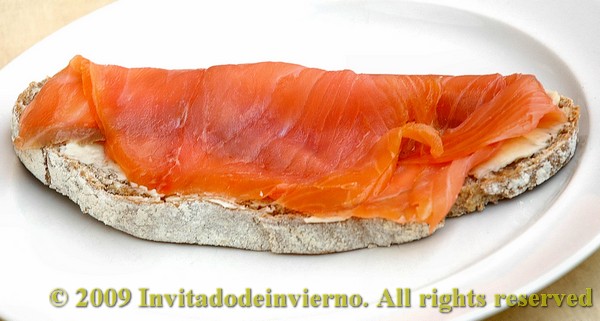
But... in spite of so many blunders... the bread was scrumptious! The consistency is similar to those creamy and dark German breads and the taste is delicious. I strongly recommend it for breakfast, with butter and smoked salmon, with cheese, with scrambled eggs...

By the way, this bread goes to Susan's Wild Yeast, as a rentree after this very long summer...

Eager to know more?

Barley, rye and spelt sourdough bread

>> Wednesday, July 22, 2009


Being that I liked so much the taste of barley in this bread, I wanted to try barley in a softer bread. Can you guess where I got this recipe from? Mmmm, (clock ticking...) you're right, from Dan Lepard's book again! That's what I call tiresome. (I think I've gone a bit too far with the picture size, have I not? I go blinder everyday.)


And without further delay, here's the recipe, adapted for spelt sourdough. The original recipe calls for white wheat sourdough:

Barley, rye and spelt sourdough bread

  • 250 g spelt sourdough (100% hydration)
  • 300 g water
  • 175 g spelt flour (I used semi-whole)
  • 225 g rye flour (I used white)
  • 100 g barley flour (I used whole)
  • 1 1/2 tsp good sea salt
You know you can find everything you wanted to know about sourdough but never dared to ask in The Fresh Loaf.

Well then... mix all the ingredients except the salt. I didn't allow for the 20 minutes autolysis because rumour has it that the benefits are only really noticeable in white breads (my source for this statement is the book by Nancy Silverton, Breads from the La Brea Bakery. She's very clever, so I believe her). As this is rather a sticky dough because of so much whole and rye flour, I used my mixer for kneading, to make things easier. I added the salt halfway and I kneaded for around 5 minutes. And then all the dough went to a well oiled bowl, I covered it with a plastic shower cap and left it to ferment.


I then went out for dinner (I know this is not related to the recipe, it's just for you to see that I have some social life, not only blogging life) around half past eight and when I came back home around twelve the dough had more than doubled and looked beauuutiful... so plump and round, like a little baby... sorry, I get carried away. I decided to form a small boule and a ficelle for a change. Then I put both in the fridge inside a plastic bag, the boule in my one and only banneton (for the time being).

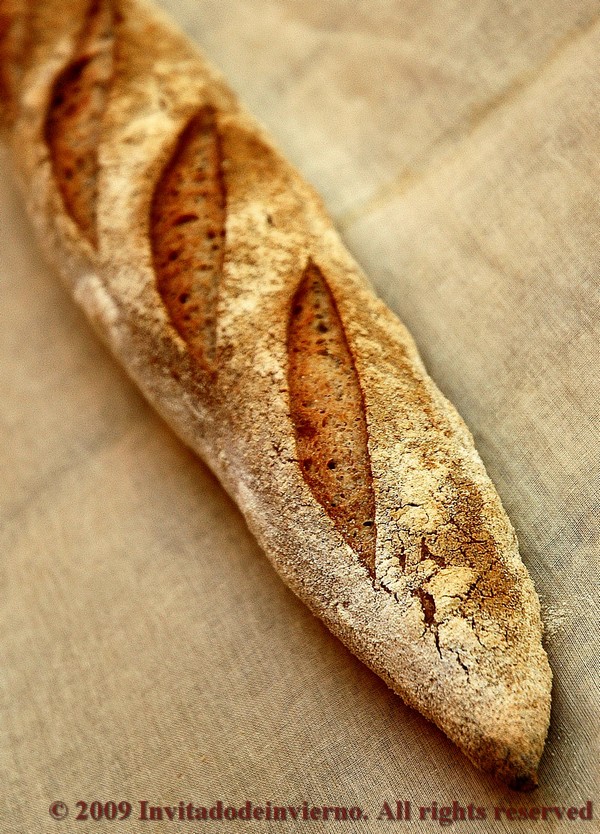
The next day I took them out of the fridge around ten in the morning, while I started the oven, because it takes nearly an hour to get to 250 ºC. Around eleven I put the ficelle into the oven, which baked nicely on the garden tiles for 20 minutes, and then I baked the boule inside my red dutch oven. Half an hour was enough. I always follow Peter Reinhart's advice and I control that the final inner temperature of the loaf is 92-95 ºC with roast-beef thermometer (I looove kitchen gadgets).


Result: ex-cel-lent, the ficelle was so cute and the boule... oooohhh, it's the first time that I get a a boule that looks like the ones in the books, with the nice banneton marks and all. Besides, I love the baking in the dutch oven, it's more thrilling that the bread is concealed and then when the time comes to open the treasure chest... I love it. The scoring was not so good, because I did it when the boule was already in the pot (mistake) and manouvering around it was more difficult. The crumb was dense, but soft and moist. Perfect for nordic accompaniments like smoked salmon, caviar with hard boiled egg and that type of thing. I guess I'm going to have it for breakfast the whole week.


Eager to know more?

Coca de escalivada

>> Wednesday, May 13, 2009


I started to bake "cocas" after buying my Thermomix ages ago... it doesn't matter how long, following the accompanying recipe book where only a slight fermentation is used. But now I've prepared it with sourdough. It's a long time since I last prepared a "coca" and I felt like eating it again, so I thought it would be a good idea to make it completely catalan and spring-like with a good "escalivada", wooonderful!

Cocas are pizza-like pies typical from Catalonia and the Eastern Mediterranean coast of Spain, including the Balearic Islands; I don't know the precise latitude where they stop being baked.... If there's someone from Murcia out there, show up and tell me if some similar pie is baked also there. I can't wait to know... please teach me! I've got an excellent cooking book written by an American, Colman Andrews, Catalan cuisine, (worth buying!) which includes several recipes and offers some explanation on "cocas" and their lore. Here it is, forgive my rendition, I'm translating from a Spanish translation of the English original:

"Coca is more or less a catalan pizza, a flat dough base which admits a wide variety of garnishes, whether sweet or not. (...) The word apparently is derived from the latin coquere, to cook, and it is used no only in catalan but also in the old Oc language of Toulouse and its surroundings.(...) Cocas are different from pizzas not only regarding their typical shape, but also in that cheese and herbs are hardly ever used for garnish. Besides they are traditionally served at room temperature"... Nice cultural touch for this blog, you know it needs it badly. And I add: "cocas" are indeed delicious at room temperature unlike pizza. Mrs. Coca, you've got a point there.

I don't know if the description of catalan "cocas" is valid for another region's, my information is scarce... mmm, I'd love to undertake a field study. Let me remind you, I'm willing to be taught. And after this cultural addition, it's time to get to the point. The amounts in the recipe make 2 medium sized "cocas" or one large "coca".

Coca de escalivada

Base dough (adapted from the Thermomix book, with sourdough)

  • 160 g whole spelt sourdough 50% hydration (use any sourdough type you like, you just need to adjust the final liquid depending on flour hydration)
  • 100 g milk
  • 70 g water
  • 50 g virgin olive oil
  • 300 g white spelt flour (according to the recipe I should have had to add 420 g white bread flour, but I had enough with 300 g)
  • Pinch of sugar (I skipped it)
  • 1 teaspoon good salt

The same recipe with normal fresh yeast and no sourdough:
  • 100 g milk
  • 150 g water
  • 50 g virgin olive oil
  • 500 g strong bread flour
  • Pinch of sugar
  • 1 teaspoon good salt
  • 30 g fresh yeast

Escalivada
  • 2 eggplants
  • 2 red peppers
  • 2 onions
  • 2 tomatos (these were leftovers, they are not really essential ingredients)
  • 1 clove garlic
  • Virgin olive oil to taste

You can cook the vegetables in the oven while you prepare the dough. Preheat the oven to 190 ºC. Brush some olive oil on the vegetables and put them in the oven on a baking tray. I coat the tray with aluminum foil because the juice the red peppers ooze is really hard to clean. And if some catalan is reading, maybe he'll kill me: it's traditional to cook the vegetables on a grill, barbecue or the like, till they are nicely browned and smoked, but... the oven is much easier, ahem. I even wrap the onions in aluminum foil so that they don't end up too burnt. When the vegetables are cooked and tender, in 30-40 minutes, take them out of the oven and put them altogether in a lidded pan for them to sweat and cool.


Meanwhile prepare the dough. I mixed a sponge first because my sourdough was past its prime at that moment and I was afraid to add all the ingredients at once, for fear that the dough would not rise sufficiently. Therefore I added the water, milk and 200 g flour to my sourdough and left it to proof for a couple of hours. Once the sponge was bubbling, I added the oil and the rest of the flour. Only 100 g more did the trick. And the salt. And to the fridge with it because I had no time to bake the coca until later on.

After 1 hour in the fridge and another hour tempering, I tipped it on a floured counter, I divided it in 2 (I put one half to freeze) and I flattened it with a rolling pin. It's traditional to make them in oval shape, with a raised edge to hold the filling and put them in the oven with a peel like a pizza. I normally put the dough in an oven tray, out of laziness... I get rectangular "cocas". And here comes another tricky question since in every corner "cocas" are made somewhat differently: many sources state that the filling is laid on the uncooked dough and then put in the oven, while in other recipes the dough is briefly blindbaked before, like some pies, and then you add the filling and take everything to the oven again to finish the baking. I take the easiest way, I bake everything altogether out of laziness (nice idea you're getting of me), but I've got to try the blind baking of the dough someday. I'm sure the result is going to be different, because the juices from the filling somehow interfere with the oven spring of the dough in the middle part of the "coca".

So let's add the garnish. When all the vegetables have cooled, peel the eggplants and peppers and separate them into strips with your hands. Slice the onion and tomatos. Start laying the vegetables on the dough. I advise to put the peppers on top for a more colourful dish. In several recipes we are advised to mince the garlic and spread on top of the vegetables before baking. I prefer to soak the minced garlic in 2 tablespoons virgin olive oil for a while and then brush the mixture on the vegetables... yummy (I used 1 clove garlic for half the dough and vegetables, I like it garlicky). Then you add plenty of salt on the vegetables to compensate for the sweetness of both peppers and onion.


Bake the "coca" in the oven preheated to 210 ºC for 12-20 minutes, baking time depends on whether you use sourdough or not. Mine took 20 minutes to bake. The result was excellent, the dough has a lot more flavour and character than the one you make with the original Thermomix recipe, of course. What I love about "cocas" is that they are equally good the day after and there's no need to keep them in the fridge, just at ambient temperature (of course not for longer than 2 days, 1 day in warm weather). You can choose to reheat them or not to your taste. It's a most delicious dish, unfortunately a lot less known than pizza... I vindicate "coca"! The "coca" also exists!

Eager to know more?

"Shapeless" sourdough bread with wine, rye and spelt

>> Friday, April 24, 2009

Look at the silly title. Maybe to call the post "all-round kitchen leftovers bread" or even "crisis bread", because of using up leftovers, would have been more accurate.

The shapeless thing is because it hardly has any shape, you can see it in the picture. I didn't feel like deflating the fermented dough very much, so I just folded it like a ciabatta, but without much interest. I had a lazy day. Another one. The leftover thing comes from using a mix of a white spelt leftover from a 5 kg sack, mixed with semi-whole rye and spelt, Dutch sourdough and last but not least, some Viña Mayor red wine which had been standing in my fridge for ages. It's not that I don't like wine, but it lately doesn't seem to agree with me and my partner-in-crime prefers beer... damn him. Mr. Lepard, the king of leftovers usage, would be very proud of me.

And... I told myself I could bake half the bread in the artifact that's shown in the picture, just to pass the time. The German name is "Römertopf", the same as the trademark. The meaning is "roman pot", quite nice. As far as I've read it's quite common in Germany. My mother got it as a gift thousands of years ago. She didn't find it interesting to use, so she passed it to me. She knows I love kitchen gear. So far I have used it mostly for roasting chickens. The result is delicious, they get a perfect browned and crispy skin, in spite of the lid, and you get plenty of sauce.

As in any clay pot the heat is well distributed and being that you must soak it in water for 10 minutes before putting it in the oven, all these moisture is supposed to be released inside the pot to keep the food tender and juicy.

Therefore, on a beautiful and warm April night I got down to work... ahem. I'm giving the formula but I don't know what for, it makes no sense:

Leftovers sourdough bread with wine

  • 390 g semi-whole rye and spelt sourdough, 50% hydration, just doubled in volume, perfectly bubbly
  • 130 g red wine (I was afraid to put too much and end up with a black-and-blue bread)
  • 80 g water
  • 120 g white spelt flour (the leftover flour in the sack)
  • 290 g semi-whole spelt flour
  • 2 teaspoons Himalaya salt
  • 2 tablespoons gluten (Mrs. Guru advice, though I didn't dare to add as much as she does
I put everything into my stand mixer (my precioussssss), except the salt, and I mixed it just to blend. I left it to stand for some 10 minutes and then I added the salt. After some brief shakes I left it in an oiled bowl, well covered with a night cap, to proof overnight in the fridge. By the way, after the advice of Nils the Great, I added the wine cold from the fridge.

The next day I took it out of the fridge and left it to temper at around 9 AM. Then I left it ferment for 5 hours, till 2 PM, with an intermediate folding exactly like a love letter. I never get these kind of dough, with spelt and rye, to grow much, so I never quite know when to stop the fermentation. I divided the dough in two parts and folded them like ciabattas, more or less, trying to deflate them as little as possible, and left them standing for another hour. Then to the oven for 45 minutes, previously heated up to 250 ºC. I put then one in the Römertopf (which had been lying in the oven after soaking) and the other one on the tiles in my oven. The latter got 4 water sprays along the first 10 minutes baking. The result is plain to be seen: The loaf in the pot looks wonderful, it's ripped in the middle without any score and has a white floured surface. And I can tell you I got my glasses all misted up when I opened the pot because of the amount of steam inside. The load outside the pot was a lot uglier, too toasted on some sides, and the flour on the surface is not apparent because of the water spraying, I guess. Also the loaf opened down under, uneducated behaviour, what an ill-mannered loaf.

And... the bread is delicious, with a more airy crumb than ever before, I guess because of the added gluten, I don't know. The crust is perfect for me, neither too soft nor too hard, crispy, crispy... mmmm so thrilling. I've already had two slices and I only regret that I've run out of butter, damn damn damn. It has the sour flavour of sourdough, but I hardly notice the taste of wine, it's not even evident in the color. My fear to add too much wine was pointless. Next time I will soak the bread in wine... hics.

Eager to know more?

Rye sourdough bread with cider

>> Wednesday, April 15, 2009


I'm still in the mood for baking bread, experimenting. Now with a semi-whole rye sourdough, originally developed from some sourdough my friend Lourdes, who lives in the Netherlands (dutch yeasties!), kindly brought me and adding only white wheat bread flour, everything from Rincón del Segura. And to use up some leftovers, with natural cider I had in my fridge for ages instead of water.


Rye sourdough bread with cider

  • 270 g semi-whole rye sourdough
  • 470 g plain bread flour
  • 260 g cider
  • 2 teaspoons salt
I used the same method as in the previous post, so I won't repeat it. The only difference is that I baked one of the bâtards inside my dutch oven and the other one outside, just on the tiles I have in my oven for baking stone. And as it can be seen in the picture both bâtards have a different look in spite of them having undergone the same process and having almost the same size. The bread baked in the dutch oven is the right one. Besides growing more symetrically, the crust had a more uniform and nice color, toasted and orange, instead of brownish. The dutch yeastie beasties liked my dutch oven... Both breads had the richest smell of cider in spite of it not being very evident in their taste. A delicious bread, with a crispy crust, with the scores nicely open and showing gluten fibers. Maybe the bread could have had a bigger oven spring even though the initial dough was not very liquid. No doubt I will use the dutch oven again for baking bread, it's a pity my oven is not big enough to fit the two dutch ovens I have.

Eager to know more?

Sourdough bread with rye and spelt

>> Tuesday, April 14, 2009

I'm in the mood for baking bread. I've taken up again on sourdough and feel like practising different techniques. I've got the impression that my stand-mixer doesn't bring out the best in the dough. I decided to hand-knead this bread, French method here. As I always end up with absurd amounts of sourdough because I refuse to throw away a single bit, the recipe I used is as follows:


Sourdough bread with rye and spelt

  • 500 g (18oz) whole spelt sourdough, 50% hydration
  • 200 g (7oz) refined spelt flour
  • 150 g (5.3oz) semi-whole rye flour
  • 150 g (5.3oz) water
  • 1 tablespoon wheat germ
  • 2 teaspoons Himalayan salt (or any other good salt)
  • 1/2 teaspoon gluten
  • Splash of maple syrup (optional)
All these flours are organic and come from Rincón del Segura. I added the maple syrup on an impulse, I'm hooked lately, it's deliciousssss.

To add gluten... well, if rye and spelt flours have less gluten than white wheat, why not supplement with some added gluten? I've found some references on adding gluten to rye breads, but I'm not sure of the ratio. I've got to make some tests.

Back to my point. Mix all the ingredients (I did use my stand mixer for this), except the salt. Leave it to rest for 10 minutes (autolysis) and then add the salt. Integrate the salt and put the dough on the counter. Be rough on the dough "a la française" at least during 10 minutes (the guy in the video talks about beating it 600 times), shape it into a ball, put it into an oiled bowl, cover with plastic and leave it in the fridge overnight.

Next morning take the bowl out of the fridge and let it warm up to ambient temperature. Rye and spelt dough doesn't rise as much as white wheat dough, at least mine didn't, so don't expect it to double in bulk. Shape the dough as you like, I made bâtards and heat up your oven to 250 ºC (480ºF). I usually leave the shaped dough to proof on an oven tray with a floured cloth and inside a plastic bag. This is a recommendation by Peter Reinhart. After one hour more or less I put the bread in the oven with my mock wood peel on my mock oven stone... and then sprayed it three times with water during the first 5 minutes. For a super rustic look I had sprayed the bâtons with water and sprinkled some rolled cereal just before putting them in the oven. They baked for half an hour, more or less, but I always check for doneness with a thermometer. According to Peter Reinhart the inner temperature must be somewhere around 95 ºC (200ºF) when properly baked, at least for white bread. And then out to cool down on a grid.

In the picture it can be seen that in spite of the dense crumb characteristic of rye and whole breads, my bread had some big holes in it. I don't really know where they came from. The bread had a delicious flavour. It was a great success in some family meal and there wasn't a single crumb left.

Eager to know more?

Sourdough ciabattas with spelt

>> Tuesday, April 7, 2009

I hadn't baked bread for days so I was eager to do it again. I spent 2 days affectionately feeding my little whole spelt sourdough, out of the fridge, till it was ready to be used for baking a bread. The black spots in the picture are raisins which I used to kick the yeastie-beasties resurrection. If you're interested in good tutorials and advice on bread baking and sourdough, check this site. There's everything you wanted to know about sourdough but never dared to ask.

I frequently use Ibán's recipe for a simple 2-pounds bread: 0.4lb sourdough, 0.6lb water and 1lb flour. (I talked about Ibán here.) As I had 0.88lb of sourdough instead of 0.4lb and I wanted to use it all, I adapted Ibán's quantities like this:

  • 0.87lb whole spelt sourdough
  • 0.37lb water
  • 0.77lb strong white flour
But I got lost somewhere on my way and I swapped the flour and water quantities... so after mixing with my precioussss radiant-red Kenwood Patissier stand-mixer I got something very similar to a baby's pap... what had happened? I had put my foot in it again? Yap. So I had to add tons of flour to get to something kneadable. Of course I didn't measure the excess flour, that's why I can't give you the exact amount. Typical of me. Scientific method is called. Thanks to my wonderful planning skills I ended up with something close to 3lb of dough. Never mind. Of course you have to add at least 2 teaspoons salt. I usually do it after the initial mixing and a 5-minute rest. Being that my stand-mixer doesn't admit any more than 1.2lb flour I had to knead by hand, not very good for my tennis elbow. I used Richard Bertinet method, perfect for very wet doughs like ciabatta's. Please check this video. I was extremely lucky to learn this method live from Ibán at La cocina de Babette. Incidentally, I strongly recommend the book by Bertinet "Dough" that, in spite of not using sourdough, it's a good book and includes a very illustrative video on his kneading method.

After the initial kneading I left my dough resting in a bowl for say... more than an hour and a half, I had some translations to do! I'm a working woman! So I had to postpone some Bertinet violent kneading till after lunch. Kneading is so amazingly good to get rid of all your frustrations... I kneaded it for 10 minutes till the dough was nicely elastic and then I put it in an oiled bowl covered with a nice plastic shower cap, the kind you get in hotel rooms (another thing I learnt at Babette).

Once the dough had doubled in volume, I spread it on a well floured counter, deflated it just a little bit with the palm of my hand and folded it in four ciabatta shapes. I carefully lay the four ciabattas in four nice linen-lined baskets, dredged in flour. There's no way I could explain it better than in this video. I put each basket inside a plastic freezer bag and put it in the fridge overnight.

The morning after I took them out first thing in the morning for them to temper and heated up my oven to the maximum (250 ºC, 480ºF). They had expanded quite a lot in spite of the cold.

I decided to try and bake them in a dutch oven, according to Bea's advice. This type of pot is called "dutch oven" in some places, but for me it's always been a "cocotte", the French name well known to many Spaniards, owners of a very famous cookbook by Simone Ortega. And I've had a "mademoiselle cocotte" for years that of course I had never used to bake bread before! Voilá!

I baked 2 ciabattas in the cocotte and the other 2 just on the garden tiles that I use as sophisticated baking stone... ahem. Frankly, dear, I didn't find a very clear difference between both methods. Maybe the crust color of the cocotte ciabattas was nicer, more golden and less chocolatey than the others. According to Bea of La cocina de Babette, spelt has a different behaviour than normal strong white flour. I should try with regular bread flour to really see the difference. Another pending test. By the way, I shouldn't say so myself, but the bread was de-li-ciousssss.

Eager to know more?

Followers

About This Blog

Lorem Ipsum

  © Blogger templates Palm by Ourblogtemplates.com 2008

Back to TOP