Related Posts Widget for Blogs by LinkWithin
Showing posts with label Christmas. Show all posts

Roscón de Reyes or Three Kings cake

>> Friday, January 7, 2011

Roscón Reyes 1

Roscón de Reyes is a strong tradition in Spain (check the pronunciation of roscón here). It is eaten on the Día de Reyes or Three Kings day and also on the previous eve, when traditionally presents are given, in remembrance of the presents the Kings brought to baby Jesus. Roscón de Reyes is a brioche-y bun in the shape of a crown, traditionally studded with colorful candied fruit and scented with orange and lemon zest and orange blossom water (these flavorings are essential to a Spanish roscón, otherwise you just cannot call it such). Today roscón has become so widely popular that the cakes are baked all over Spain in huge amounts since the beginning of January or even earlier, which inevitably means that in many supermarkets and pastry shops you find stuff of very low quality. Which inevitably leads, if you are fond of baking at all like I am, to prepare it yourself. And it is not difficult, only a bit time consuming as any yeast-leavened sweet bread is. But well worth the effort.


Roscón Reyes 5

The Christmas season has not always been so Christian as it is now. The origin of roscón has nothing to do with the arrival of the Magi to Bethlehem to worship the child, but appears to be related to the Roman Saturnalia. These were celebrations dedicated to the god Saturn in which the Roman people celebrated the longer days that started soon after the winter solstice. For these celebrations round cakes with figs, dates and honey were prepared, which were divided equally among the commoners and the slaves. Already in the 3rd century, it was usual to hide a dry bean inside the cake, and the fortunate finder was named king of kings for a short period of time agreed beforehand. This type of game was popular in the Iberian peninsula since the Roman era, he who found the bean had to pay the treat for the others... Nowadays a small figurine is hidden in the cake and the person who happens to find it is set to pay for the roscón. That is not possible if you make it at home, of course.

This recipe is uncomplicated and it works, although you need to have a basic knowledge of bread kneading and sweet doughs in general. It is adapted from my Thermomix cookbook. It yields 2 medium roscones or a large one.

Roscón de Reyes

For the flavored sugar

  • 120g icing sugar
  • Zest of 1 lemon
  • Zest of 1 orange (feel free to use more)
For the preferment
  • 40g whole milk
  • 30g water (you can use also 70g skimmed milk instead of the milk and water)
  • 10g fresh baker's yeast
  • 130g strong flour
For the main dough
  • 30g whole milk
  • 30g water
  • 70g butter, softened
  • 2 large eggs or 3 small ones
  • 15g fresh baker's yeast
  • 30g orange blossom water (it may sound like a lot, but roscón is not roscón without this)
  • 1 tbsp rhum (optional)
  • 450g strong flour
  • 1 pinch salt
  • The flavored sugar
  • The preferment
For garnish
  • Beaten egg glazing
  • Candied fruit
  • Sliced almonds
  • Sugar
  • Butter
    Roscón Reyes 3
  1. Fine, let's make the preferment first. Sift the flour, crumble the fresh yeast on top, add the liquid and knead until just mixed. 
  2. Then fill with tepid water a bowl where the dough ball can fit and put the dough in it. When the dough is fermented enough, the ball will float. It can take from 15 minutes to half an hour, it depends on the temperature on your kitchen. 
  3. In the meantime, zest the lemon and the orange and mix the zest with the icing sugar; cover and set aside to let the aromas permeate the sugar.
  4. Now for the main dough: sift the flour again, add the crumbled yeast, eggs, flavored sugar, orange blossom water, milk, water, preferment and salt (everything but the butter). Knead by hand or in a stand mixer with the hook attachment until you have an elastic dough. Make a ball and leave to rest for 10 minutes, covered. I prefer to let the dough stand for a while without the butter, as fat interferes in the gluten formation. Somewhere in the future I will divide the dough in two and try to add everything altogether to the first dough and delay adding the butter to the second dough, then check if the final cakes show some difference.
  5. After the rest, flatten the dough on the counter and smear the soft butter (I prefer to do this by hand), knead thoroughly to mix well. When the dough is smooth enough, make a ball, put into an oiled bowl, brush the surface with oil too and let double in bulk, well covered. Mine takes between 3 and 5 hours, but it depends on temperature again and on how active your fresh yeast is.
  6. Once the dough is doubled, tip it on the floured counter and flatten with your hands to degas completely. Divide the dough in two, then make a ball with each dough portion. Set one aside.
  7. Leave the first ball to rest for a couple of minutes. Prepare two parchment papers the size of your oven sheets, flour them lightly. 
  8. Lay one of the dough balls on one of the papers, then punch a hole in the middle with your floured fingers and start opening the hole. Stretch the ring of dough little by little. If it tends to shrink, let it rest for another couple of minutes before resuming your stretching. In the end the ring should be about 6-7cm thick and have an oval shape about 30x40cm.
  9. Brush the roscón thoroughly with beaten egg, cover with plastic (though the plastic shouldn't touch the roscón as it would stick to it) and let nearly double again, it will take at least one hour. Repeat the whole process for the second dough ball.
  10. Half way the rising, preheat your oven to at least 180-190ºC if your oven is of the air convection type like mine, somewhat closer to 200ºC if radiation type, but not higher than that (again, you know this depends largely on every oven).
  11. When the roscones have almost doubled, brush them with egg again, very carefully as the dough is a delicate thing at this point. Then you have two options: the traditional one is to stud the whole thing with colorful candied fruit as though the fruits were the jewels in the crown. The second one and my favourite (at home we are not exactly fond of radioactive-colored candied fruit in cakes) is to mix a handful of sugar in melted butter or in some water (just enough to get a crumbly mixture) and sprinkle on the roscón. Then sprinkle some sliced almonds too on top... delicious.
  12. Put the roscones into the oven for 10 minutes, then lower the heat by 10ºC and leave some further 10-15 minutes (cover with aluminum foil if you find they brown too much). After the baking time, take them out and let cool on the sheets.
This time my roscones were a bit overfermented, that is why they are a bit on the flat side. A good roscón should have a rounder section. Nowadays a lot of people like their roscón stuffed with whipped cream, ganache or many other fancy fillings, you just open the roscón like a giant bagel and pipe the filling, then replace the top half. I do not like this at all, but feel free to do it. I won't interfere, but I will lose all respect for you... However, of course you must have your roscón with hot chocolate... I admit no objections about it. I would be soooo disapointed if you would not...

Roscón Reyes 2

And by the way, this is my first submission of the year for YeastSpotting, Happy New Year, Susan!

Firma 200px

Eager to know more?

Chocolate turrón, Spain's Christmas fare

>> Friday, December 31, 2010

Chocolate turrón 2

A Spanish Christmas celebration is not such without turrón, as it should graze the table of every respectable family during the holidays. Everybody here likes turrón of some type, and those who do not are regarded as hopeless individuals. Turrón is a confectionery typically made of honey, sugar and egg white, with toasted almonds or other nuts, and usually shaped into either a rectangular tablet or a round cake (check here the Spanish pronunciation of turrón). As found in Wikipedia, Spanish turrón may be roughly classified as:

  • Hard (the Alicante variety): A compact block of whole almonds in a brittle mass of eggs, honey and sugar; 64% almonds.
  • Soft (the Jijona variety): Similar but the almonds are reduced to a paste. The addition of oil makes the matrix more chewy and sticky; 60% almonds.


Eager to know more?

Marzipan mousse with Christmas compote

>> Wednesday, December 8, 2010

Marzipan mousse 1

This is a reinterpretation of two typical Spanish Christmas sweets, marzipan and dried fruit compote, combined in one scrumptious dessert. The mousse recipe comes from a book by famous Spanish pastry chef Paco Torreblanca and for the sauce I used my method of cooking the dried fruit in sweet wine, without sugar added as marzipan already has plenty of it. Also it is a great alternative for those who find marzipan overly sweet or heavy... this is a lighter way to eat it.


Marzipan is one of those culinary treasures that we do not appreciate in full because here in Spain we all grow up with it and that makes it all too familiar for us... and we take it for granted. As Claudia Roden tells us, Spain is the largest commercial producer of marzipan in the world, with the beautiful town of Toledo as the center of this trade. In Toledo there is a marzipan museum, where this delicacy is described as the ancient symbol of harmony between Arabs, Jews and Christians in the city during the Middle Ages. In Toledo marzipan is made by grinding equal weights of blanched almonds and sugar until the almond oil that is released turns the mixture into a smooth paste. This paste is modeled with traditional molds and baked in the oven until it browns on top. I will say that the Germans (I have relatives in Germany) also have popular varieties of marzipan, with the peculiarity that their marzipan always carries a tiny ratio of bitter almonds, unlike the common Spanish marzipan. I assure you that bitter almonds give it a very interesting twist.

This mousse caught my attention because it seemed a very different way to taste something so ubiquitous and familiar to Spaniards as marzipan.

For the mousse:

  • 400g milk
  • 500ml whipping cream
  • 250g marzipan
  • 8 sheets of gelatin
For the compote:
  • 100g dried apricots
  • 100g seedless raisins
  • Sweet wine, preferably Muscat
Marzipan mousse 2
  1. Soak the gelatin sheets in cold water as per the package instructions.
  2. Heat the milk to 50°C approx., cut marzipan into pieces and add to the milk. Beat well in a blender or electric mixer until completely dissolved. The mixture must be fine and without very noticeable chunks.
  3. Add the drained gelatin sheets to the mixture and stir well to dissolve. Leave to cool to about 30°C.
  4. When the warm milk and marzipan mixture is tempered, whip the cream to stiff peaks. Add the liquid to the whipped cream in four or five batches and mix gently each time, being careful not to deflate the cream too much.
  5. When everything is homogenized, pour the mousse into whatever molds you want to use. Pastry rings are great for these matters, especially if we want to make small portions, but it is also possible to use a rectangular loaf dish and cut the mousse into slices. The mousse can also be poured into a round mold to use it as a layer in a cake. To easily unmold the mousse first cool it in the refrigerator and then freeze it in the freezer, better overnight. I place the pastry rings on a baking paper placed on a tray. If you use another type of mold, it’s better to line it with plastic wrap to easily unmold the mousse.
  6. The compote-sauce is prepared by cooking the dried fruit covered with the wine. Cook until the fruits are softened and the wine has thickened to your taste and turned into a beautiful syrup. I cut the fruit in small pieces for a more homogeneous look. Let cool. You can make this several days before use, for it is better to leave it to rest so that the flavors mingle.
  7. The day you want to serve the mousse, take it out of the freezer at least 2 hours in advance and transfer it to the fridge. Serve it on a beautiful dish and then top with the compote. This mousse, besides being a different way of eating marzipan (not exactly lighter...), can take advantage of all the marzipan leftovers after the Christmas celebrations.
There you have a very elegant dessert made with most traditional ingredients... this is going to turn into a classic at my household, I am sure. I hope you enjoy it in the upcoming Christmas.

Eager to know more?

Mulled rosé wine

>> Sunday, December 27, 2009

mulled rosé wine
I love the spiced hot wine typical from Northern and Central Europe, mulled wine, glühwein, whatever... Two of my in-laws live in a nearby street and they have a German neighbor. I remember a copious snowfall, some five years ago, that covered all the village streets in white. It happened on the weekend, so we immediately went out on the street with the kids for a nice stroll on the new snow. This German guy didn't think twice and he went out on the street offering German stollen and some glühwein to celebrate the snow with his neighbors... he was chatting with my in-laws, so we were lucky to be invited. That's exactly the perfect way to taste glühwein...


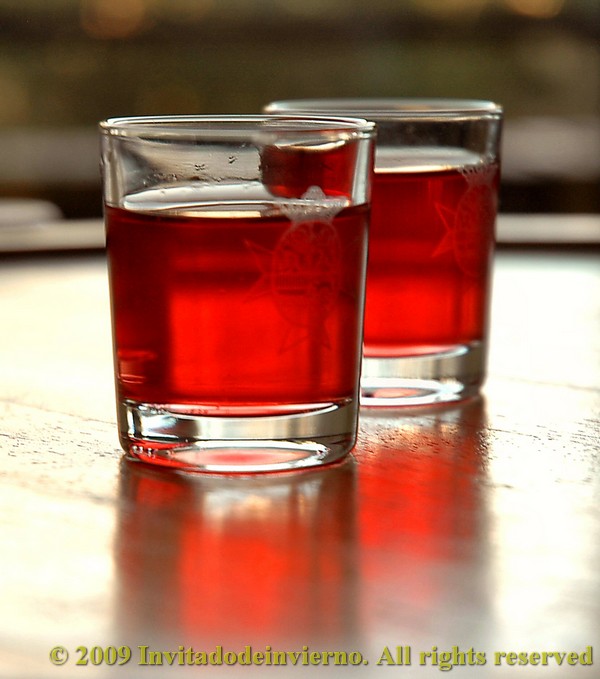
This time I've bottled some spiced wine in cute bottles for Christmas gifting. For a more transparent and appealing look I've used rosé wine, even though the tradition calls for red wine... I hope the Germans aren't offended, sometimes I'm very disrespectful regarding traditions... I've also made it sugar-free, to help relieve the richness of the Christmas fare.


mulled rosé wine
Mulled wine or glühwein
Yields 3 half a liter bottles

  • 2 bottles of good rosé wine (but not excellent!)
  • 2 sticks cinammon
  • 1 vanilla pod
  • 4 whole cloves
  • 4 allspice grains
  • 4 tbsp agave syrup (7 or 8 tbsp sugar, though the sweetening depends on the type of wine and personal taste)
  • 2 tbsp ginger syrup (optional, just if you happen to have it handy, otherwise add another tbsp agave)
About the ginger syrup, I had some leftover from candying ginger, so I used it.

Put all the ingredients in an enameled pot and heat the whole thing up, but don't bring it to a boil. Just leave it to infuse. As we were not going to drink it straight away, I left it to rest overnight, for all the flavors to develop.


mulled rosé wine
The day after filter the wine (I used a paper percolator coffee filter) and transfer to bottles. You can add some spices to the bottles. I added some allspice which I thought would look good at the bottom of the bottles... but it floated, damn. Give the bottles to your loved ones and advise them to serve it hot.

Mmmm, how I long for the snow now...

Eager to know more?

Spanish Christmas biscuits: Hazelnut mantecados

>> Tuesday, December 22, 2009

hazelnut mantecados
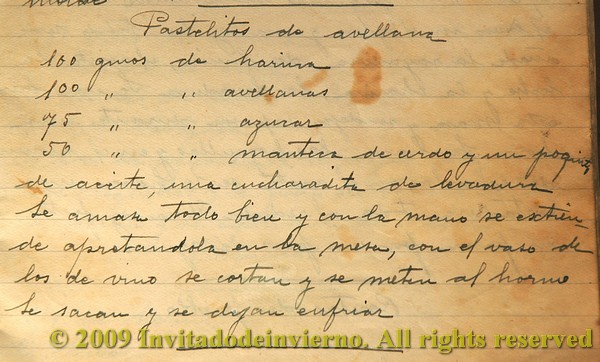
This recipe comes from a recipe notebook my grandmother kept. A few days ago we tidied up the attic (some of the boxes from our last moving are still there... already for 9 years!), and D. found it when I thought it had been lost ages ago. So to celebrate this reunion, I decided to try one of the recipes (for the first time!) and then use the product for my Christmas gifting...


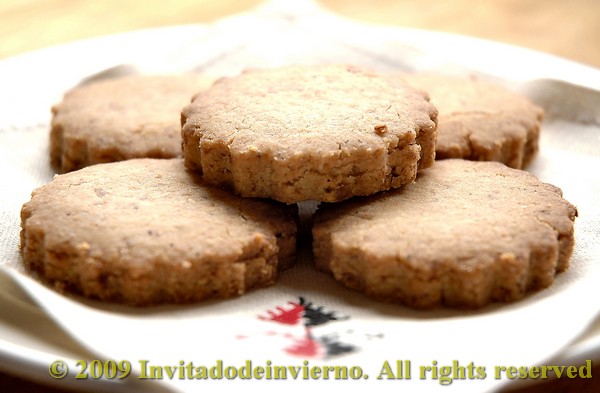
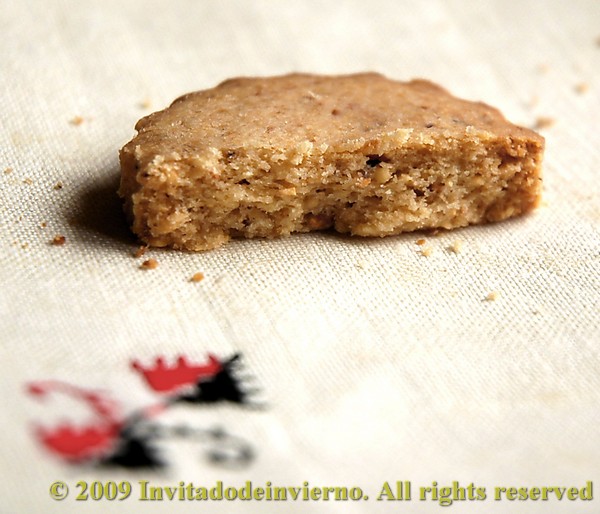
Mantecados are a very typical Christmas sweet in Spain. Mantecado means made of manteca, that is, pork lard. This sweet is traditionally made with lard, ground nuts, sugar and flour. According to the web Sabor mediterráneo (Mediterranean flavor):

Between September 1st and the beginning of December, in the Sevilian town of Estepa 20 million kilos of mantecados, polvorones, alfajores, and roscos de vino are made and sold... Because regarding mantecados, Estepa is the same as Jabugo in respect to jamón or Jijona in respect to turrón. The pastry tradition of Estepa originates from the Arabs, but the tradition regarding mantecados is a lot more recent, possibly dating from the 15th or 16th century, when the inhabitants of the area sought to put all the lard surplus to good use. This lard derived from the pigs that were slaughtered in the winter.


My grandmother calls these little biscuits "hazelnut pastries" in her notebook, but they are suspiciously similar to mantecados... Here's the recipe:

Mantecados de avellana (Hazelnut mantecados)
Yields between 25 and 35, depending on the size of the cutter.
  • 200 g all-purpose flour
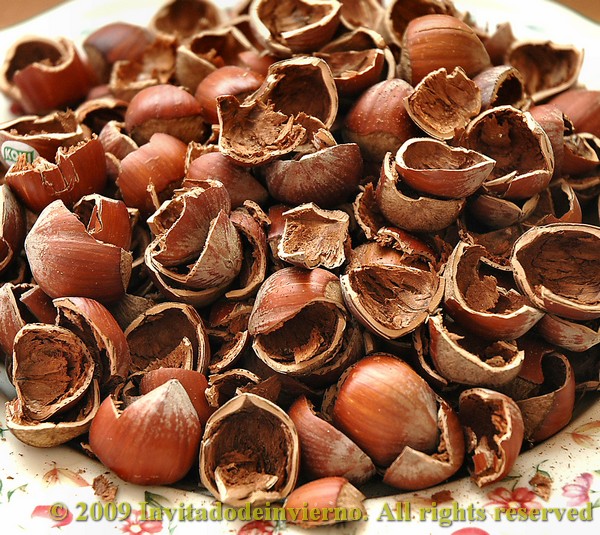
  • 200 g hazelnuts (please use unroasted and unshelled hazelnuts where possible. Shelling and roasting them is not such a great effort and the flavor is much better. If you don't like hazelnuts, you can use almonds.)
  • 150 g powdered sugar
  • 100 g pork lard (good quality, it mustn't smell)
  • 2 tsp baking powder
  • A dash of olive oil

My grandmother didn't give any direction on the type of sugar used, oven temperature, baking time, how to knead the dough... typical from somebody who knew her way around in pastry making. Unlike me. The first time I tested the recipe I concluded that the sugar had to be powdered, because otherwise you notice an annoying crunch with every bite.

First shell the hazelnuts. Then roast them in the oven, preheated to 120 ºC, 20 minutes is enough in my case though this depends largely on your oven. Watch the hazelnuts closely as they can burn easily. Don't let them brown excessively. When the skin is cracked, take them out and leave to cool. They can be easily shelled just by rubbing them between the palm of your hands. Throw the skinned hazelnuts in a food processor and grind them. Don't overdo it or the mixture will be too oily. We don't want them to release their oil, we're interested in a somewhat coarse meal. Then mix the hazelnut meal, the sugar and the flour. Melt the pork lard. I skipped the baking powder and the oil, I think they're not necessary at all. Pour the lard over the rest of the ingredients and mix by hand. The dough may seem very crumbly at first, but after a while, when the lard is absorbed by the solids, you have to be able to make a lump of dough that stays amalgamated by clenching a portion of dough in your hand. It's difficult to explain what the texture needs to be to someone who've never eaten mantecados. The dough has to keep together but stay somewhat crumbly at the same time. It may be necessary to add some more lard if the dough is still too crumbly after say 5 minutes. Add it little by little. Then roll the dough to 1 cm thickness (I made them thinner... careless). The edges can crumble, but they can be compacted by hand. Then choose a simple shaped cookie cutter, a small glass or something similar. Don't use complicated shapes. The first time I tried this recipe I used a very lovely and tiny moose cutter. The biscuits looked good, but all the moose's legs ended up amputated... these biscuits are too fragile and delicate. What a horrible massacre. One minute's silence for the moose's legs...


hazelnut mantecados
Well then, cut the shapes and transfer them to a parchment paper or a silicone sheet. Put it in the fridge at least half an hour for the lard to set. Preheat the oven to 180 ºC. Put the mantecados in the oven and bake for 10-12 minutes in a convection oven. Watch them closely to prevent the edges from burning.

When they are nicely browned at the edges, take them out and let them cool on a rack. Sprinkle with powdered sugar when cool (I didn't do it because they were sweet enough for me, but it's a matter of personal taste). The smell of hazelnuts permeates the whole house... And they are incredibly easy to make.


hazelnut mantecados
With this recipe I want to wish you all Merry Christmas and a Happy New Year and all those things... hope you've been good and Santa brings you all you asked for... I love to watch movies at Christmas and besides some good ol' Spanish classics, I always go back to this one all-time classic... don't you think it's time to revisit it?


Eager to know more?
Sugar-free Christmas compote, Spanish style

>> Tuesday, December 15, 2009

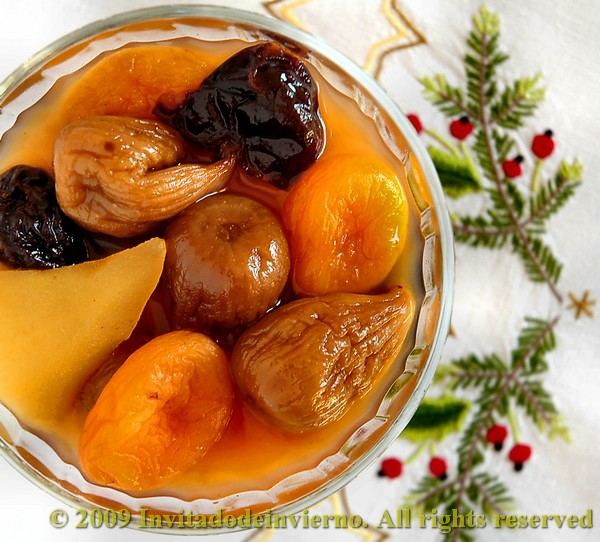
Christmas compote
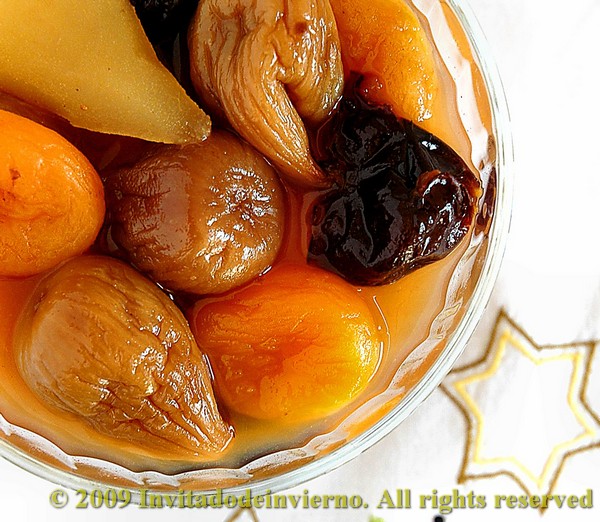
This is a very classic dessert in many countries of Europe, with different tweakings. In my crusade against common sugar, I decided to try and make it sugar-free. It's incredibly easy and you can get as tipsy as ever while eating alcohol-oozing-fruits, but with less bad conscience... my family is gonna give me a medal for that, I know it. Well, most of the alcohol just evaporates during the cooking. Pity. Instead of using red wine for poaching the fruit, which is the traditional ingredient in Spain, I prefer sweet wine, preferrably light in color for a nicer look and a milder taste. I looove sweet wine and besides you don't need to add as much sugar or sweetener in this case, as the sweet wine is... well, sweet, brimming with healthy fruit sugars.


Regarding the fruity ingredients, it's totally up to you. I'm giving here the fruits of my choice, but that's very personal. Some people prefer it with more fresh fruit, others with more dried fruit... Here's my take on this dish:

Sugar-free Christmas compote, Spanish style

  • 250 g pitted dried apricots
  • 100 g pitted dried dates
  • 100 g pitted dried prunes
  • 200 g dried figs
  • 2 firm pears (Conference for example)
  • 500 ml white sweet wine like moscatel (you can use a tawny port too)
  • 500 ml water
  • 1 stick cinammon
  • 1 tsp allspice (optional)
  • 1 dash orange extract or 1 tsp orange zest (also optional)
Some people like to add apple too, but the apples must have a very firm flesh, so that they don't "deconstruct". Please use the best quality dried fruit available. It makes a difference. In Spain dried fruit is very popular and usually of good quality. Dried fruit is eaten in tons around Christmas.

The preparation is pretty straightforward. Peel the pears, quarter them and put all the ingredients together in an enameled pot. Bring to a boil. Simmer until all the fruit is tender, around 40-50 minutes depending on the ripeness of the fresh fruit and the freshness of the dried fruit. I boil the compote without any sweetener and then try for sweetness when done, because you can always adjust it later. In this case the result was, in my humble opinion, sweet enough, which means I was using a VERY sweet wine. So I didn't add anything else. If more sweetness is needed, please avoid filthy synthetic sweeteners like aspartame and use natural sweeteners like agave syrup and maple syrup.

Christmas compote
If you find the liquid too thin, just add some powdered gelatin or agar-agar to thicken it a bit. Remember that without sugar you don't get a syrupy liquid.

There's something that's often overlooked when subtituting sweeteners, whether natural or synthetic, for sugar: its preserving properties. Sugar is a hygroscopic substance, which means that it "scavenges" the water surrounding its molecules. Therefore the sugar molecules "steal" the water that microorganisms need to thrive. I can't give you the reference where I found this... I don't remember. Believe me, I'm a chemist... (pause)... (silence)... you, at the end of the class, I won't tolerate any giggling... Well, that's why this sugar-free compote must be kept in the fridge and I guess its "shelf-life" will be shorter than if it was sugar-full. Of course, you can always store it in jars and sterilize them, like any other preserve. But I'm sure the compote will have no time to go bad at my home. This compote is delicious served with vanilla ice-cream or on a waffle cup with custard... yum.

Eager to know more?
Followers

About This Blog

Lorem Ipsum

  © Blogger templates Palm by Ourblogtemplates.com 2008

Back to TOP