Related Posts Widget for Blogs by LinkWithin

Balsamic tomatoes and carrots salad

>> Friday, July 30, 2010

Balsamic salad 1

I like to confit tomatoes in balsamic vinegar and salt, at a low temperature in the oven. It's very convenient when you find yourself in the middle of a tomato surplus, for example, when you buy 4 kilos of cheap tomatos and forget that you already had another 3 kilos sitting in the fridge... that can happen... and maybe you don't feel like drinking 3 liters of gazpacho. Making the tomatos in confit allows you to still eat a lot of them, but in a different way. And they keep for long in the fridge. By the end of Winter, when you already start to find edible tomatoes at the market (unlike the disgusting insipid things you get in December) here in Spain, it's a very good way to eat tomatos. I find it hard to swallow cold salads in the middle of the Winter. And they're very versatile, you can serve them as a side or accompaniment to almost any dish, either cold or warm. This technique can be applied to other vegetables, like carrots in this case.


Balsamic salad 2

This salad couldn't be simpler, sprinkled with some virgin olive oil or basil cream... easy and delightful. And of course, some other veggies can be "confited" as well. Just take into account the different cooking times.

Salad of tomato and carrot en confit
These are the approximate amounts per person:

  • 1-2 tomatoes, depending on size (plum tomatoes or any firm flesh tomatoes are best)
  • 1 tender carrot
  • Balsamic vinegar (of not too bad quality...)
  • Virgin olive oil
  • Salt
Balsamic salad 4
  1. Preheat the oven to 150ºC.
  2. Quarter the tomatoes if they're not too big (cut them in 6 or 8 if needed) and lay them on an oiled oven dish, skin down. Drizzle each piece with balsamic vinegar (if you have spray bottle, use it) and sprinkle with a good pinch of salt. You can add some more oil too if you like. Bake them for 3/4-1 hour, depending on size and type of the tomatoes, or even on how soft you like them.
  3. Peel and cut the carrots in thick sticks and season them in the same way, plus add 1 cm of water to another oven dish. Bake them covered around 3/4 hour. Unlike tomatoes, which are very watery and need to dry in the oven, carrots are much drier and would dry excessively if you don't cover them. Prick them to test for doneness, as it depends very much on the carrots freshness.
  4. When the veggies are cooked, let them cool. Then lay them on a pretty dish and drizzle with a generous amount of olive oil or this basil cream.
Tomatoes en confit are delicious, they seem to unleash all their sweetness. But many people, like D., dislike overly soft tomatoes. So refrain from preparing this dish if you're one of those people.

Balsamic salad 3

By the way, the blog will be closed for some time... I deserve some vacation time too! We're making a trip through Germany, Denmark and The Netherlands by car. I must carry an extra suitcase with me, just to bring back all the special ingredients and kitchen gadgets I will surely buy... goodness. Take care of yourselves. Read you soon.

Eager to know more?

Suikerbrood or Dutch sugar loaf

>> Tuesday, July 27, 2010

Suikerbrood 3

I have a soft spot for The Netherlands. I spent a year and a half living there, in Delft immediately after leaving college, 20 years ago now... unbelievable. When I look back I only regret that there were a lot of things related to my present hobbies that I didn't enjoy, like cooking and lacemaking (being so close to Belgium!). Mmm, those were the times when all my time was really mine, all the money I earnt was for me... No responsibilities, no mortgages, no children... Yes, those were the times. We'll be spending part of our next vacation in The Netherlands, visiting good old friends, riding bikes and watching the tall ships. Therefore with rather anticipated nostalgia, I felt an urge to prepare this delicious and very typically Dutch sweet bread, suikerbrood, meaning sugar loaf, for the first time. And surely it won't be the last.


I've searched the whole net for information on this bread, but the Dutch food blogging community doesn't seem to be as large as other countries', like mine for example. The information in Wikipedia is rather silly:

Suikerbrood or sûkerbôlle in Frisian, is a bread typical from the Northern region of The Netherlands, Friesland. Its shape has developed from a former round shape to a loaf type bread. The Frisian sugar bread contains 40% sugar and cinammon too. This bread is baked in some other parts of The Netherlands though, like Limburg in the south and North-Brabant, where the sugar content is lower (25%) and no cinammon is added. In Friesland this bread is presented as a gift to women who have just given birth to a girl.

Suikerbrood 1

It's a pity I couldn't use sourdough. I'm not baking very much lately because of the scorching heat, so my sourdough is quietly resting in my fridge. The real bread is fluffier than mine, I remember it being almost as airy as a pannetone, but the directions in the recipe I found called for a second proofing of only 15 minutes (???!!!). I proofed it 45 minutes and maybe it needed even somewhat longer. I must remark though that I used less yeast, because the recipe called for 25g fresh yeast for 1/2kg flour, and that's a lot in my opinion. The final volume after baking should be almost 4 times the unleavened dough, my bread was slightly over 3 times. But it was delicious all the same. This bread includes ginger syrup, which is hard to find here in Spain. So I had to prepare it myself to be faithful to tradition... recipe follows. The ginger syrup gives the bread a subtly special flavor.

Suikerbrood or sûkerbôlle (adapted from Living on bread and water)
  • 500g strong flour (I used spelt. The original recipe called for all-purpose flour, but I think this is heresy when you use baker's yeast)
  • 10g salt
  • 1 tsp ground cinammon
  • 3 tbsp ginger syrup
  • Milk to be added to the syrup up to a volume of 200ml
  • 15g fresh yeast (if you can only use 10g and retard the first fermentation in the fridge overnight, the bread will sure have more character)
  • 75g melted unsalted butter
  • 2 eggs
  • 75g sugar (the type of sugar the Dutch use for this can't be found in Spain. See how it looks here. You can use sugar cubes instead, crushed with a rolling pin. This type of sugar melts during the baking and leaves a lot of sweet and gooey pockets in the bread... Though the original recipe calls for 150g sugar, I preferred to reduce it)
Ginger syrup (from the recipe for candied ginger by David Lebovitz)
  • A couple of fresh ginger roots
  • 1 cup sugar
  • 1 cup water
  1. Peel the ginger and slice finely.
  2. Put everything in a pot and boil till the ginger is tender, or until the syrup scores 106ºC. I'm a primitive being and I didn't measure anything though. You just need a minimum of 3 tbsp of the damned thing. And you can keep the candied ginger for your next Christmas confections.
Suikerbrood 2

Fine, now that you have your ginger syrup, proceed to preparing this utterly delicious and utterly Dutch bread:
  1. Pour the syrup into a measuring cup and add the milk till you get 200ml of liquid.
  2. Add the eggs.
  3. Melt the butter and add it too; mix well.
  4. Weigh the flour and crumble the yeast in it. Add the liquid ingredients and start kneading till you have a reasonable gluten development. My dough was a bit on the dry side, maybe that's another reason why the crumb was on the dense side.
  5. Put the dough in an oiled bowl, cover with plastic and leave to double in bulk. Mine took less than one hour yesterday because of the heat in my kitchen. Simply amazing. I can't imagine what could have happened had I added the original amount of yeast. I would have needed a machete to get into my kitchen.
  6. Preheat the oven to 170-180ºC.
  7. After the first proofing, tip the dough on the countertop, deflate it and shape it into a large rectangle by sliding your fingers underneath the dough and pulling. The rectangle needs to be as wide as the length of your loaf pan, so that the rolled dough fits into the mold. I don't have photos of the process as it was almost night when I started and I don't have the proper photography props. I admit donations though. And my baking inspiration doesn't arrive when it's called, I couldn't tell her to come back the next day... no no no. My dough had a wonderful gluten development I don't always get, because I could stretch it a lot without much effort. The heat also has something to do when the dough carries butter.
  8. When the dough is well stretched, scatter the sugar pieces and sprinkle the cinammon. Roll the dough carefully to make a cylinder, lift it and put it into the oiled and floured loaf pan. Cover with plastic film and let it at least double in volume.
  9. Bake it 40 minutes. Watch it every now and then to prevent it from browning too much on top. When done, unmold on a cooling rack. Let it cool.
If you like bread that is sugary and smells of cinammon, this is up your alley. Undescribable if you have it in a veranda with tons of butter... like the Dutch do... eet smakelijk.

And I'm sending this one to Wild Yeast, for the weekly YeastSpotting.

Marken 2005

Eager to know more?

Indecent chocolate cake

>> Monday, July 19, 2010

Chocolate cake 1

Now that I've got your attention...

That's the way some people advertised their parties while I was at college, with a notice where you could read SEX in a large font... followed by the details of the party in a much smaller font. Well, this post beginning has to do with the author of this recipe, the very well known British chef Nigella Lawson, the queen of food porn (just take a look...). Her recipes can send your blood sugar sky-rocketing and raise your cholesterol so much you'd need a chisel to clear your arteries. In fact I found the recipe already tweaked by Heidi of 101 cookbooks. She praised it so much it made me curious. So today it's a sweet and chocolatey day. I hardly try this kind of delicacy when I make it, but my children often appreciate these indecently caloric cakes, just because they don't put on weight (so far) and they can do it. Yes, they can.


I was intrigued by the sinking and deflating quality of the cake that Heidi talked about in her post. Oddly enough, my cake didn't sink although it didn't really raised a lot. It was extremely soft and moist (indecent, I tell you), I guess it has to do with the boiling water addition, which I had never seen before added to a cake. When you add the water it feels as if the chocolate in the batter melted again. My family loved this cake, I strongly recommend it, in spite of the health issues... And I dared to turn on the oven during a rather brief break from the scorching heat of this month.

Chocolate cake 2

Indecently rich chocolate cake

  • 145g spelt flour (all-purpose will do too)
  • 1 tsp baking powder
  • 1/2 tsp salt
  • 225g softened butter
  • 215g muscovado sugar
  • 2 large eggs
  • 115g bittersweet chocolate
  • 250ml boiling water (I really only added 2/3 of this amount)
  1. Preheat the oven to 190ºC.
  2. Sieve the flour, mix with the baking powder and the salt and set aside.
  3. Melt the chocolate in the microwave or a double boiler and leave to temper.
  4. Cream the butter in a stand mixer until light and fluffy then add the sugar little by little while still beating. Scrape the bowl every now and then for all the butter to homogenize. When all the sugar is added, add the eggs one by one, beat well to mix.
  5. Bring the water to the boil.
  6. Add the melted chocolate at a slower speed and mix thoroughly.
  7. Lastly, add the solid ingredients and the boiling water, first 1/3 of the flour mixture, then 1/3 water, mix and repeat 2 more times. I didn't add all the water because I found the batter too thin. Mix well.
  8. Line a loaf pan with parchment paper, oil it well using a brush (I use tigernut or sunflower oil). Don't skip the paper, otherwise you just won't be able to take the cake out of the pan. Bake for 30 minutes, then lower the temperature to 160ºC and bake for another 15 minutes. Try for doneness (although it's difficult to make out, as it's quite sticky), and leave to cool in the pan: don't unmold while still warm, as it would crumble down; it's very fragile and crumbly.
Chocolate cake 3

I love to use spelt in cakes and cookies. But regardless of the type of flour, what I always try is to use stone-ground flour, because it contains all the essential oils of the grain germ, something that's missing in conventional industrially milled flour. When the flour contains the germ nutrients it goes rancid more quickly... therefore if you get rid of the germ the shelf-life is extended... so that large producers and distributors can speculate. If you want to know more about this fascinating subject, read Michael Pollan's In defense of food.

Chocolate cake 4

Eager to know more?

Remojón or codfish and orange salad

>> Sunday, July 11, 2010

Remojón 2

There is little doubt that this is the best time of the year for salads, that is in the Northern hemisphere of course. And if they're really nourishing, they can be a whole meal in themselves. That's very convenient when your kitchen is above 29ºC (84ºF) like mine these last days. I'm tending to avoid any meal that requires fire and oven as much as I can. But being away from the kitchen is hard for me, mainly because I'm used to the opposite. I don't seem to know what to do with the spare time I suddenly have in my hands. Today I'm posting a very simple and refreshing salad, ancient and traditional in many places of Andalusia, with such an original combination of sweet and savory flavors that would make many a modern chef envious. That's exactly what popular genius is all about. Being inimitable.


Remojón as a salad (there are also warm brothy versions), as far as I know, has countless variations in the provinces of Almería, Granada and Málaga, which are usually prepared on the basis of oranges and salted cod. In some places, the cod is added without desalting, only flaked, in others the fish is baked in the oven, even raw in some... the variations are endless. By the way, check the pronunciation of remojón here (and yes, it's my own voice).

The presence of oranges talks about a dish that was once typical of the Fall/Winter season, in fact consumed at the time of the yearly pork slaughter, which in many places of Spain occurs around Saint Martin's, on November 11th... but now we have insipid fruit grown in greenhouses at any time of year, or other brought from the far side of the globe spending a lot of resources while the Southern hemisphere farmers are hardy paid enough to live... oops, sorry, I get carried away. In short, in early summer we now have oranges available, so the alleged seasonality of this dish is no longer such.

Remojón
Yields 2 servings

  • 250g good salted codfish
  • 2 smallish oranges or 1 large orange
  • 1/4 onion
  • 1 good handful of whole black olives
  • 2 hard boiled eggs
  • Virgin olive oil
Remojón 1
  1. Desalt the codfish by leaving it to rest in water overnight in the fridge. You can also use unsalted cod, of course, only the dish won't have that distinct saltiness. I like the cod on the salty side, the contrast with the sweet flavors is irresistible. The next day, drain the fish, put in an oven dish, drizzle with olive oil and bake in the oven preheated at 180ºC, taking care not to overbake it. Take out of the oven, let cool, flake it and set aside.
  2. Boil the eggs for 10 minutes, let cool, peel them, cut them in fourths and set aside.
  3. Peel the oranges and get rid of as much pith as you can. Cut them in slices or dice; set aside.
  4. Finely dice the onion.
  5. Pit the olives.
  6. Place the ingredients on the plates in the following order: orange, onion, codfish, olives and eggs. That is if you want to make the salad according to my taste, but if you prefer to contradict me, do as you like. I personally prefer to skip the vinegar with this kind of fruity salads, but adding a good vinegar is the traditional thing. So you have my permission to do it. I'm that magnanimous. And lastly drizzle a fair amount of olive oil on the salad.
Remojón 3

The combination of the sweetness of the orange with the saltiness of the fish, the freshness of the onion and the bitterness of the olives is like an adrenaline dose... I mean it. Just try it.

Eager to know more?

Ponche segoviano or Segovia layer cake

>> Tuesday, July 6, 2010

Ponche segoviano 3

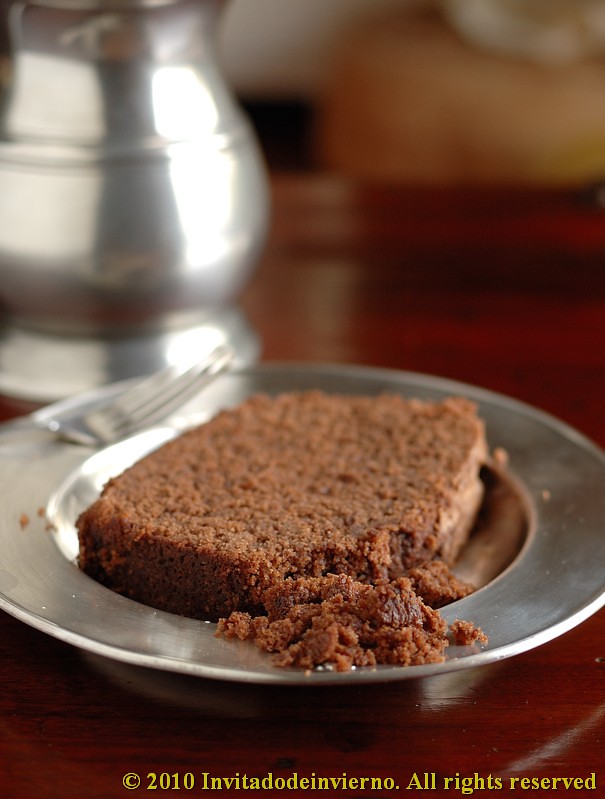
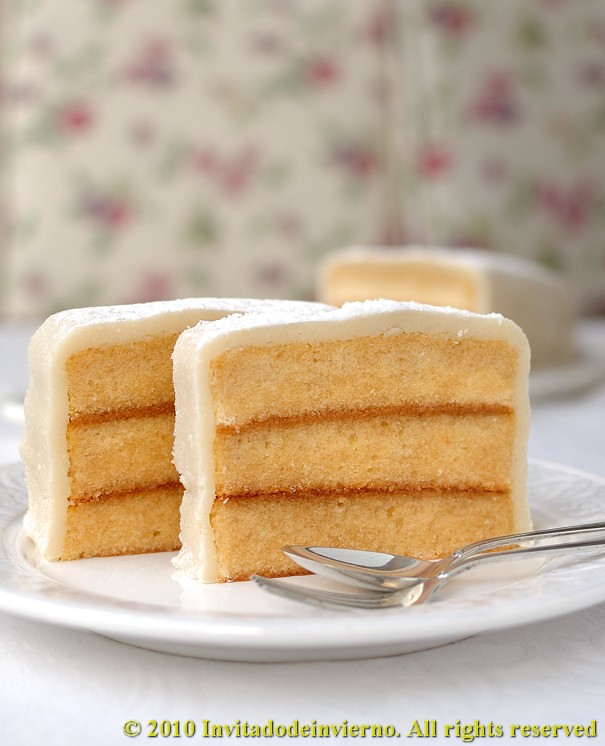
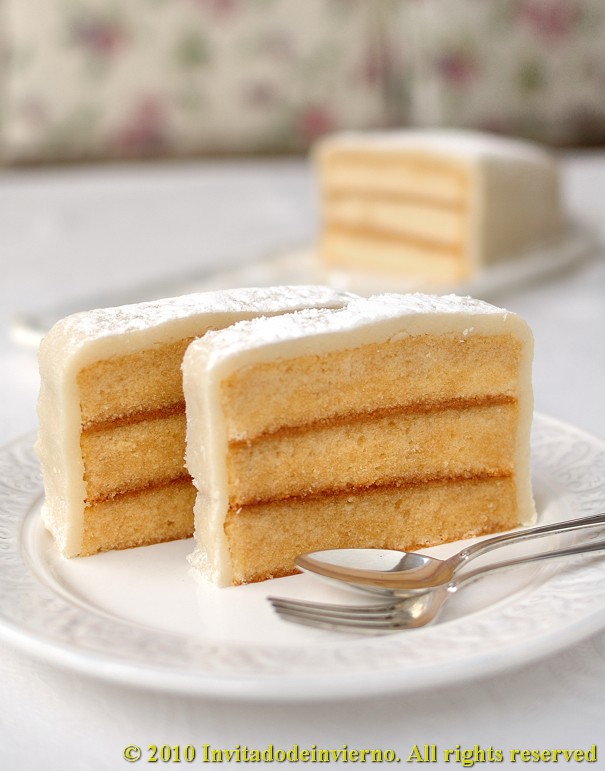
I have a soft spot for Segovia. It is such a beautiful city, one of my favourites. For Madrilenians like me, Segovia has always been one of the classic day-trips at any time of year (it's only 60 km away), mainly for its succulent suckling lambs... poor things. I recall having visited it quite some times as a child. As a child it is impossible not to be impressed by its Alcázar that looks like something out of a fairy tale... One expects at any time to see on one of the tall windows, in the highest room of the tallest tower, one of those princesses with a conical cap topped by a veil or a knight coming out at full gallop across the bridge over the moat (I've told you before, all my problems come from reading too much through my childhood... and from watching Robin Hood too many times). It's been days since I wanted to complicate my life with this rich and somewhat labor-intensive dessert typical of Segovia, although relatively recent in history. For those who've never heard about it, despite its name it is a cake, not a drink, that consists of several layers of cake drenched in syrup, with an egg yolk cream between them, and with a thick layer of marzipan covering the whole thing... the perfect dessert for Segovia's cold winters.


This dessert is so famous, at least in its place of origin, that it even has its own website: www.ponchesegoviano.com. And on this website, where they state that this candy was invented in the tearoom El Alcázar, next to the cathedral, they tell us the following about its birth:

In 1926, the confectioner Frutos García Martín began marketing the candy in his establishment of the Plaza Mayor of Segovia. The King Alfonso XIII, the last Bourbon who regularly spent the summer at La Granja, encouraged him to spread the word outside of Segovia and in other areas. The king advised the confectioner to present this dessert at the Universal Exhibition of 1929 where he won the gold medal.
They also tell us the exact formula for this sweet is a well kept secret. Does that mean that the recipes found in books and websites are mere attempts? I've read that the genuine filling is not plain pastry cream, as indicated in many places (anathema!), but egg yolk custard or cream. I have used egg yolks, of course, just to avoid being chased by a mob armed with pitchforks and clubs. I don't know if Segovians will forgive me for not marking the ponche with the classic caramel lattice though... I had no adequate gadget (me?). I know that with this aspiring ponche I'm exposed to the wrath of Segovians... but anyway, I risk it because I intend to improve it... the next time I make it.

After a long and brainy research into the subject (ahem), the recipe I used is a collage of bits found here and there... The composition is roughly taken from an old and excellent book apparently no longer in print and recently inherited from a family friend, Nuestra cocina, by José Sarrau. Well, there goes my Segovian-Galapagan ponche:

Ponche segoviano
Yields about 12 servings

Cake
  • 8 eggs
  • 2 egg yolks
  • 150g sugar
  • 200g of medium strength flour
  • 100g rice flour (potato starch in the original recipe)
  • 25g butter
  • 2 tablespoons warm water
  • Sunflower oil for brushing the mold
  1. Weigh the flours and set aside.
  2. Cream the eggs and yolks with the sugar until fluffy and pale, 3-4 minutes in the Thermomix at speed 5 and 37ºC. If you do not have Thermomix, you already know that creaming is accelerated by beating the mixture in a water bath with tepid water, because the temperature helps the mixture to stabilize with the air.
  3. Preheat the oven to 180ºC.
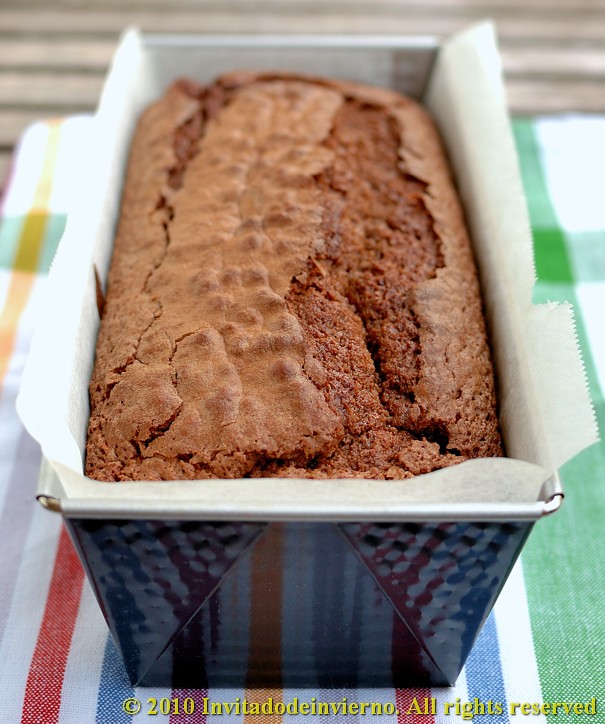
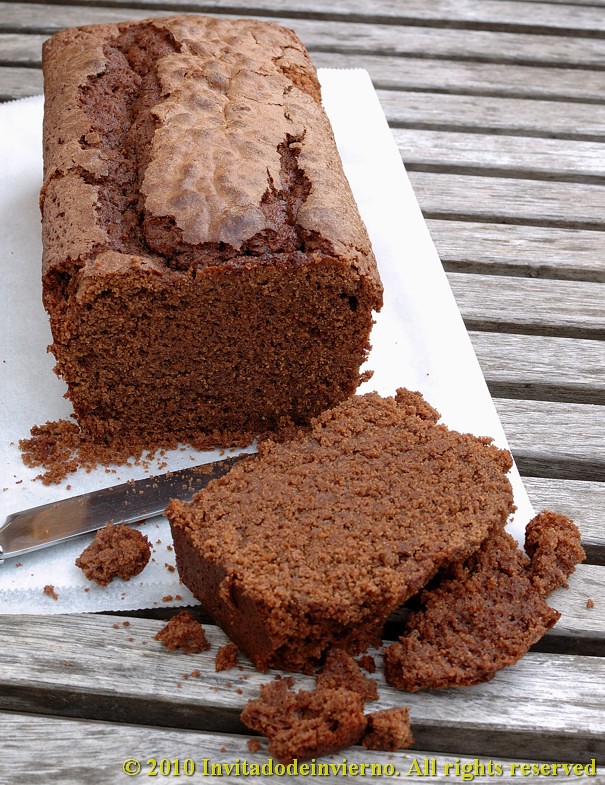
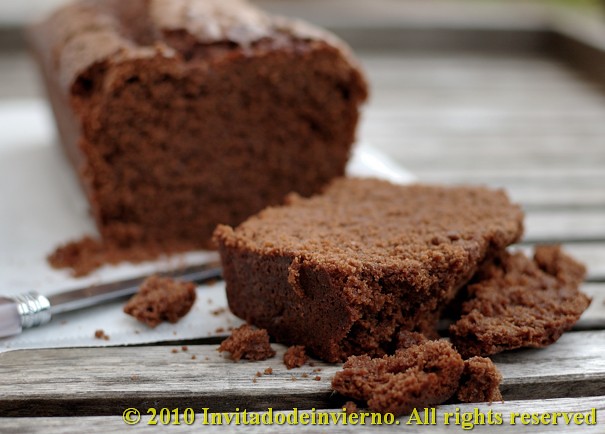
  4. Add the sifted flours into the eggs, with a gentle motion. Melt the butter, add and mix well. Line a large bowl with parchment paper, brush it with sunflower oil, pour the mixture and bake about 25 minutes. Remove from the oven, unmold on a rack and let cool. The oven dish size should be sufficient for the cake layer to yield three parts of reasonable size. My strips were 9 cm by 40 cm, more or less.
  5. While the cake cools down, make the syrup and the yolk cream.
Syrup
  • 250g sugar
  • 200ml water
  • A glass of liquor (I added sweet wine)
  1. Put the sugar and the water in a saucepan, and bring to a boil. Boil the syrup for about 7 minutes, turn off the heat, add the liquor and keep it hot for soaking the cake later.
Ponche segoviano 1

Egg yolk cream
  • 7 egg yolks
  • 150g sugar
  • 75ml of water
  1. Make a syrup by boiling the sugar and water till it thickens slightly, around 15 minutes.
  2. Meanwhile, crack the eggs open, separate the yolks and strain them to remove the skin that encloses them.
  3. When the syrup is ready, add the yolks and stir vigorously. Then keep on heating the mixture on low heat, stirring continuously until it thickens. When it's thickened (thinner than a regular custard), remove from the heat and set aside.
Marzipan
  • 500g ground almonds or almond meal
  • 500g icing sugar
  • 1 or 2 egg whites
  1. For the marzipan I mixed two formulas and I added 2 full egg whites (which I had left over from the cake) and 10ml of water... blunder. My marzipan was too wet and I had to knead it on the counter for quite a while adding sugar galore. So I imagine that using only the egg whites is correct. Well, the recipe yields more marzipan than necessary for the ponche, but you can just freeze it until December. Although I don't know if will last that long, because homemade marzipan is an indescribable delight. You can buy ground almonds or grind the same amount of raw almonds. Thoroughly mix the almonds with the sugar and add the egg whites. Although at first the paste seems quite unmanageable, the liquid will slowly permeate the solid to make a more or less pliable dough.
  2. Knead on the counter until it forms a paste that can be laminated with a rolling pin. You will need to sprinkle lots of icing sugar to prevent sticking. Wrap in plastic foil and set aside.
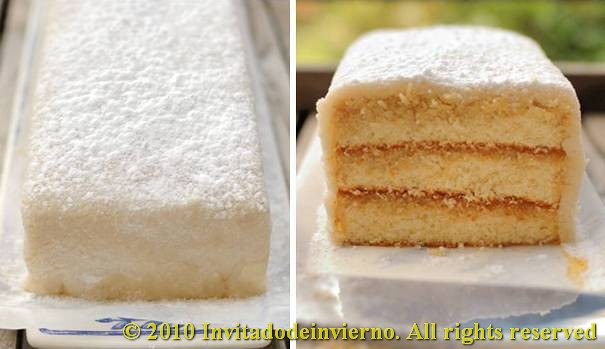
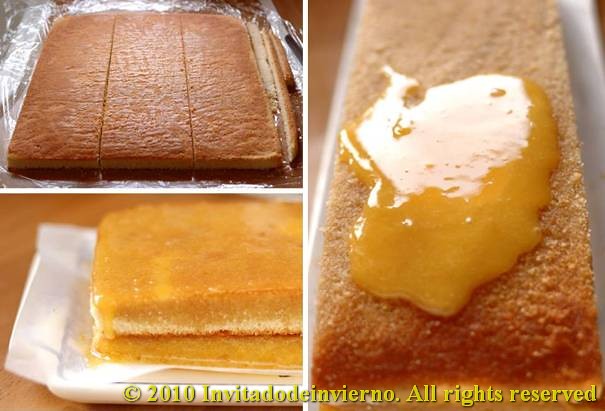
Ponche segoviano 2

Putting it all together
  1. Cut the cake layer into three equal parts. It's better to trim the edges before, which will always be somewhat uneven and lower, and form a perfect rectangle, measured with a measuring tape. You can also trim the top if it is somewhat domed, which is very common.
  2. Place the first cake layer on a serving dish and brush it repeteadly with the hot syrup, until you see in the sides that it has permeated almost the entire cake layer. Though it might look like a lot of syrup, you should really use a third of the total amount. Oddly enough, the cake is able to suck most of that syrup. You can help the cake in soaking by poking it here and there with a toothpick. Once the first cake layer is soaked in syrup, spread one third of the egg yolk cream on top. Do the same with the second and third layers, repeating the brushing and spreading.
  3. Roll the marzipan to a thickness of about 3 mm. Place the cake tower as close as possible to the marzipan and with the help of another person (I think it is impossible to do it by yourself), raise the marzipan layer with great care and place it on the cake. It will fit all right. Beware of any cracks on the corners, though you can hide most of all cracks and imperfections just by pressing the marzipan with your fingers. Trim the excess with a knife and adjust the marzipan around the perimeter to cover the cake perfectly.
  4. Finally, sprinkle the entire top surface of the ponche with icing sugar (as you see the ponche can raise your blood sugar to infinity and beyond) and, for a perfect finish, you should make a classic lattice pattern on top by burning the sugar with a hot iron. I know you can do this with a red-hot metal skewer, but I always use wood skewers... Next time.
Ponche segoviano 4

As I said, this dessert is best suited for a cold winter afternoon. But... if you get in a bathtub filled with ice cubes, the feeling is similar. You just need to find an excuse to eat this eggy and marzipaney delicacy...

Eager to know more?

Followers

About This Blog

Lorem Ipsum

  © Blogger templates Palm by Ourblogtemplates.com 2008

Back to TOP