Related Posts Widget for Blogs by LinkWithin

Pisto manchego and giveaway winner!

>> Thursday, February 25, 2010

Pisto

I didn't want to make a post just for announcing the giveaway winner, without recipe, that's why I've been absent for quite some time. I've been very busy and I haven't had the time for posting until today. Sorry for that. First of all, I guess you're all anxious (more or less...) to know the name of the winner of the Le Creuset giveaway. I'm acompanying the reveal with another of my very famous traditional Spanish recipes... yes, I have one of those high-self-esteem-days...

First things first: after substracting all the comments from people who were not interested in the giveaway and also the ones living outside USA and Canada, congratulations to Sinful Southern Sweets! You're the lucky one. The people from CSN Stores will soon contact you to send you your ramekins!

And now to the recipe. Pisto manchego is a thick and chunky sauce, made with a mixture of stir-fried vegetables and originating from the region of La Mancha (where Don Quixote was born and Manchego cheese is made...). It's easy to make and healthy, similar to the French ratatouille and absolutely nothing to do with Italian pesto! It's used as accompaniment in a lot of dishes, like grilled meat and eggs or even pasta, and also as filling for empanadillas. It's a staple in my household and it never lasts for very long... I'm giving you my take on pisto:

Pisto manchego
Yields 6 servings

  • 300g onion
  • 300g red bell pepper (the original recipe calls for half and half of red and green bell pepper, but I like red better, so choose whatever version you prefer)
  • 300g zucchini
  • 2 cloves of garlic
  • 60g of virgin olive oil for frying
  • 400g crushed or pureed tomatoes (I buy them canned here)
  • 50g white wine
  • Salt to taste

Garlic
  1. Finely dice the onion and the pepper. Cut the zucchini in bigger dice than the onion and pepper (let's say... hazelnut-sized?), set aside. Peel the garlic, slice it (you can mince it if you don't like to actually see the slices of garlic in your sauce) and set aside too.
  2. Pour the olive oil in a large frying pan and put on medium heat. When hot, first add the onion, stir and fry till it begins to soften. Then add the pepper and garlic. Stir-fry till the pepper begins to soften, depending on the kind of veggies, around 7 minutes.
  3. Add the zucchini and stir-fry the whole mixture for at least 15 more minutes, till all the vegetables are thoroughly wilted. The zucchini is added the last because it takes less time to soften than the others. Don't let it get soft enough to fall apart though.
  4. Add the tomato puree and the wine. Let the whole thing simmer for 20-30 minutes, till the liquid of the tomato and the wine reduce and you get a thick sauce. It shouldn't be too runny neither too dry. Just look at the photograph.
  5. When done, add at least a couple of teaspoons of salt, stir well and try for saltiness. Add more if necessary. Let cool.

You can enjoy it by a tasty Spanish tortilla like me... no, the recipe for Spanish tortilla will come soon, but only if you behave yourselves...

Eager to know more?

Carnival flowers

>> Thursday, February 18, 2010

Flores carnaval 5

Carnival season is over and I didn't find the time to make these flowers... But the idea of making them had got into my head and it wouldn't let go. So I made them this week, better late than never. And that gives me the chance to use another one of my gazillions of kitchen gadgets that I use every 2 years... more or less: the lovely flower mold. It makes me so happy... It was quite dusty, poor thing. I had to clean it up with one of those baby bottle brushes, that I still keep for this kind of use. So I brandished my gleaming mold and embarked on making these flowers.


What? That you can't find such a mold in your neighborhood? I found out that a very similar device is used in South East Asia for a surprisingly related kind of cookie.

Flores carnaval 4

These sweets are typically eaten around Carnival in many regions of Spain. They are deep-fried in oil, which is a very common method of cooking sweets around here. They seem to originate in the region of La Mancha, and imitate the shape of the ancient Order of Calatrava emblem. The recipe I use comes from Segovia, from the book Cocina Segoviana, by Dionisio Duque, out of print (Segovia is a beautiful town, included in the UNESCO World Heritage sites for its old quarter and aqueduct). This Mr. Duque was the owner of a very famous and traditional restaurant in Segovia, Asador Duque, a place I used to frequent with my parents when I was a kid... certainly long ago. The restaurant prides itself on being the oldest one in Segovia. And I'm sure you'll love that the measures are given in spoonfuls and egg shells...

Flores carnaval 1

Carnival flowers
Yields around 25 flowers

  • 6 medium eggs
  • 6 egg shells water (half of the egg shell, in fact)
  • 1 egg shell anise liquor
  • 12 tbsp flour (I had to add more, the final consistency of the batter should be similar to pancake batter, somewhat on the thinner side)
  • 1/2 tbsp aniseed crushed in a mortar
  • Sunflower oil for deep-frying
  • Sugar for sprinkling
Well, my first tweaking is to put more anis liquor and less water... that's very personal.
  1. Break the eggs, mix them in a bowl or food processor and keep a half shell for measuring the liquid ingredients. Add the liquids and then the flour and aniseed.
  2. Mix thoroughly to avoid any lumps.
  3. Transfer the batter to a bowl deep enough to easily accommodate the mold. Sorry that I don't have photos of the process, but I was alone and it wasn't very easy to do everything at the same time.
  4. Pour 6-7cm of sunflower oil in a small frying pan (you can only make one flower at a time with one mold...) and put it on medium heat. In Spain we recommend to use sunflower oil for frying sweets because of its neutral flavor.
  5. When the oil is quite hot, but not releasing any smoke, dip the mold in the oil to heat it (cover it in oil).
  6. Within a minute or two, take the mold out of the pan and dip it in the batter. Be careful not to dip it entirely, leave uncovered a space of around 1cm, otherwise you won't be able to remove the flower. The moment you dip the mold in the batter, this sticks to the mold and it tends to get loose when it's fried.
  7. Completely dip the battered mold in the oil and keep it in until the flower is golden.
  8. Once the flower is golden enough, peel it off the mold pushing carefully with a wooden spoon, in case it's not loose yet. Place the flower on kitchen paper to absorb some of the oil.
  9. Sprinkle with sugar. Cinammon can be added too.

Flores carnaval 8

This is a very crunchy cookie, not oily at all in spite of the frying. They were fantastic... I made them at lunch time and by bedtime there were only four left...

Eager to know more?

Daring Cooks' challenge February: Mezze

>> Sunday, February 14, 2010

Pita bread 1

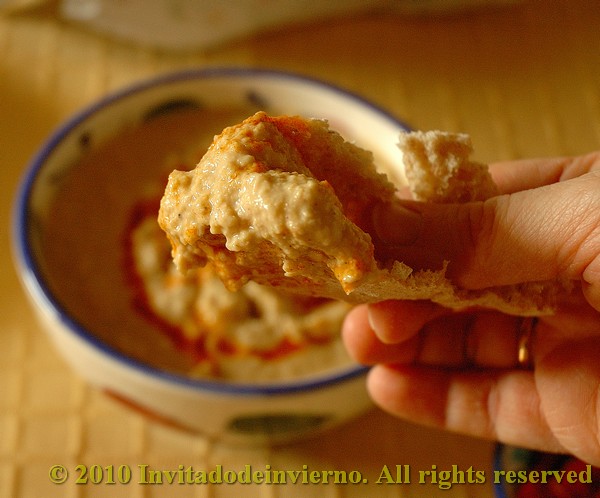
I have really enjoyed this challenge. I love Middle Eastern food and almost any Mediterranean food in general, therefore I was really excited about the mezze. Michele, this month's host, says: "if you’re not familiar with mezze, it’s more of a style of eating than a specific recipe or recipes. Mezze is a bunch of small dishes served all at once—sort of like the Middle Eastern version of Spanish Tapas. It can be served as appetizers before a meal, or as the meal itself". So this was really a multiple challenge, because it involved various dishes. The essential part of the challenge involved preparing pita bread and hummus, which I had never prepared before. That's good for me, I need to be pushed every now and then. D. knows a lot about it...


The 2010 February Daring Cooks challenge was hosted by Michele of Veggie Num Nums. Michele chose to challenge everyone to make mezze based on various recipes from Claudia Roden, Jeffrey Alford and Naomi Dugid.

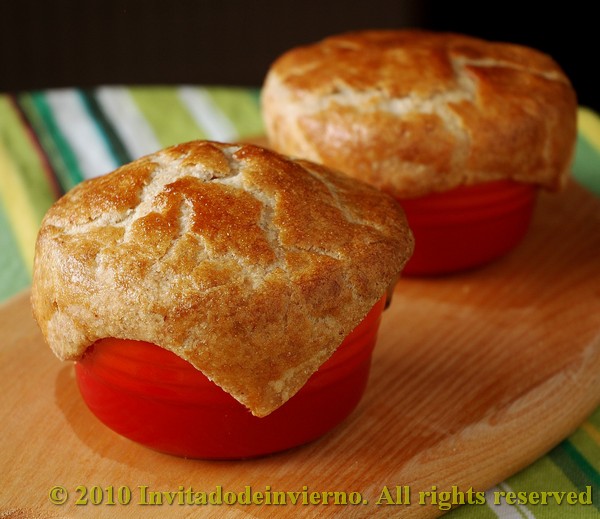
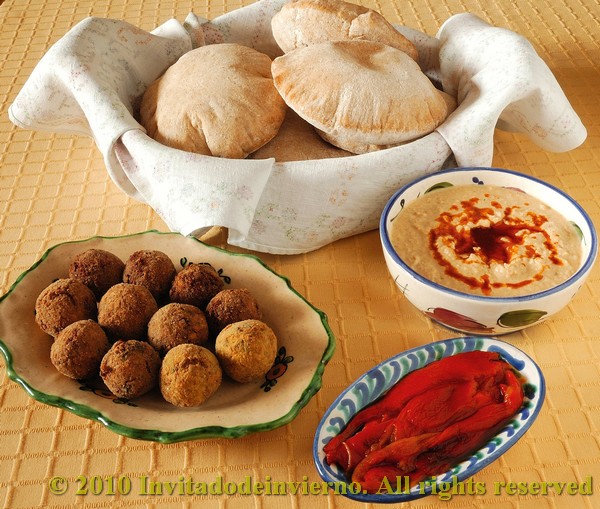
For my mezze, besides the compulsory pita bread and hummus, I prepared roasted red peppers and falafel, both having starred at my table a number of times previously. I'm really hooked on falafel. And I'm not usually a chickpea lover (I'm in love with chickpea flour though), but the flavoring of falafel really gives me a kick. And they are easy to make, you can prepare a lot and freeze part of them for later use, which is very practical when you have kids... or even unexpected visitors. I was planning to prepare dolmades too, but I couldn't find the time to scout for grapevine leaves... they're nowhere to be found in my neighborhood. I'm giving you 3 recipes here, for pita bread, hummus and falafel.

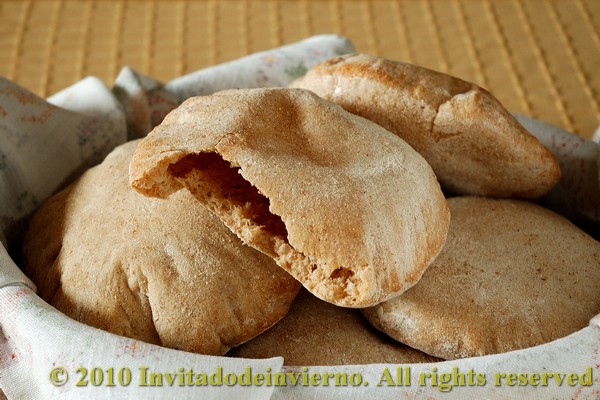
Pita bread, adapted from Flatbreads & Flavors by Jeffrey Alford and Naomi Duguid
Prep time: 20 minutes to make, 90 minutes to rise and about 45 minutes to cook

  • 2 teaspoons regular dry yeast (.43 ounces/12.1 grams) (I used 25g fresh baker's yeast)
  • 2.5 cups lukewarm water (21 ounces/591 grams)
  • 5-6 cups all-purpose flour (17.5 -21 ounces/497-596 grams) (I used spelt here, half white and half whole, and I had to use 7 cups in total)
  • 1 tablespoon table salt (.50 ounces/15 grams)
  • 2 tablespoons olive oil (.95 ounces/29 ml)

Pita bread 2

  1. In a large bread bowl, pour the warm water. Crumble the fresh yeast on 3 cups of flour. Stir in the flour, a cup at a time, and homogenize. Let this sponge rest as long as needed, until double in bulk and bubbly (mine took less than 1 hour, but I think the amount of yeast was more on the excess side). The original directions call for a minimum of 10 minutes, I think that's too short.
  2. Sprinkle the salt over the sponge and stir in the olive oil. Mix well. Add more flour, a cup at a time, until the dough is too stiff to stir. Turn it out onto a lightly floured surface and knead for 8 to 10 minutes, until smooth and elastic. Rinse out the bowl, dry, and lightly oil. Return the dough to the bowl and cover with plastic wrap. Let rise until at least doubled in size, approximately 1 1/2 hours.
  3. Place a pizza stone, or two small baking sheets, on the bottom rack of your oven, leaving a 1-inch gap all around between the stone or sheets and the oven walls to allow heat to circulate. Preheat the oven to 450F (230C) (I use old floor tiles as a pizza stone...).
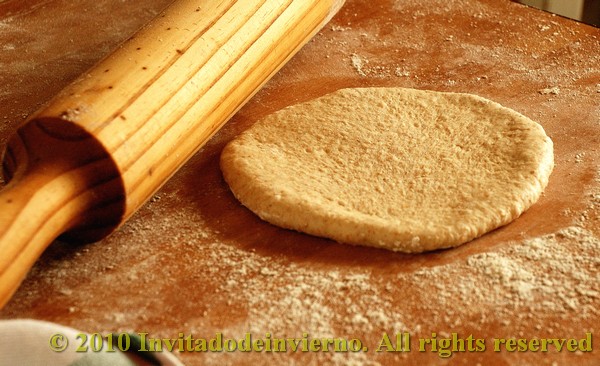
  4. Gently punch down the dough. Divide the dough in half, and then set half aside, covered, while you work with the rest. Divide the other half into 8 equal pieces and flatten each piece with lightly floured hands. Roll out each piece to a circle 8 to 9 inches in diameter and less than 1/4 inch thick. Keep the rolled-out breads covered until ready to bake, but do not stack.
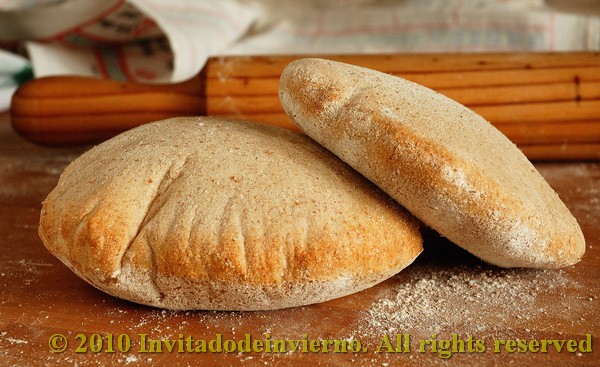
  5. Place 2 breads, or more if your oven is large enough, on the stone or baking sheets, and bake for 2 to 3 minutes, or until each bread has gone into a full balloon (I needed around 12 minutes for the breads to brown). If for some reason your bread doesn't puff up, don't worry it should still taste delicious. Wrap the baked breads together in a large kitchen towel to keep them warm and soft while you bake the remaining rolled-out breads. Then repeat with the rest of the dough. Wow, my breads puffed up so beautifully!

Pita bread 3

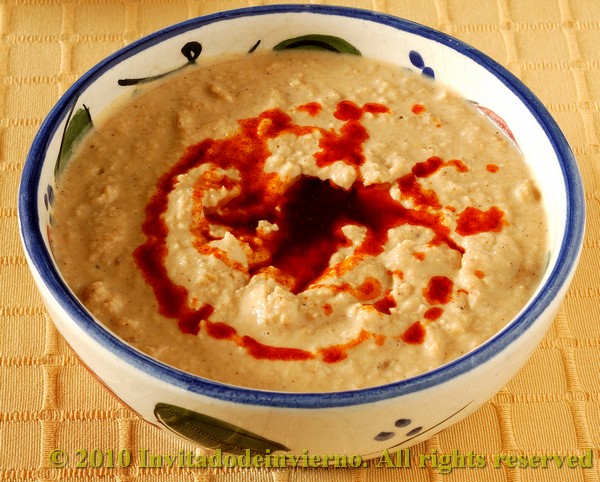
Hummus, recipe adapted from The New Book of Middle Eastern Food by Claudia Roden
Prep Time: Hummus can be made in about 15 minutes once the beans are cooked. You can use dried chickpeas or canned boiled chickpeas, but I prefer to soak them and cook them myself.
  • 1.5 cups dried chickpeas, soaked in cold water overnight (10 ounces/301 grams)
  • 2-2.5 lemons, juiced (3 ounces/89ml)
  • 2-3 garlic cloves, peeled and crushed
  • a big pinch of salt
  • 4 tablespoons tahini (sesame paste) (1.5 ounces/45 grams)
  • Additional flavorings (optional) (I simply garnished it with pimentón oil, 3 or 4 tablespoons of olive oil with half a teaspoon of sweet Spanish pimentón)

Hummus 2

Directions:
  1. Drain and boil the soaked chickpeas in fresh water for about 1 ½ hours, or until tender. Drain, but reserve the cooking liquid.
  2. Puree the beans in a food processor (or you can use a potato masher) adding the cooking water as needed until you have a smooth paste. (I preferred to add the lemon juice here and use the water later to adjust the thickness. If you use the cooking water here to adjust the thickness so that you can process it, maybe the mixture will be too liquid after adding the lemon juice... it's just my idea)
  3. Add the rest of the ingredients and mix well. Adjust the seasonings to taste.
  4. Serve on beautiful pottery and drizzle the surface with the flavored oil.

Hummus 1


Falafel

I didn't use the recipe Michele provided, but the one I usually prepare, from the book Tamasin's Kitchen Bible, by Tamasin Day-Lewis (ambitious name for a book, don't you agree? But I quite like it. And yes, she's Daniel Day-Lewis's sister)
  • 340g chickpeas, soaked overnight
  • 2 medium onions
  • 4 cloves garlic, crushed
  • 2 green chillies, seeded and finely chopped
  • 1 handful flat parsley
  • 1 handful fresh coriander
  • 2 tsp cumin seeds
  • 2 tsp coriander seeds
  • Salt
  • 600ml olive oil
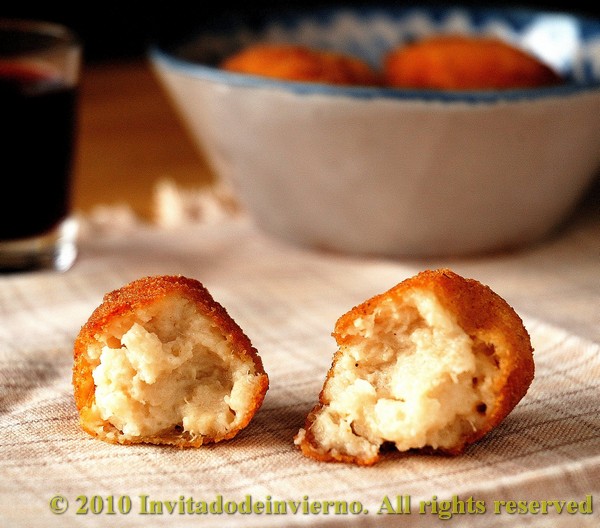
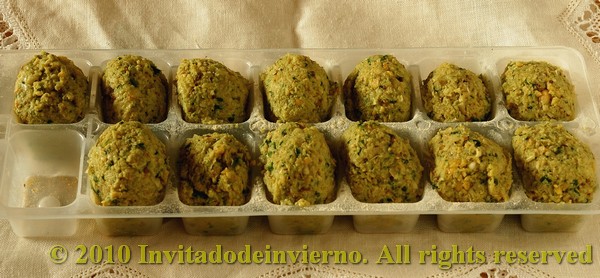
The challenge's recipe included some all-purpose flour too. It's true that the crushed chickpeas mixture can ooze some liquid, but I prefer to drain them a little bit after crushing. Or dry them thoroughly on paper before processing them. And if you don't want to drain the crushed chickpeas, you can also add some chickpea flour, then you keep the falafel gluten-free. In fact I added some this time, that's why my little balls have such a light color, they are rolled in chickpea flour.

Falafel 2

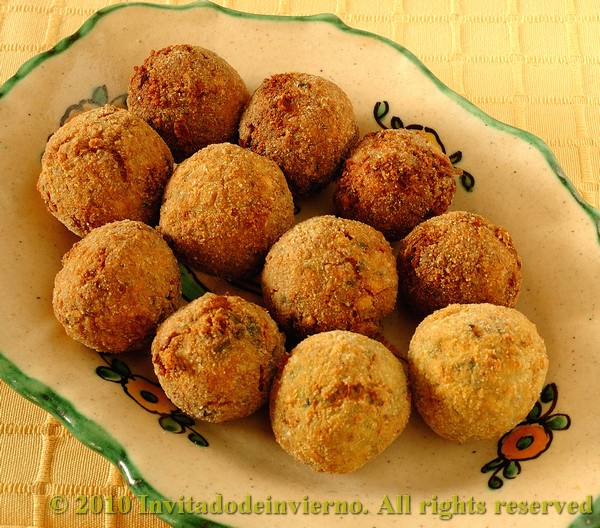
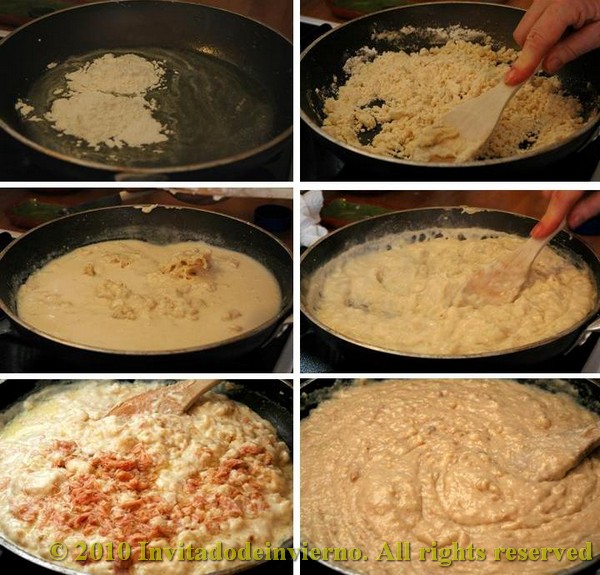
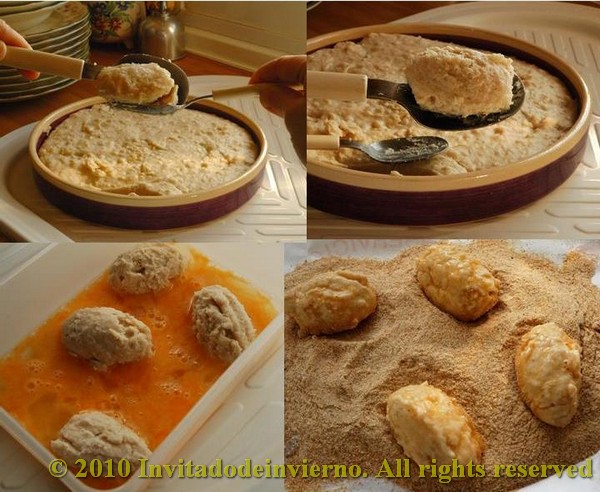
The preparation is really easy: first grind the cumin and the coriander seeds in a mortar. No need to grind them to a powder. Then put all the ingredients together in a food processor or mixer and grind them to a grainy pulp. Don't expect it to be smooth. Take walnut-sized pieces with a spoon and form them into balls. I rolled the balls in chickpea flour to absorb some of the moistness.

If you're not going to eat all the falafel at once, you can freeze them at this point. I use ice cubes trays for this.

Falafel 1

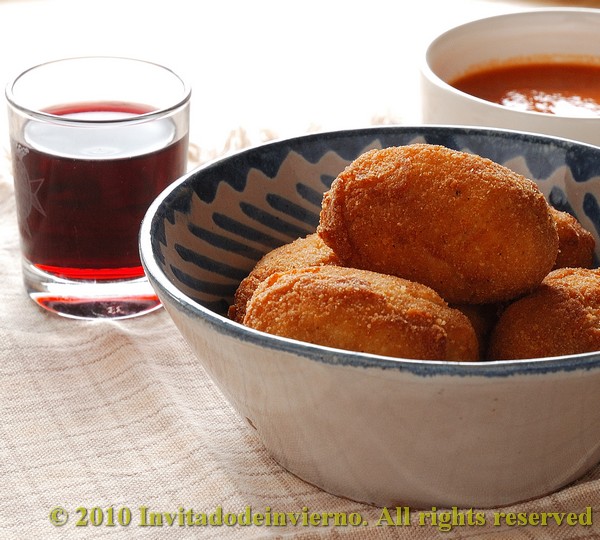
Heat the oil and fry the balls in batches; brown them thoroughly and drain on kitchen paper. They're delicious dipped in tahini sauce, but that was another failure, because my last tahini paste had gone into my hummus... am I badly organized??

Mezze 1

Eager to know more?

Grandma Libia's homemade croquetas

>> Monday, February 8, 2010

Croquetas 5

In Spain there are few dishes as traditional as croquetas. Imagine a very very thick bechamel sauce, almost solid, with some garnish added, like crumbled tuna fish. You take pieces and shape them into oval patties, then coat them in egg and breadcrumbs and deep-fry them in olive oil like a beignet. Well, there you have croquetas, comfort food at its best, common to all Spanish regions. Also served as a tapa everywhere. And good for absorbing any leftovers in the house, as you can add flaked cooked fish or meat, crumbled cheese... a wide variety of things. This is the typical recipe for which each family has its own version, which is supposed to be the best, of course. It used to be taught from mother to daughter. Or to son nowadays... I hope. The way I prepare croquetas is my mother's, it's understood. And she learnt it from my grandmother. I don't know if it's better or worse than others, but my children love them.


I haven't made croquetas too often, because my mother is kind enough to prepare them for my children, therefore I wasn't really an expert... till now. So the other day I asked my mother to come over to my place and prepare the dough or thick sauce or... I don't know how to call it. And here it is.

Grandma Libia's homemade croquetas
Yields between 36 and 40 croquetas, depending on the size

  • 8 tbsp all-purpose flour
  • 2 tbsp olive oil
  • 2 tbsp butter
  • 1 liter milk
  • 200g tuna fish in oil, flaked
  • 2 or 3 pinches nutmeg
  • 2 or 3 eggs, beaten
  • Breadcrumbs
  • Salt to taste
  • 0.5 liter olive oil for frying (minimum)

Croquetas 1

Melt the butter and heat along with the oil on a large frying pan. When hot, add the flour and stir for it to toast, eliminate the raw flour taste and absorb the fat. Mash the lumps with the back of a wooden spoon, till you have a crumbly mixture and all the fat is absorbed, around 5 minutes. Then add half of the milk and stir continuously for a while, while breaking the lumps and thickening the mixture. Add a table spoonful of salt. When the mixture is thickened a little bit, add the rest of the milk. If too many lumps are left, you can just use a hand mixer to break them and make the mixture more even. Add the tuna garnish, previously drained and flaked, and keep on stirring to thicken. When the mixture starts to separate from the pan walls and it's thick enough to shape it, turn the heat off (yeah, I know this is tricky if you've never seen the real consistency. But you have to be careful, if the dough is too runny, the croquetas will burst the coating on frying... they should be solid enough). Try the salt and add more if necessary (it will be). Add the nutmeg and stir. Pour the whole thing on a shallow dish to cool. Cover with a plastic wrap that touches the surface, so that no crust is formed on cooling.

Croquetas 2

When the dough is at ambient, take small portions with a table spoon, like in the photos, and use 2 spoons to shape them into oval patties. Beat a 2 or 3 eggs in a container and coat the patties in egg. Then roll them in breadcrumbs. When my sister and I were small we used to help my mother with the coating task. When all the croquetas are prepared, heat the oil in a deep pan. Then fry them in very hot oil (I fry them in a deep-fryer, at maximum temperature of 190ºC). People usually prepare a lot of them and freeze a part for later use (isn't it nice to have a ready-to-be-fried appetizer if you have some people coming unexpectedly?). I love them dipped in a good homemade tomato sauce, like they're served at many bars.

Croquetas 8

My mother makes better-looking patties than me... but she has a lot of practice in the croqueta-science, which I don't. Anyway, croquetas are always yummy. If you have them for dinner, you should be in your pijamas already, like if you were kids... ;-). Just imagine your mother has just made them for you...

Croquetas 5

And also I want to send this very traditional recipe to the Culinary Olympics 2010, hosted by Blogger Aid Changing the Face of Famine. BACFF is hosting an event to promote both the sport of food and their mission (to be actively promoting the allevation of world hunger). They invite you to participate and represent your country with a recipe you like. Check here for the conditions to participate!

Croquetas 7

Eager to know more?

Mini Ibérico pork pot pies and a giveaway!

>> Thursday, February 4, 2010

Mini potpie 2

This is my first giveaway ever and in spite of my usual "British" composure (although I'm nothing like British), I must admit I'm pretty excited. I was recently contacted by the people from CSN Stores, which boasts over 200 specialty web-based stores (check out their stools! I have a high table in my kitchen with bar stools, and I wish the variety of bar stools was that wide in Europe). If you visit their site, you'll find a lot of things you need and a lot of things you don't need, but would kill to have! After browsing their stores looking for some interesting goodies to giveaway, I've opted for the cutest Le Creuset ramekins. I happen to own a couple of them myself, two vibrant-red cuties, which make a lovely setup for individual soufflés and gratins, miniature pot pies, clafoutis or cream desserts. And now I'm giving away 6 of these lovely pieces of bakeware to my readers. So keep on reading to learn about how to enter.


Giveaway details: The only thing you have to do to enter the giveaway is to leave a comment about the kind of dish you'd love to use these ramekins for. Easy, isn't it? ;-). Please include your e-mail or make it visible in your profile. As usual, each comment will be given a number and I will post one winner, which will be chosen at random by a random number generator.

But there's more. Besides the mandatory entry to enter the giveaway, you can increase your chances by making extra entries. Just leave a comment letting me know the following:

  • You've suscribed to my blog on Google friend connect
  • You've tweeted about the giveaway (please leave the link!)
This giveaway is only open to US and Canada (sorry, other international readers) till February 20th at midnight (CET). The prize will be sent by CSN. I will collect all comments and use random.org to draw the winner.

And now to the recipe. I found it would be a good idea to use my ramekins to prepare something that could illustrate how beautiful any dish looks in them. So here's a simple and comforting recipe for cold winter days, a tapa-sized pot pie type of dish without cream nor butter, with a Spanish twist coming from the sweet wine used in the sauce and the Iberico pork meat. Lovely served for brunch or as an appetizer.

Mini potpie 3

Mini Ibérico pork pot pies
Yields 4 servings
  • 1/2 kg diced pork sirloin (I used Iberico pork, which is an indigenous free-roaming pork breed, fed mostly on acorns, widely known for its wonderful flavor, like in Ibérico ham. Of course any type of pork will do, only the dish will taste different)
  • 16 prunes, pitted (or more, just figure out how many you want in your ramekin and multiply by 4)
  • 3 scallions
  • 1 large handful chestnuts (if uncooked, you can roast them in the microwave oven for a while. First cut a slit on the shell to prevent them from bursting)
  • 1 cup sweet white wine (Spanish moscatel is best)
  • 1/2 tbsp all-purpose flour
  • 2 pinches thyme
  • Virgin olive oil for frying
  • Salt
  • A sheet of puff pastry for the pot cover (I used some leftovers of homemade flaky pastry)
  • 1 egg for brushing the pastry
Lightly salt the pork dices. Pour 3-4 table spoonfuls of olive oil in a heavy pot (I use my French oven) and fry the chopped scallions on low till wilted. When done, add the pork and stir-fry it on high heat, to seal the juices. Then add the flour and stir for the flour to toast lightly. Add the shelled chestnuts and the prunes, pour the wine and add water enough to cover the meat. Add a teaspoon of salt and let the whole thing simmer on low heat till the sauce is thickened (don't let it thicken completely, as it will thicken further in the oven) and the meat is tender, around half an hour, depending on how tender the meat actually was. Some of the prunes may fall apart in the process, but this only adds to the sauce richness. If you prefer to find firmer prunes on your plate, just add them half way of the cooking. Check for saltiness when the meat is cooked and adjust if needed.

Mini potpie 1

Heat up the oven to 200ºC in the meantime. Divide the stew among the ramekins, fill them almost to the top. Add a little water if you find the stew to be too thick. Roll the puff pastry on a floured surface till 0.5cm thick or thicker if you prefer. Find yourself a round cutter, cup or glass that can yield circles of pastry slightly larger than the ramekins. Cut four circles and set aside (you can see I was lazy and ended up cutting squares... they add to the pot pies rustic look). Brush the edge of the ramekins with some beaten egg and lay the pastry circles on them, pressing the outer edge to seal. Brush the surface with some more beaten egg. Then bake in the oven for 20-25 minutes, until the pastry is golden. Hmmmm, I thoroughly enjoy the moment of breaking the crust... in awe... and releasing all the aromas... Have a forkful of stew and a bite of the crust at the same time... yum.

Eager to know more?

Followers

About This Blog

Lorem Ipsum

  © Blogger templates Palm by Ourblogtemplates.com 2008

Back to TOP