Related Posts Widget for Blogs by LinkWithin

Cherry gazpacho

>> Tuesday, May 25, 2010

Cherry gazpacho 1

It seems that the fair weather is here to stay. This pleasant warmth announces the return of one of my favorite fruits (and I don't have many): cherries. On the other hand, at home salmorejos and gazpachos are essential items when the weather gets too hot. There is nothing better than sipping one of these refreshing soups on the terrace, watching the blackbirds and... almost touching nirvana with my fingertips. And you'll be wondering by now, what do cold soups, heat and cherries have in common? Mmm, that in order to add a colorful note to our grey and monotonous lives, and use the first cherries that I found on the market, I decided to try this daring variation of gazpacho, with cherries of course, from the famous Basque chef Martin Berasategui.


Here's the recipe:

Cherry gazpacho 2

Cherry gazpacho by Martín Berasategui

  • 1kg ripe tomatos
  • 220g sweet cherries (the original recipe calls for 200g, I wanted more...)
  • 5g green pepper
  • 5g onion
  • 1 clove garlic
  • 55g bread crumb
  • 1 tbsp cider vinegar (Sherry vinegar in the original recipe, but it's a bit too strong for me)
  • 3 tbsp virgin olive oil
  • Salt to taste
Cherry gazpacho 3
  1. Pit the cherries, cut all the ingredients in chunks, place in a large bowl and leave overnight, except the vinegar and salt.
  2. The next day, process everything together in a food processor (Thermomix in my case, of course), and put it through a fine sieve if you don't like it chunky. Refrigerate for a couple of hours at least, as it's better served well cooled.
The cherries tame and sweeten the somewhat fiery flavor of traditional gazpacho... and give it such a beautiful color... that I'd love to put it in a frame... none of those so very contemporary artists has invented liquid art? So much for this art, damn it.

Cherry gazpacho 4

I take this opportunity to share some images from my garden. Everything's bloomed all at once, hardly noticed... and this year we had almost forgotten how flowers looked like! Have a happy warm weather, everyone.

Eager to know more?

Raspberry espuma by Ferrán Adriá

>> Friday, May 21, 2010

Raspberry espuma Adriá 1

Maybe you've never heard about this gadget. It's the iSi Whip, which I use for making whipped cream since some years ago, because there's no other device as good for serving perfectly whipped cream, straight from the bottle. It will impress all your guests and will leave them utterly flabbergasted. I don't get paid for this, I'm that silly and I do it for free. I simply love this gadget. Mr. Ferrán Adriá, one of the most famous cooks in the world, in a quest to provide espumas, foams, mousses, or whatever you want to call them keeping the purest possible taste of the main ingredient, thought this artifact could be used to avoid air-entraining additives such as egg whites or similar things, and prepared various concoctions directly whipped in this device.


But the bad news is that this recipe can only be prepared with the mentioned device. You know that I'm the maniac for this kind of junk, even though I seem to have some childhood trauma that prevents me from buying a scale... For I am the proud owner of one of these artifacts from time immemorial, but so far I had not dared to make an Adriá style espuma. I'd been wanting to make a humble tribute to him for quite some time already and the time has come for it. Because, regardless of all the arguments about his molecular cooking, its prices and the temporary closing of his restaurant, this guy has contributed greatly to put Spain on the culinary map of the world. And I really appreciate it. As simple as that.

I have substituted agave syrup for the sugar, to make for an even lighter espuma. It's excellent as dessert or as palate-cleanser.

Raspberry espuma Adriá 2

Raspberry espuma
Yields 4 normal servings or a handful of ridiculous spoons

  • 250g fresh raspberries
  • 50g sugar (you can use 40g agave syrup instead)
  • 100g water
  • 2 gelatine sheets
  1. Put the raspberries in a saucepan with the sugar or sweetener and cook in a water bath for one hour. I did it in my Thermomix at 80ºC. I don't know at what temperature the puree was supposed to be in a bain-marie, but I guess pretty close to 100ºC. I didn't dare to go that high though. Allow to cool.
  2. Pass the puree through a sieve fine enough to remove the seeds. I put it through a food mill first and then through a sieve and the result was a pretty smooth puree. I also added half the water to the puree to facilitate the process. Mr. Adriá says that with the 250g of raspberries and 50g of sugar you obtain 300g of raspberry puree... This man is an optimist. In the food mill and in the sieve you lose quite some puree even after patiently scratching the bottom of both, but that can't be helped.
  3. Cut the gelatin sheets into strips and place in a bowl with cold water for 10 minutes. When they are soft, warm the remaining water and dissolve the gelatin in it. I wanted to experiment and substituted 10g of water for the same amount of wine, but it was barely noticeable in the final result. The next time I will add more wine (I often get to this conclusion ... food for thought).
  4. Pour the puree into the iSi whip, close tightly and apply a gas canister. Shake vigorously and set aside in the fridge. That's what Mr. Adriá instructs you to do... But what happens then is that the mousse solidifies into a block in the bottom of the bottle and no agitation gets it off (at least, I didn't manage to). So I had to depressurize the device and stir the espuma with a spoon to loosen it. Then I used another canister to pressurize it. And it worked... I guess the best thing to do is to visit the fridge every now and then while the foam is solidifying and give the bottle a vigorous wiggle.
  5. Then choose a nice container where the espuma can shine in all its splendor, invert the bottle, as connoisseurs already know..., press the handle with caution and... serve a beautiful pile of espuma. The espuma must be eaten almost immediately, since it deflates slowly but inexorably. I have to try adding more jelly next time.
  6. Then you're ready to devour the espuma...
You certainly get a mousse with a pure raspberry flavor, frankly airy, which melts in the mouth, very light, volatile ... oh, ah, uh, I go into ecstasy.

There's a nice little e-book with Adriá's foam recipes in Spanish, but there doesn't seem to be an available English translation. Publishers out there, I could certainly aid in that translation... ahem.

Eager to know more?

Challah, from far away

>> Monday, May 17, 2010

Challah 1

Though the English-speaking blogosphere is packed with Challah recipes, this word is quite unknown in Spain. All ethnicities and nationalities with communities of a certain importance in the United States enjoy an amplification and diffusion in the rest of the world of all their characteristics and peculiarities that for example we Spaniards do not enjoy. When we were compelled to emigrate, we had a lot of Spanish-speaking countries to go to, instead of heading for the United States, like Italians, Germans, Swedes, Irish, Russians, Poles, etc. And now our cuisine is not as widely known as theirs.


It's funny how in almost all the books where I have the recipe for challah (see here its pronunciation, I mean hear it), the name is written in the form challah. I guess that's the spelling in Yiddish and German. But in Spanish we would pronounce that starting with a sound like in the Italian word ciao, for example. I have a book in Spanish in which it is correctly transcribed, jalá, which leads me to worship the translator... I like that book, New Jewish Cooking by Elizabeth Wolf Cohen. Although the recipe I used here is not from this book, but from a baking course on festive breads. Are you yawning yet? Good. This is my method for screening my readers. Only the chosen ones will get to the bottom of the chasm of knowledge...

Challah 5

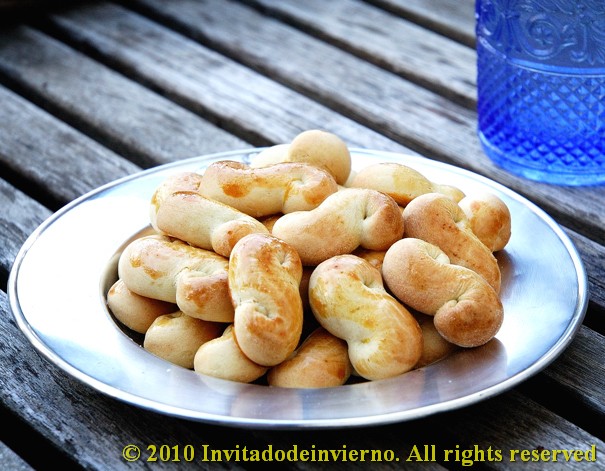
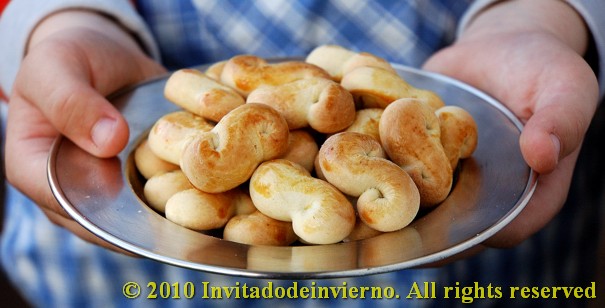
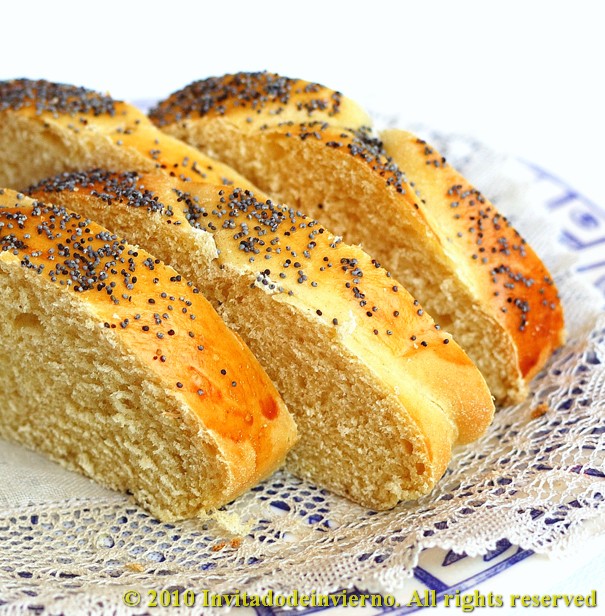
When I brought home my first challah from my baking course, my youngest son liked it a lot, so with the happy occasion of his birthday today, I decided to bake him a challah, because he doesn't like cakes... And also because challah is delicious. Here it is:

Challah, Shabbath's bread (recipe by Paul Merry)
Yields 2 biggish plaited breads

  • 1/4 tsp saffron
  • 270ml water
  • 700g bread flour (I used 500g spelt and 200g Manitoba flour)
  • 10g salt
  • 12g fresh yeast
  • 2 tbsp agave syrup (the original recipe calls for honey instead)
  • 3 medium eggs
  • 80g softened butter, at ambient
  • Poppy seeds
  • 1 aditional egg for brushing
Challah 3
  1. Lightly toast the saffron to boost its flavour. I put the threads on a little piece of aluminum foil and heat it with a lighter. Put half the water in a bowl, heat it in the microwave and leave the saffron to infuse. Let cool.
  2. In the meantime mix the liquid ingredients. Add the cooled saffron mixture to the rest of the liquid (substract the infusion water from the total), then add all the solids except the butter and the poppy seeds.
  3. Knead well until gluten begins to develop, around 10 minutes. Then add the softened butter in small pieces and continue kneading until the dough is smooth and supple, but not too soft. Make a ball, place it on an oiled bowl, cover and let it double in bulk, from 1 hour to 1.5 hours.
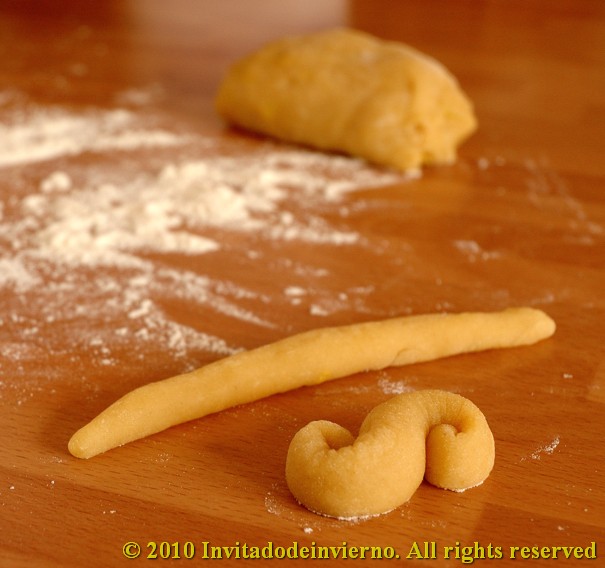
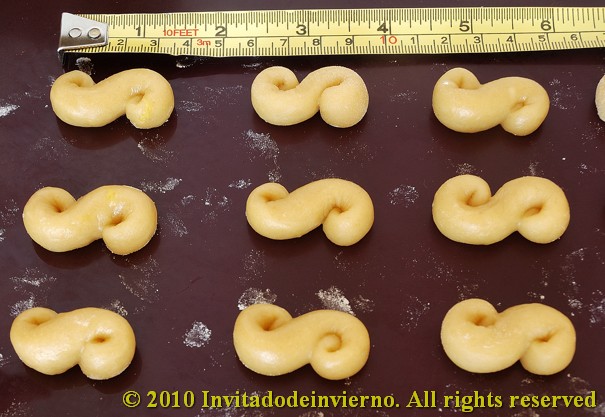
  4. When doubled, punch it to degas. Leave it in the same container to continue the fermentation till almost double again, at least another hour. Once fermented for the second time, tip the dough on the countertop, degas again and try to shape it into a flat rectangle. Cut the rectangle into two equal parts (you can weigh the portions, but I'm a primitive person without scale), then roll each portion into a cylinder and divide into three pieces, to make the strands of the plait. Each portion is shaped into a long thread, about two fingers thick. Leave the stretched strands to rest a couple of minutes on the counter for the dough to relax.
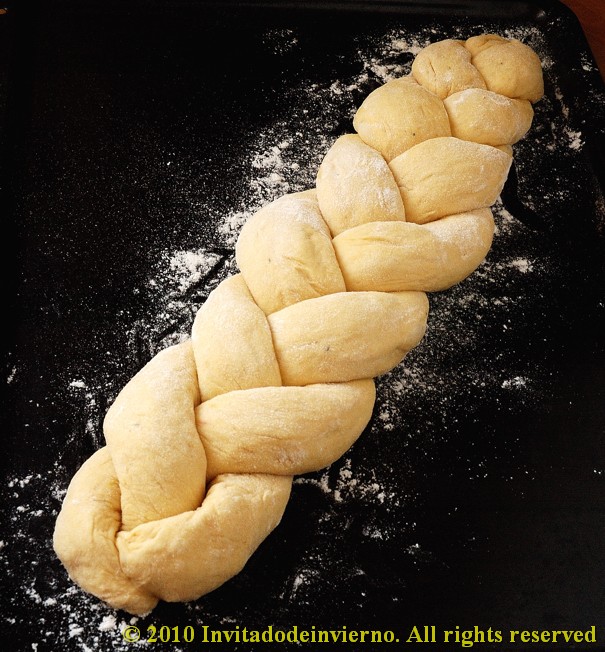
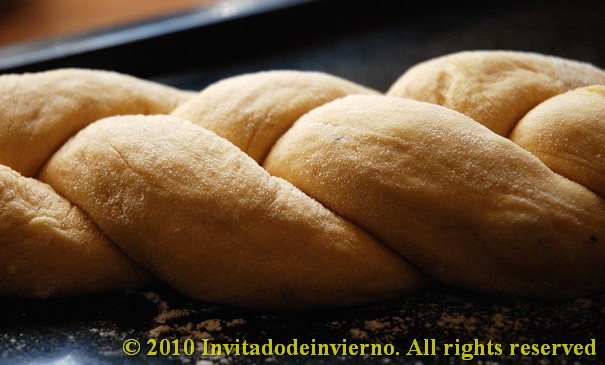
  5. The next step is to make the plait. What, you don't know how to make a plait? Shame on you. Here's an instructional video. The braid should be initiated at the center, progressing to one end. Then flip the bread and make the other end of the braid. The center should be thicker than the ends. Try not to overtight the crosses, better let the braid a little loose, because it needs space to rise. It's a good idea to make the braid on a well floured baking sheet so that you don't need to transfer it later.
  6. Make a glaze with one egg yolk and a little water (the remaining egg white can be frozen). Brush both braids, trying not to let much egg flow between the strands, so that it doesn't act as glue. You can brush them a second time after a few minutes. After the final glaze, sprinkle poppy seeds on the loafs and allow them to rise a third time. They will take less than an hour, so turn on the oven to 190ºC immediately.
  7. When properly risen, put the loafs into the oven. In my oven they took something in between 20 and 25 minutes to bake. To test for doneness, press the sides near the base, and if the bread springs back, they are ready. Handle them with great care not to break them and leave to cool on rack.
Challah 4

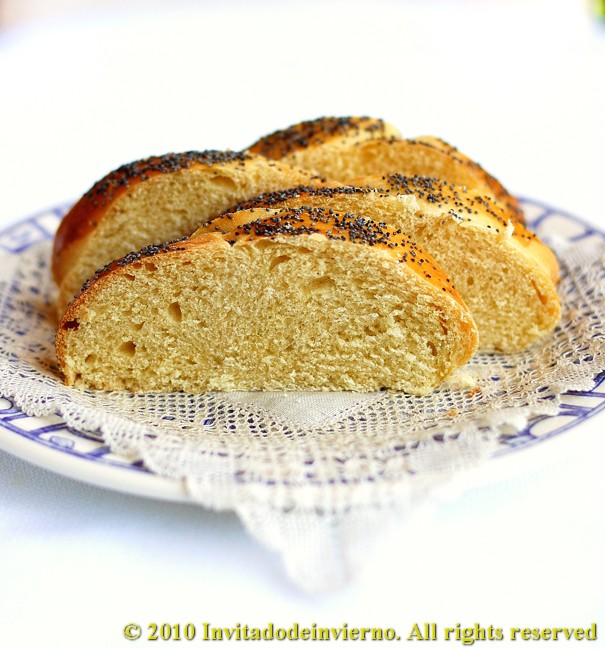
I think less yeast can be used, 10g or less may be more than sufficient. The neatness in making the strands is important for the outcome. The first loaf (which is not in the photos, uh-huh) looked worse, because all the strands rose to almost fuse with each other. The second loaf was much better looking, although the center burst to some extent. I have to improve my braiding technique. I'm willing to bake all the challah loafs that may be required. And some more. Yum.

Challah 2

I guess you know it keeps very well inside a plastic bag, but if you don't find it as good as freshly made, you can always slice it and toast it. It is delicious spread with butter. And as French toast...

This challah goes to Susan's Yeastspotting!

Eager to know more?

Daring Cooks' challenge May: Stacked green chile and chicken enchiladas

>> Thursday, May 13, 2010

Enchiladas 3

I was really excited about this month's challenge. I haven't tried many Mexican dishes, but so far I've always loved what I've tried. I love mole and I love tacos and I love fajitas and I love quesadillas... now I would taste enchiladas for the first time. Wonderful! I was only afraid that this dish would be too hot for me...

MU7WVWJKBEYQ


Our hosts this month, Barbara of Barbara Bakes and Bunnee of Anna+Food have chosen a delicious Stacked Green Chile & Grilled Chicken Enchilada recipe in celebration of Cinco de Mayo! The recipe, featuring a homemade enchilada sauce was found on www.finecooking.com and written by Robb Walsh.

Fine, so the challenge involved making an enchilada sauce consisting mainly of roasted green chiles and tomatillos, grilling some chicken breasts and making some corn tortillas (I already knew about the tortilla part...). The challenge turned out fantastic despite all the mishaps... First, after learning about the challenge, I located an online source of tomatillos in Spain, because I hadn't even seen them in my life. Perfect. Then, when the time arrived for making the enchiladas, I realized I had forgotten to order them, so I had to use green tomatoes and lemon... not the real thing. Shame on me. Second, I searched for green chiles everywhere... but they were nowhere to be found. I used regular green peppers and then add some mildly hot pickled Spanish green guindillas. Third, I wanted to make my own tortillas with my beautiful tortilla press and then I couldn't squeeze into my schedule going down to Madrid to buy the damned tortilla flour... so we had to manage with store-bought tortillas. But still your heroine (that's me) managed to make some delicious enchiladas, my way... here's how.

Enchiladas 2

Stacked green chile & grilled chicken enchiladas
Serves 4

  • 750g green peppers (not bell peppers)
  • 2 green pickled guindillas
  • 250g green tomatoes
  • Juice of 1 lemon
  • 1 clove garlic
  • 1/2 liter vegetable stock
  • 1 small onion
  • 2 tbsp cornstarch
  • 1 tsp dried oregano
  • Salt to taste
  • 2 boneless chicken breasts
  • Olive oil
  • 12 small corn tortillas
  • 200g Manchego cheese (the recipe called for cheeses not easily found in Spain and... what the heck, Manchego is perfect)
Enchiladas 1
  1. To make the sauce, first roast the peppers on an oven tray, at 180ºC, till the skin is dark. Take them out to a pot and cover them till cool. In my case, I also roasted the tomatoes.
  2. When cool, get rid of the skin. Fry the minced onion and garlic in a frying-pan with a couple of tablespoons of oil, till wilted. Here I mixed this with the peeled peppers, the tomatos and the chopped guindillas in a food processor and pureed it.
  3. Then add the lemon juice, the vegetable stock and the salt and boil the mixture for 10 minutes.
  4. Add the cornstarch dissolved in a little water and continue boiling till the sauce thickens, another 10 minutes.
  5. In the meantime, salt and oil the chicken breasts, put them into an oven dish, add a glug or two of white wine and cook them for 20 minutes at 200ºC. When done, cut or shred in little pieces.
  6. Shred the cheese and set aside.
  7. When the sauce and the chicken are both ready, fry the tortillas slightly in 2 or 3 tablespoons olive oil.
  8. Take a large baking dish enough for 4 tortilla stacks or 4 individual oven plates, like I did. Ladle some sauce on the plate base, then lay the first tortilla. Ladle some more sauce on the tortilla, then some shredded chicken and some shredded cheese. Now lay a second tortilla, ladle some sauce on it, more chicken and more cheese. Top with a third tortilla, more sauce and a generous handful of cheese. Make the other three stacks in a similar fashion.
  9. When you have 4 nice stacks, put the baking dish or plates into the oven and bake for 20 minutes at 180ºC until the cheese is melted and browned on top.
  10. Take the enchiladas out of the oven, let them rest for 10 minutes and... enjoy!
Enchiladas 4

Thanks Barbara and Bunnee for a very interesting and timely challenge!

Eager to know more?

Pastas del Consejo or Council cookies

>> Sunday, May 9, 2010

Pastas consejo 6

I'm working on a project that has led me to prepare pastas del Consejo. Because this project has driven me to make a tour through the most historic places in Madrid, my hometown. And there I found charming and ancient pastry shops where traditional sweets are still made with great care for the quality of the ingredients and in their ellaboration. I left Madrid 10 years ago (although I moved to a distance of only 40 km) and, like many natives of gigantic cities, I have always maintained a love-hate relationship with it. When I left, though a more correct description would be run away, I fled to a place with more space, less noise, less mess, less pollution ... ultimately more peaceful. But a couple of unhurried visits around some of its corners have sufficed for me to fall in love with her again ... I'm ready, 10 years after.


Pastas del Consejo, meaning Council cookies, are typical Madrilenian confections, one among the many specialties of one of the more traditional pastry shops in Madrid, El Riojano, located at number 10 the Calle Mayor. They are small cookies in the form of a double spiral, also shaped as small rolls, as the famous panecillos de San Antón, eaten to celebrate the feast of San Antonio on January 17th, can be prepared with this same dough. Mr. Martínez Llopis, in his book La dulcería española (Spanish pastry and sweets), tells us that these cookies were originally called Senate cookies and they only became known as Council cookies during the minority of King Alfonso XIII (1886-1941), who liked them a lot, because he used to eat them while presiding meetings of the Council of Regency with his mother the Queen. No wonder that he spent his time eating pastries... while listening to incredibly entertaining political arguments before being even 18 years old...

Pastas consejo 2

This we are told about El Riojano at the Madrid tourism website, turismo de Madrid:
This pastry shop was founded by Damaso Rioja de la Maza, baker of the Royal House in 1855. The establishment has not changed since then neither in the decor, with mahogany, bronze or marble, nor in the quality of its sweets. Among its specialties are the sugar candies called azucarillos, light snacks traditionally taken with brandy, and pastas del Consejo, so called because they were served in the councils of state. The shop has a small tea room where you can taste their specialties.

Pastas del Consejo (from La dulcería española, M. Martínez Llopis)
Yields around 180 cookies (I'm not good at dividing an odd egg number... you can always freeze half the dough for a rainy day)
  • 5 eggs
  • 3 egg yolks
  • 250g sugar (they're not very sweet, add 50g more if you do have a sweet tooth)
  • 125g butter
  • 750g all-purpose flour
  • Lemon extract or zest
  • 1 extra egg for brushing
Pastas consejo 5
  1. Break the eggs, toss them in a bowl and add the three yolks previously separated. Add the sugar and mix well just until the sugar is dissolved, no need to cream them.
  2. Melt the butter and add to the mixture. Then add the lemon zest or extract, to your taste.
  3. Add the sifted flour. I add it little by little, to make a batter that gradually thickens. You can do this in a food processor.
  4. Once all the flour is used, tip the dough on the countertop and roll it with a rolling pin a couple of times, to homogenize. The dough must be soft, but not very sticky. Add more flour if needed.
  5. Pull little pieces and form them into a worm about 9-10cm long (I say a worm because they really have the same size as the earthworms in my garden), thicker in the middle and thinner at the ends. Then twist both ends of this churro, as shown in the photo, and put it on a baking tray lined with parchment paper or silicone mat. It's a good idea to keep the bulk of the dough into a zipper bag, to prevent it from drying. Keep only medium chunks at hand while you shape.
  6. While you shape the cookies, preheat the oven to 190ºC (convection oven). If your oven is not convection-aided, then preheat to 200ºC.
  7. When you've filled a whole tray with cookies, brush their tops with beaten egg and put the tray in the oven for 12-15 minutes; watch out because the exact time depends on the oven. It's better to take a look at the browning after 10 minutes. In the meantime keep shaping cookies and placing them on another tray.
  8. When properly browned, take the cookies out to cool on a rack. And they're ready!
Pastas consejo 4

Pastas consejo 3

Eager to know more?

Followers

About This Blog

Lorem Ipsum

  © Blogger templates Palm by Ourblogtemplates.com 2008

Back to TOP